



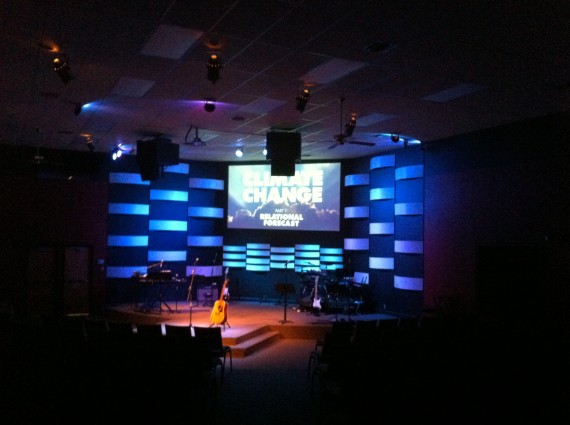
Scott Ivey from Crosspoint Fellowship Church in Schertz, TX, brings us these hovering flying discs.
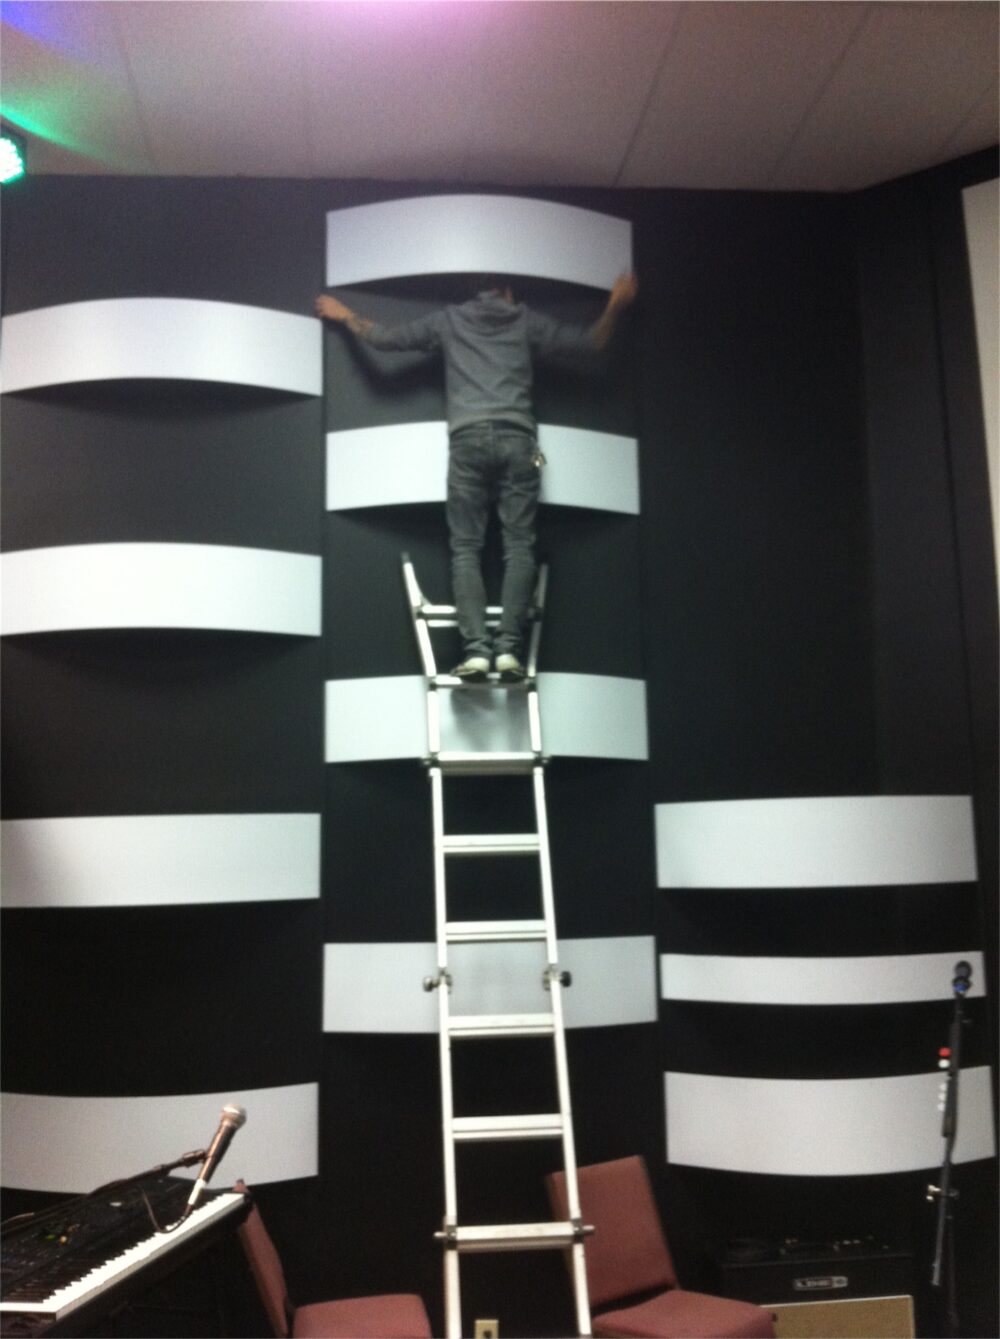
They bought six sheets of 4’x8′ white Coroplast, cut them into 4’x1′ sections for the big walls, and 3’x6″ pieces for the middle wall. Initially, they were going to just stick them flat on the wall in a checkered pattern, but Scott wanted more dimension than that. So they came up with the idea of using thin, squared-off crown molding as a way to allow them to bow the Coroplast on the wall.
They sprayed the molding black with a flat black Rust-Oleum paint, and stuck them on the wall vertically with extra-strong 3M tape. Then they bowed the Coroplast pieces into the pattern that they wanted on the wall by sticking one side of each piece on the inside edge of the molding, and the other side on the inside edge of the parallel molding strip.
The Coro held well for the first couple of hours, and then they could tell they were going to start falling off the wall. So they held them in place with a dot of hot glue on the corners of the Coro pieces.
They cost about $220 for the whole stage. Nice!
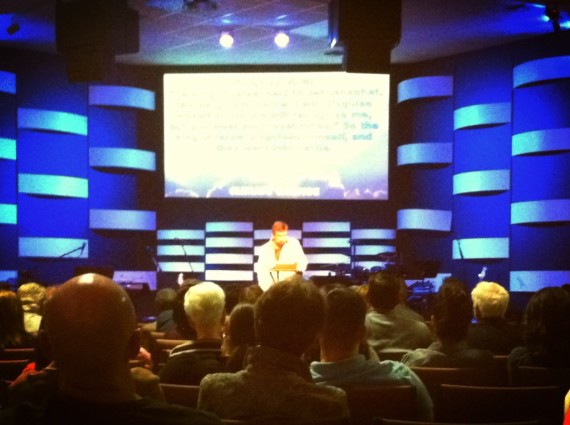
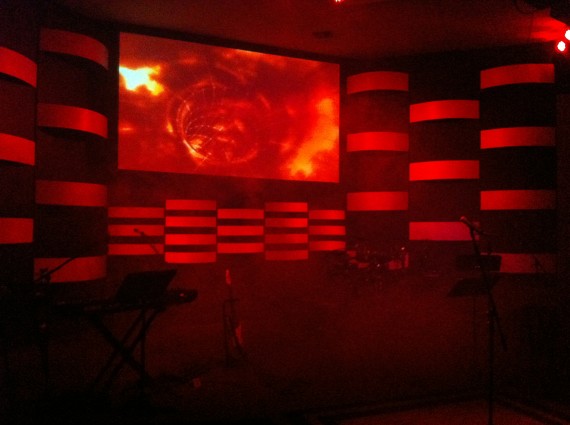
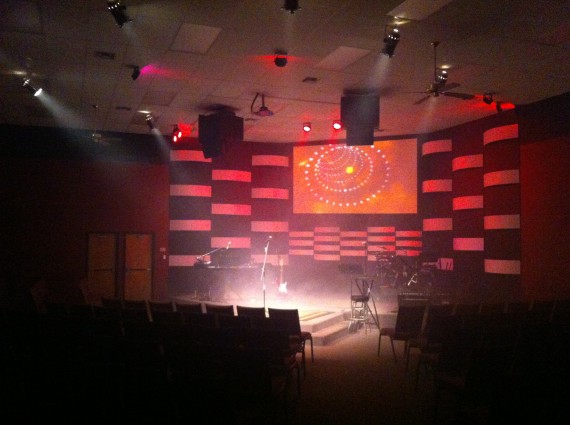
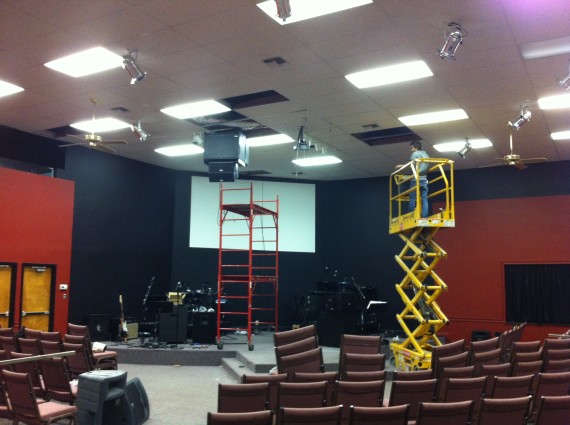
How the Curved Coroplast Effect Works
The strength of this church stage design comes from a simple change in plane. Instead of mounting every Coroplast strip flat, the team compressed each flexible panel between two vertical rails. The shallow bow catches light differently across its surface, so a low-cost white sheet begins to look like a sculpted architectural feature. Repeating the same curve creates rhythm across the back wall while the alternating panel sizes keep the center from feeling visually heavy.
To recreate the look, mark the rail locations with a laser level or chalk line before applying tape. Cut every strip with a sharp utility knife and a long metal straightedge, then test one bay before producing the remaining pieces. Coroplast flutes can make a panel bend more easily in one direction than another, so keep the flute orientation consistent. A small template for the panel width and bow depth will help volunteers build matching modules quickly.
Mounting, Lighting, and Budget Planning
The original adhesive needed help once the bowed panels began pushing outward. That is an important load lesson: bending material stores energy, and the attachment points must resist that continuous pressure. Use hot glue only on a surface that can safely accept it. For painted drywall or rented rooms, consider lightweight wood frames, removable mechanical clips, or freestanding scenic flats so the finish is not damaged. Always test the complete assembly away from people before using it during a service.
White Coroplast responds well to saturated LED color because it reflects light evenly and shows gradients clearly. Place fixtures at a shallow side angle to emphasize the curves, or uplight the panels from the floor for bright lower edges and softer color above. Keep the front wash aimed at people instead of the scenery; too much white front light can flatten the texture. Programming two or three coordinated colors usually reveals the geometry better than rapidly changing effects.
For budgeting, begin with the number of full sheets, then add molding or framing, paint, adhesive, fasteners, and a small allowance for test pieces. The reported $220 total is a useful reference, but local material prices and wall dimensions will vary. The modular strips can also be stored flat and reused as fins, pixels, or layered geometric panels, which extends the value beyond one stage concept.
Related Designs
- Plated Youth – See another geometric wall treatment that uses repeated shapes to create depth.
- Simple Panels – Explore a clean modular-panel approach that adapts to different stage sizes.
- Coroplast. Two Ways. – Compare two practical ways to turn lightweight plastic sheets into scenery.
- Separated Coroplast – Discover a spaced Coroplast installation designed for dimensional lighting.
- What is Coroplast? – Learn the material basics before cutting, bending, and mounting panels.
Pro Tips for Curved Coroplast Stage Panels
- Prototype one complete section: Test the curve, attachment method, and lighting angle before cutting every sheet. A full-scale sample exposes mounting pressure and unwanted shadows early.
- Use fresh blades: A dull utility knife can tear the flutes or leave ragged edges. Make several controlled passes against a straightedge instead of forcing one deep cut.
- Add a secondary restraint: Adhesive alone may release under constant outward tension. Use a discreet clip, screw, or frame connection that suits the wall and venue rules.
- Label reusable parts: Number the rails and panels on the back, photograph the finished layout, and store the pieces flat so volunteers can rebuild or remix the design later.
Related CSDI guide: See how repeated lightweight shapes fit into 15 low-budget small-church stage layouts.



Joshua Neal worked hard on this stage design. Great job, son!
Yes he did! That’s one creative guy!!
What’s the distance from the stage to the ceiling? I’m trying to replicate this, thanks
From the stage to the ceiling is about 20 feet. Hope it turns out like you want it! God Bless!!
Hey Scott! Nice design! We are trying to replicate this at our church but I was having trouble seeing the type of molding you guys used. I know it says squared crown molding but I’m having trouble finding small enough size that would work.
Any tips?
Thank you!