



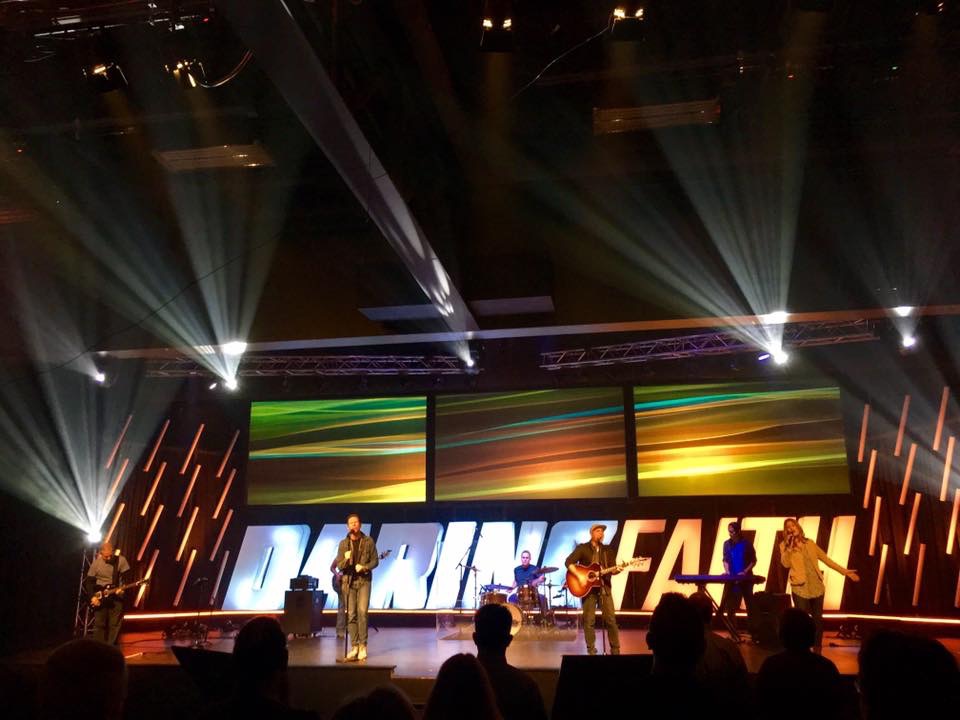
Heritage Creative from Heritage Church in Sterling Heights, MI brings us these huge letters on their stage.
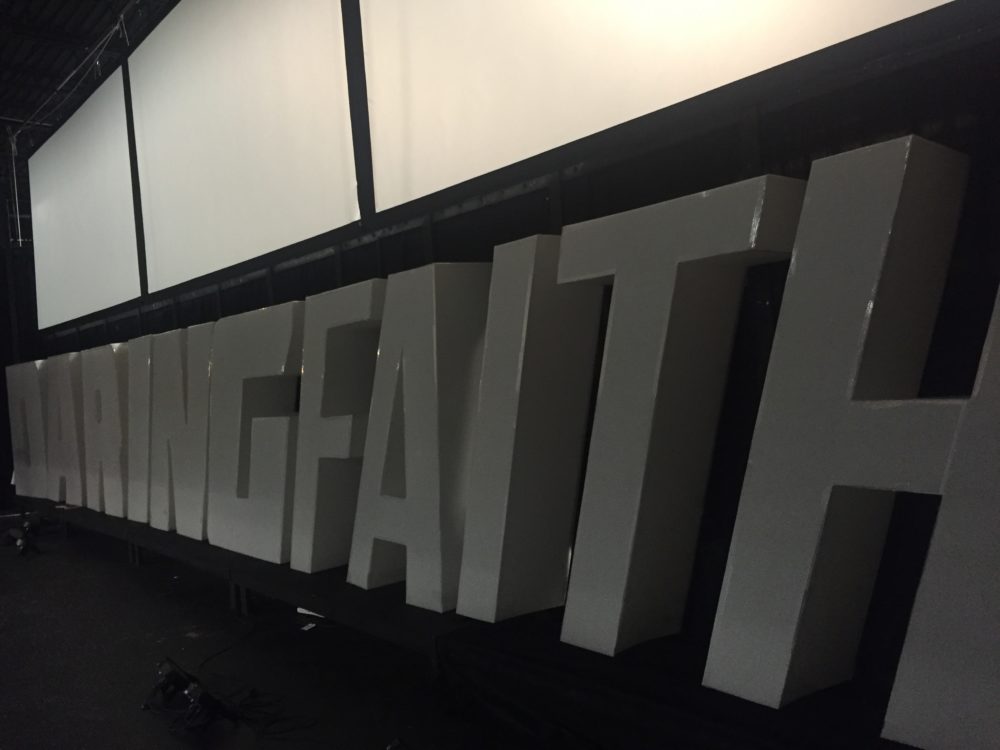
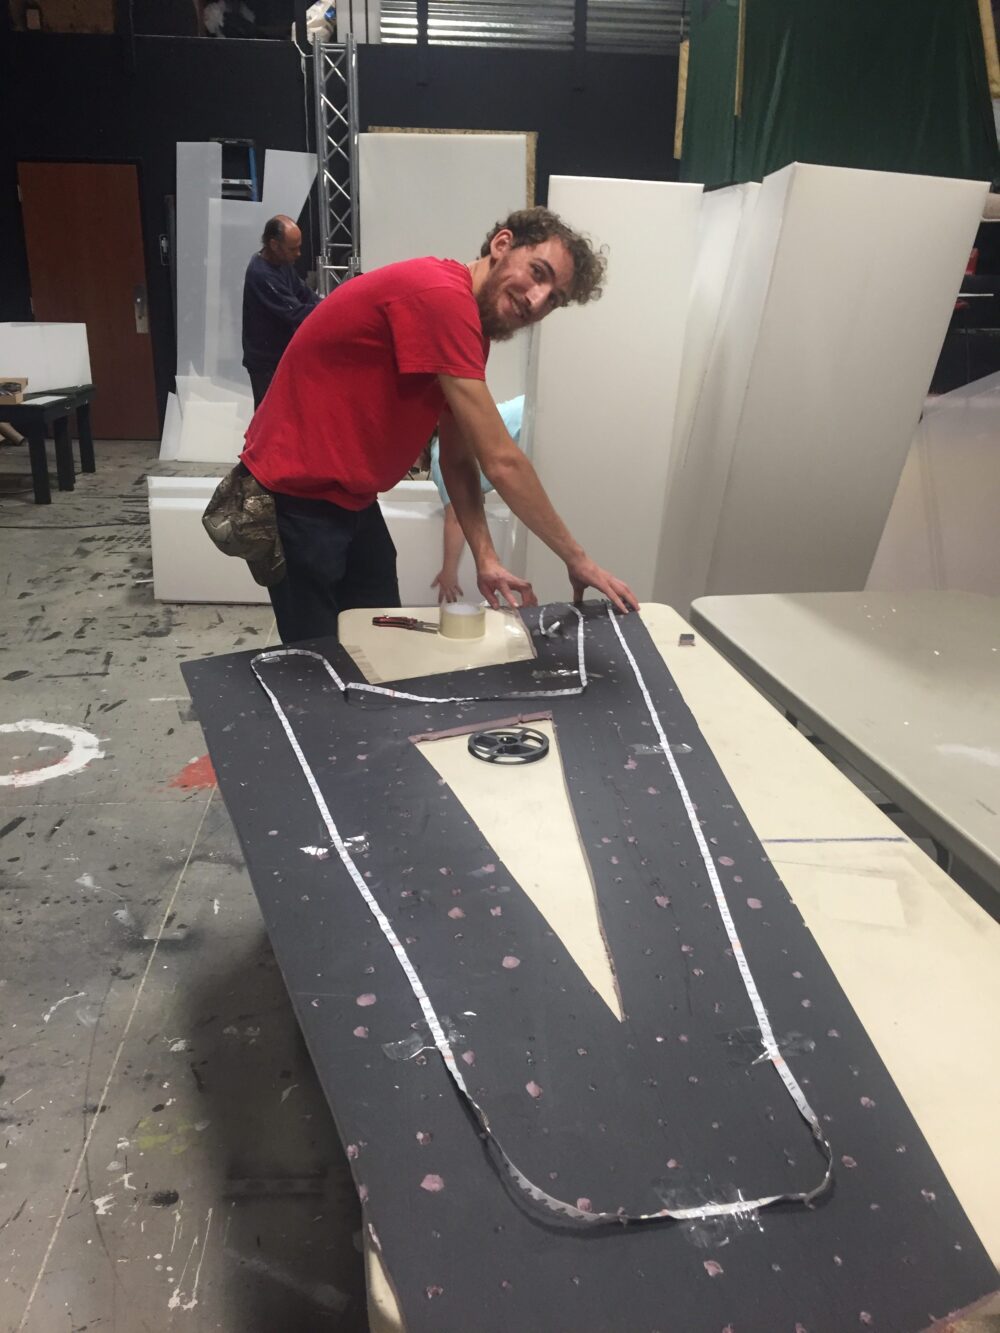
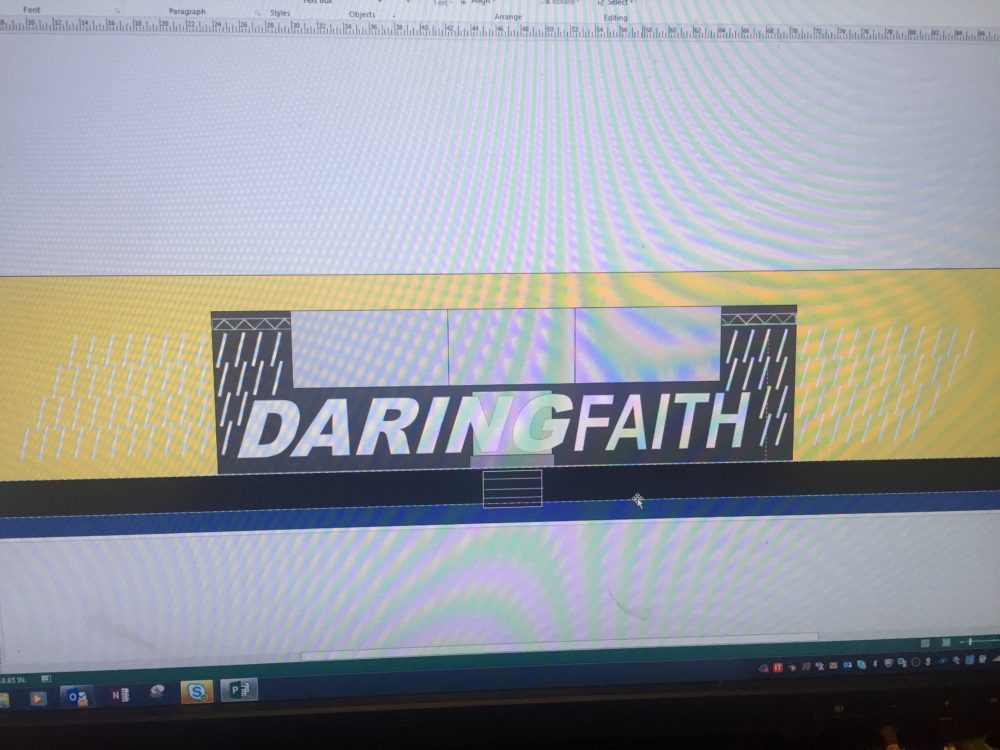
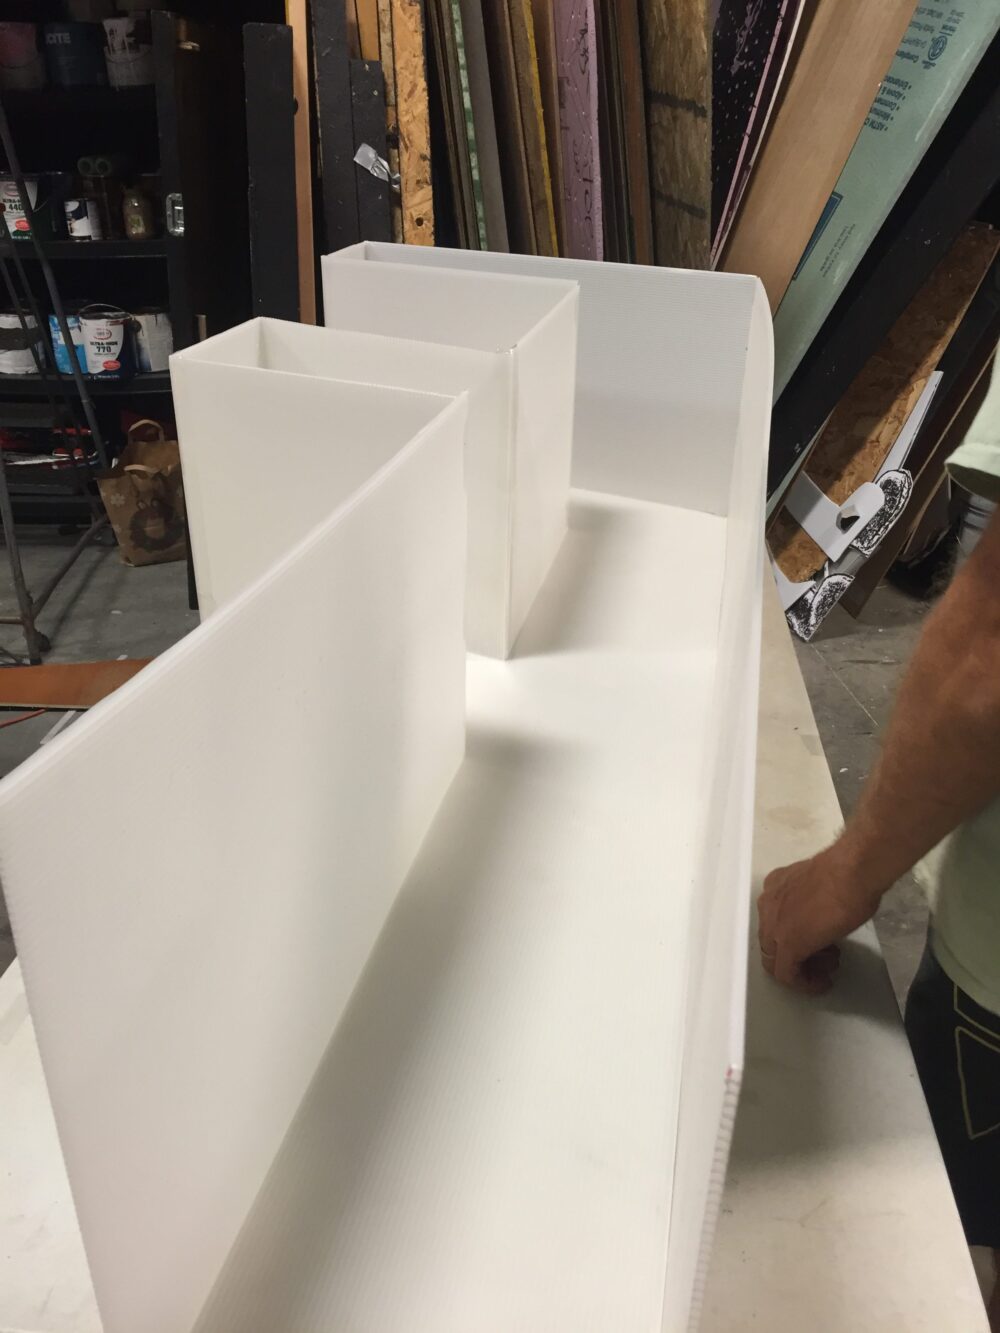
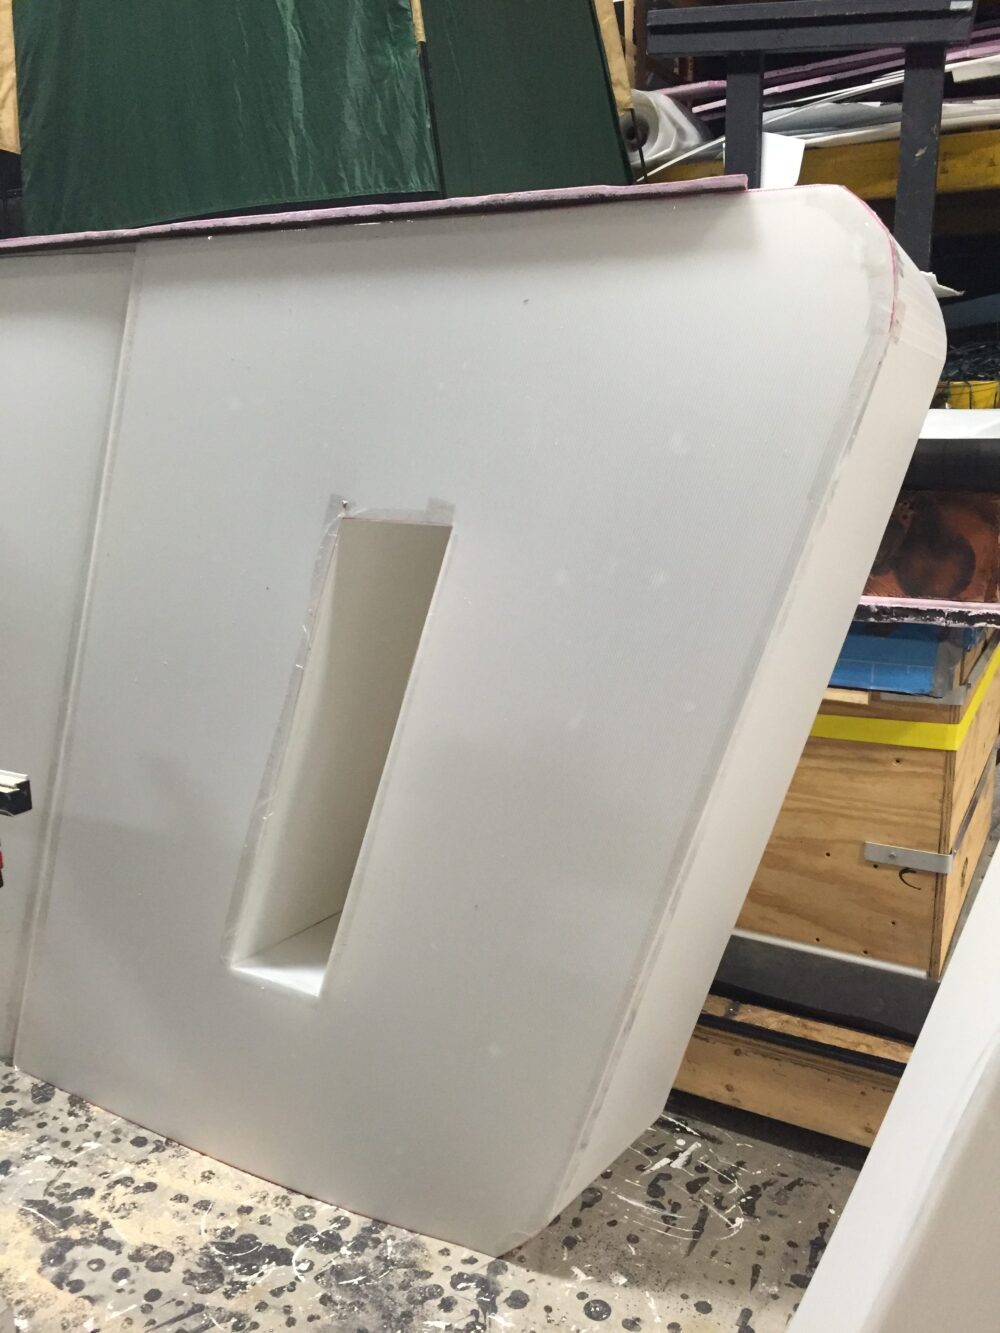
From the team: For our “Daring Faith” series, we wanted to take the font on the marketing material and turn it into giant 3D letters for our stage. We took the exact font used for the series design and printed it out on our plotter (5 ft 6 in. high). We then cut each letter out and traced them onto 4X8 sheets of corrugated plastic (5MM/Natural/translucent). Each corrugated plastic letter was cut out using a utility knife and a straight edge. We then traced the corrugated letter onto a backing of scrap luan or 1/2 foam (leftover scraps from previous sets). The quality of the back piece did not matter as it would not be seen. The backing was then also cut out. Then we cut many lengths of 16-inch by 8ft strips of corrugated to be used for the sides of each letter. Every cut was square (this made it quick and easy). We simply cut the sides to match the face piece. Where we had curves in letters such as “D”, we simply cut many 1-inch cuts 1/2 way through the thickness of the corrugated, then snapped it so that it would bend around the face of the letter. Everything was taped together using packing tape. We took extra care to be sure to have the front face clean. The sides were taped behind the front face so that there was no open corrugated exposed. We also took care to be sure there were no gaps as light would escape if there were. Once the front face and sides were built, we added 16-foot LED strips with duck tape to the center part of the back of each letter. Each letter had its own LED tape and controller: https://www.amazon.com/dp/B00B42M3RG/ref=as_li_ss_tl?ref_=pe_621110_204385130_shiptrack_e_304_dt_1&linkCode=sl1&tag=csdi-20&linkId=f802244b84953e244755355b08976955
Note: The LED strips don’t work on DMX without these: https://www.amazon.com/dp/B00B42M3RG/ref=as_li_ss_tl?ref_=pe_621110_204385130_shiptrack_e_304_dt_1&linkCode=sl1&tag=csdi-20&linkId=f802244b84953e244755355b08976955.
Our lighting genius’ had to do some re-wiring. Because each letter had its own LED strip and box, each letter can be a different color and can chase (See link below at 3:18). Finally we attached the backs (with the light strips) to the front and side faces using the packing tape and placed them on the stage on a small riser. The bold letters stand on their own, however “FAITH” was screwed into thin strips of wood that hand down from a wood frame we have on our stage against the curtains. Otherwise, they would tip over. Finished it up with light bars along the risers under the letters.
Corrugated plastic: $12 per sheet
Tape: $25
LED strips: $15 each (a re-usable investment)
LED controller: $22 each (a re-usable investment)
Creating Impactful 3D Letter Stage Designs
Large dimensional letters have become a powerful visual tool in contemporary church stage design, offering immediate impact and clear messaging that resonates with congregations. This build from Heritage Church demonstrates how oversized typography can transform a worship space while maintaining budget consciousness and DIY accessibility. The combination of lightweight corrugated plastic construction and integrated LED lighting creates a professional appearance that rivals expensive custom fabrication.
The choice of corrugated plastic (also known as Coroplast) as the primary building material reflects smart resource management. Unlike heavier materials such as wood or acrylic, corrugated plastic offers excellent strength-to-weight ratio, making the finished letters manageable for volunteer teams to move and position. The translucent nature of the material works perfectly with internal LED lighting, creating an even glow that makes the letters appear to float on stage. This diffusion effect eliminates harsh hot spots while maximizing the visual impact of the lighting investment.
The construction technique of scoring and bending corrugated plastic around curves demonstrates practical problem-solving that any church team can replicate. Rather than attempting complex curved cuts, the team made partial cuts through the material’s thickness, allowing the rigid plastic to flex smoothly around letterforms like the “D” in their design. This approach maintains structural integrity while achieving professional-looking curved edges that would be difficult to produce through other methods.
Lighting integration represents where this design truly shines. By mounting LED strip lights to the back panel of each letter rather than the sides, the team created even illumination across the entire face of each character. The decision to give each letter its own controller enables sophisticated lighting sequences where letters can change colors independently or chase in patterns that add dynamic movement to the stage. This level of control transforms static set pieces into active visual elements that can respond to music or message themes.
From a practical standpoint, the modular nature of this design offers significant advantages for churches with limited storage or changing stage needs. Individual letters can be rearranged to spell different words for various sermon series, stored flat when not in use, or transported easily to alternate venues for special events. The durability of corrugated plastic means these pieces can serve multiple series over several years, making the initial investment in LED controllers and strip lights pay dividends across many applications.
Related Designs
- Taste the Rainbow – Discover how to create a wavy Coroplast backdrop with offset studs for dynamic stage lighting and visual depth.
- Gym Project – Learn how New Braunfels Church transformed a gym into a contemporary worship space using Coroplast, projection, and creative lighting.
- Branched – See how to build stunning LED light box panels for your church stage under $600 using simple materials and DIY techniques.
- 5 Bars – Explore budget-friendly LED bar construction using cable trays and LED strips for under $150.
- North Point Apps – Learn how North Point Church built a stunning gridded stage design with 342 App Icons using steel pipe structures.
Pro Tips for Building 3D Letters
Plan Your Letter Spacing: Before cutting any material, create a full-size template of your word or phrase to test spacing and scale on your actual stage. The Heritage Church team used a plotter to print their letters at 5 feet 6 inches tall, ensuring the final pieces would match their marketing materials exactly. Consider sight lines from various seating areas to ensure your letters remain readable and impactful from every angle in your worship space.
Reinforce Stress Points: While corrugated plastic is lightweight, large letters can develop weak points at narrow sections or curves. Add extra tape layers or small wooden dowels at these stress points to prevent sagging or deformation over time. For letters that will stand independently, consider adding weighted bases or sandbags inside the bottom portion to improve stability without visible supports.
Test Your Lighting Before Final Assembly: LED strips can vary in color temperature and brightness between batches. Before permanently mounting lights inside your letters, test all strips together to ensure consistent color output. This step prevents the frustration of discovering mismatched lighting after everything is taped together. Consider investing in dimmable LED controllers for greater flexibility in achieving the perfect brightness for your space.
Document Your Process: Take photos during construction to create a visual guide for future team members. Documenting measurements, cutting techniques, and wiring diagrams ensures that repairs or modifications can be made by anyone on your team, not just the original builders. This documentation becomes invaluable when the original volunteers are unavailable or when expanding the set with additional letters.

Related: Blinded Behind Sheer – Discover how Asbury United Methodist Church created stunning fabric circle ornaments using quilting looms and sheer fabric.
Related: Fractal Wall – See how Next Level Church built a dynamic geometric wall using textured tiles and LED lighting for under $6,000.
Related: True North – Learn how Oak Hills Church built a budget-friendly youth stage design using Coroplast, styrofoam bowls, and creative lighting techniques.



Have to say it….but in the video the crowd looks “real” interested in your MASH-up..
I go to Heritage, and I notice that too; it is quite weird. When the singer asks people to stand and sing, nearly everyone does. When the singer says please stay seated and listen, everyone does… When people talk after service, they are complimentary, although I’m sure not everyone enjoys everything we do, but most people say they like it… We’ve actually brainstormed about this. What can we say when we want people to not stand and sing along, but we don’t want you to feel like you have to sit totally still? I am used to pop concerts. Even if you’re sitting, you can still “dance” and groove. Maybe church people are more used to classical concerts. I dunno.
Like this design a lot. I wish we had a plotter, tracing via a projector isn’t my favorite.
This also seems a lot sturdier than the other big 3D words made out of coroplast one on this site which also makes it easier to make in the long run.
Where did you get natural coroplast for $12/sheet without buying a whole pallet worth of coroplast? Also, when you say “luwon” do you mean luan plywood? Thanks so much for your contribution.
Yeah, luan, oopsie.
There is a plastic distributor in southeast Michigan called Laird plastics. They are our supplier for the corrugated. We probably found them by searching online and calling around–I really don’t remember.
I was extremely impressed with how sturdy they are. When the boss said she wanted 3D italics lit from the inside, we all said she was nuts. But it worked, and it was surprisingly straightforward to build. Most of our sets are days of trial-and-error followed by weekly fixing, but this one worked first try, and has stayed up (which is great because it is an 8-week series).
:-)
I think the other thing that helped the rigidity was paying attention to the “grain” of the corrugated. We plotted them so that they would fit exactly on one sheet width so we could keep the corrugations as vertical as possible.