Jesse Shook from Ovation Church in Burleson, Texas brings us this LED tape setup.
They used the following materials from Amazon:
- Black LED Channel (two)
- 5050 RGBW LED Tape (nine)
- 12v Power Supply (eight)
- DMX Decoder (two)
- RGBW Wire
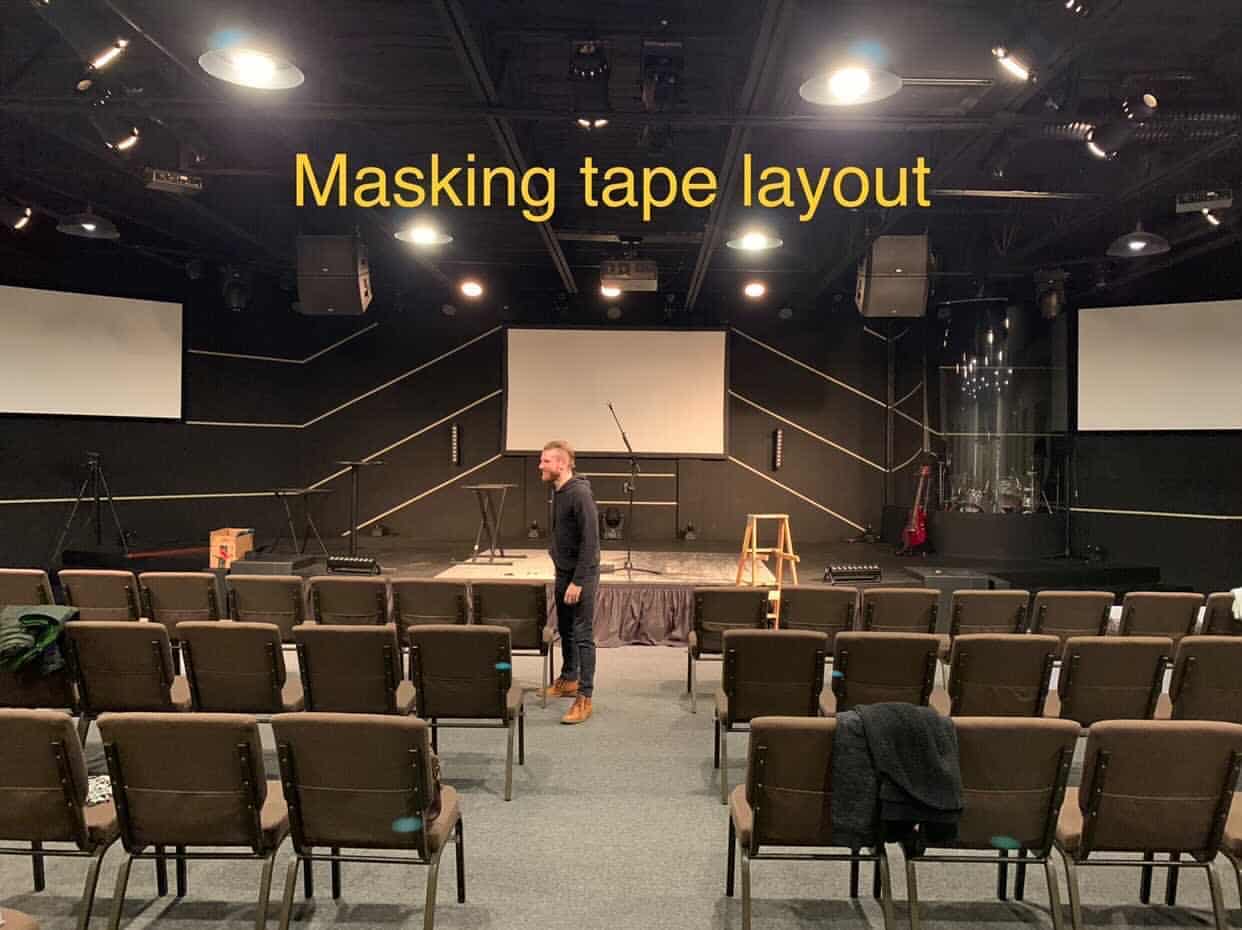
They attached the LED channel (aluminum track) directly to the wall. The channel came with installation clips.
All of their lighting was run off the Luminaire 3 app. They also recently began using the Midi sync through WiFi so that the Loop Community Prime app can trigger lighting cues in perfect timing.


About This LED Wall Design
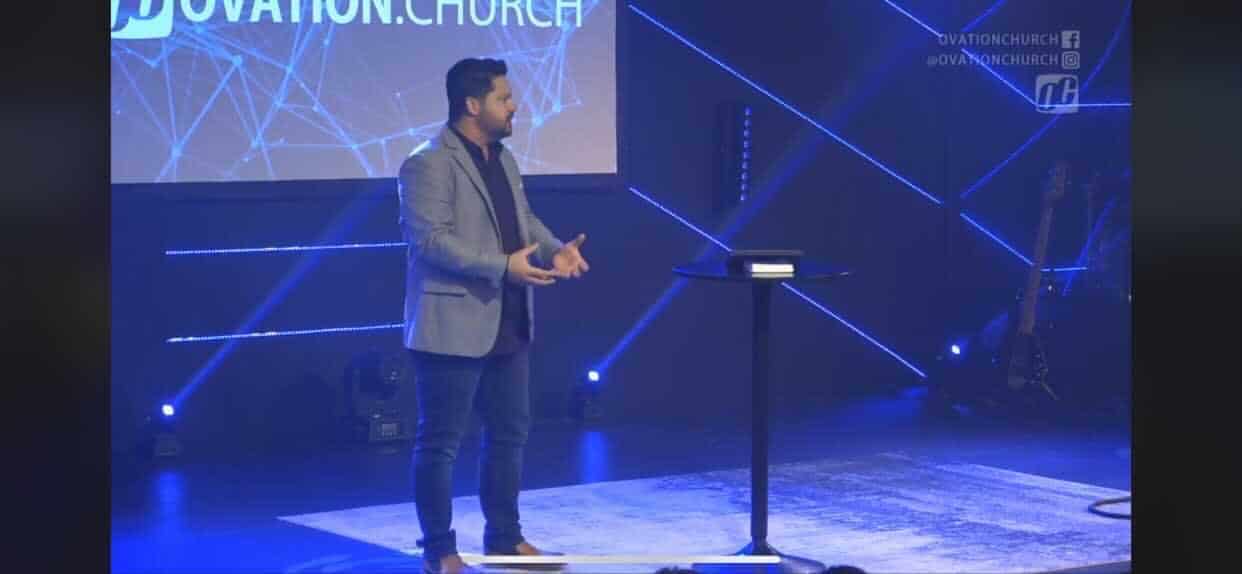
This striking LED tape installation from Ovation Church demonstrates how a relatively simple lighting setup can create dramatic visual impact on a modest budget. The design features vertical strips of RGBW LED tape mounted directly to the back wall of the stage, creating a canvas of light that can shift colors and moods instantly to match any worship moment.
The use of aluminum LED channels serves dual purposes: they provide a clean, professional mounting solution while also acting as heat sinks to extend the life of the LED strips. The black finish of the channels helps them visually disappear when the lights are off, keeping the focus on the illuminated effect rather than the hardware.
Why This Design Works
The vertical orientation of the LED strips draws the eye upward, creating a sense of height and grandeur even in a space with standard ceilings. This linear arrangement provides excellent backlighting for worship leaders while maintaining a clean, uncluttered look that doesn’t compete with the message.
The RGBW (Red, Green, Blue, White) tape offers significant advantages over standard RGB strips. The dedicated white LEDs produce cleaner, more natural whites for moments when color isn’t appropriate, while the separate color channels allow for richer, more saturated hues during high-energy worship songs.
Technical Implementation
The DMX decoder setup gives the church precise control over each strip individually, allowing for chase effects, color gradients, and synchronized patterns. Running eight separate power supplies ensures adequate power distribution across the nine LED tape strips, preventing voltage drop and maintaining consistent brightness across the entire installation.
The Luminaire 3 app control means volunteers can operate the lighting from an iPad without needing extensive technical training. The addition of MIDI sync through WiFi is particularly impressive—it allows the lighting to automatically follow the worship tracks from Loop Community Prime, ensuring perfect timing between music and lighting without requiring a dedicated lighting operator.
Budget Considerations
This type of LED installation represents excellent value for churches looking to upgrade their stage lighting. The total hardware cost typically ranges between $800-$1,200 depending on the number of strips and the quality of components chosen. When compared to purchasing traditional stage lighting fixtures, LED tape offers more flexibility at a fraction of the cost while consuming significantly less power.
Related Designs
Looking for more LED and lighting inspiration? Check out these similar designs from other churches:
- How to Choose Inexpensive LED Fixtures – A comprehensive guide to selecting budget-friendly LED lighting options for your worship space
- Lighting Controller Options – Explore different ways to control your stage lighting, from basic apps to professional DMX consoles
- Flat Panel Lights – Another clean, modern approach to stage lighting using LED panel technology
- Bright Walls – Learn how other churches use wall-mounted lighting to create vibrant backdrops
- Star Wall – A creative wall treatment that combines lighting with dimensional elements for visual interest
Pro Tips for LED Tape Installations
Plan Your Power: Calculate the total wattage of your LED strips and add 20% headroom when selecting power supplies. It’s better to have slightly oversized power supplies than ones running at maximum capacity, which can lead to overheating and premature failure.
Test Before Mounting: Lay out your entire LED tape run on the floor and test all connections before attaching anything to the wall. LED tape is much easier to troubleshoot when you can access both ends of each strip.
Use the Right Channels: Not all aluminum channels are created equal. Look for channels specifically designed for your width of LED tape (typically 10mm or 12mm). The channels used in this design include diffusers that help blend individual LED points into a smooth line of light.
Consider Future Expansion: When wiring your DMX decoders and power supplies, leave room for additional circuits. Many churches start with a basic LED installation and want to add more strips later—planning for expansion now saves rewiring later.
Related: Haze Days – Understanding haze usage for church lighting.
Related: Cloth Sun – Creating symbolic stage elements with fabric sun.


Awesome stage design! Just want to ask about the center projector. What type of projector did you use (and the specifications)? Also, how did you prevent the shadows of the people from showing?