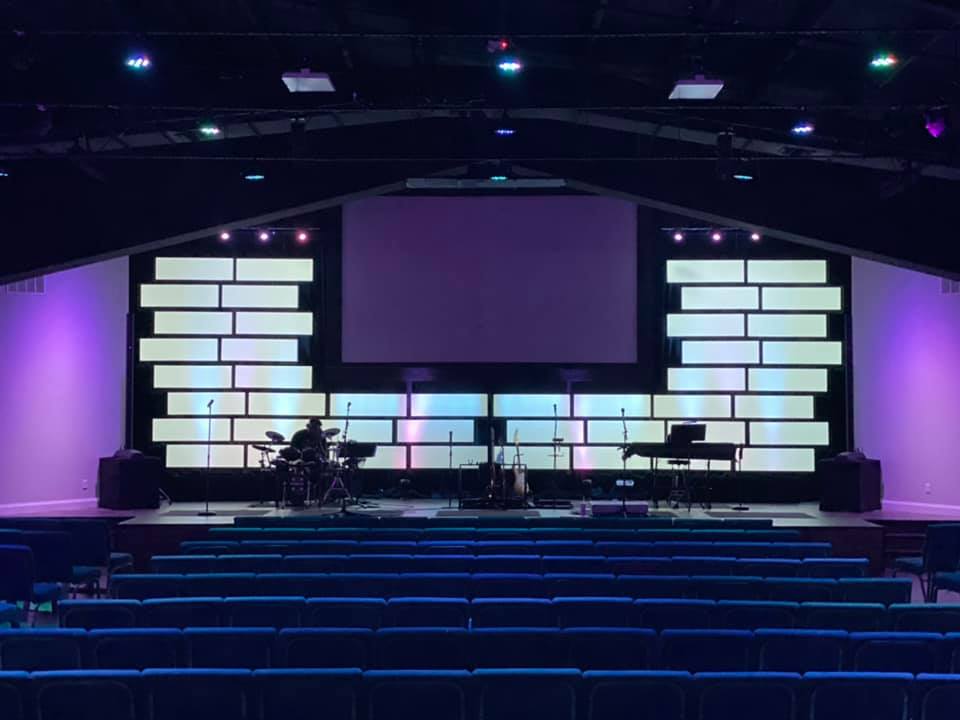
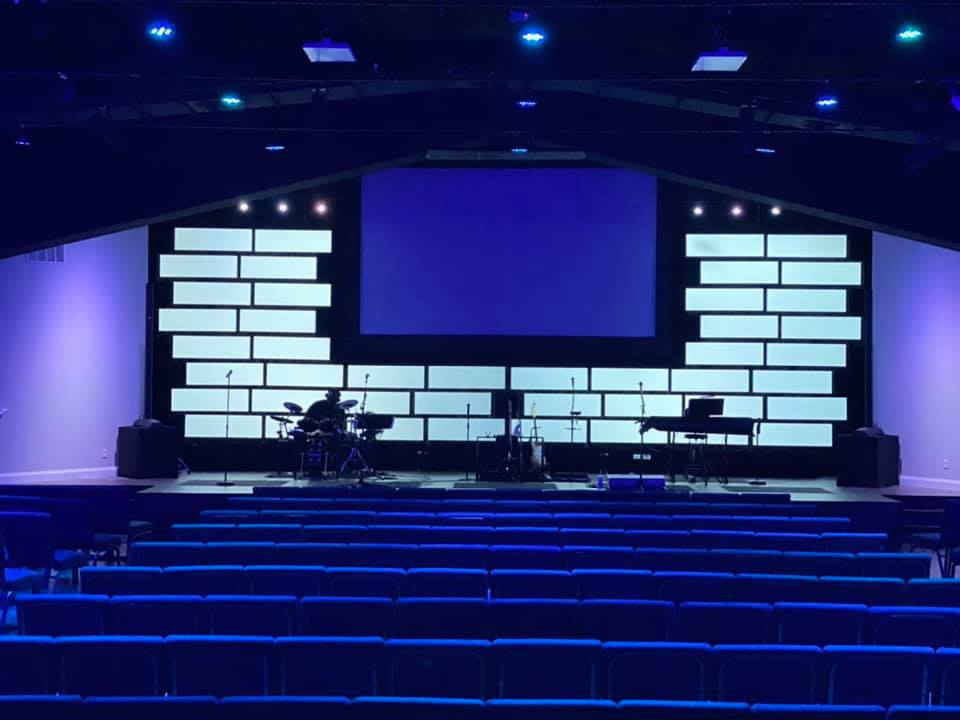
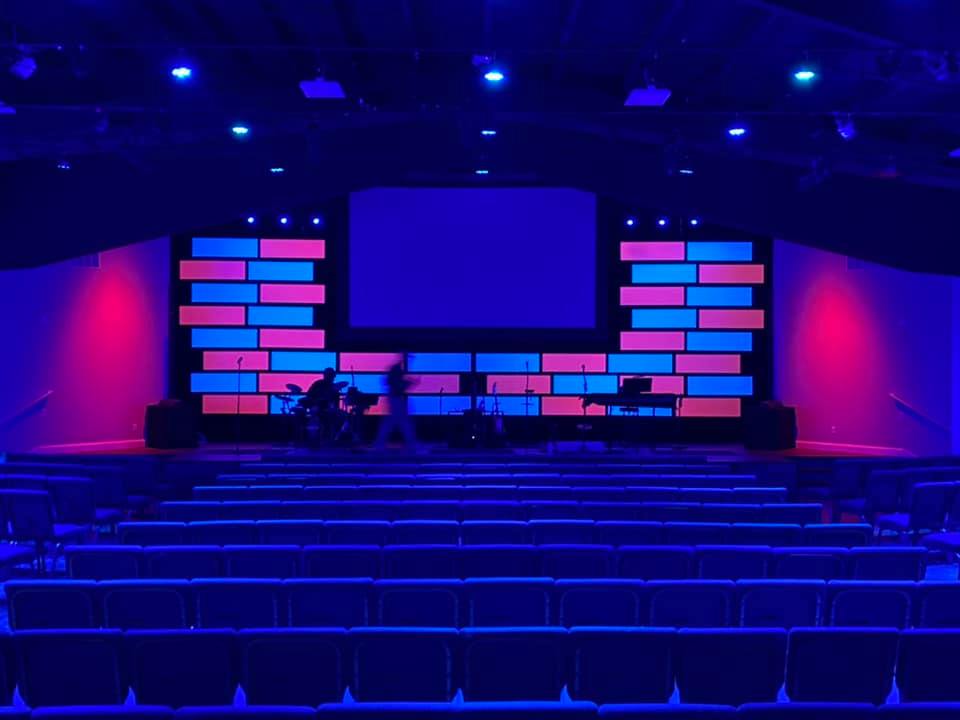
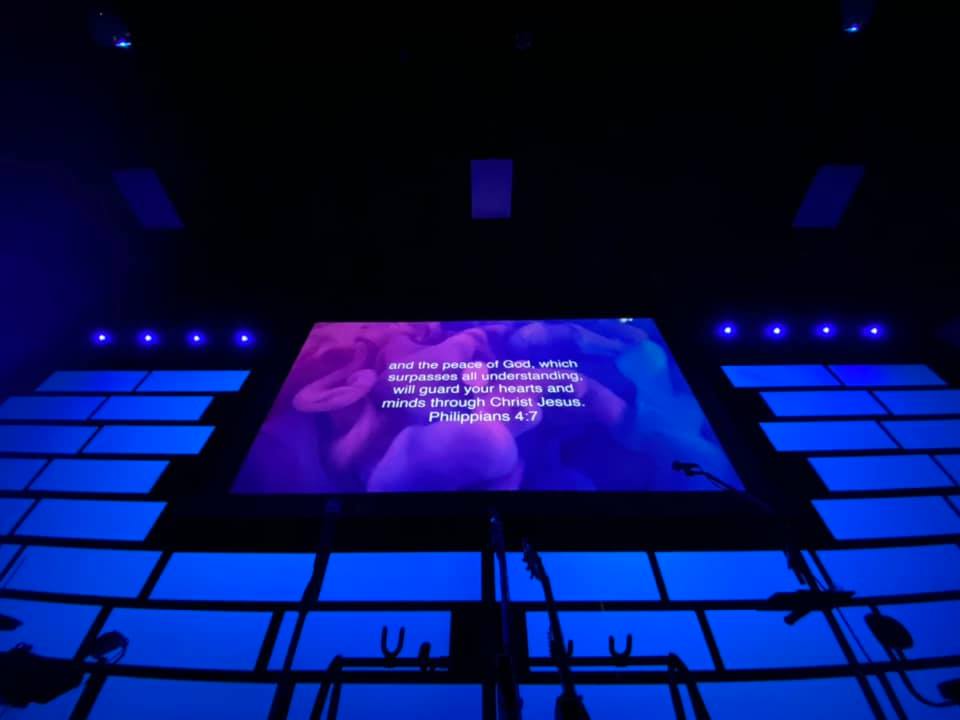
Eddy Craft from Cornerstone Church in Davenport, FL brings us this awesome projection setup.
This project, other than the two projectors (only $746 each on Amazon), was relatively inexpensive to build.
From Eddy:
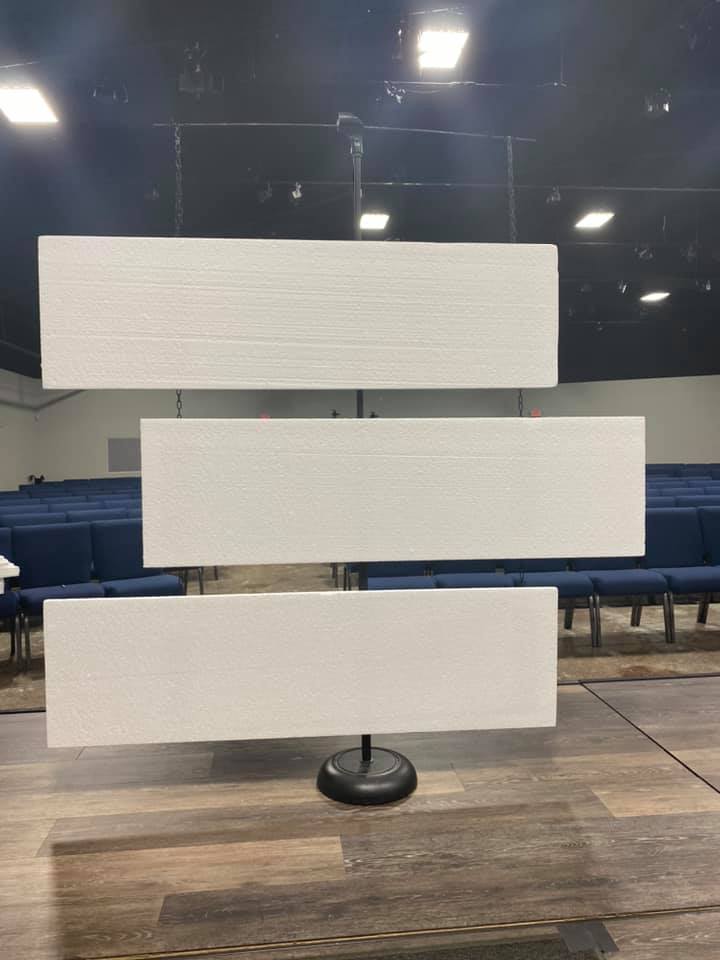
1. I used two Optoma short throw projectors, 44 styrofoam panels, 140’ of black chain, and “S” hooks.
2. I started by producing a white page in Power Point to have the projectors image upon the area. This game me the height and width limits to work within as well as to help me in positioning when mounting the projectors. Since the left side projector would be mirror imaging the right side projector, I only needed to produce the one sided image for the right side projector and the left side would image the exact opposite image.
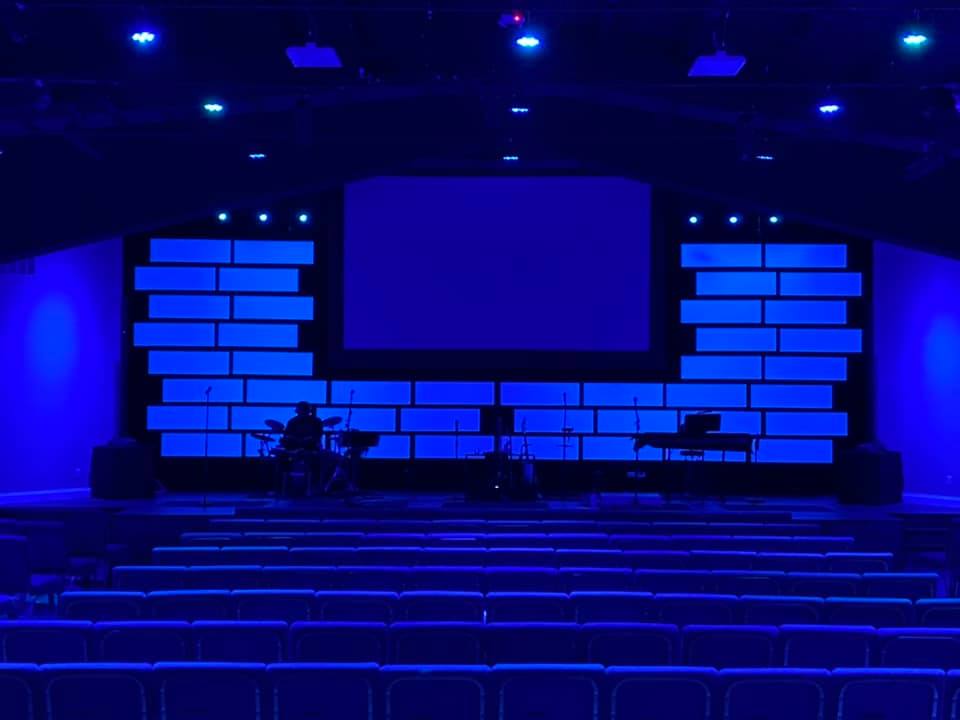
3. The most time consuming part of the project was mounting the two projectors inverted from the ceiling which took a lot of trial and error to get the exact positioning just right to project the area I needed to light up without lighting up the musicians that would be standing close to the panels. Also, to make sure that both projector’s color and brightness settings were exactly alike…except the projector on the left side would be set up to project exactly opposite of the right side so the complete image would be even.
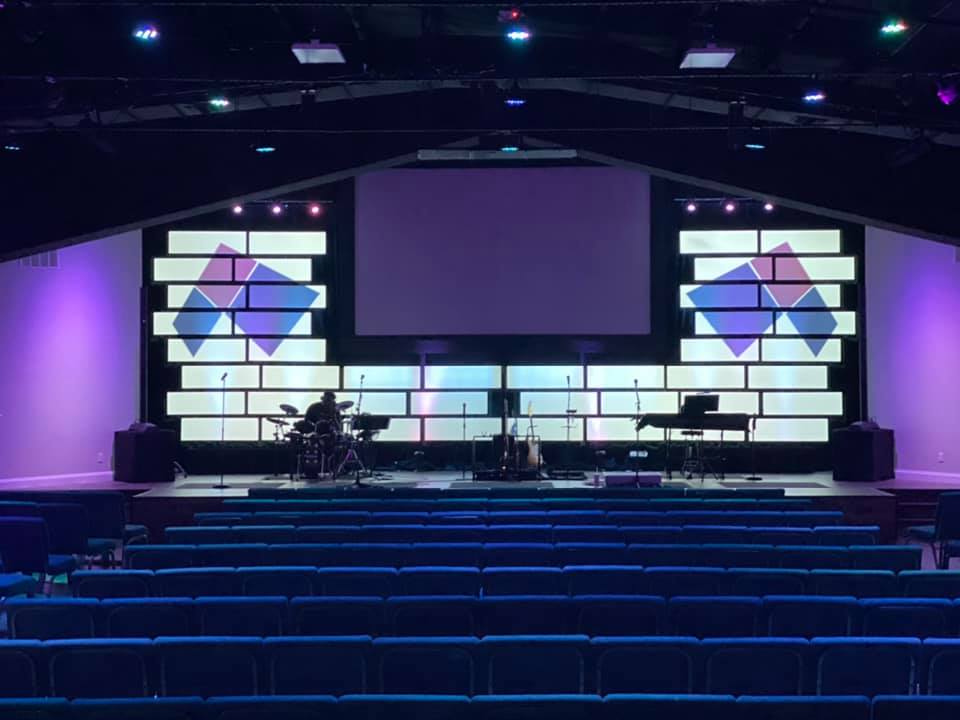
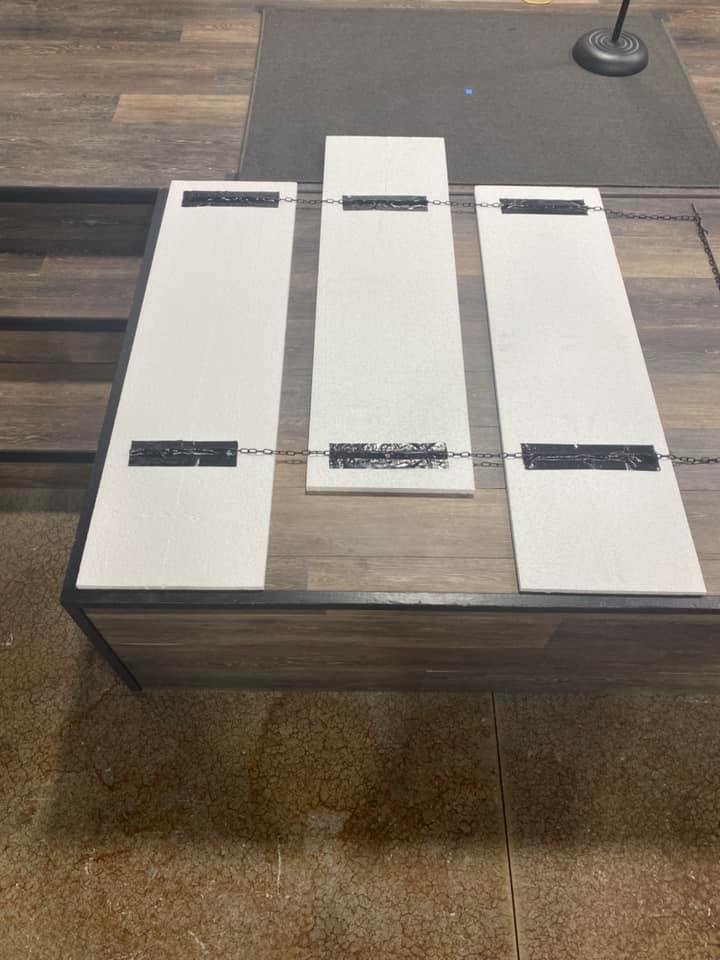
4. I laid out the panels in the design I desired, placed the black chain at the lengths I needed over the panels, and yes…duct taped the chain to the panels! I wanted to use something that would not damage the panels when removing the chain from the back of them so I could use the same panels for another design idea….I I did this time! The last time I used these same panels with the duct tape, it stayed hanging in place till I removed them to build the next stage set almost 4 months later! The styrofoam panels are so light weight and the duct tape is so adhesive…I had no issues.
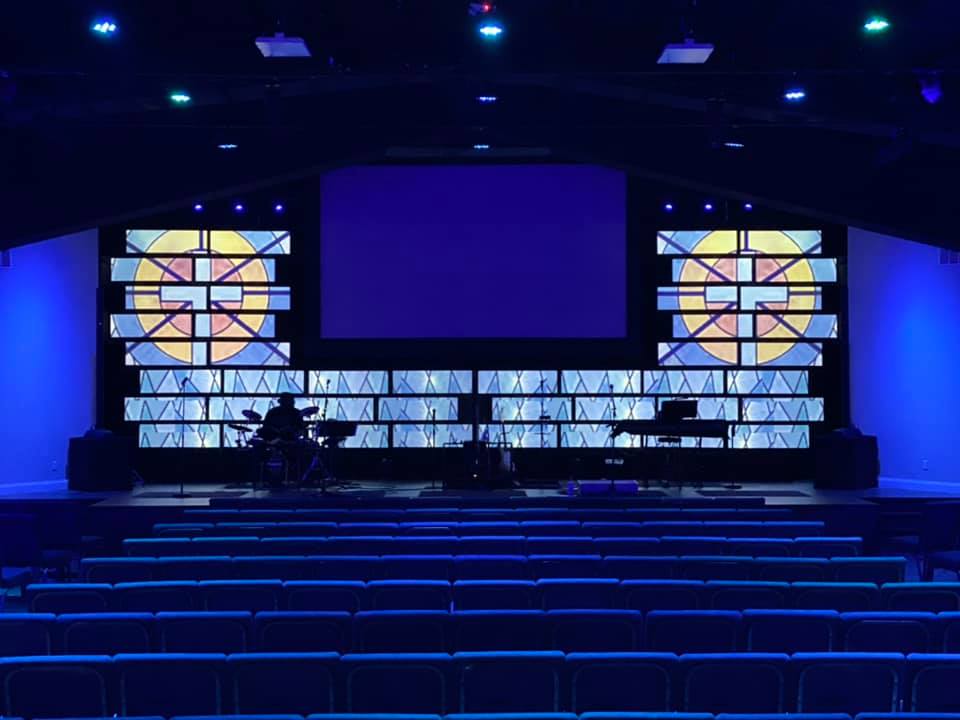
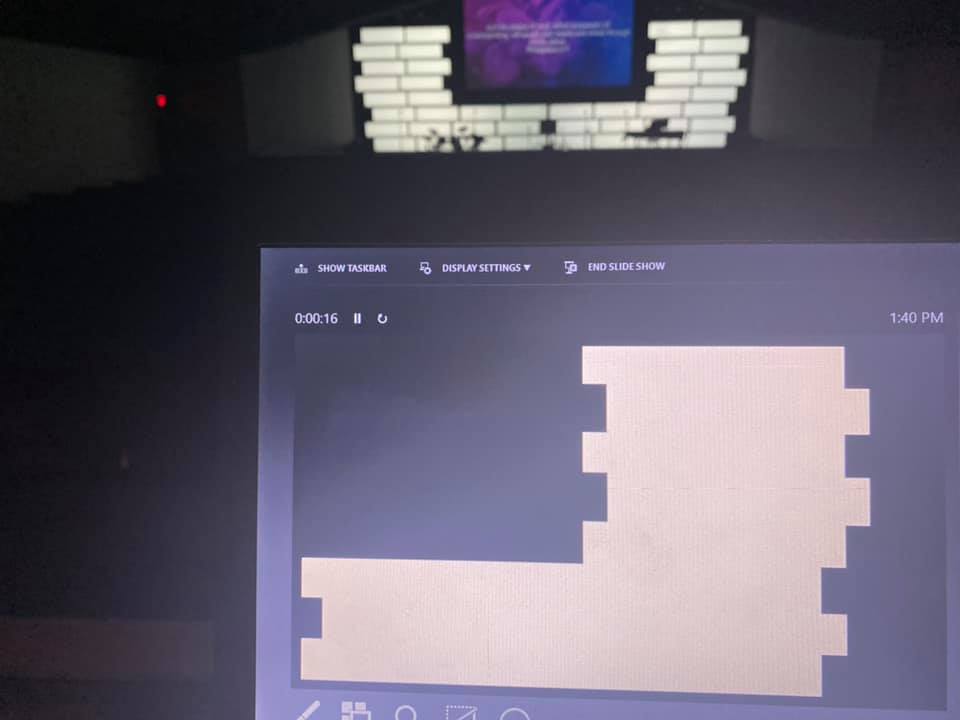
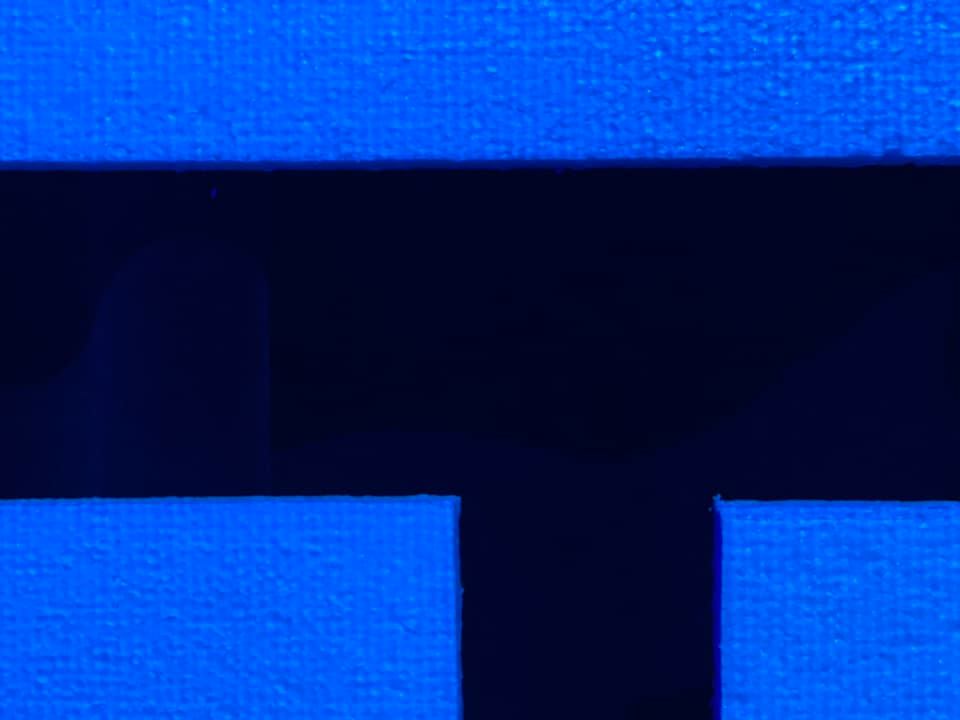
5. After hanging the panels for my design, I went back to the Power Point and in only working on the right side, started masking the areas I didn’t want to project upon. I chose a rectangle shape and solid filled in the shape with black. I sized the shape on the screen and brought up the presentation after each step so I could see how close are far I was to getting it right on the panels. Fortunately, we have black velour pleaded drape on our back wall that absorbs any overflowing image so the image wouldn’t be visible in the spaces between the panels or over the edges of the panels given me a little wiggle room. As in the close up pics, you see that the blue color is slightly visible at 1ft distance but becomes almost invisible at a 5ft distance. I repeated this process till I had all of the areas masked off that I needed. Once the one side was completed, the other projected side should be close with it being opposite of the other projector. I had only to do some slight image shifting to get this side to match. Once this was done…I now had my template to use for imaging solid colors, pics, or video loops.


Where did you purchase styrofoam panels?
Sorry for the late response…i just saw this article. You can get the panels at Lowes and are garage door insulation panels 4’wide x 13 5/8″tall x 3/4″thick that are 6 to a package for $9.95. They weight almost nothing so securing them isnt a huge challenge. Let me know if i can help with anything else.
Hi, please how did you separate the colored lights on the styrofoams. is that pushed through the projector?
I used Microsoft Office Powerpoint. Within that program you can insert shapes to mask/map your imaging only where you want it to image. My first step was to build a template to use to build multiple scenes from. So i had to basically tell the projector where i wanted imaging and where i did not want imaging. After starting a new blank ppt presentation with a white background that lit the whole area up with a big white rectangle across my main presentation screen and the panels in white, on my computer screen, i could edit the size and position of the shape i inserted live in order to get the shape either to or as close to right where i needed it to be at the edge of the panel/screen/wall. Two things, yes this takes a while and is the reason i always recommend black drape because pleeded drape will absorbe any of the overflow image in the cracks between the panels and over the edges making it almost invisible within a few feet away. I found a drape vendor that is very inexpenive and gives much much better results that flat black paint that still reflects light…and hides cables well too. Once i had this template built, i saved that template as the easy “copy,paste,& send to the back” template forsingle image or looping video scenes. I chose to insert the rectangle shape, chose to fill the shape with black, and chose “no outline”. This made it a completely black box type shape. Then I sized it to the correct size as to let the white backgroind only image where iwanted it to. I repeated these steps until only the panels were imaged bright white. After saving that template, i copy and pasted it and inserted another rectangle shape, in this picture i chose the color red to fill the space and nonoutline for the shape. I sized it and position it where it only imaged on a single panel. I copied/pasted/positioned that shape over whichever panels i wanted red. Then i pasted one more red panel shape and changed the color to blue and positioned those correctly. As i had mentiined, because of black drape absorbing the lighted imaging so well, i didnt have to worry about mapping out the exact rectangle shape to the very edge which would probably be impossible to do anyway. I chose these two colors more as a sample to show how it can be done to have multiple images in one slide and have even had two looping videos playing in the same mapped slide. I hope this helps. There are a lot more details that are required such as the correct short throw projector, angles, controlled stage wash lighting, and controlled room ambient lighting. But, once those obstacles are overcome, your creativity is limitless for theming, scene changes between songs, scene changes within the productiin of a song…all at the touch of a button! With projection, you not only save 10’s of thousands over led walls or panels, but you have the flexibilty of different shapes rather than just rectangle or square. Thank you for reaching out and let me know if i may help in any way.
We just upgraded our panel projectors from the optoma short throw 3,500 lumens bulb projectors to the optoma short throw 4,200 lumens laser projector with great results at cutting thru room ambient and stage lighting. They are twice as expensive, but the detail and color replecation of the 300,000:1 contrast ratio, brightness of how well it overcomes room ambient lighting/stage wash light reflection from the stage floor is incredible, and 30,000hrs compared to bulbs at 5,000hrs. But, if $800 per 3.5k projector is what your budget will allow at this moment, dknr hesitate, best most efficient tool i cojld ever recommend for a church service. And when your budget allows, gift another church with a used half price deal as we did to fit their budget, and move up to the $1,400 laser 4.2k projectors. Sharing the love and helping eachother as we go.