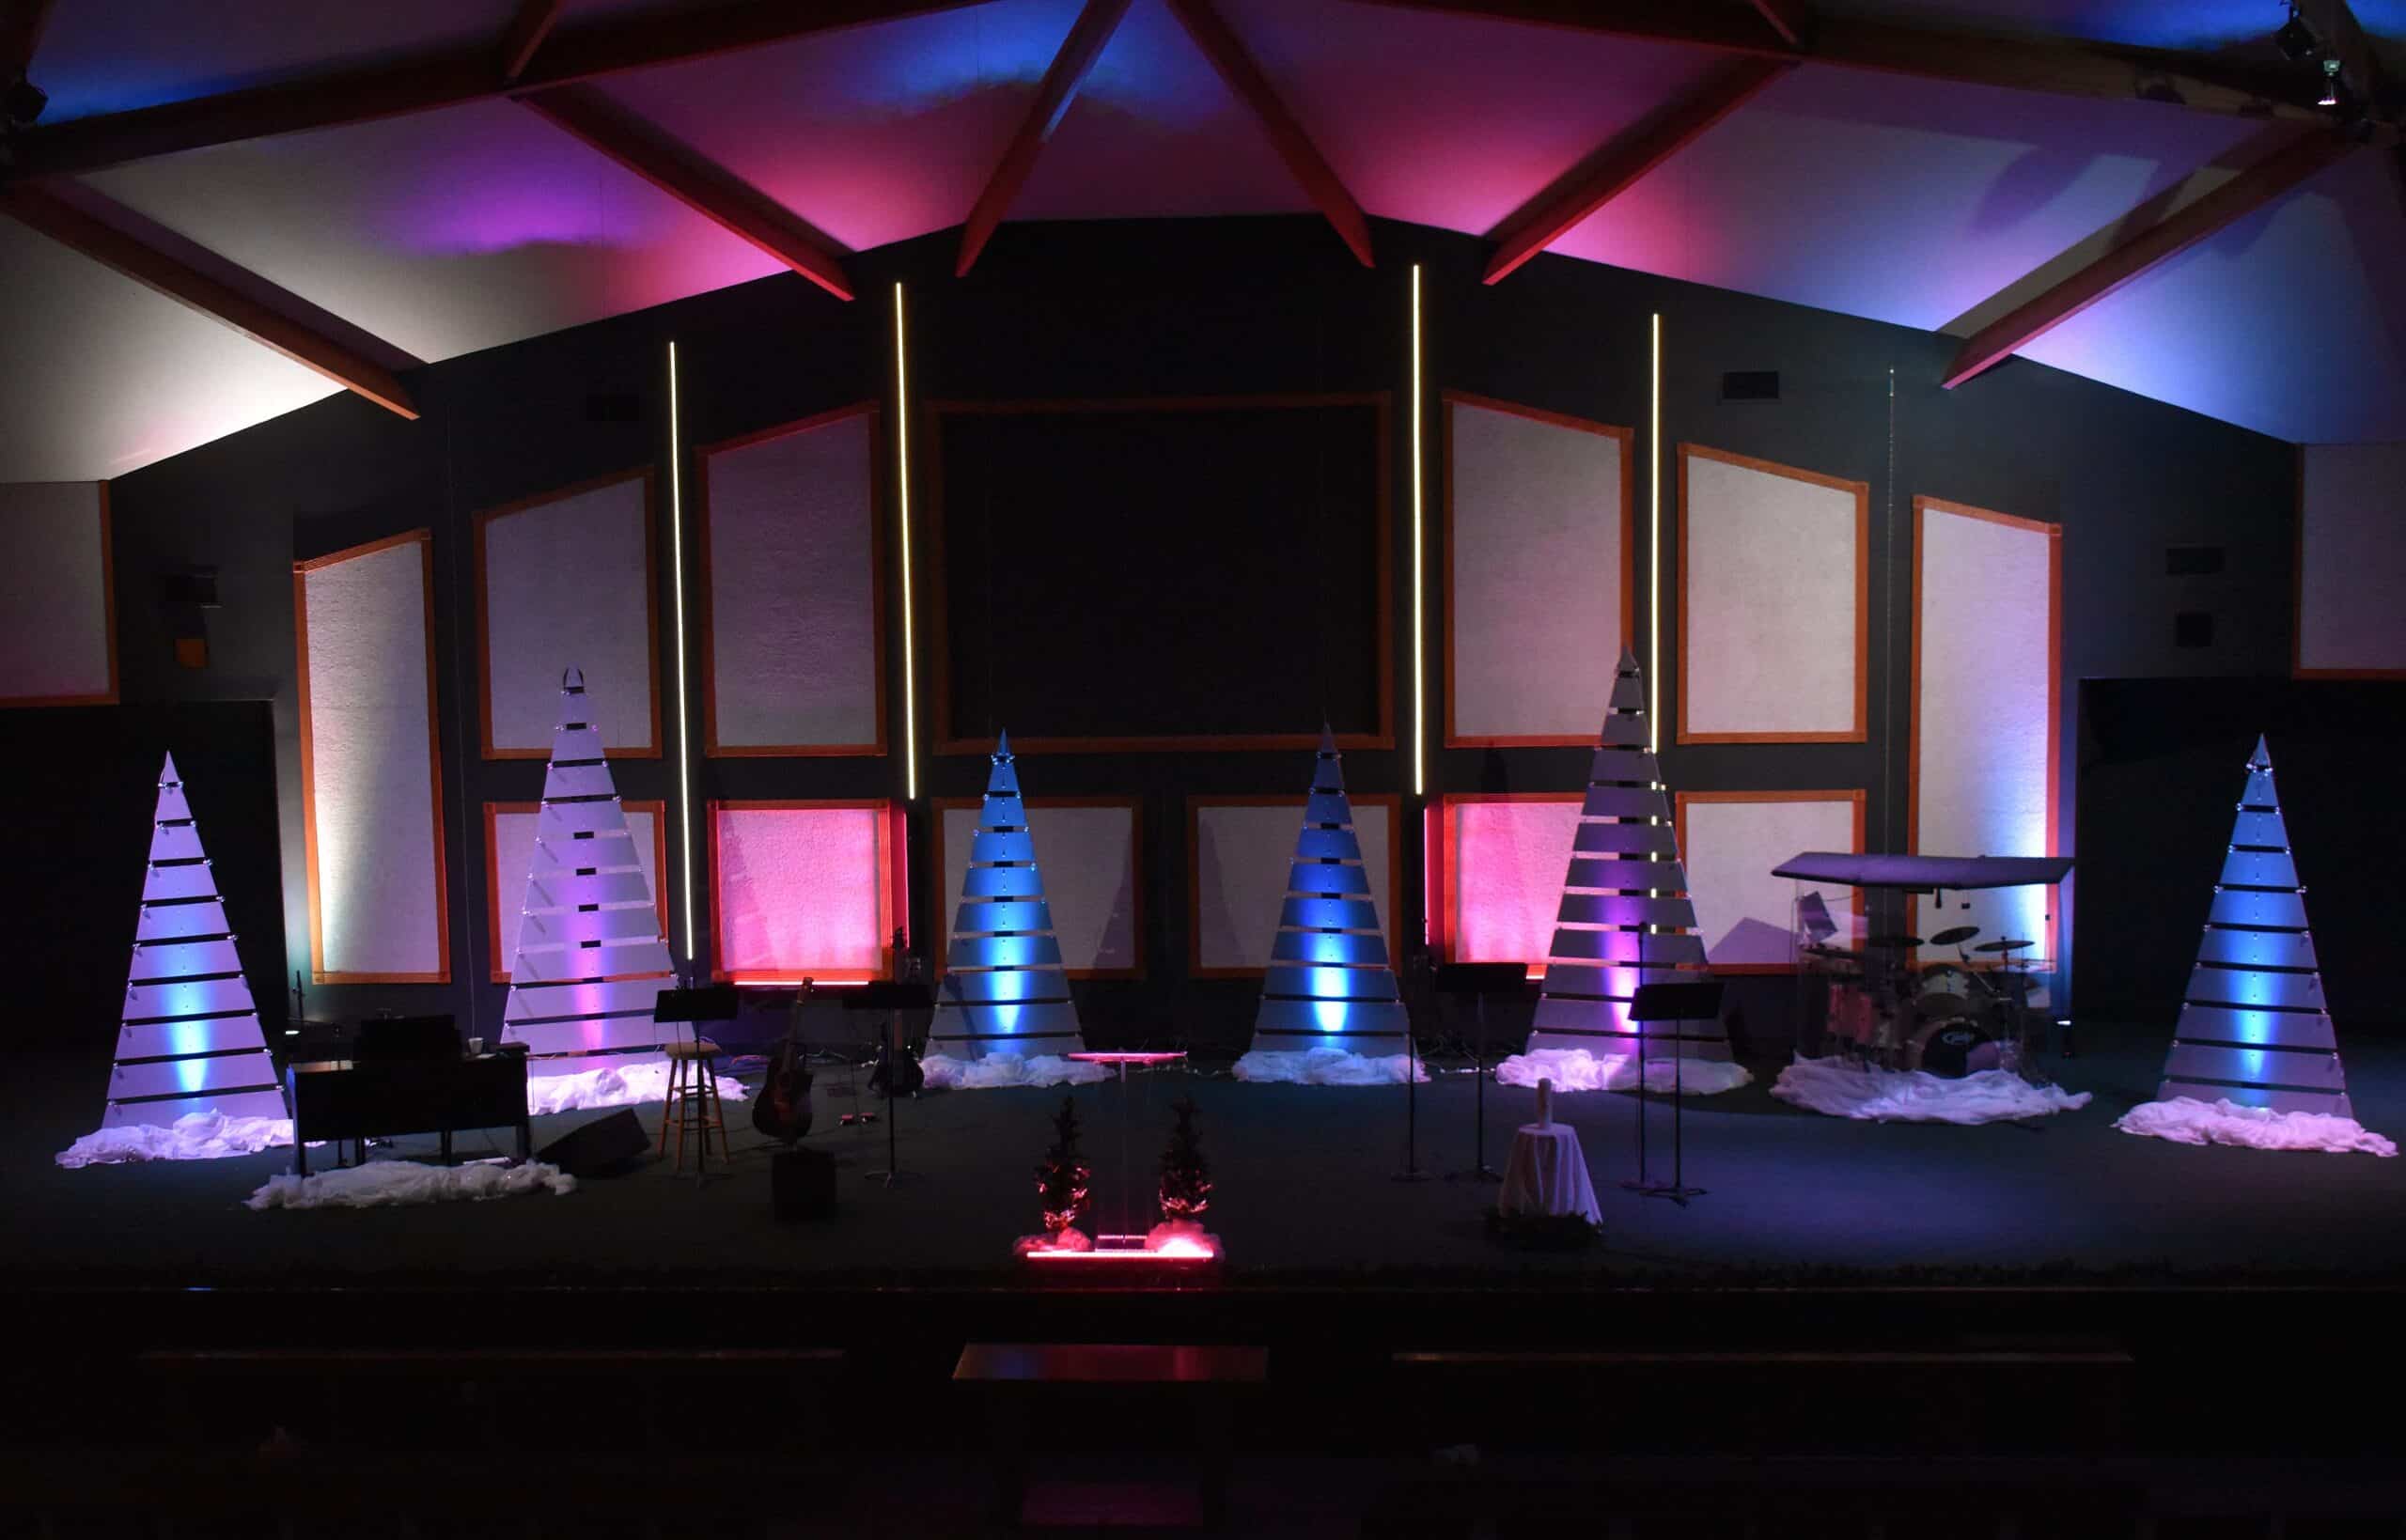
Hunter Hickman from Real Life Nazarene in Galion, Ohio brings us this fun and clean Christmas look.
From Hunter: Since our stage is very tall, we wanted to build tall trees to help fill the spaces. So we built two 10′ trees and five 8′ trees. The supplies were as follows…
1. x2 – 2″x6″x10′ – miter one side (tip of tree) to a tip by cutting both sides of the 2″x6″ to an angle.
– this angle will not matter too much but will just hide the vertical board from showing.
2. x5 – 2″x6″x8′ – these will be for the vertical supports for each 8′ tree. Again miter one side of each board to form the tip of the tree.
2. x11 – 2″x6″x8′ – these will be cut to form the base to hold the trees up. Each tree will use 1.5 boards. You can start by cutting 14 pieces @ 2′ long & 7 pieces @ 4′ long
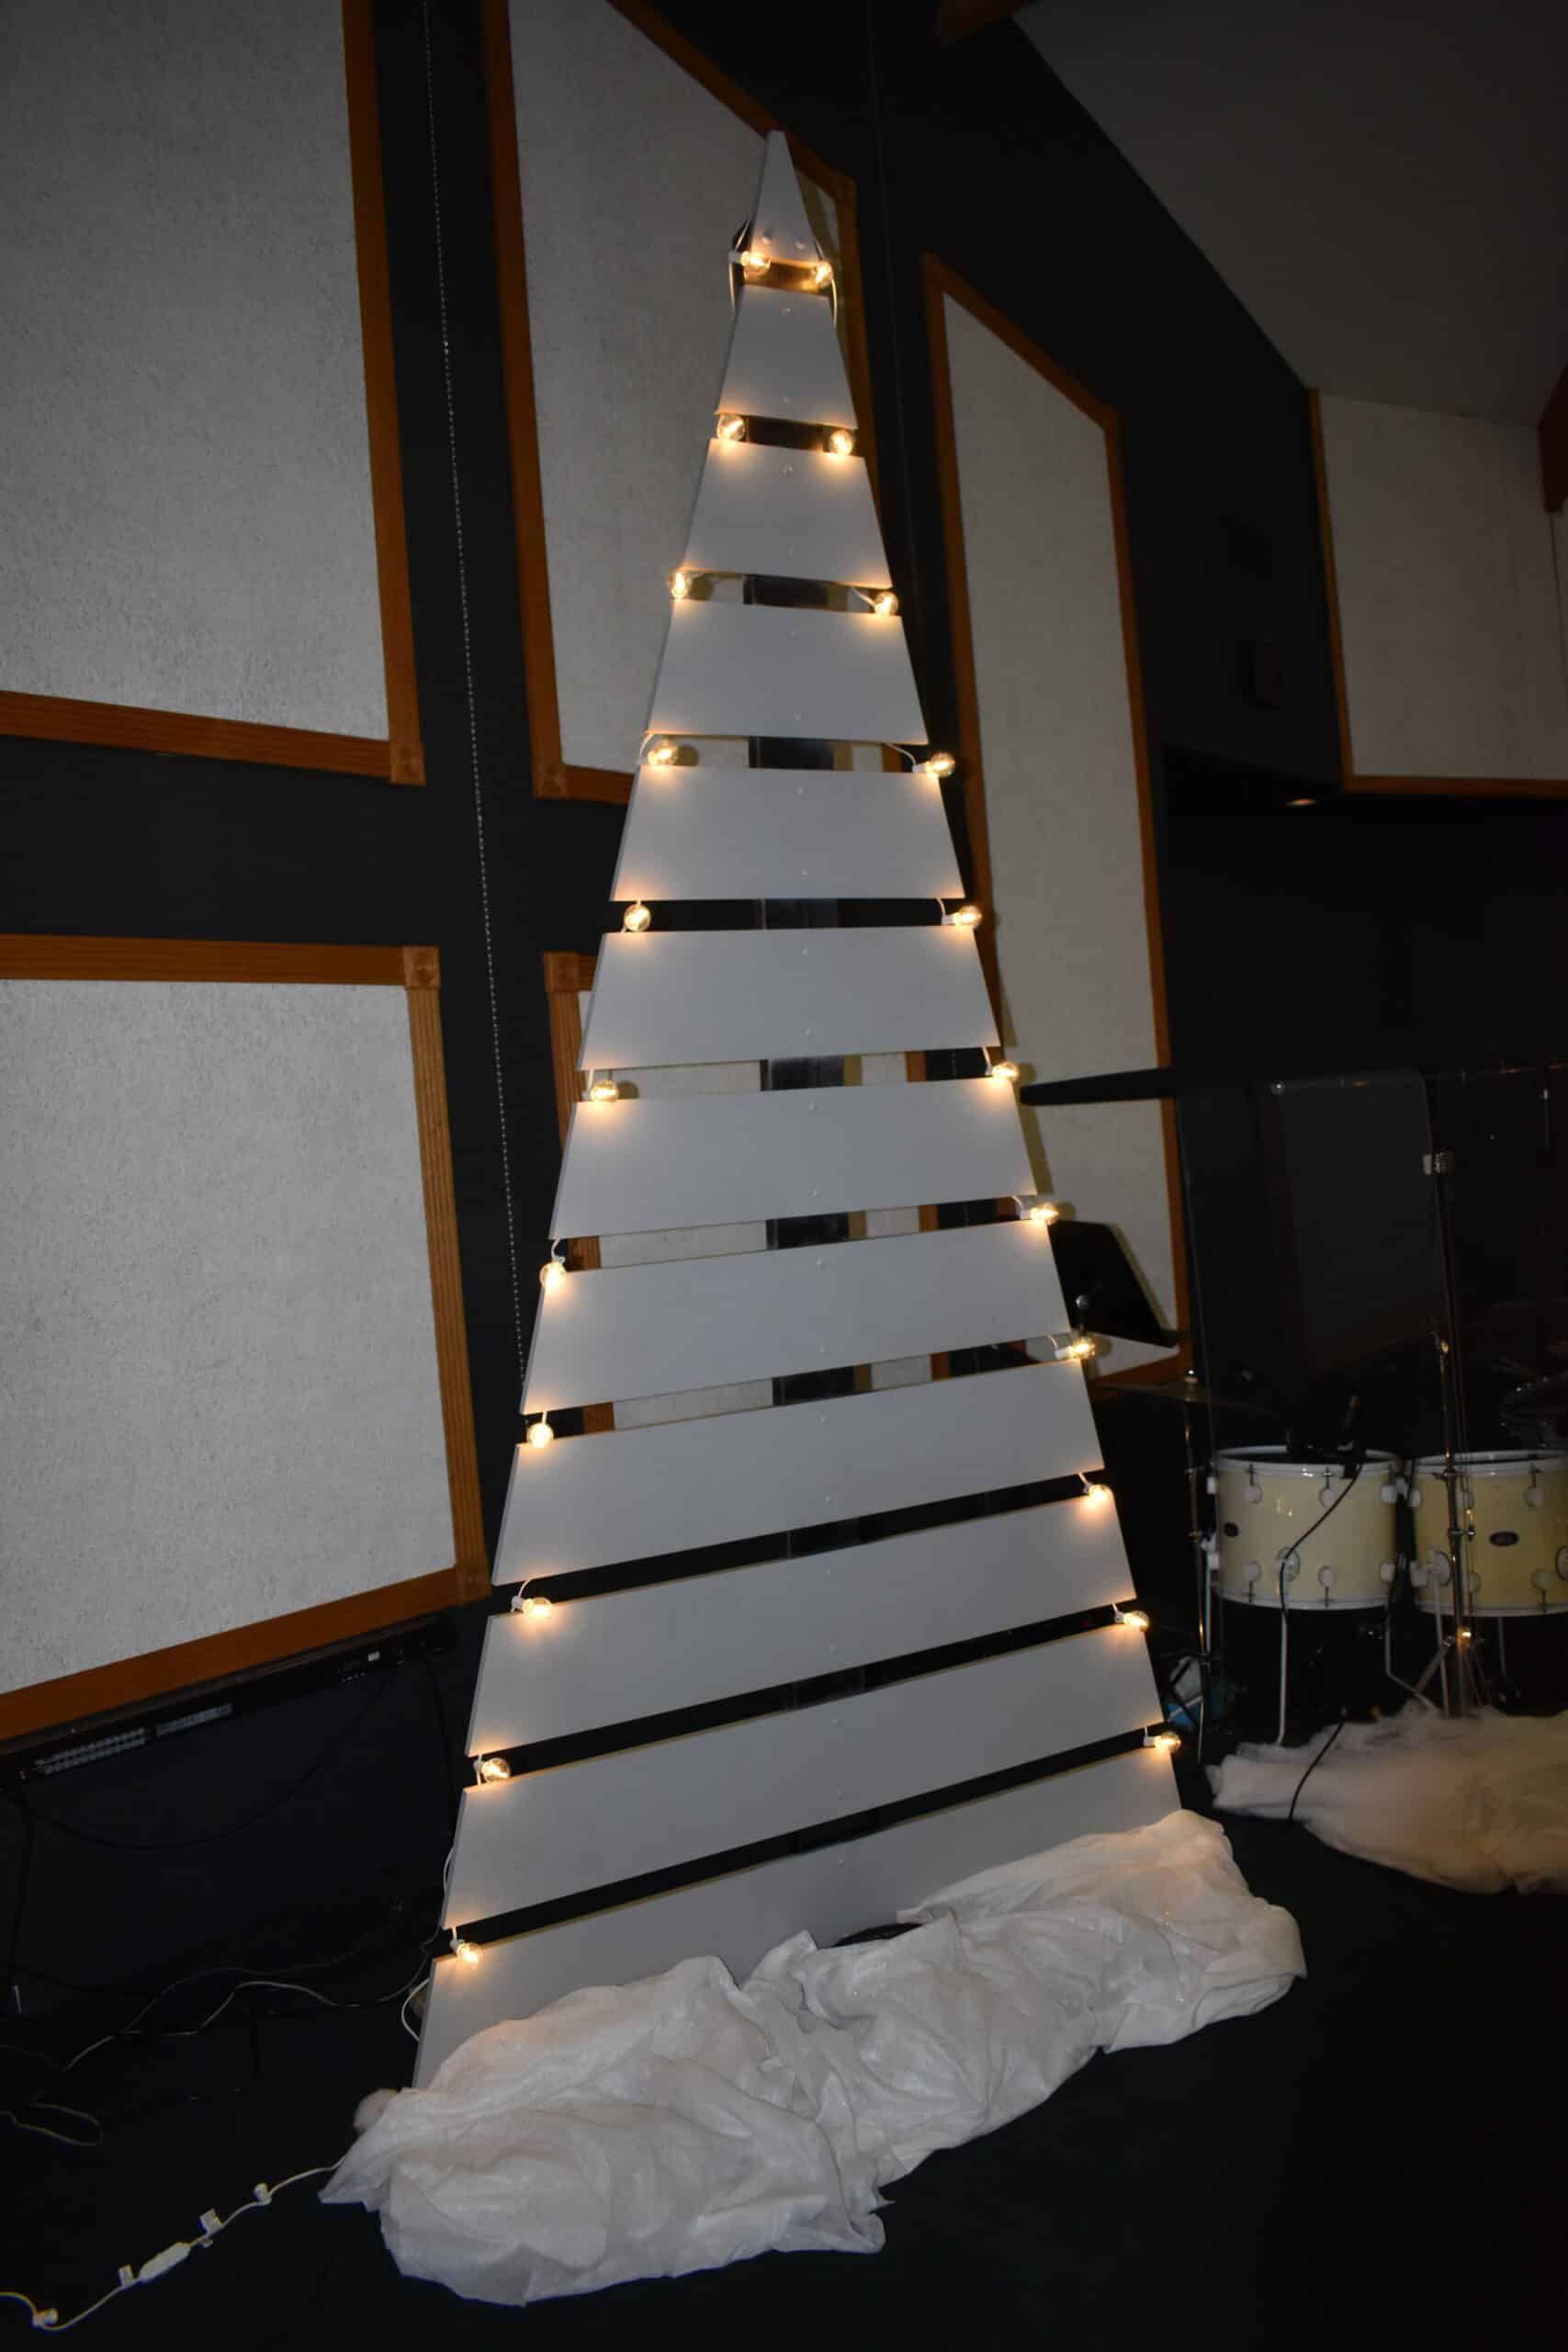
3. x5 – 3/4″x4’x8′ mdf board. This is what I chose to use for my trees. I wanted to keep it cheap but sturdy. Then I painted these boards a silver/grey to reflect the light.
4. x2 boxes of 100 2.5″ bolts.
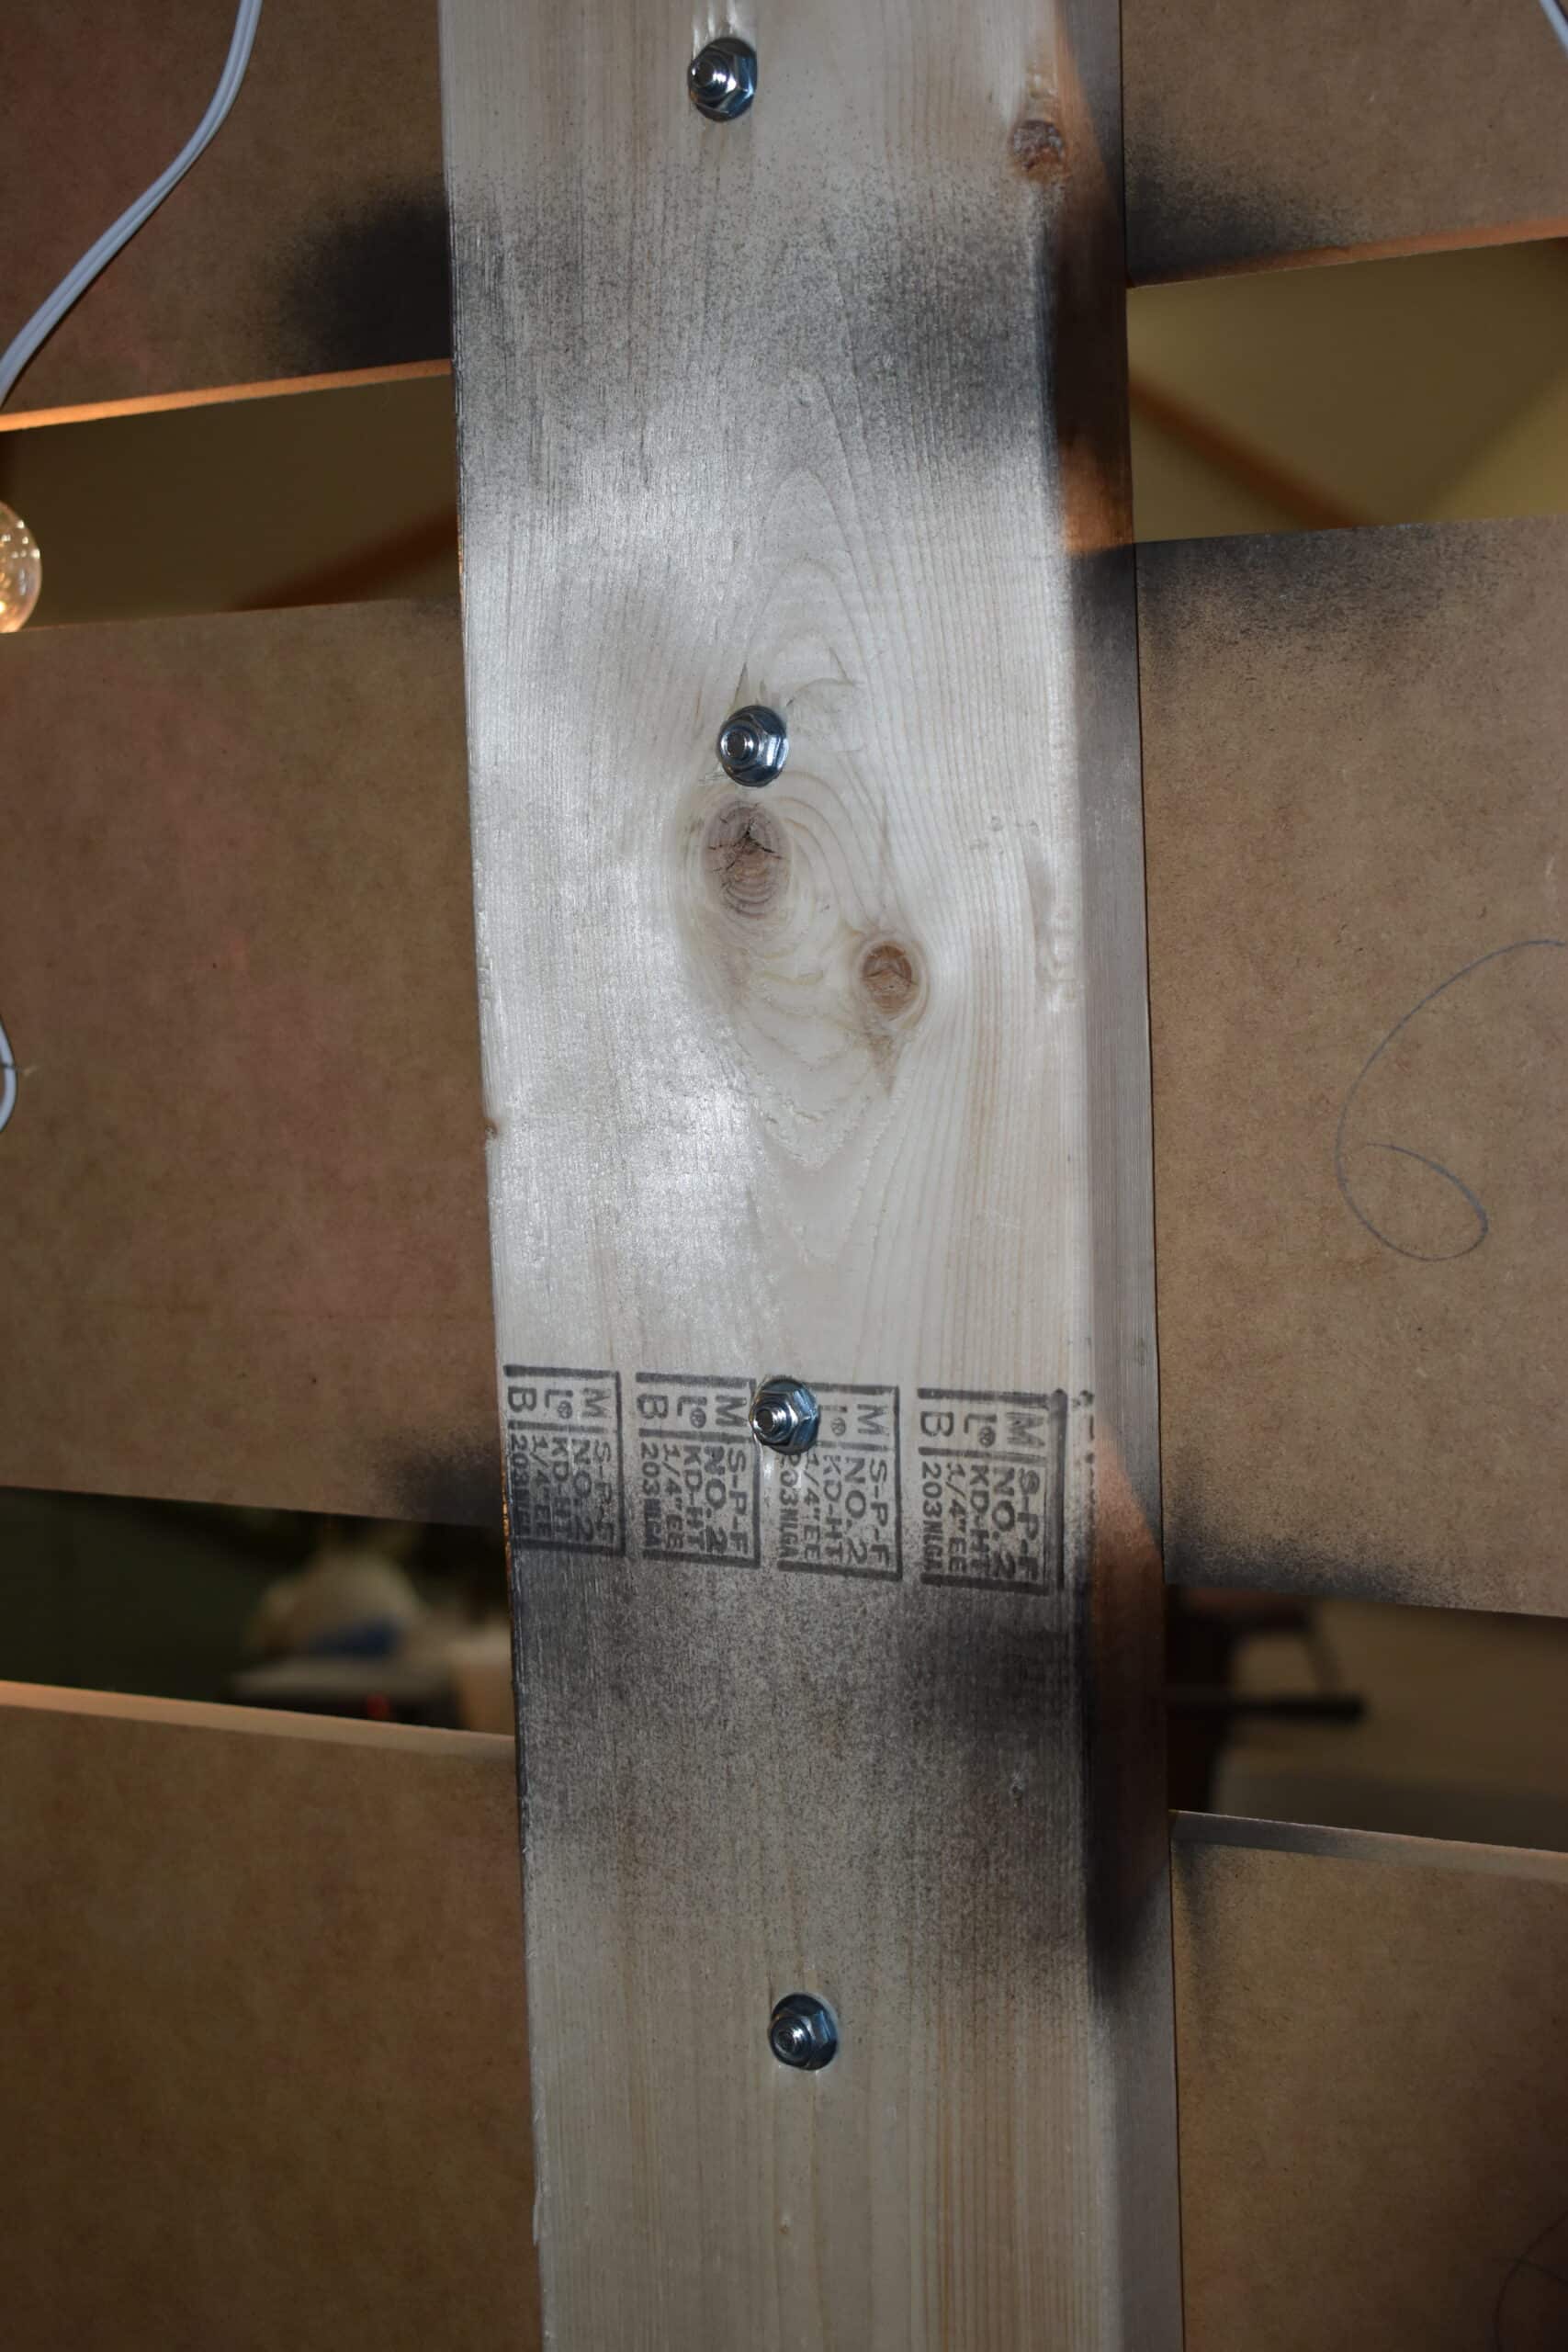
5. x2 boxes of 100 nuts to match whatever bolt you choose. I chose to put two bolts in every slab of my tree for stability. Using Screws will allow you to tear down each year and store easier.
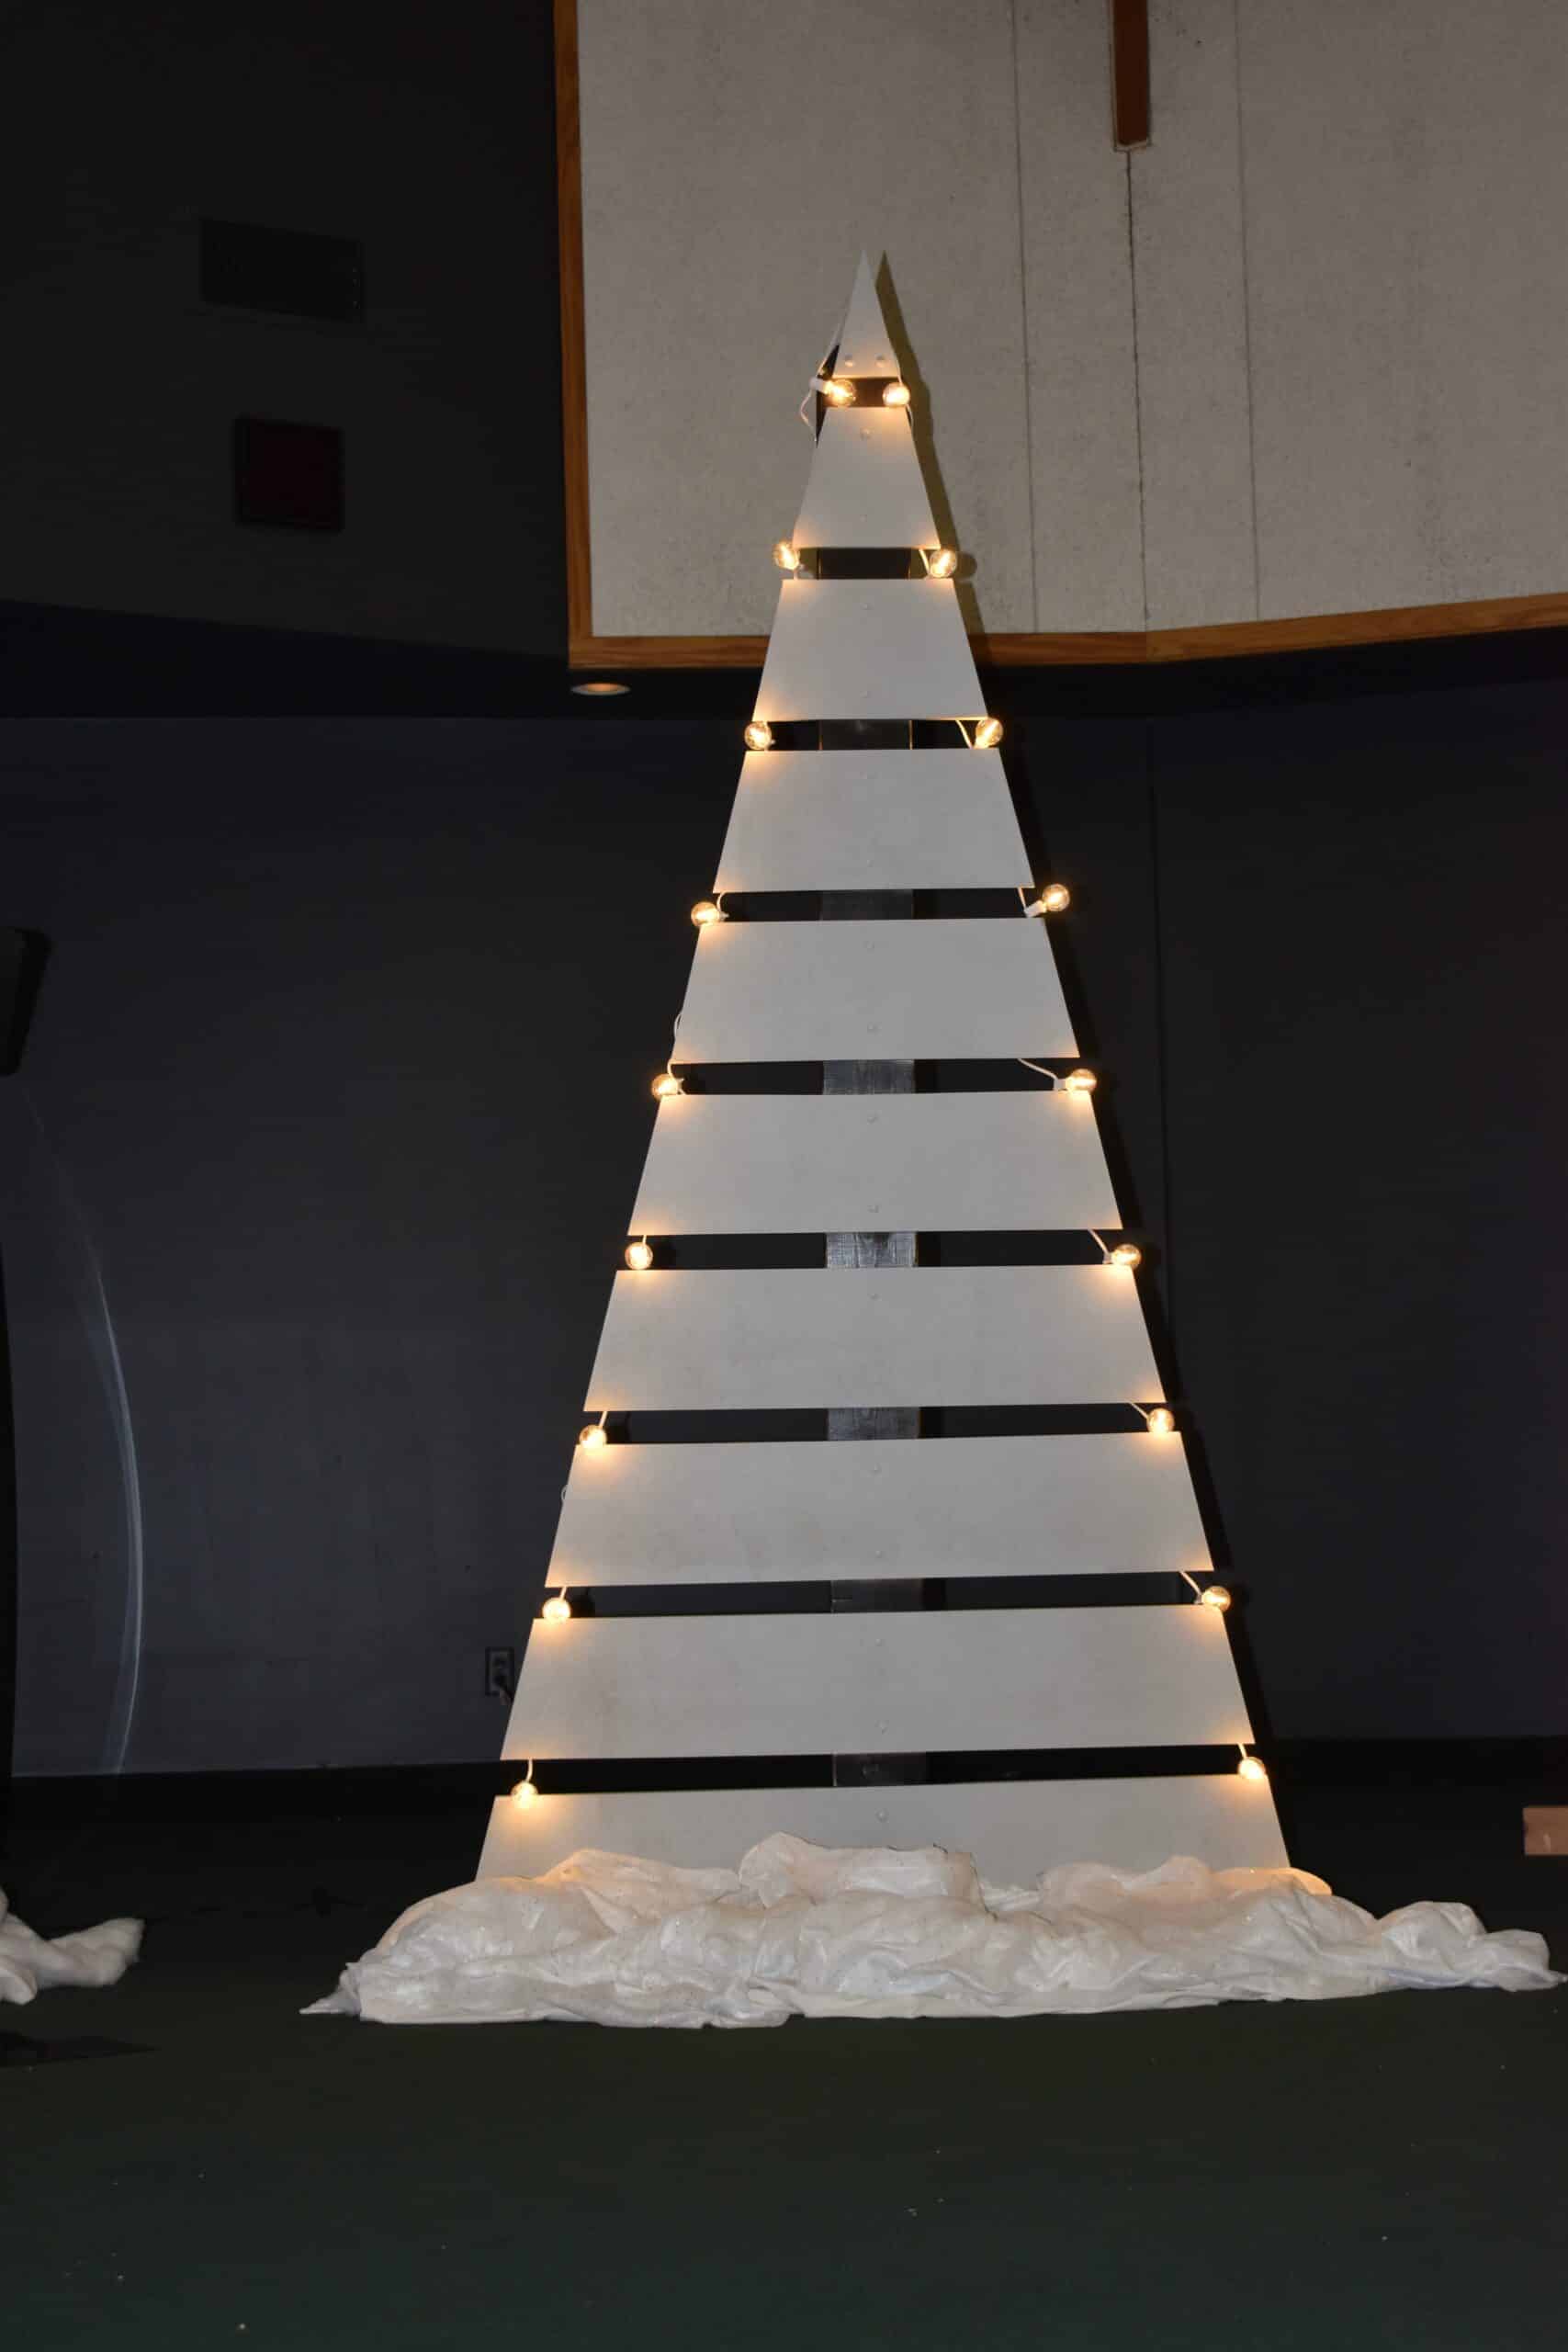
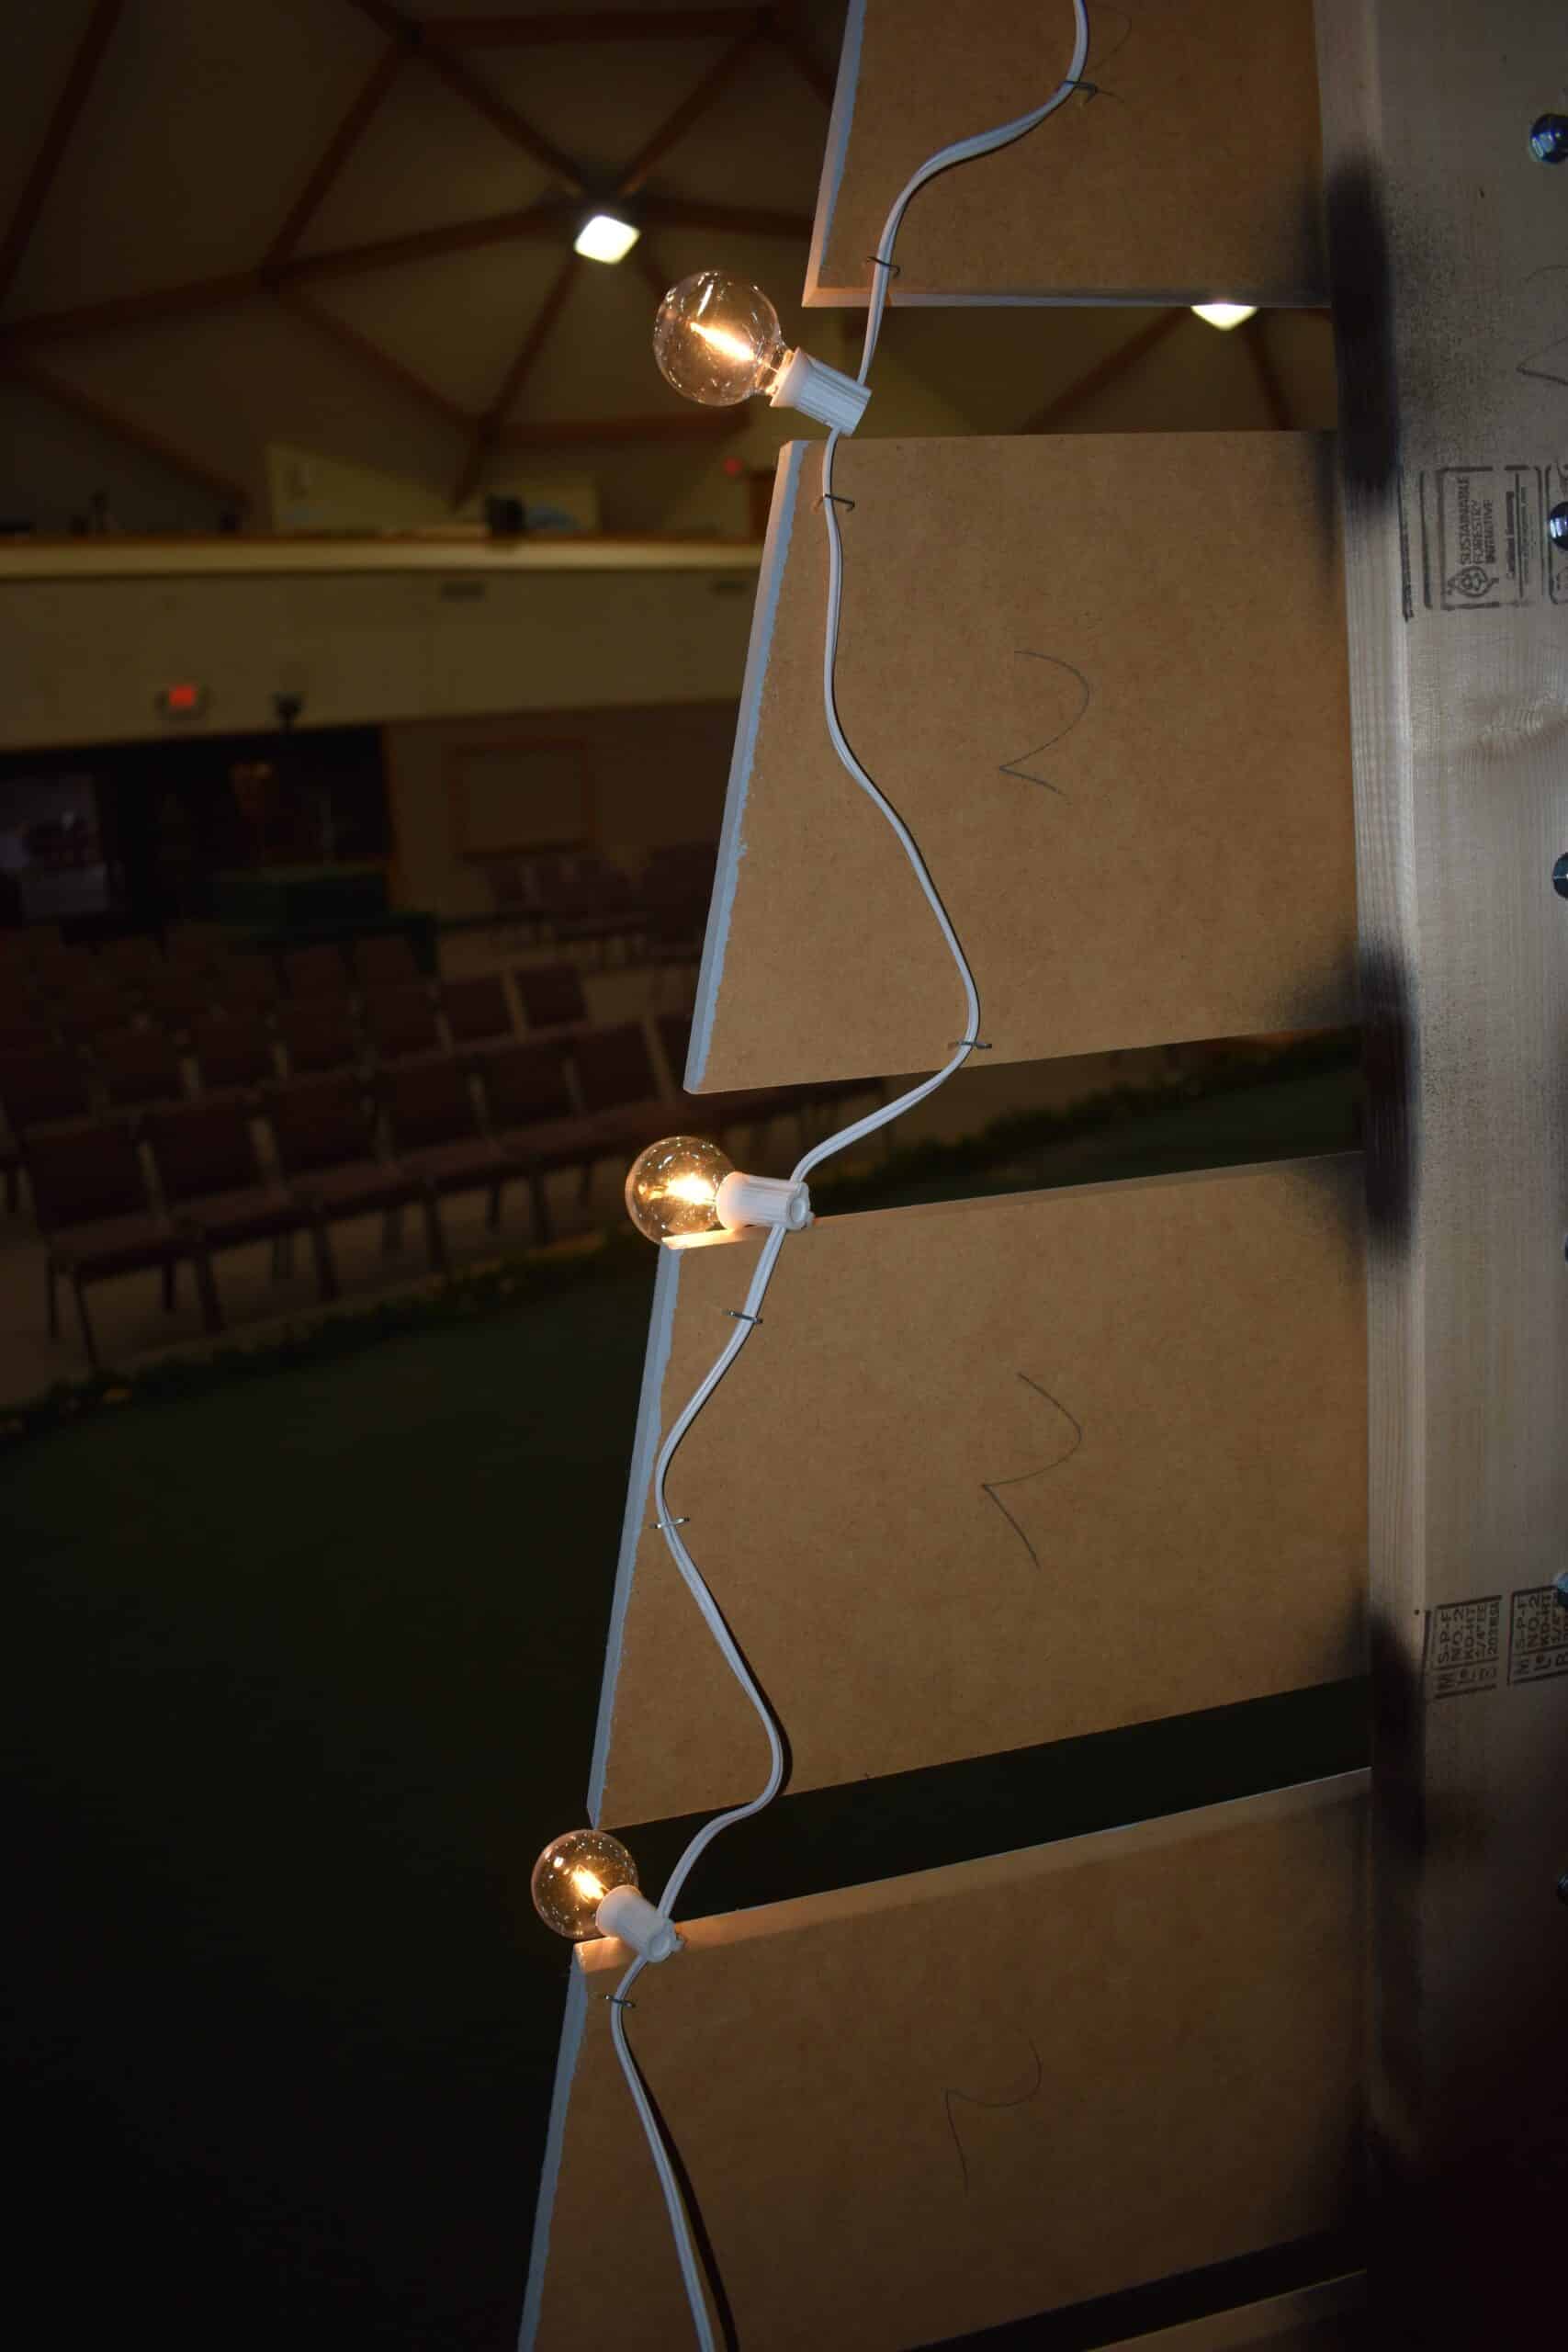
6. x7 (or however many trees you build) patio LED lights from Amazon. These are around 12″ between each light which was perfect because I cut each slab of my tree to 10″. This leaves you enough room to secure the lights in each gap.
Choose whatever paint you would like if you are not using a solid wood look. The mdf board is cheap but doesn’t look the best by itself. I chose a Gloss grey color to reflect off each tree.
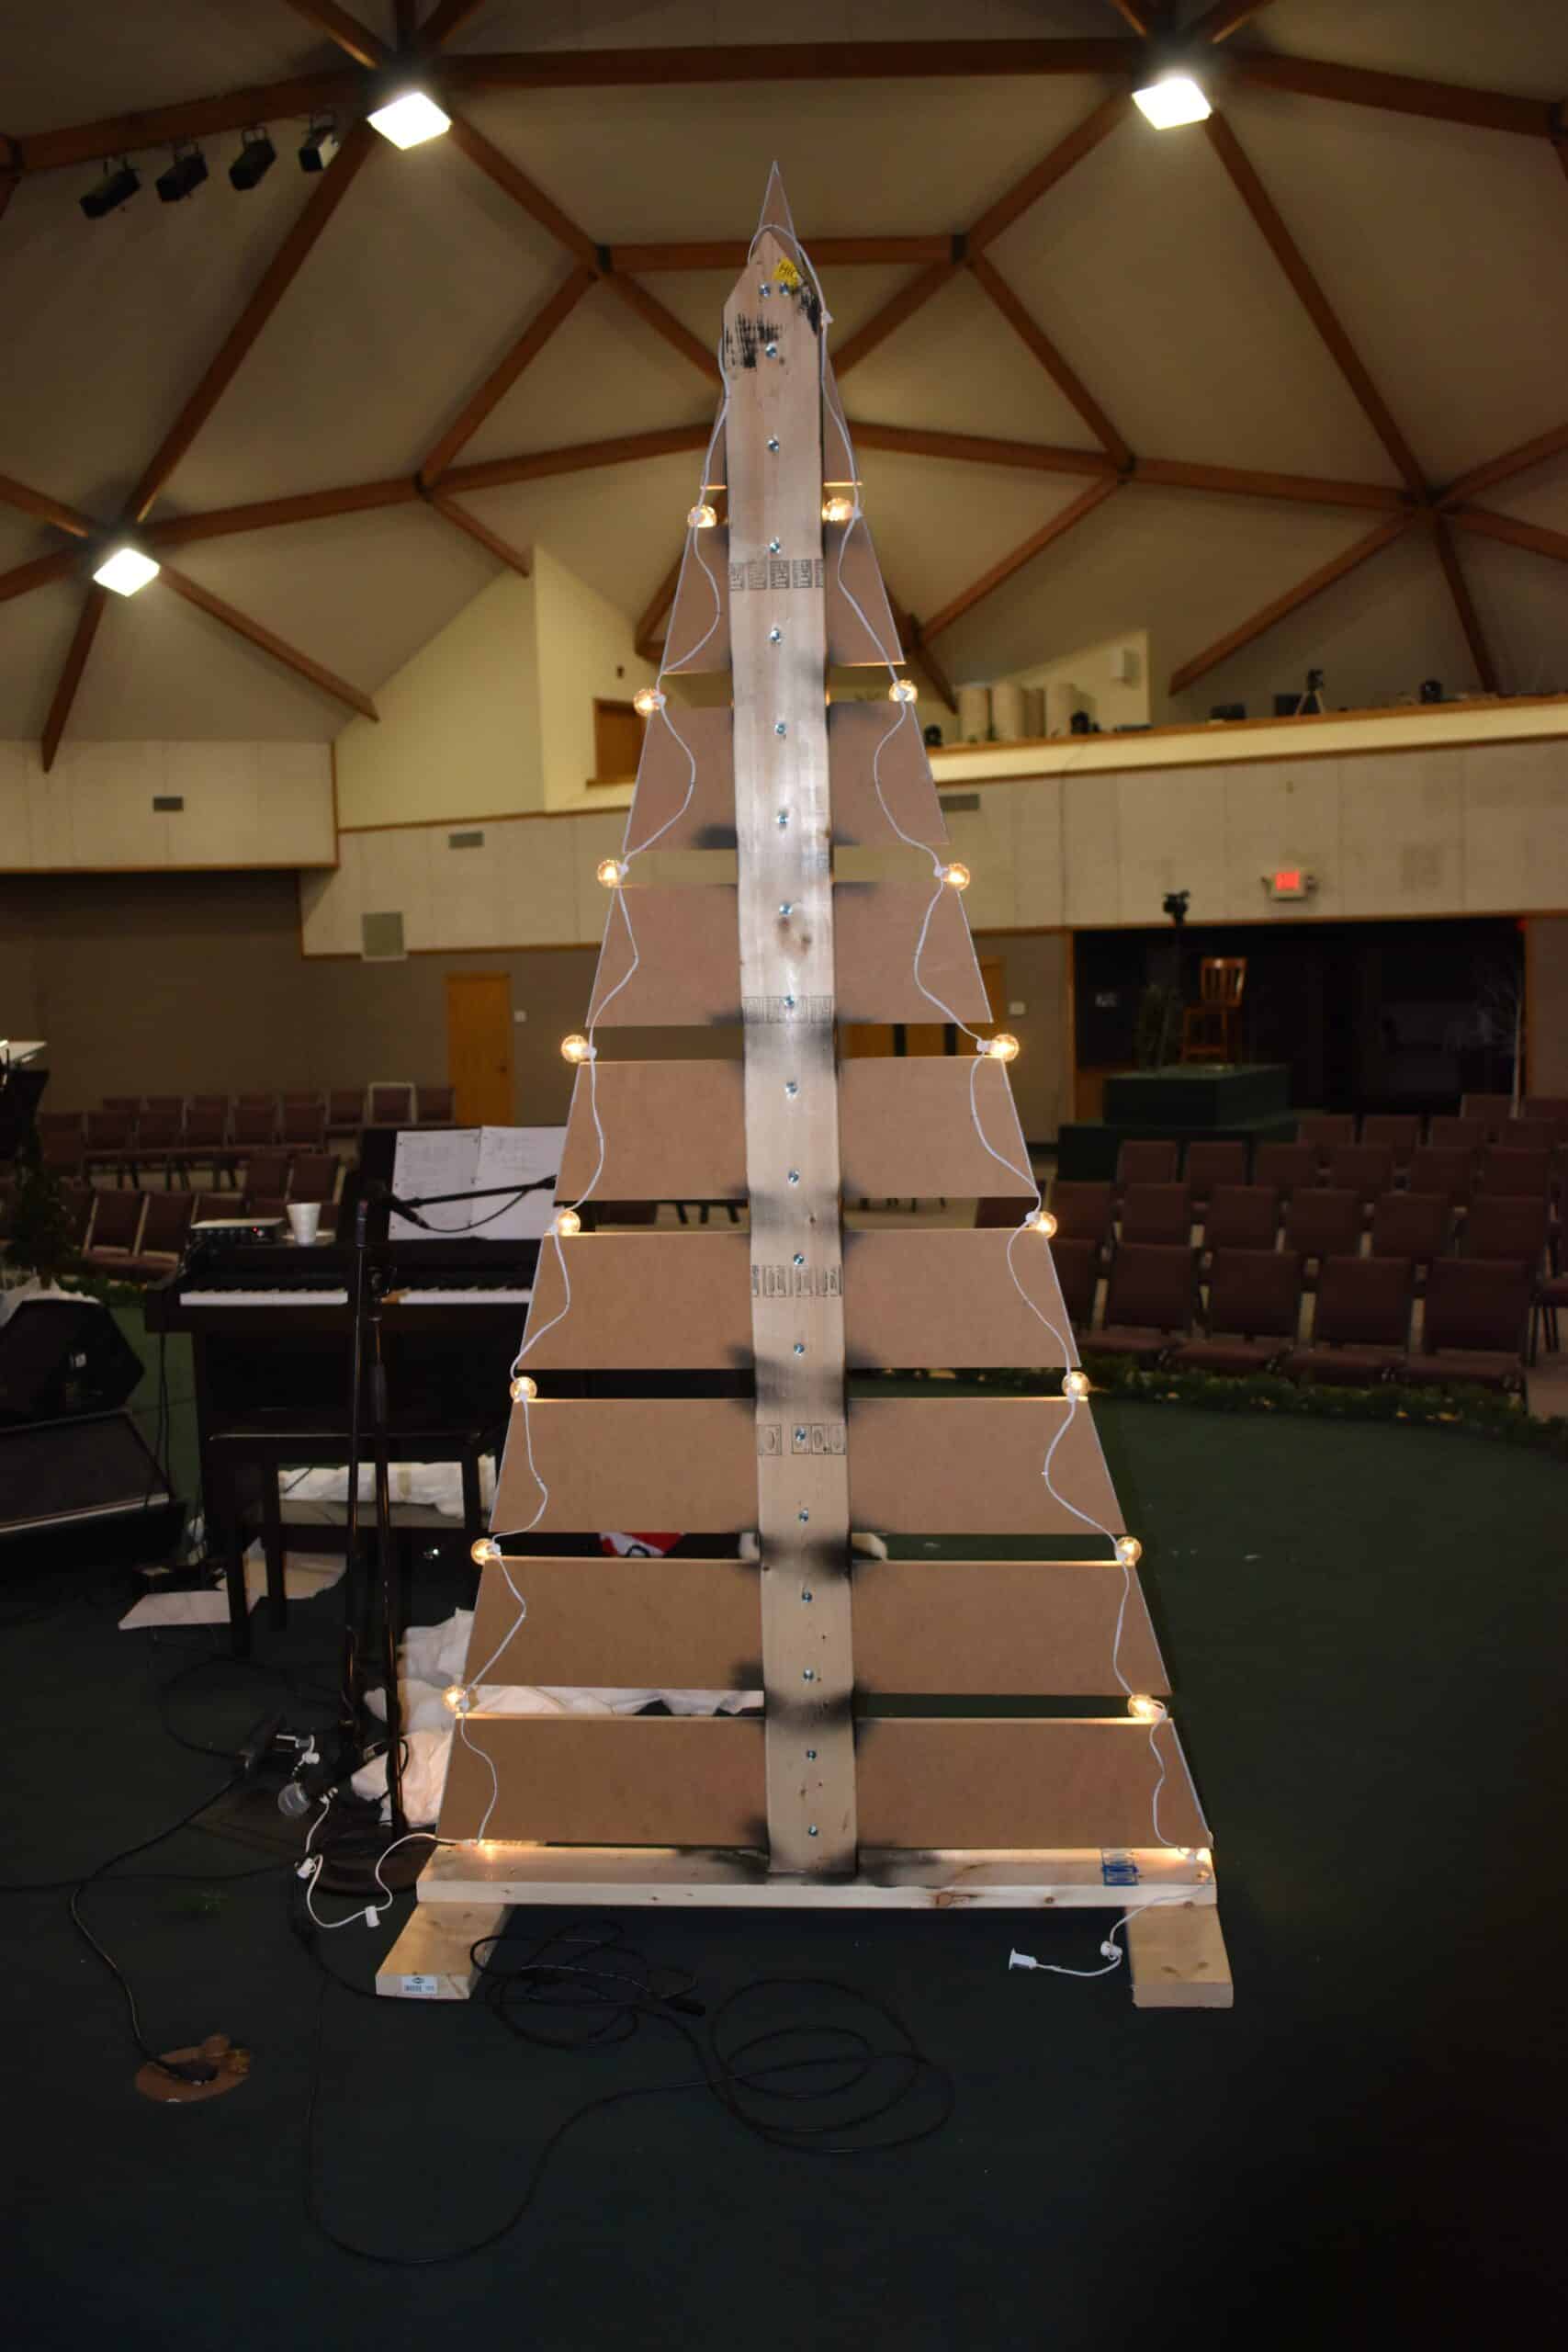
Cut all your mdf board to 10″ wide until you run out of boards to cut. I then placed each board on the floor of my garage and spaced them out evenly with a 2″ gap until I reached to a little over 8′ tall for my 8′ tall trees and the same for the 10′ trees. Then I carefully used a chalkline to mark out my trees. The tricky part comes next. After you mark your trees with the chalkline, you can see that there will be a lot of wasted wood so if you move each board over you can actually manage to save a lot of lumber and a lot of money. By doing this I was able to use a lot of cut pieces multiple times for the top parts of my trees.
Next I took a pencil and spaced out the 2″ gaps on my 2″x6″ starting from the bottom. Leave a 2″ space on the bottom for the frame to set in the base. Then mark off the 10″ mdf boards and a 2″ gap all the way up the vertical board. Lastly place one mdf board at a time onto the 2″x6″ vertical board clamp that board in place and pre-drill one at a time. take the clamp off and put your bolt through and nut on the back. Move from the bottom up the tree till you are finished.
For the base of the tree, I simply took my 2′ boards and used screws to screw my 4′ on the top perpendicular to each other. Imagine a large “I” Then I measured to the middle and used a jug saw to cut out a space the exact size of the 2″x6″ (this is 1.5″x5.5″). The vertical 2″x6″ board that holds the tree slabs on will need to fit snuggly into this hole. Do not cut too big.
Lastly, I found it easier to paint last with the trees in the air but it may have been easier if I was outside to lay them down and paint them. A tip, spray paint the 2″x6″ board where the gaps are black first and then you can come back and paint over the overspray on the mdf board. Choose whatever color you like but I found light colors reflect the light well.
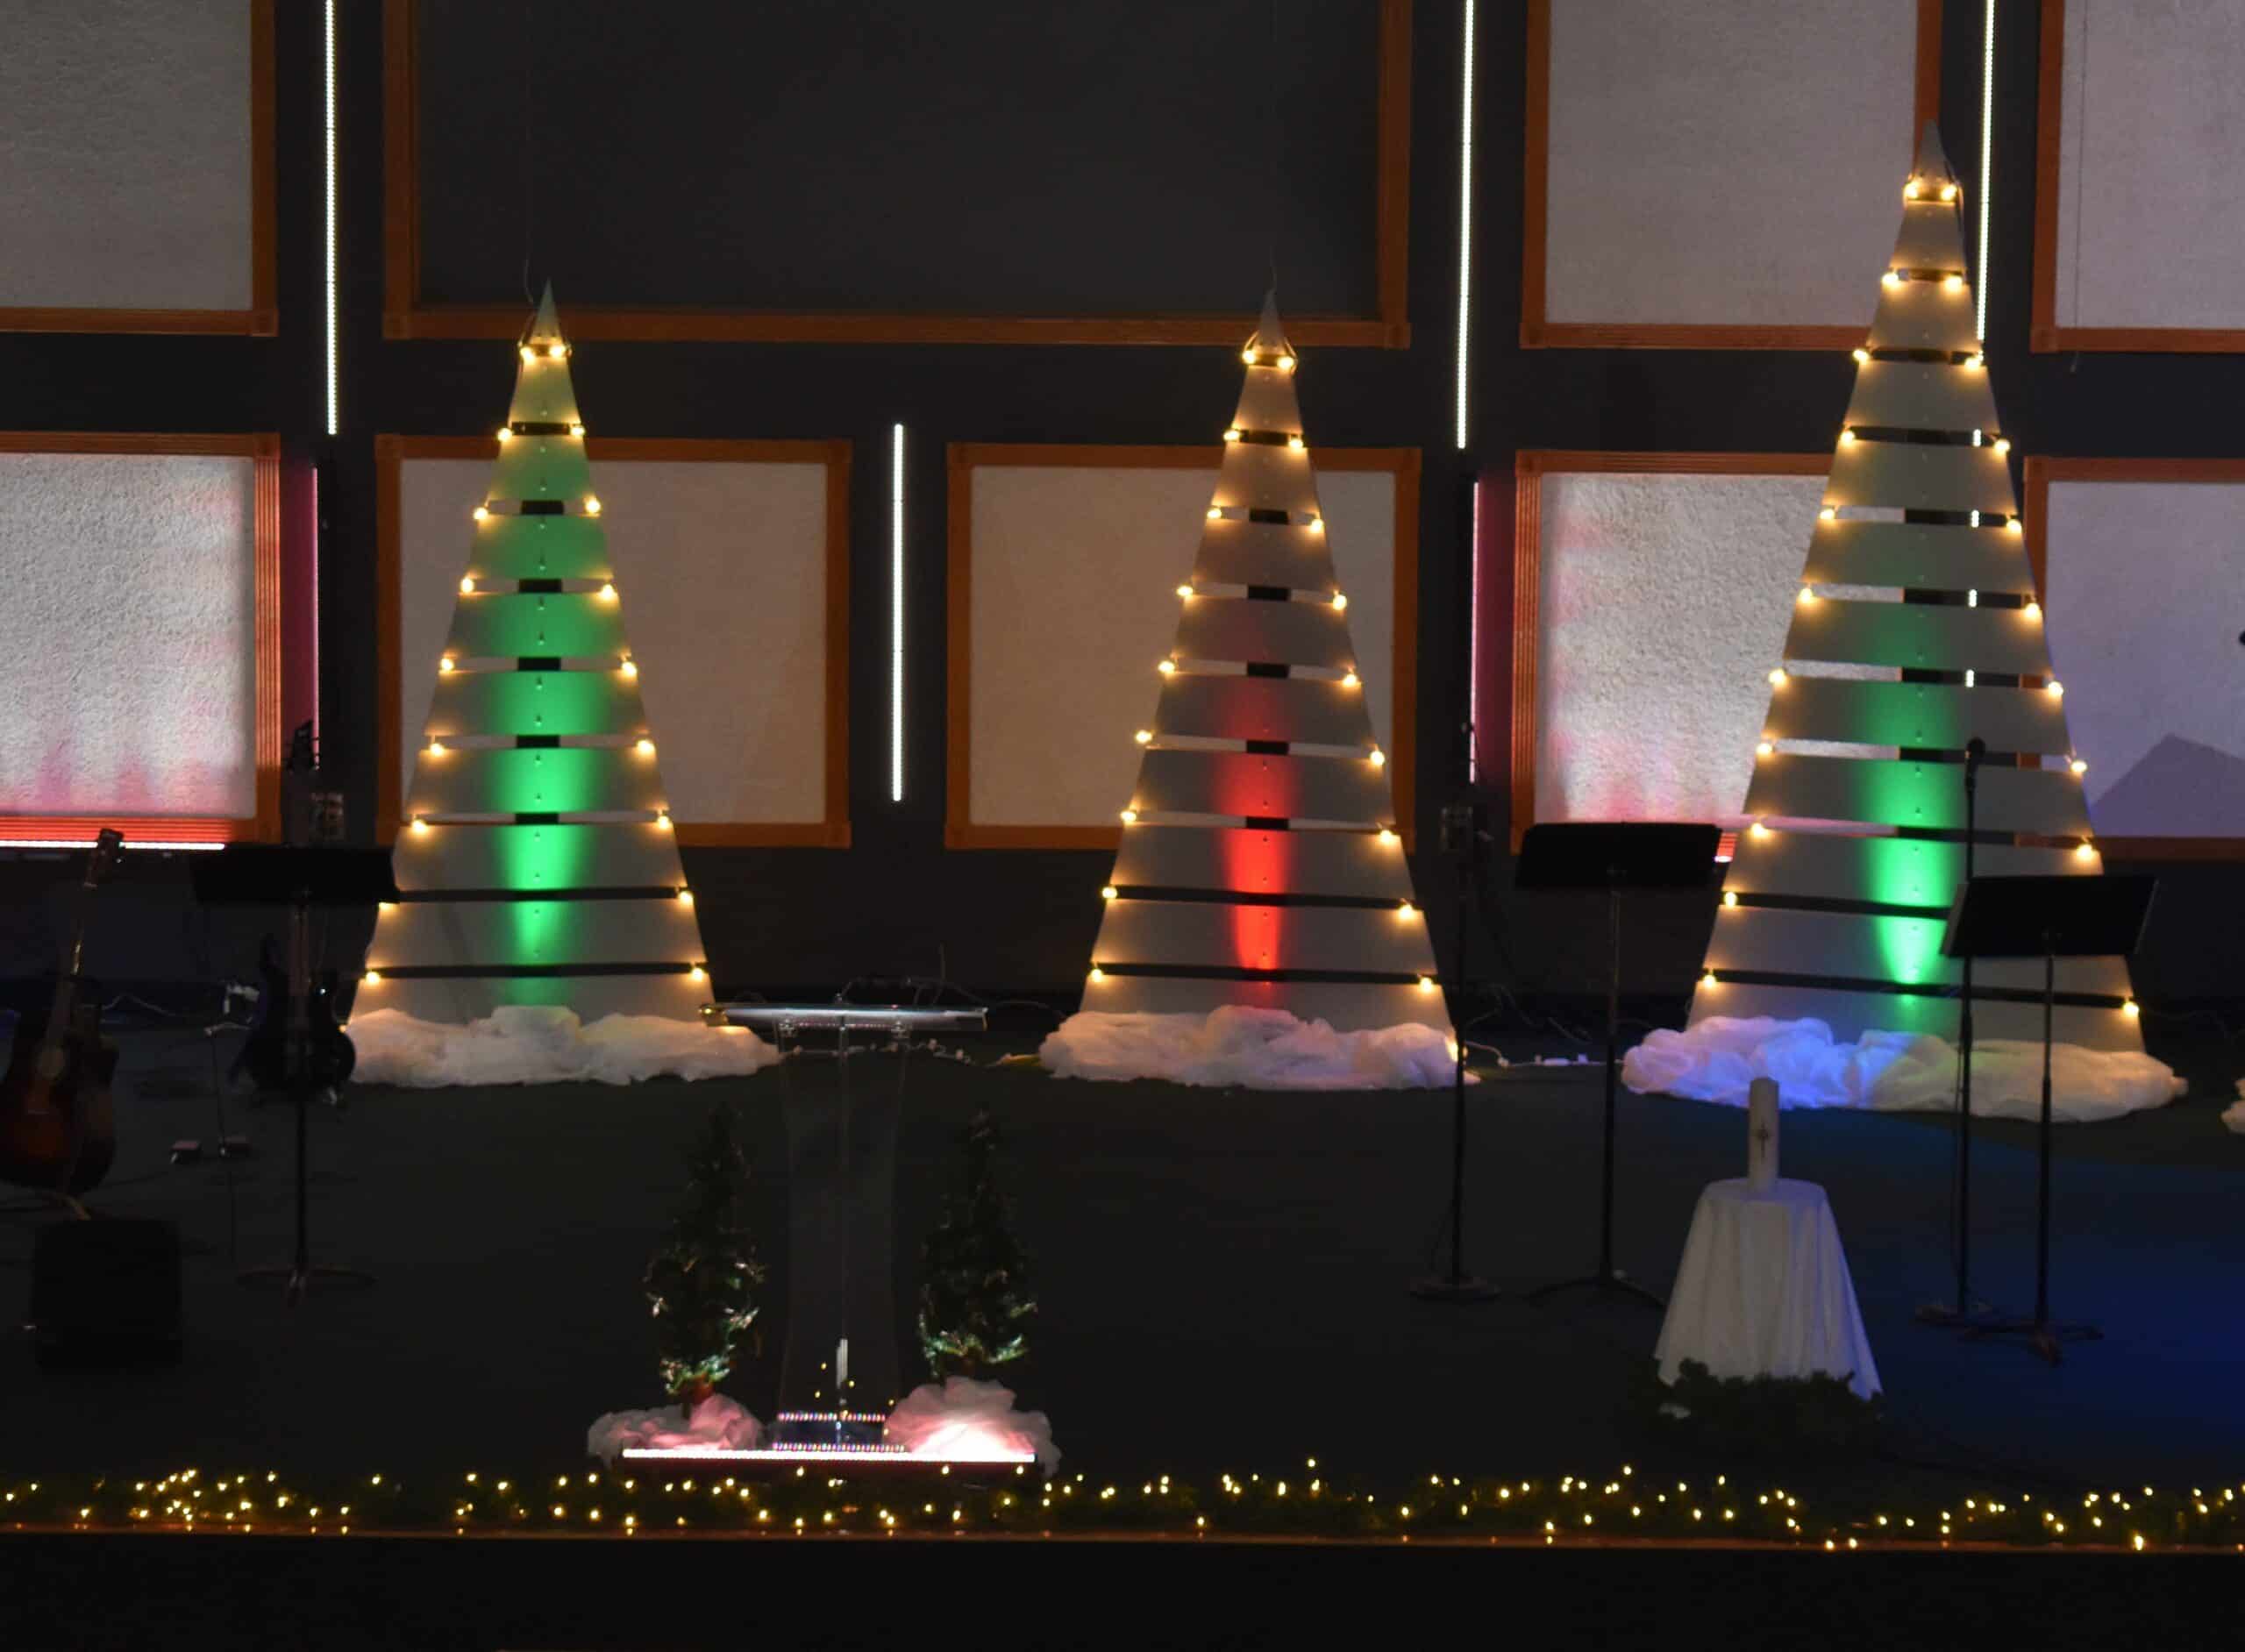
When I put everything together I bought DMX ready LED par can lights and placed them at the bottom of the trees to light them each up whatever color I like. I (carefully) stapled the LED porch lights in between the 2″ gaps of the tree all the way up and it was all done.
Total budget with the lights included and all the hardware, paint, and lumber was around $600. Enjoy.
This was an amazing way to celebrate Christmas and fill our large stage while staying within a budget. Everyone seems to love them and I don’t know what we will do when Christmas is over and we need to take them down.


Leave a Reply
You must be logged in to post a comment.