



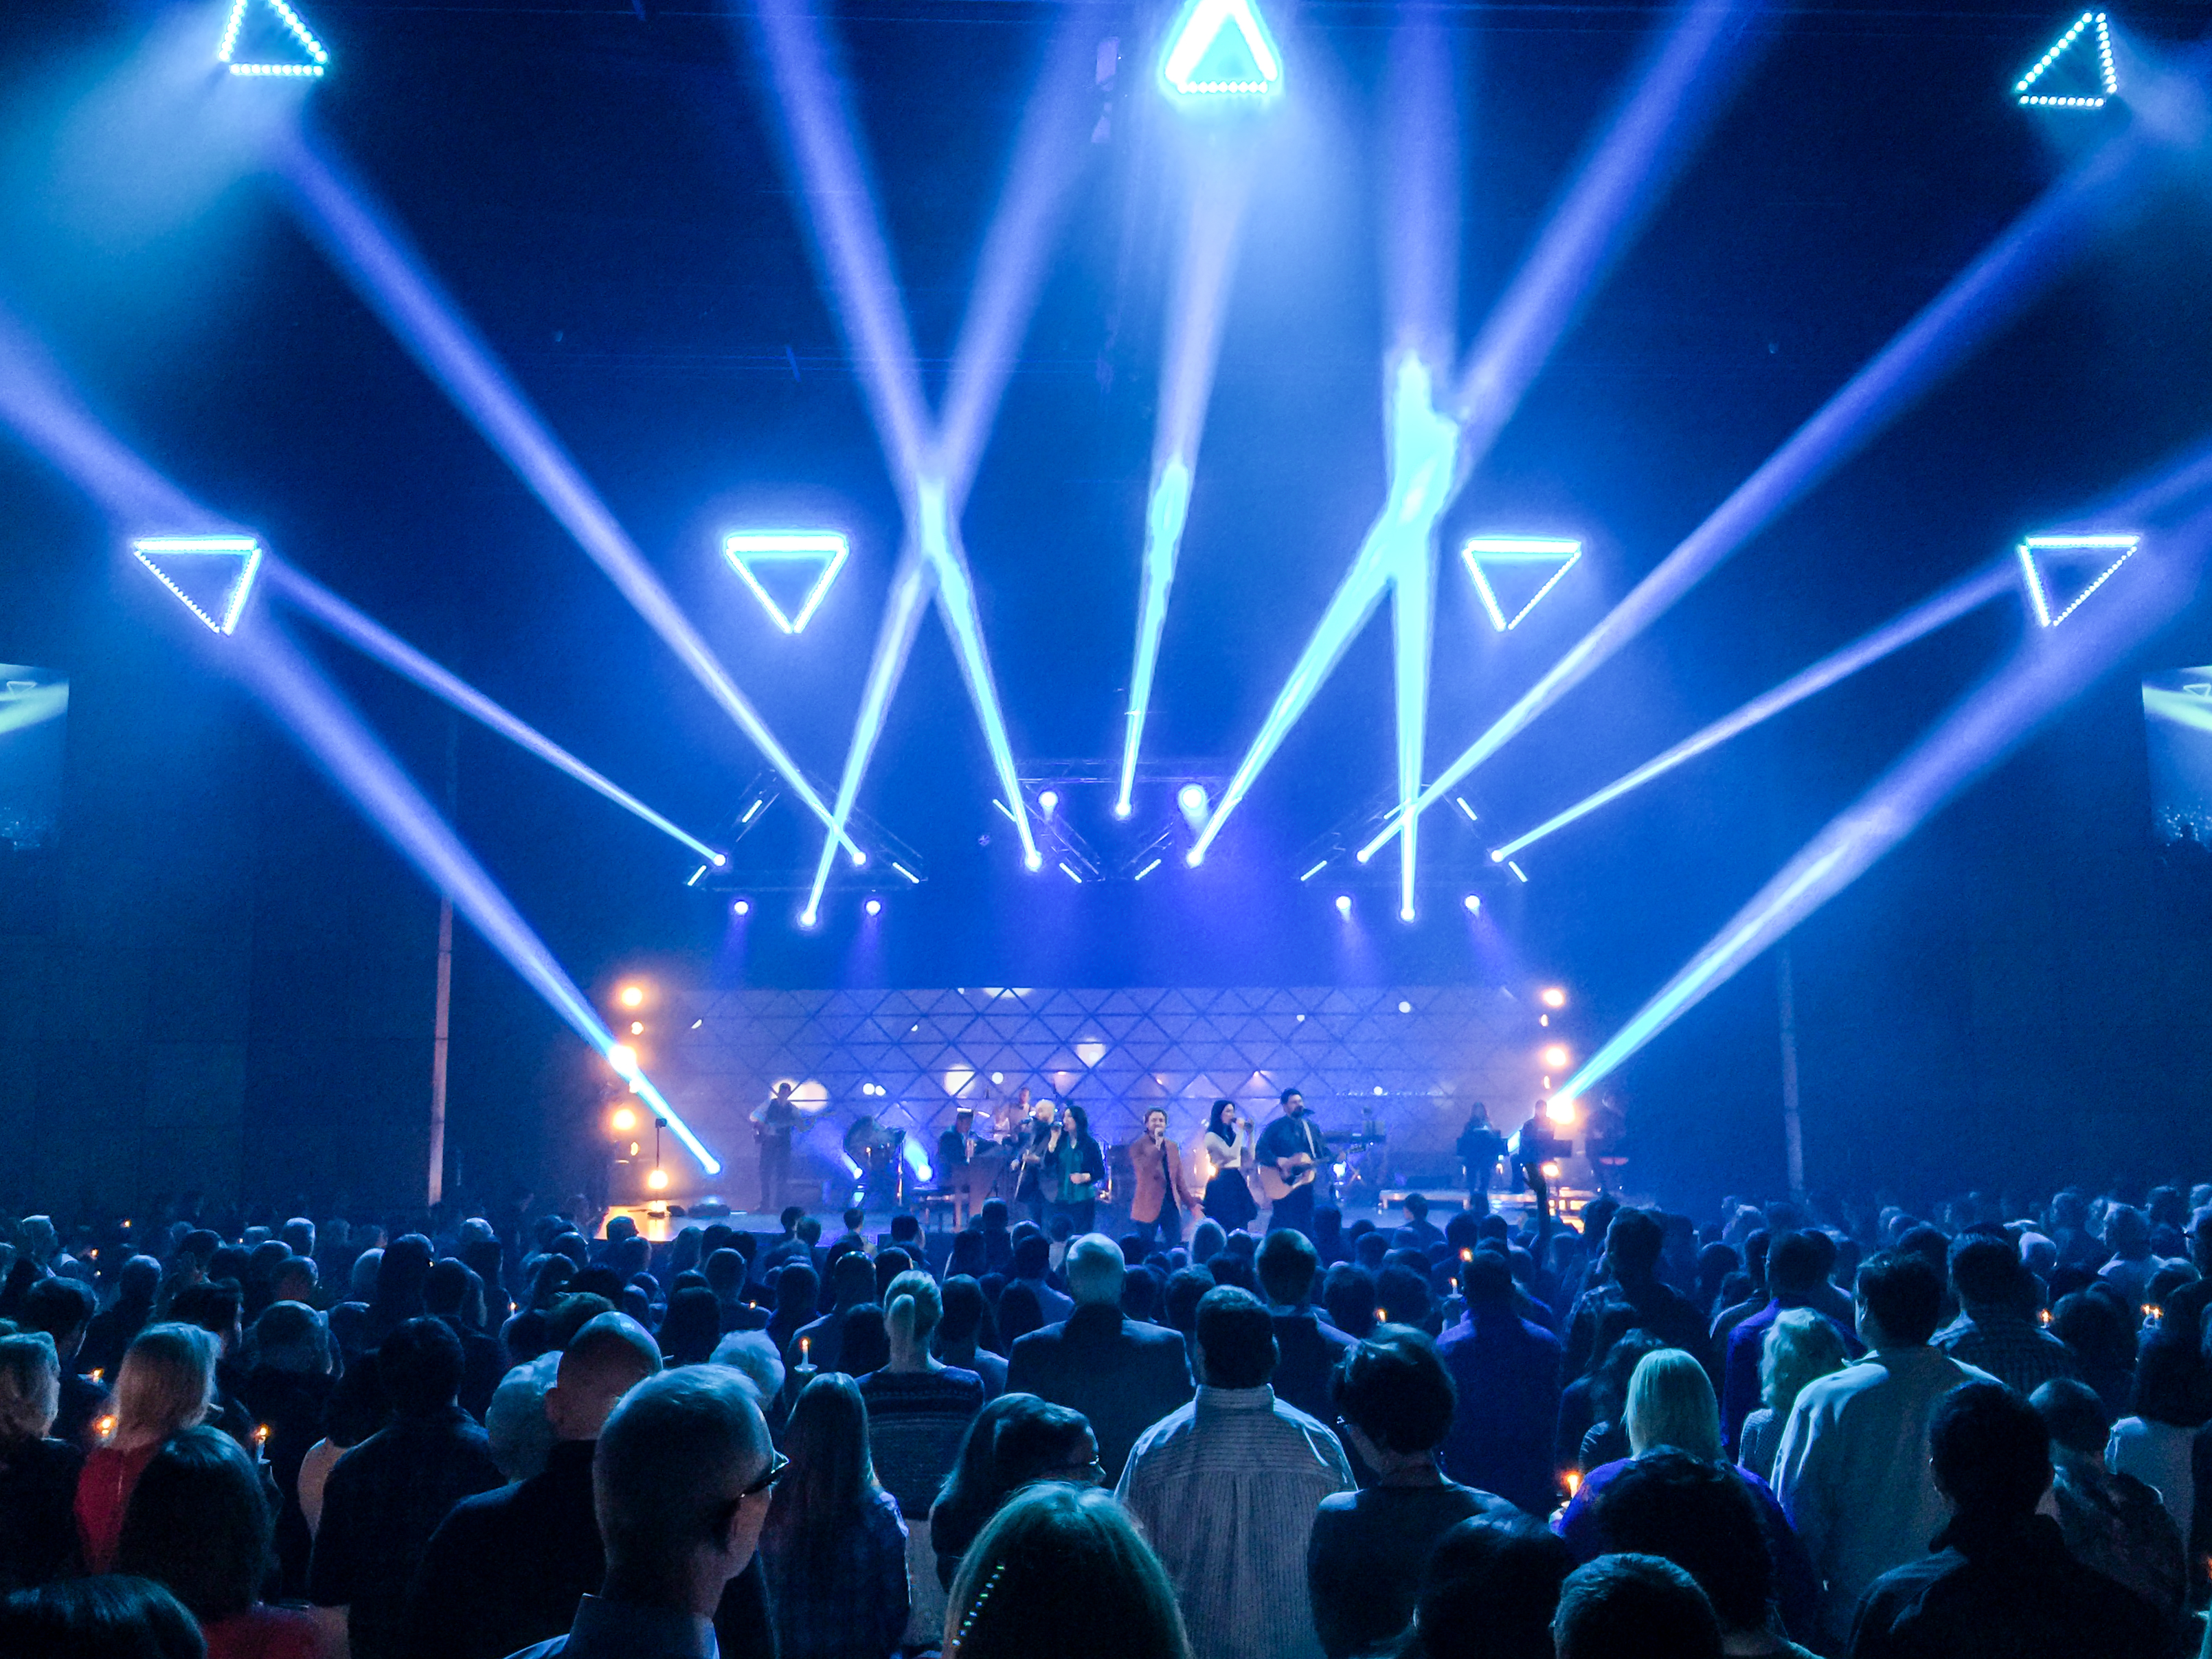
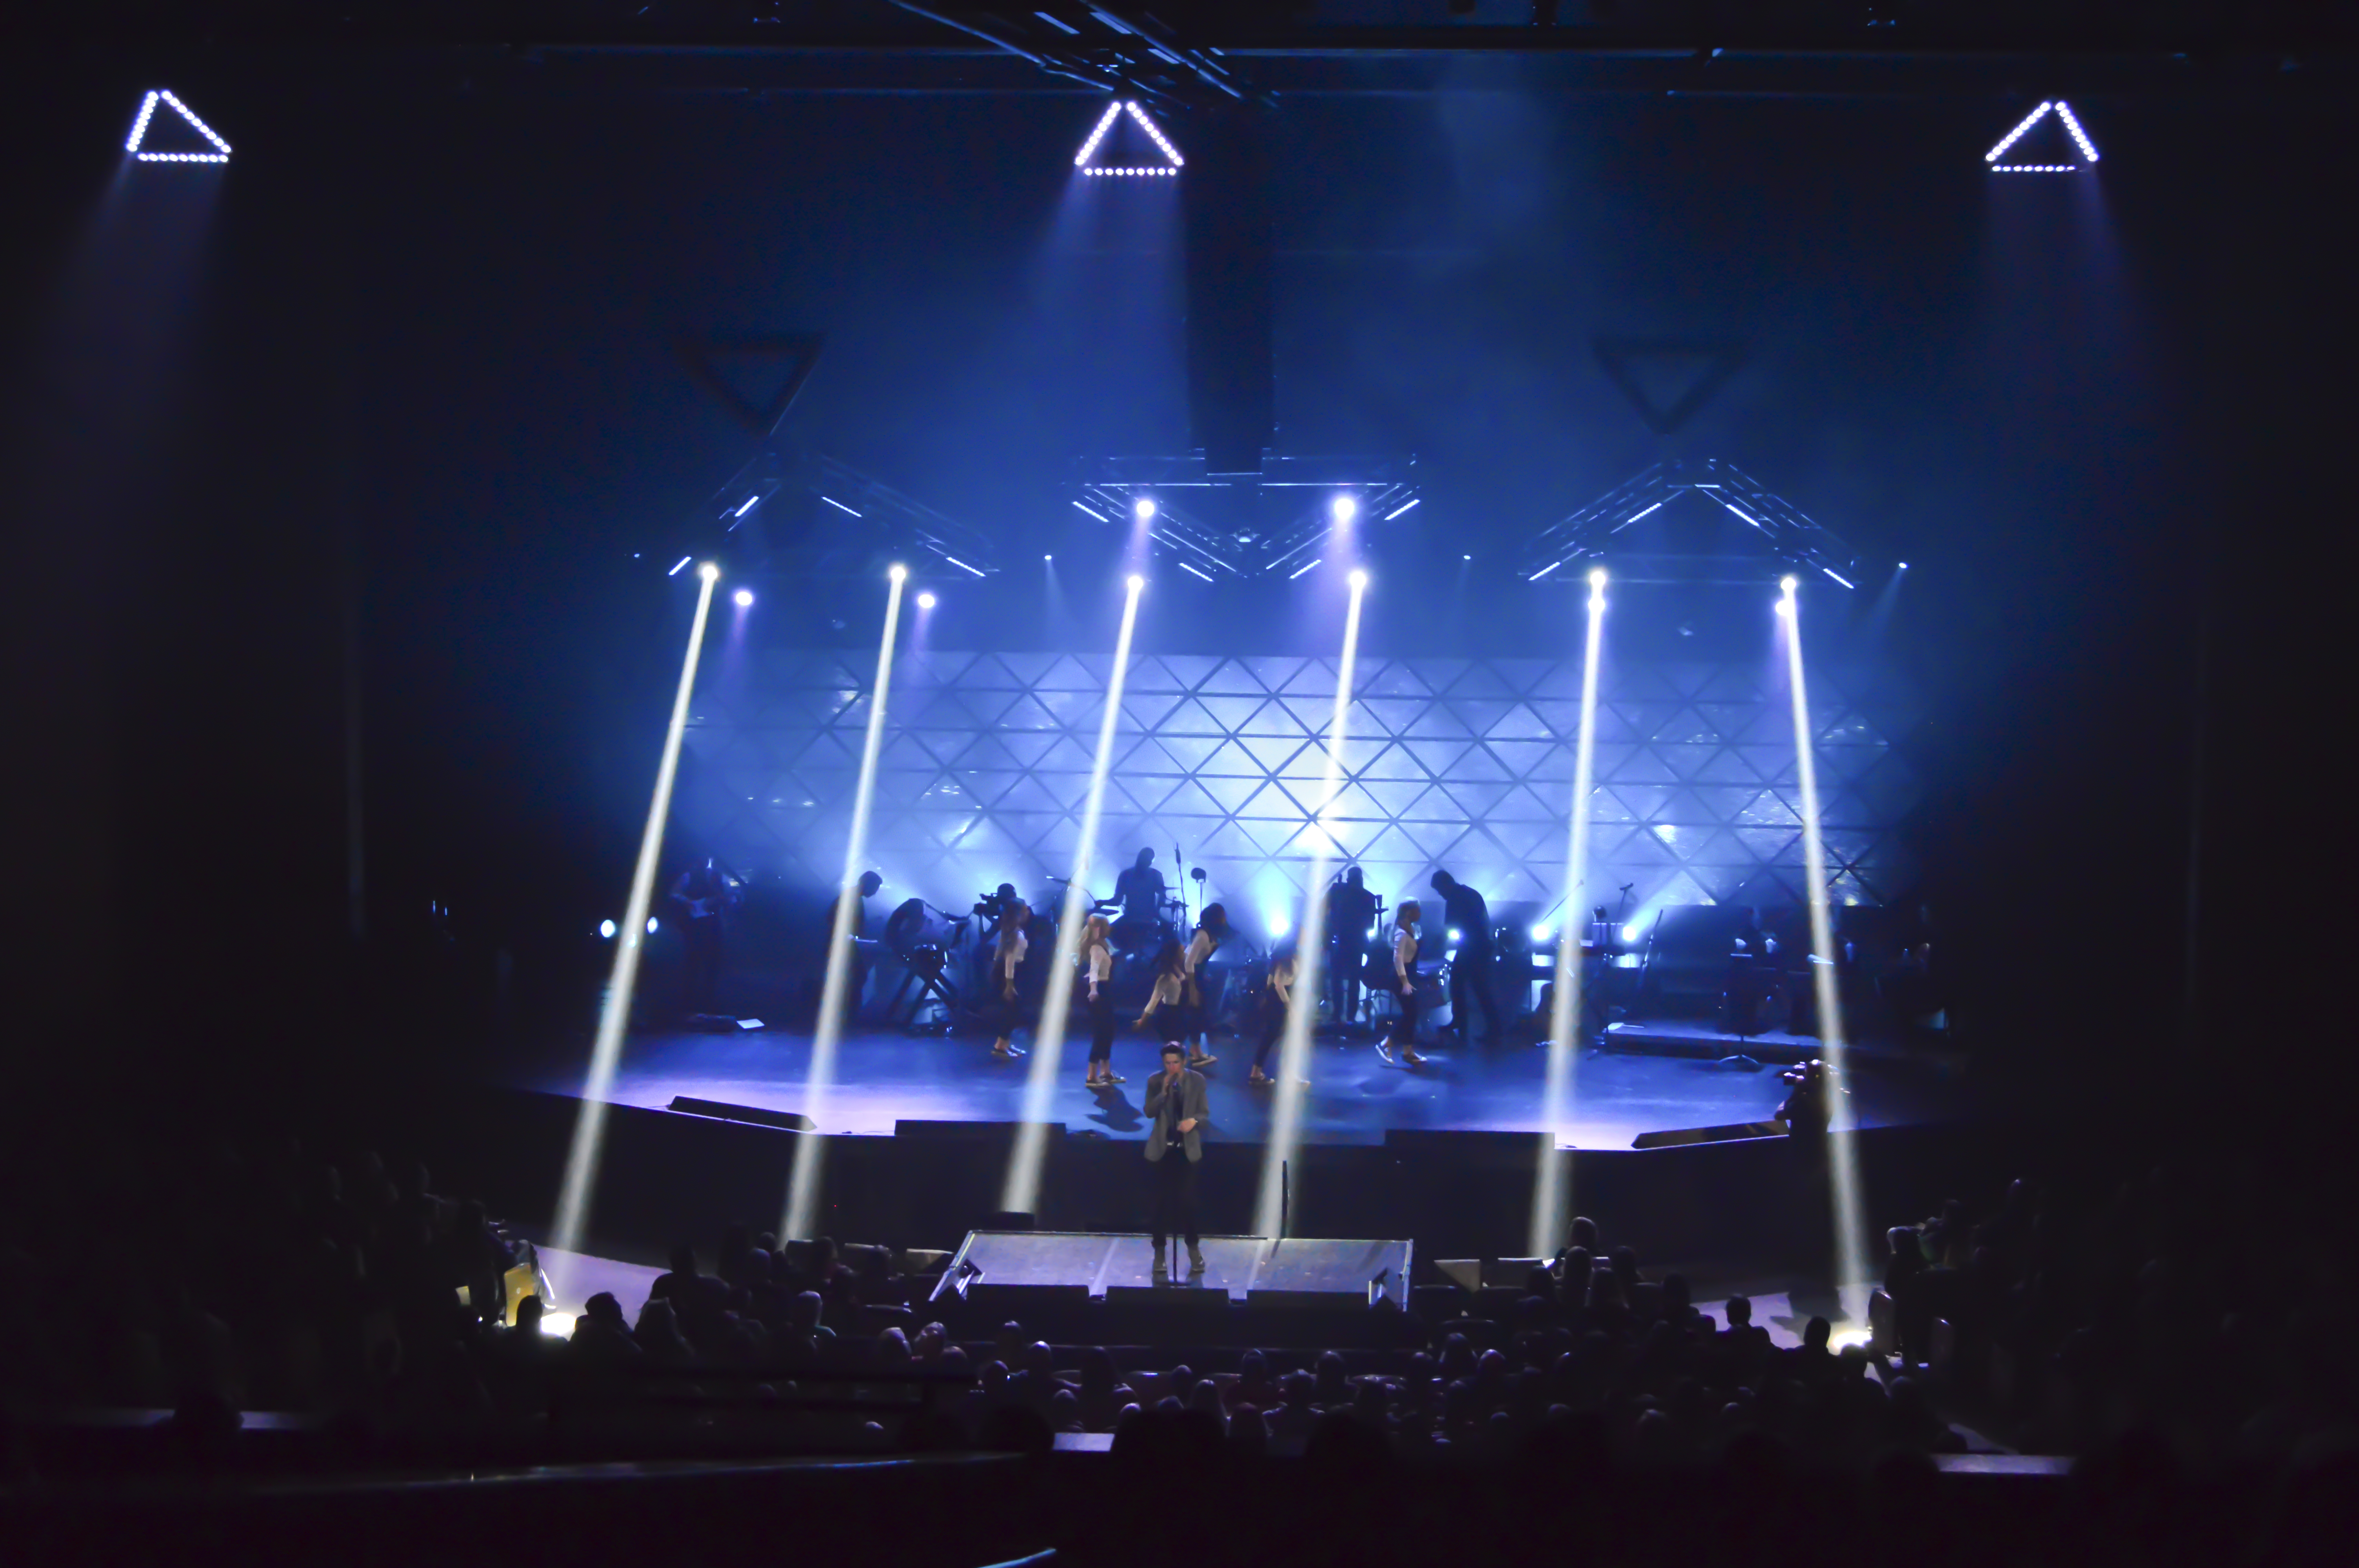
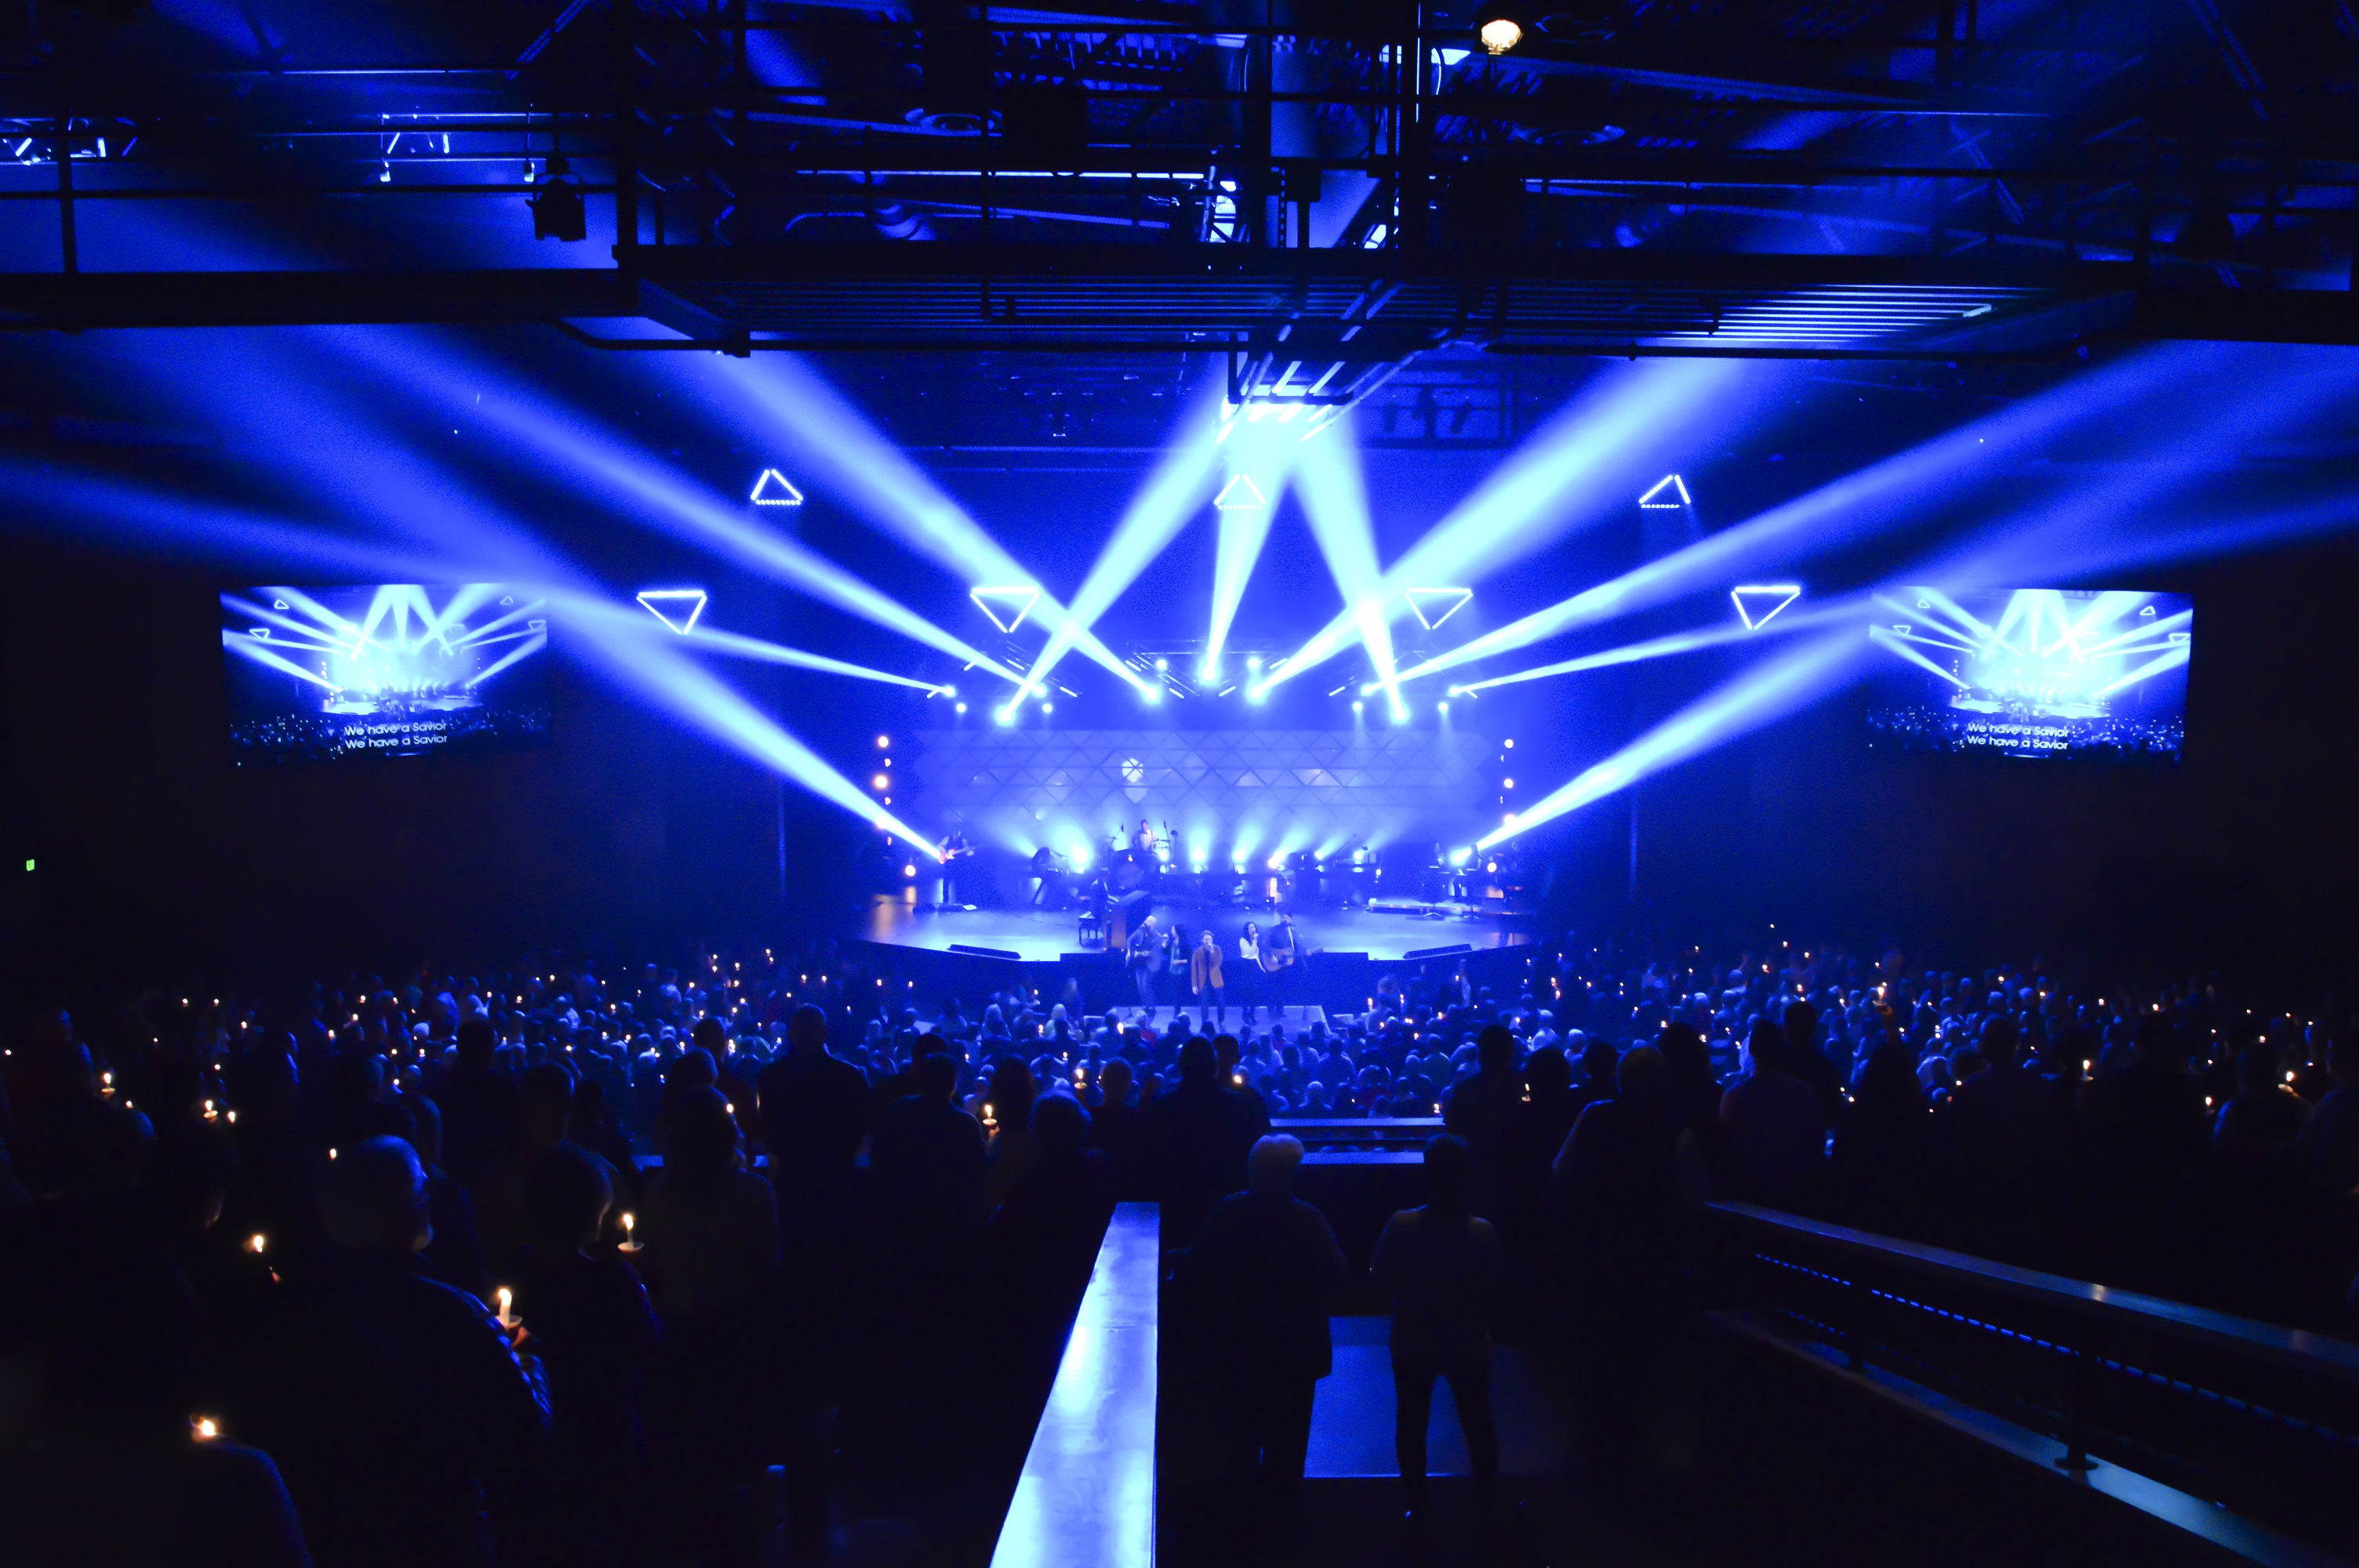
Chris Monson from Faith Chapel in Billings, MT brings us this cool projection-mapped triangle set.
*You could also accomplish this with ModScenes projection products.
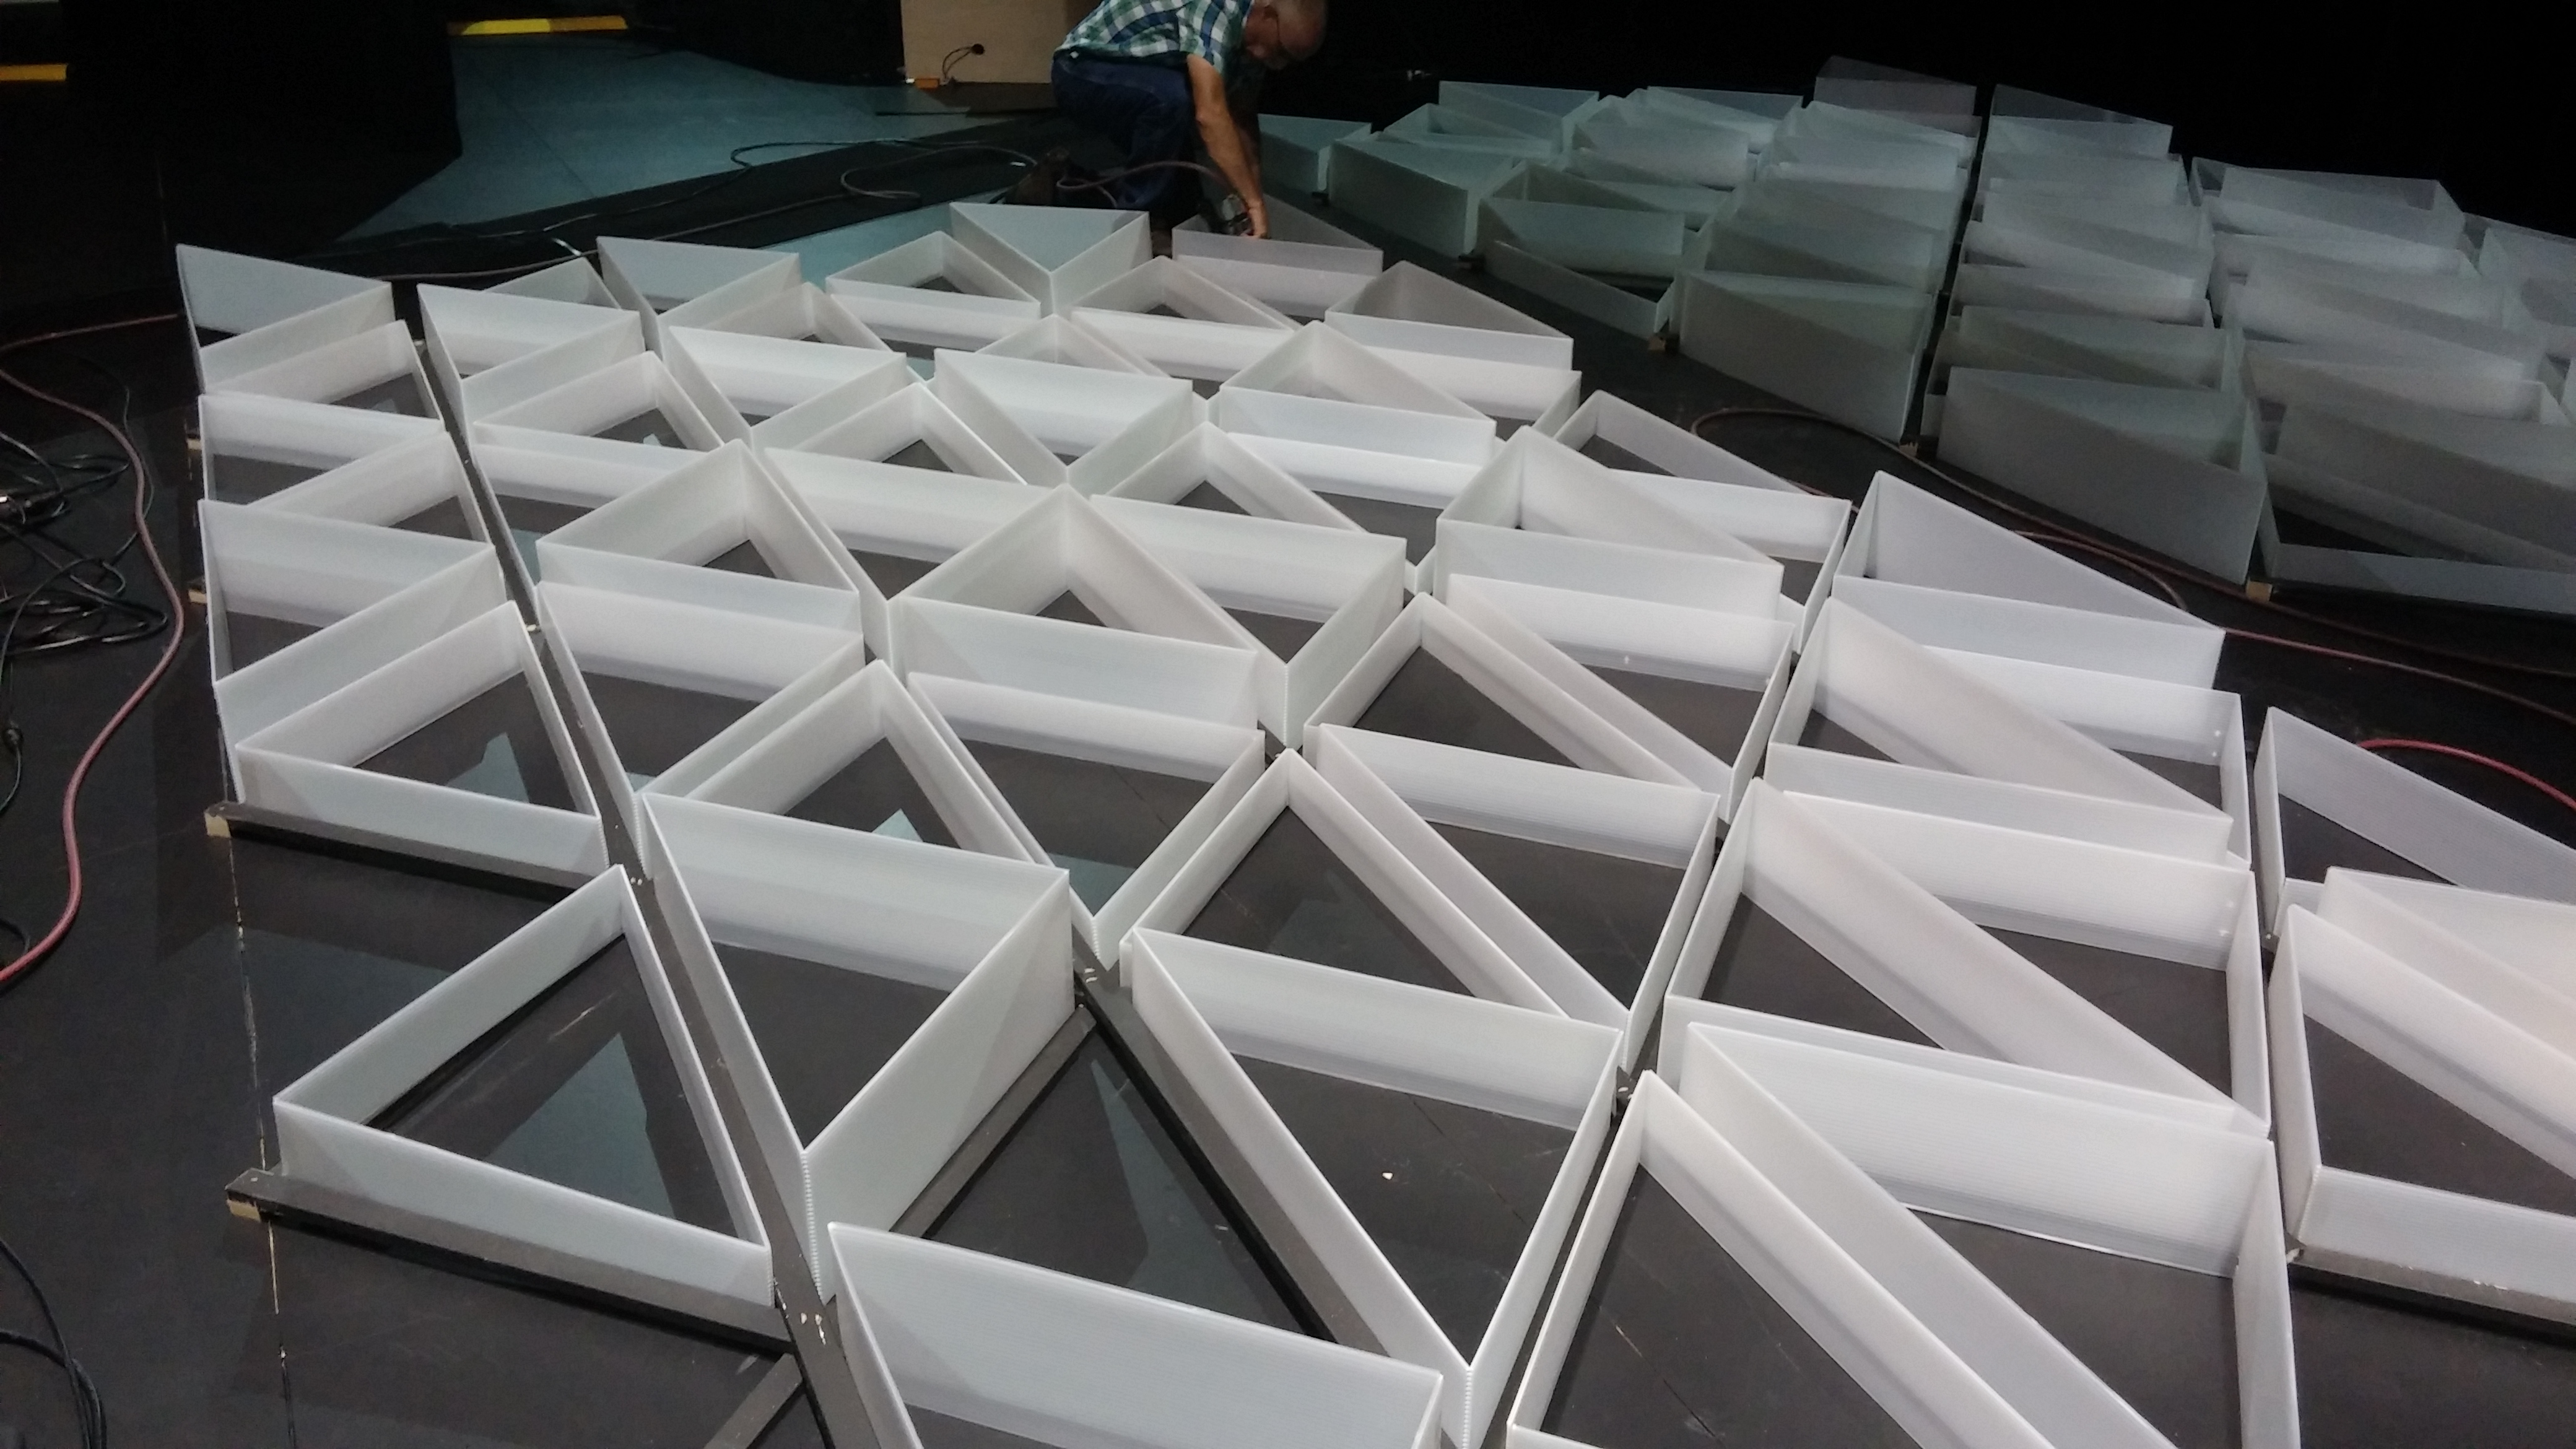
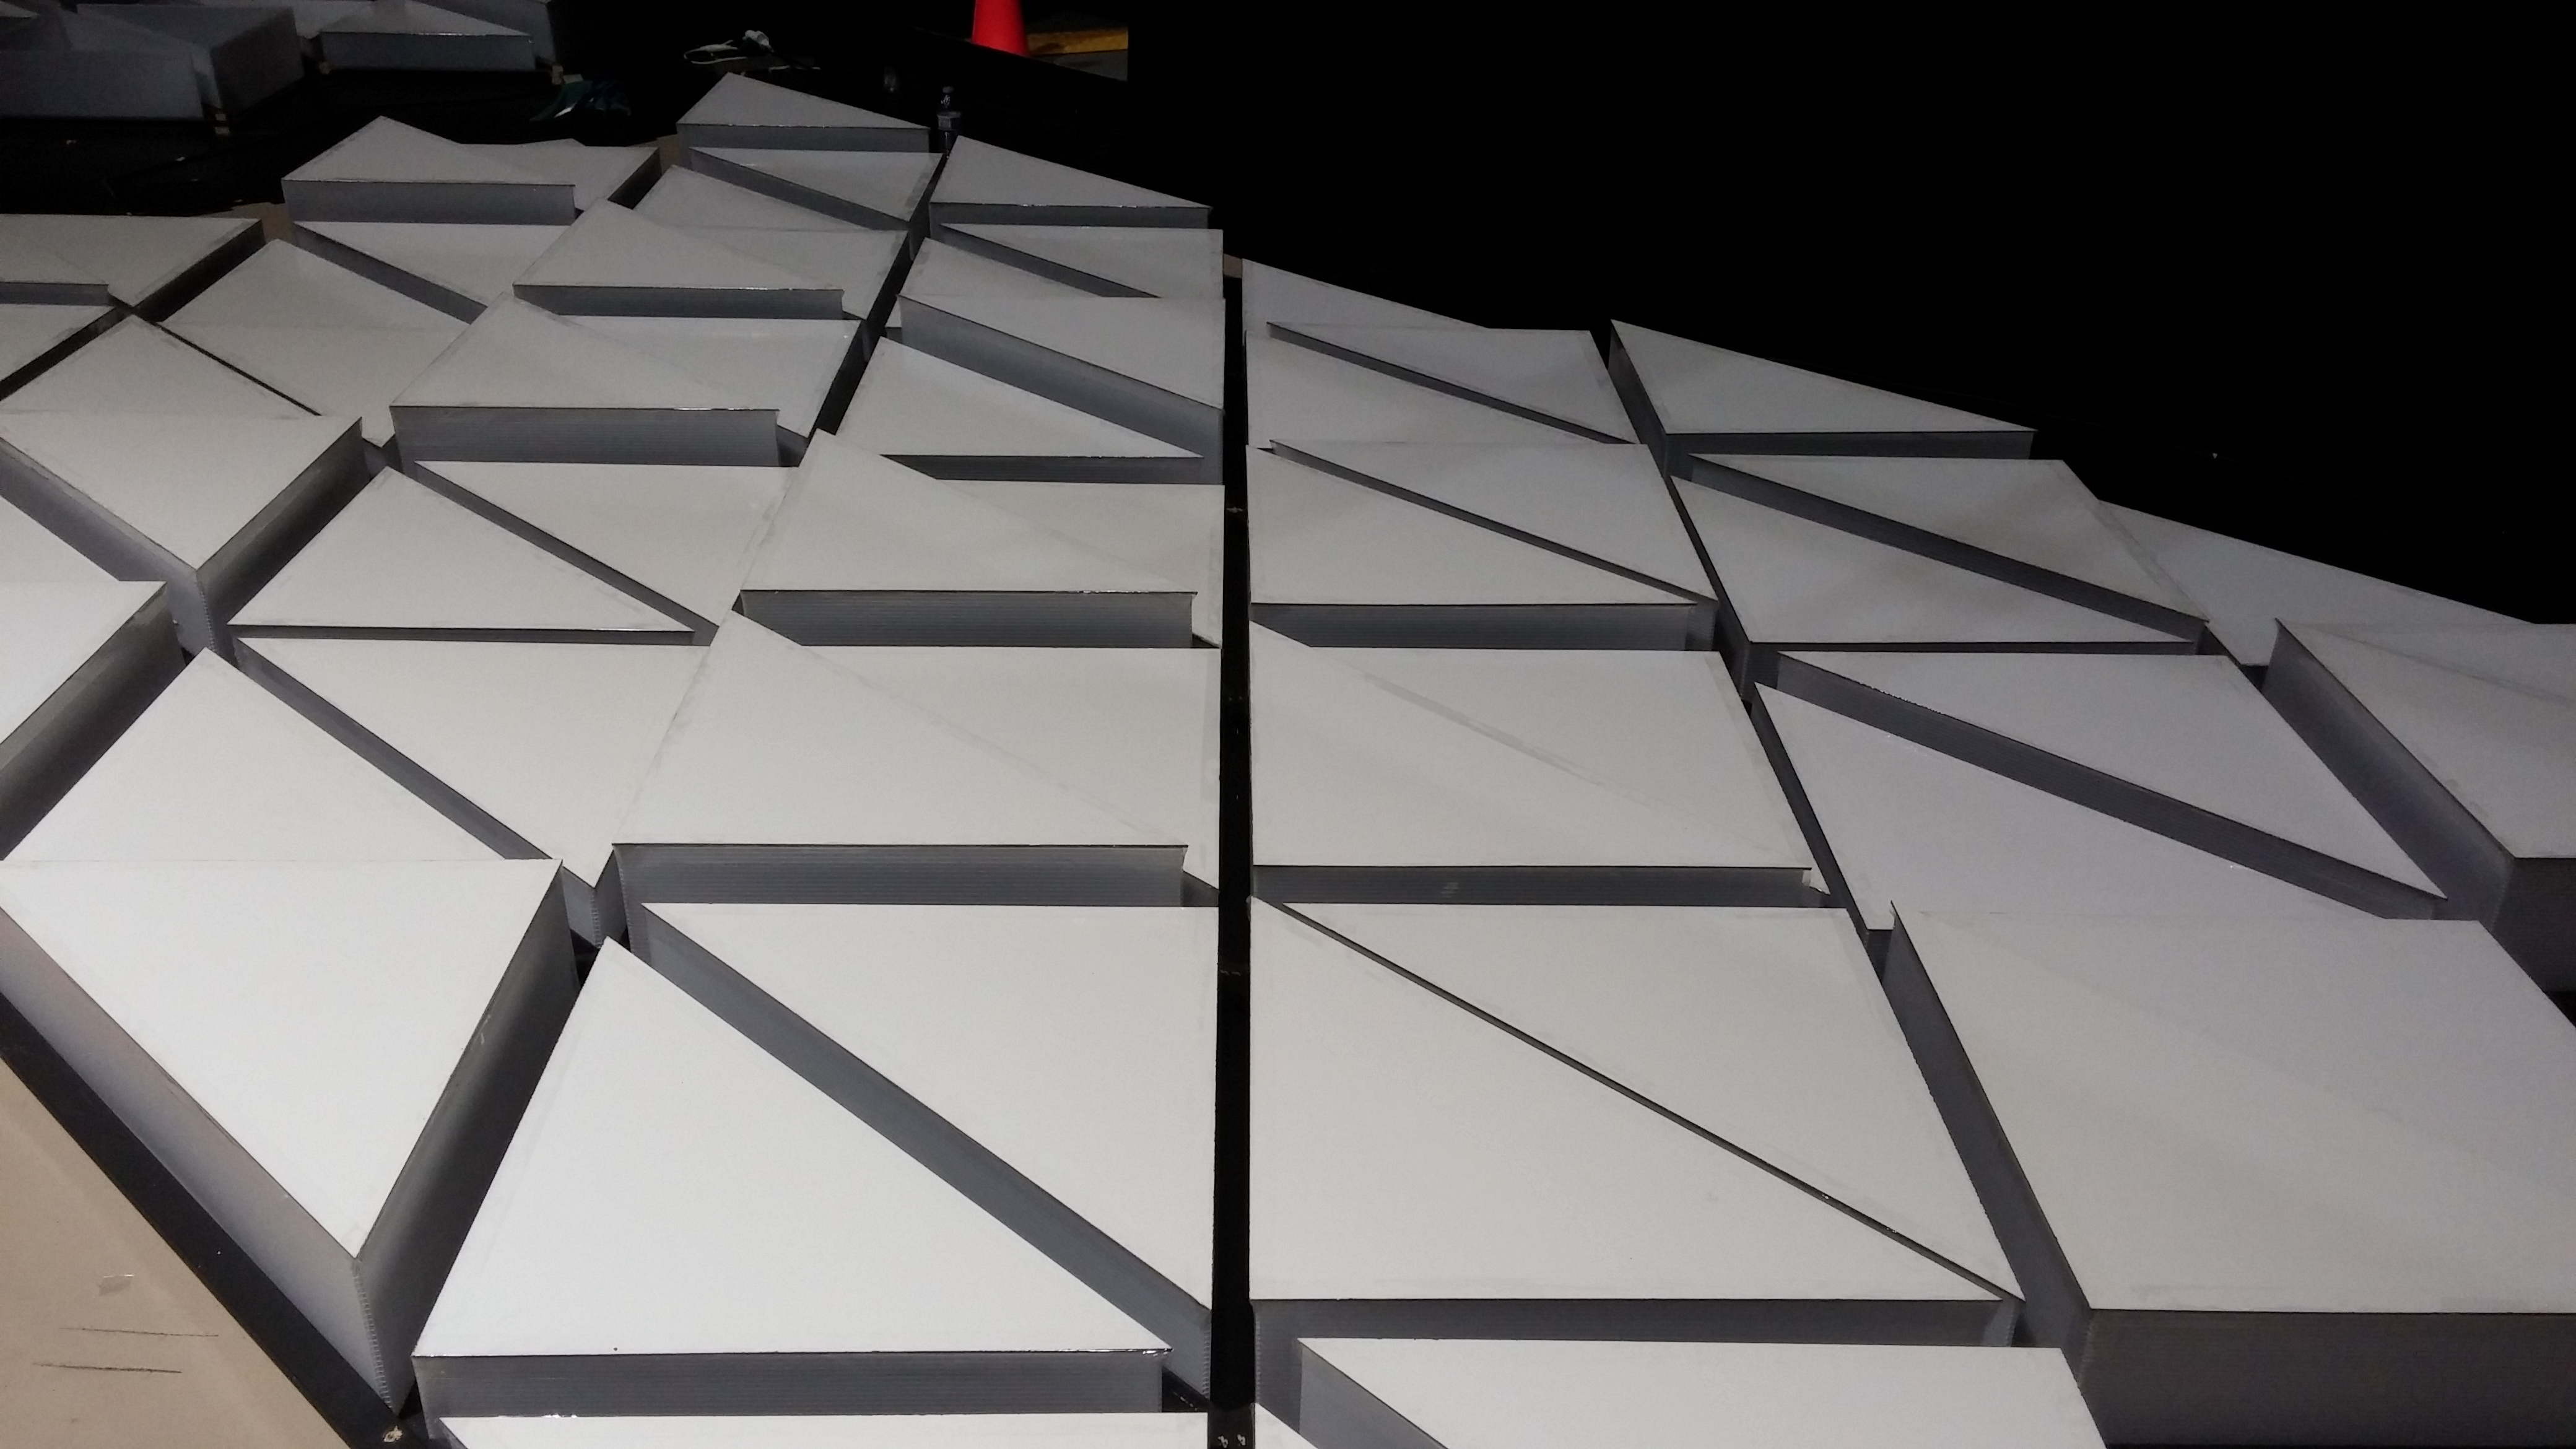
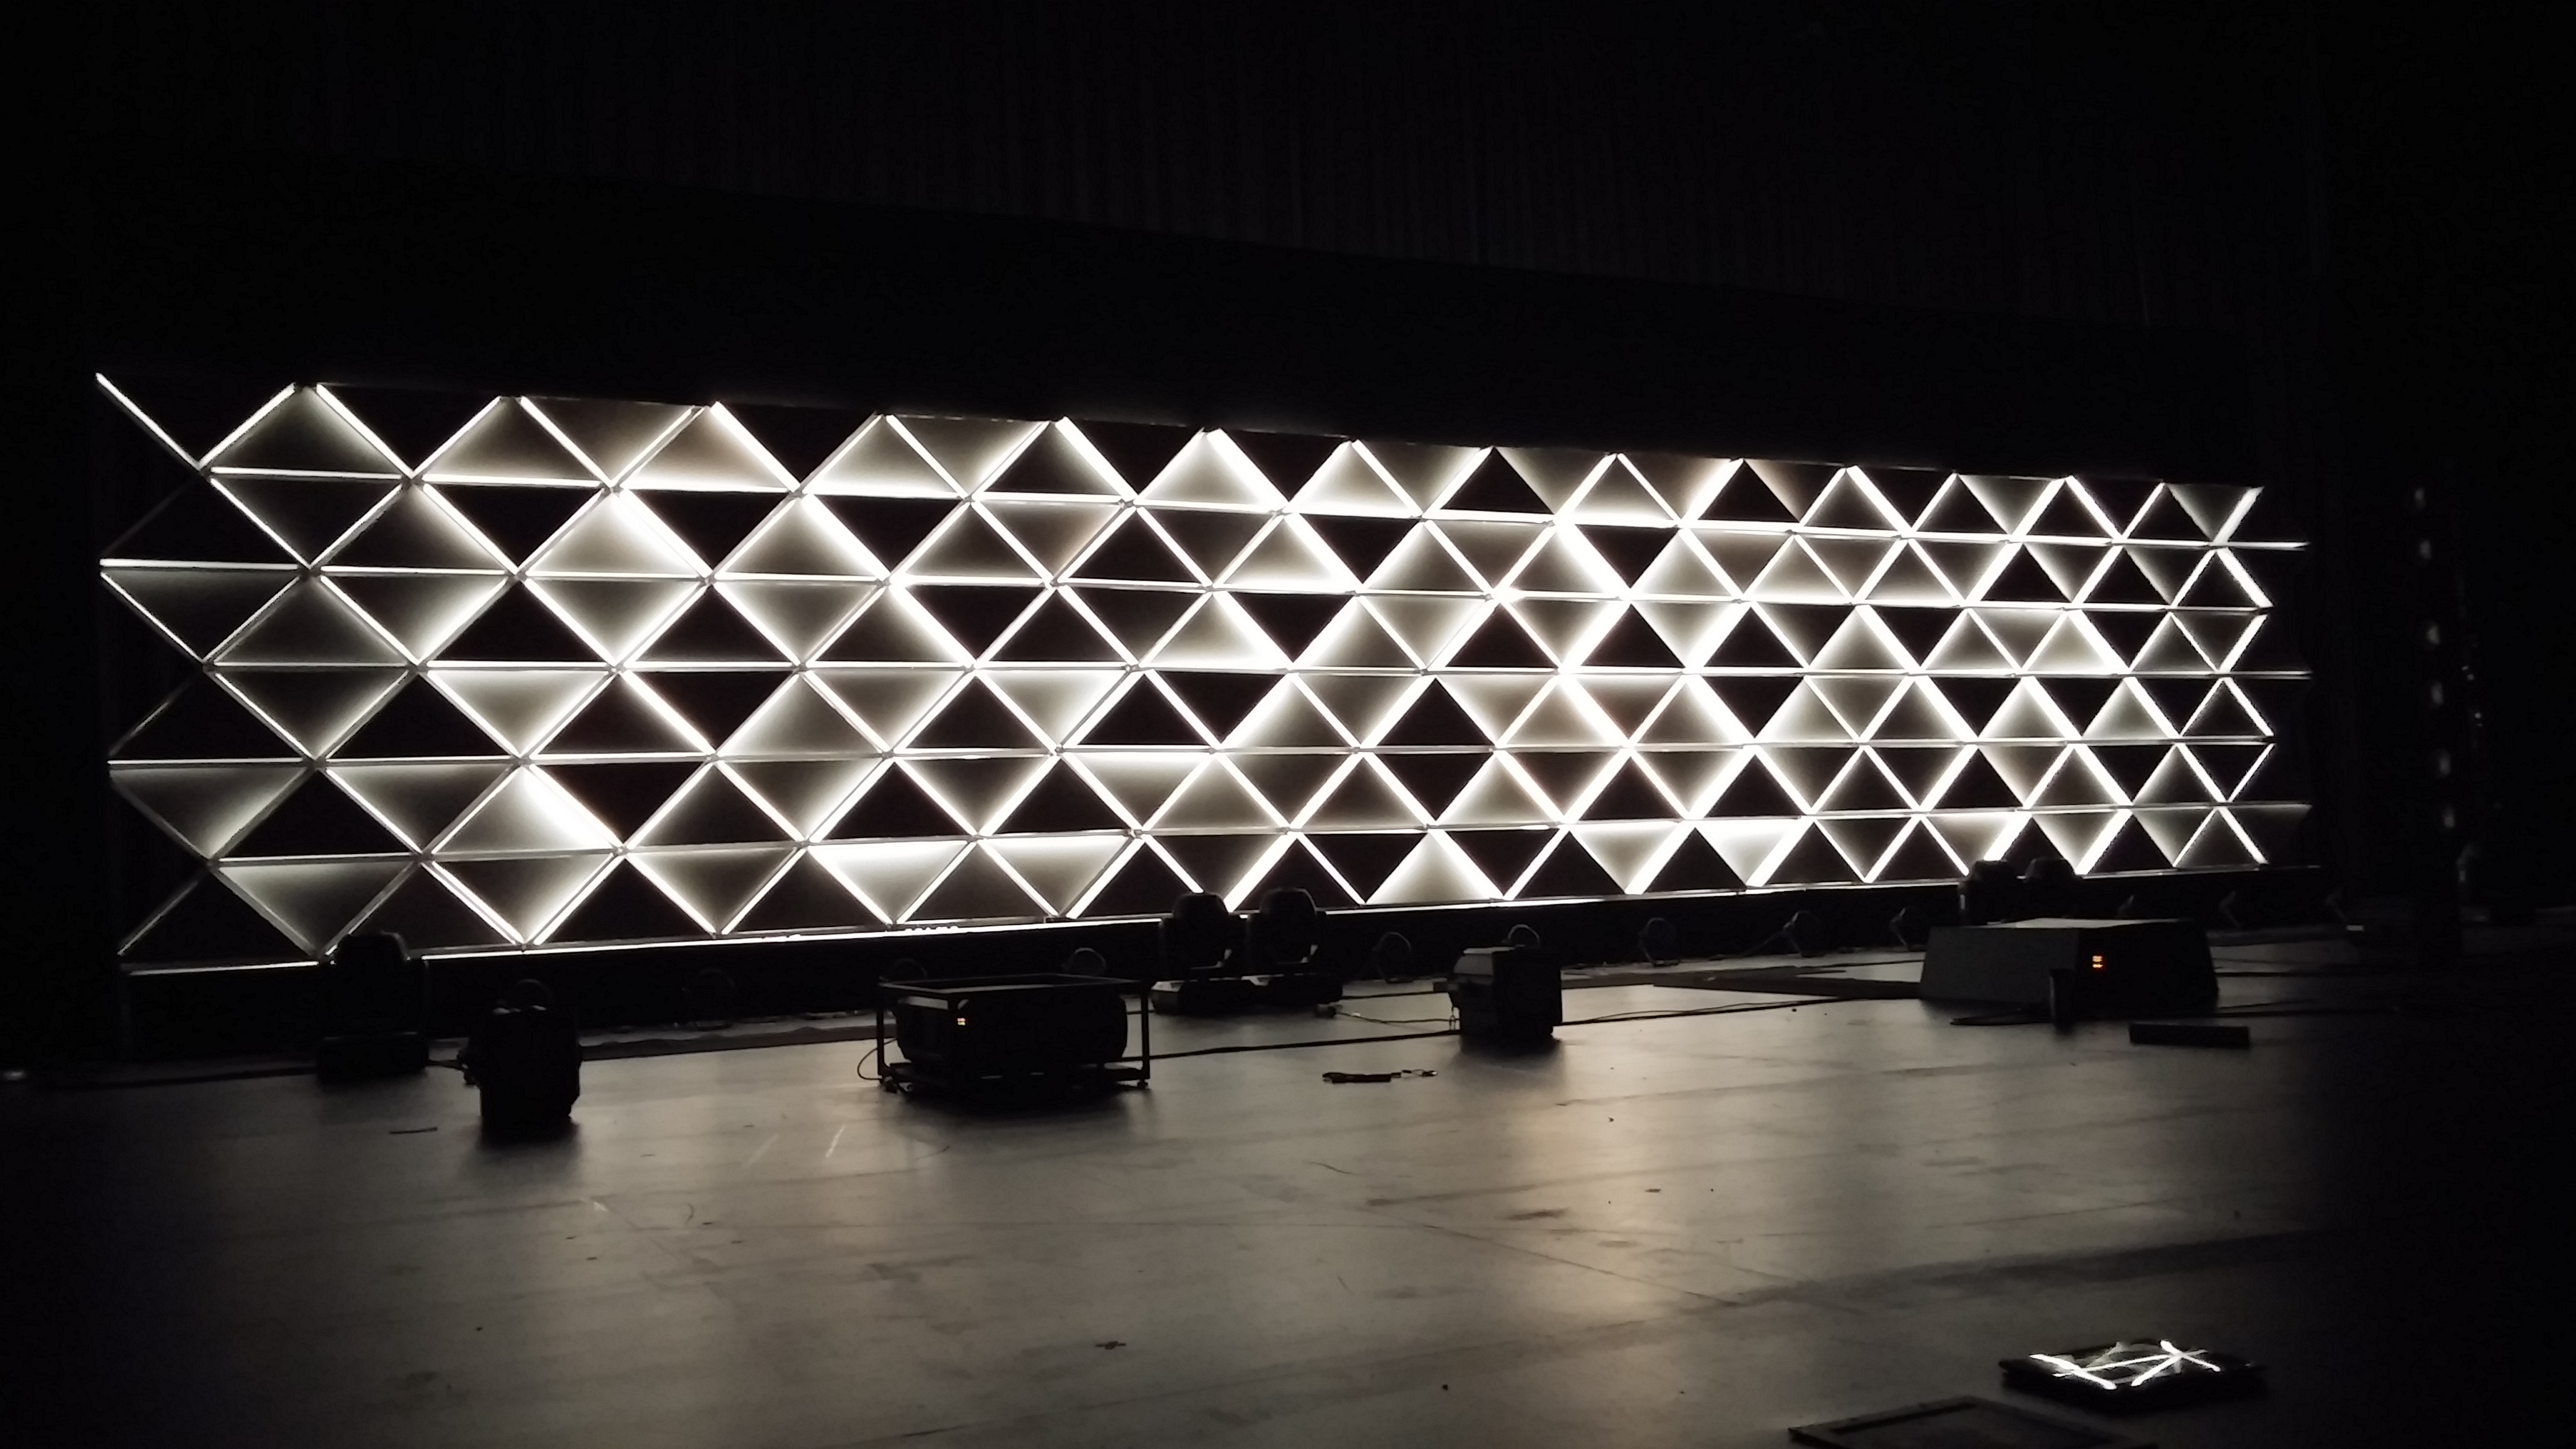
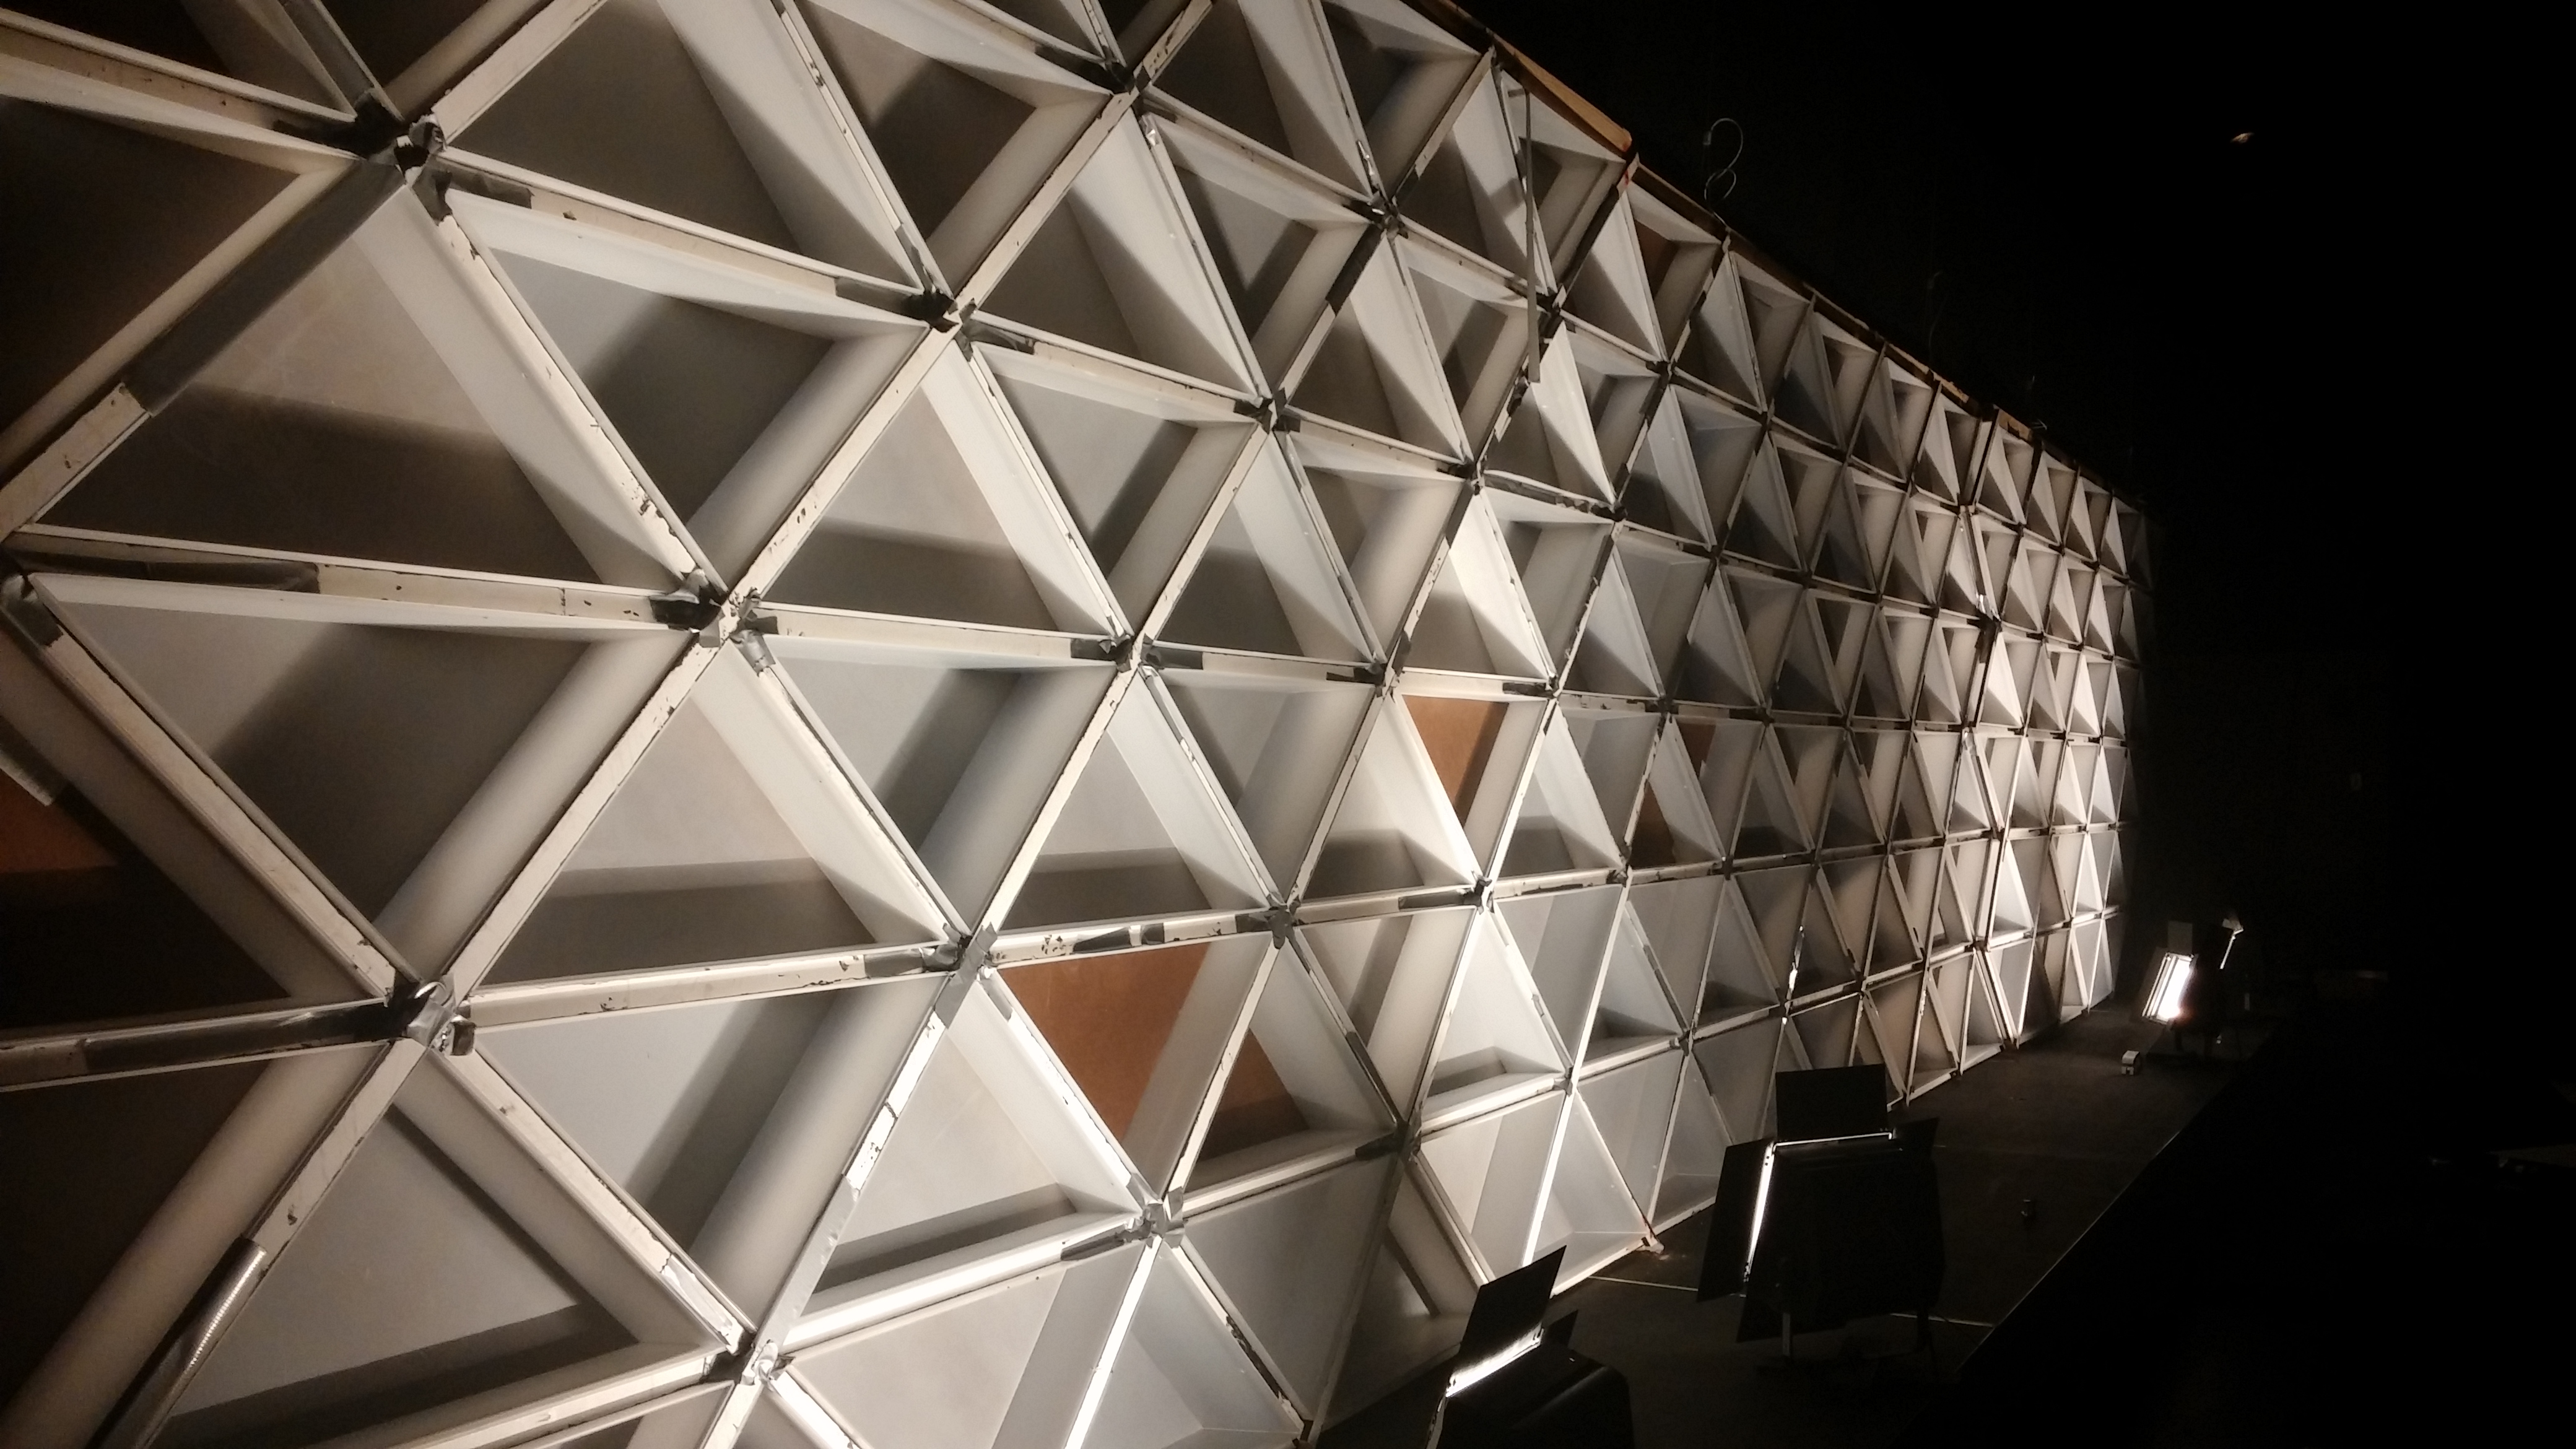
This set consisted of a triangular grid that supported 180 build out triangle pieces. The triangles were made of translucent Coroplast strips for the edges, scored to create the shape, and a thin masonite for the front surface. The reason for the material choices was that both materials were fairly light, and he wanted to be able to back light the set and get light glowing in from the edges of the triangles, but he needed the front surface to be opaque to support projection and create the look he was going for when they weren’t projecting on it. The triangles were all built out at various heights so the the glow from back light would illuminate the front faces of the triangles to varying degrees creating a really interesting design when they weren’t projecting. They constructed this in 3 interlocking pieces of 60 triangles each and then rigged them to be supported both from the floor and from the air to minimize compression on the triangles over time.
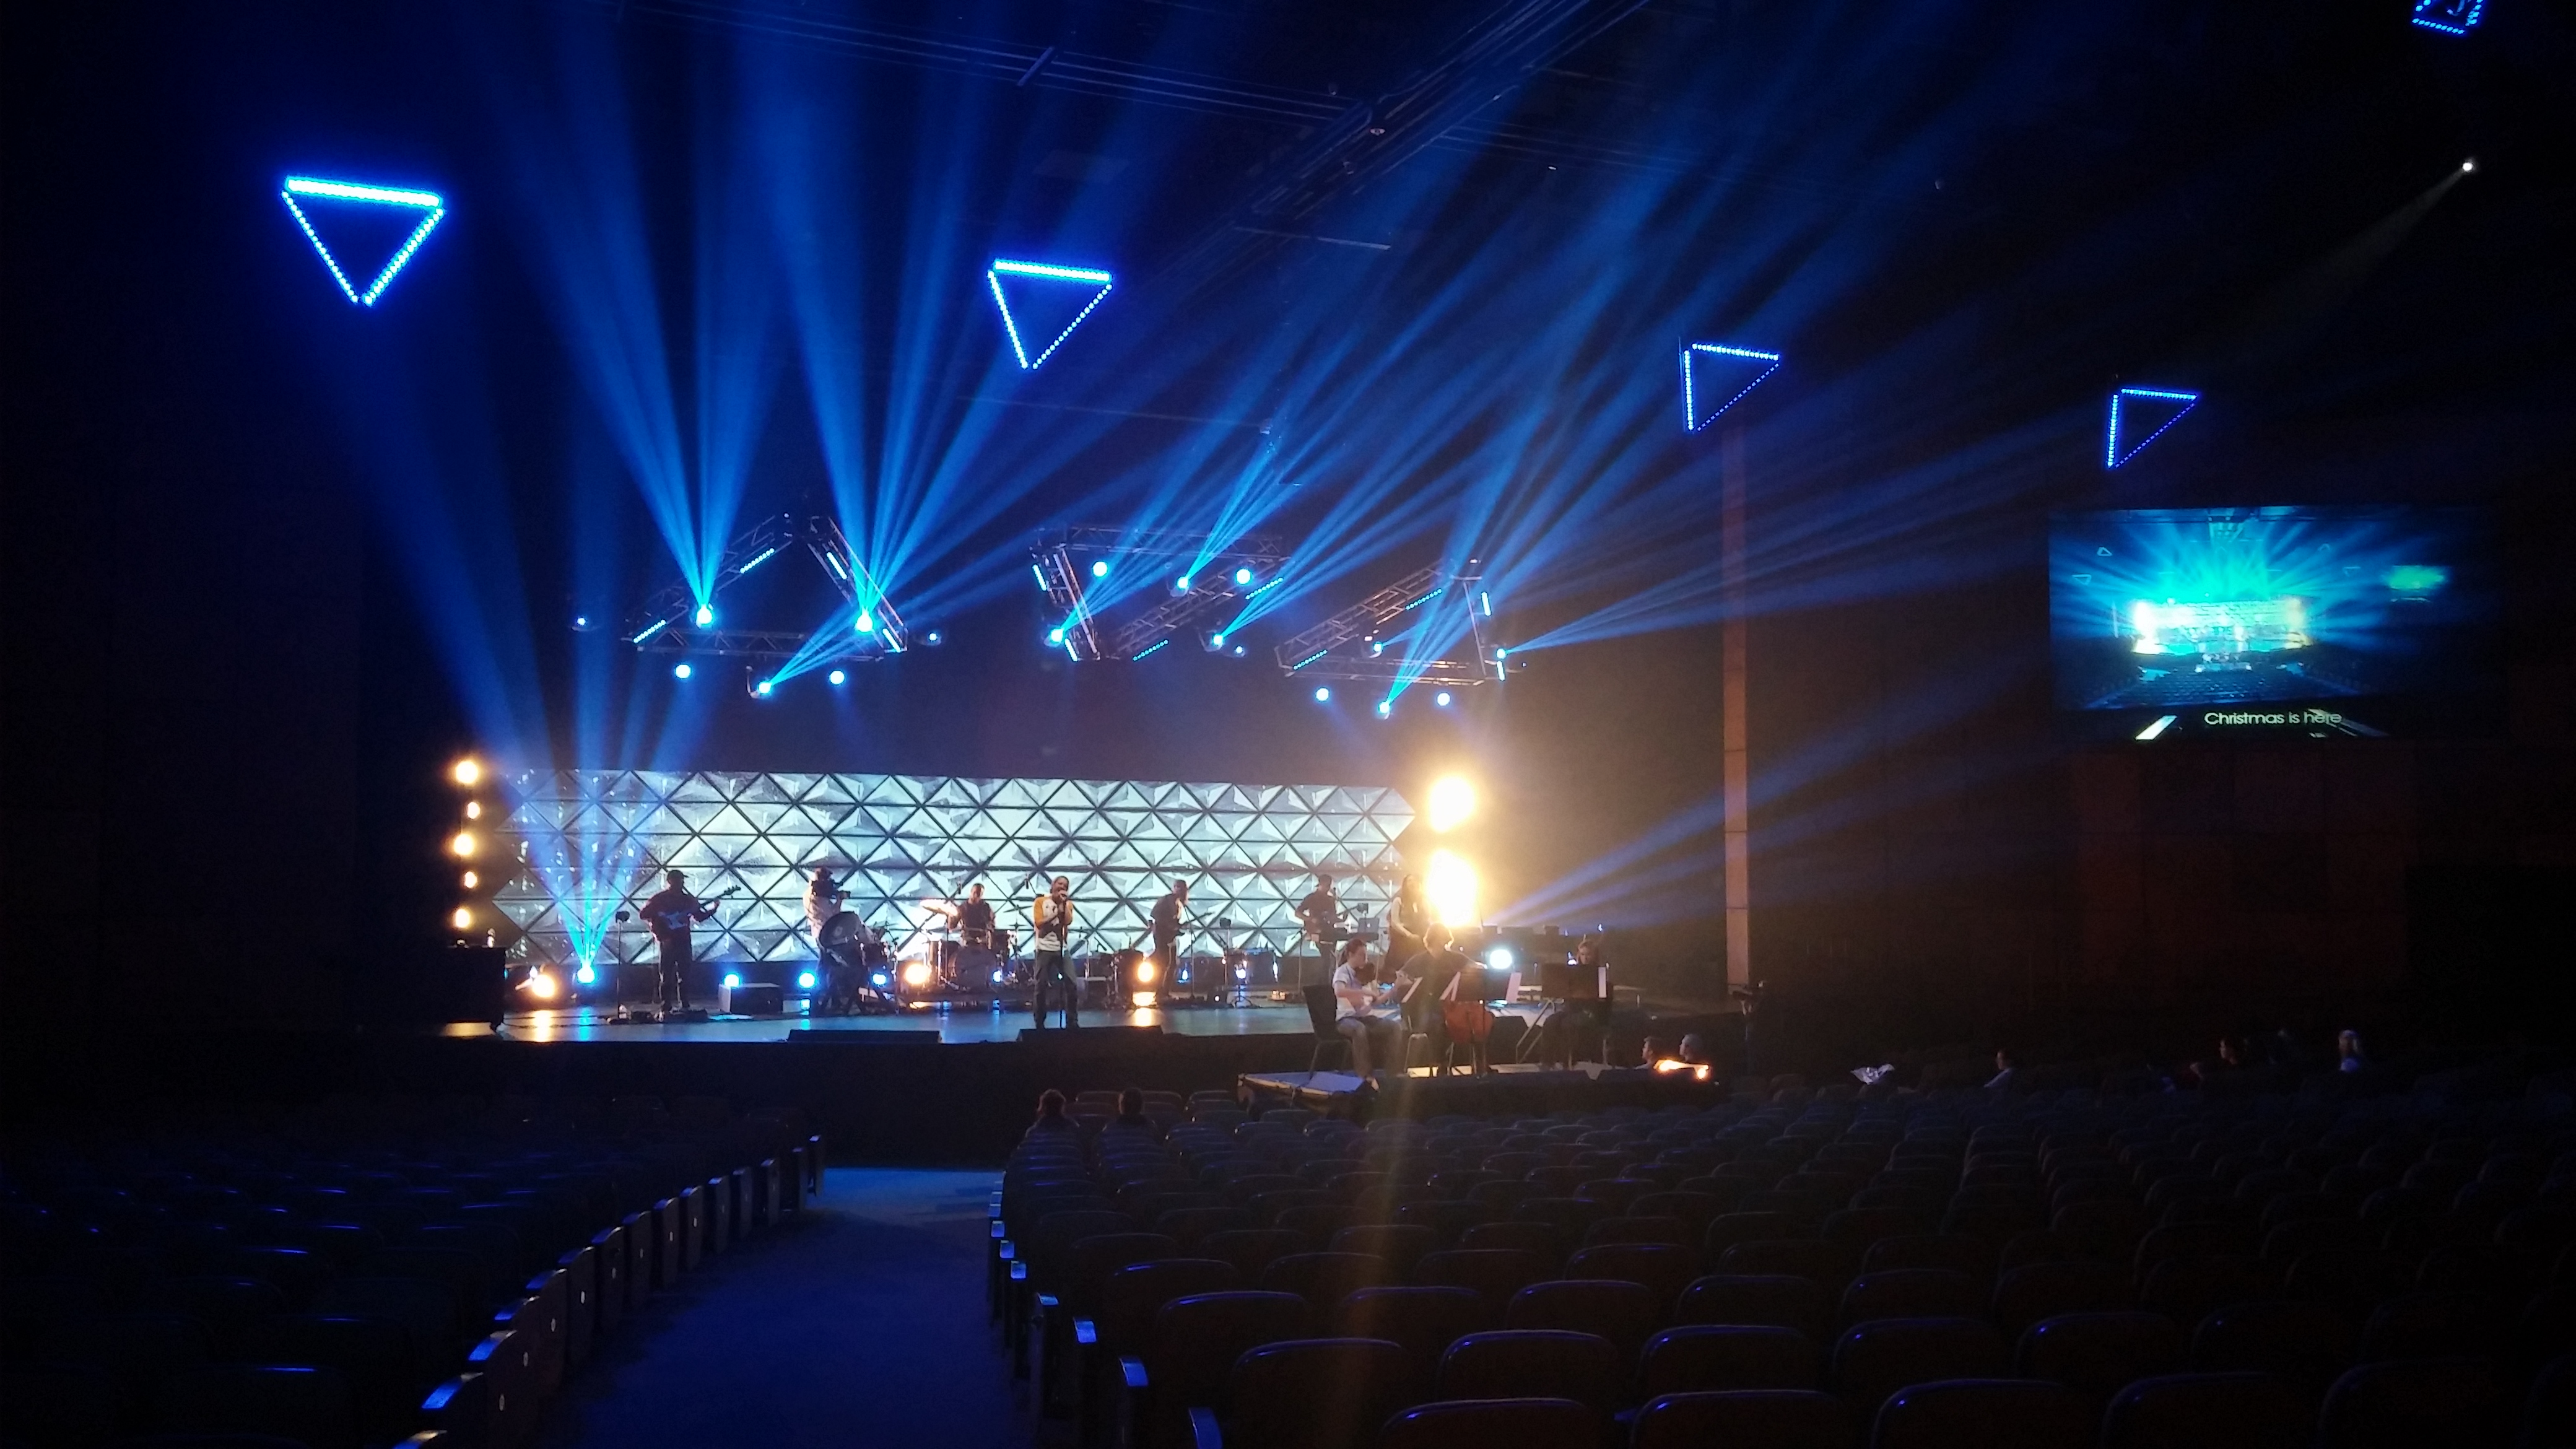
From the beginning this set was designed to be a surface for projection mapping. They projected onto the set from the front with 3 15k lumen projectors, each handling a third of the triangles. The differences in depth among the triangles that they needed to achieve the back lit look had to be corrected on the projection end so they could create coherent images. The projection for each triangle was individual positioned to match the actual position of the triangle it was projecting on. This was done with a custom piece of software they wrote to allow them to handle all the mapping, and then also tie it into their lighting console for control during their services. Although they did make a good deal of custom video content for this set, they knew that it was unrealistic that they’d be able to produce the number of distinct video pieces they’d need to source this for every service element they would do over the 5 month period of time that they were going to use this set. They addressed this by giving control of the projection system over to the lighting console. From there, if they weren’t running video across the rig, they could treat each triangle in the rig as it’s own individual lighting fixture with the ability to set color, intensity, and texture to allow us to create looks on the fly programmed into our lighting cues. Videos played back on the system were triggered via midi show control and midi time code from lighting as well. They used a combination of Lightforge and an ETC Ion for lighting control.
Content for the screens was created almost entirely through Blender, with some compositing done through Sony Vegas, and a little bit in After Effects. In order to work with the number of surfaces they were working with and control them in a meaningful manner they wound up developing a handful of Blender addons that allowed them to manipulate the rig in ways that wouldn’t have been possible otherwise.
As far as cost goes, this was a fairly inexpensive set. Most of the materials for this set were reused from a previous set, and all of the gear they used is just stuff they have on hand. It was however a very labor intensive and tedious build. They had a decent crew of people working on this throughout the construction phase to get it built and up in time.
Here are a couple videos of it in action during their Christmas services:
O Come O Come Emmanuel
Christmas Service
God In The Hay
And here are a few more from a Halloween event they do. For their part of this event, their team decided to create electronic remixes of songs from Frozen and perform them.
Do You Want To Build A Snowman
Love Is An Open Door
Planning a Projection-Mapped Triangle Backdrop
This design combines two distinct looks: opaque triangle faces receive projected images, while translucent edges let backlight reveal the depth between panels. That combination is worth testing before committing to a full wall. Build a small cluster with the intended face material, edge strips, and several depths. Try projection alone, backlight alone, and both together. Check the cluster from the center aisle and the outer seats so you can judge whether deeper triangles cast distracting shadows or hide their neighbors.
Use one cutting template for repeated faces and label each triangle with its position in the grid. A simple row-and-column numbering system can connect the build drawing, physical pieces, and mapping file. Keep a record of each panel’s depth as well as its location. When volunteers reinstall a module, those notes help them reproduce the arrangement rather than creating a new surface that no longer matches the saved projection map.
Testing Projection and Backlighting
The original team used three projectors, each covering one third of the wall. Treat that as a description of their installation, not a minimum equipment requirement for every church. For a smaller adaptation, start with the projector and stage space you already have. Confirm that its lens can cover the planned area from the available mounting position. Project a test grid onto the actual prototype to evaluate focus across the different depths, edge alignment, and the effect of stage lighting on contrast.
Begin mapping with static colors and clear outlines before adding motion. Align each triangle individually, then check transitions between projector coverage areas if you use multiple units. Keep a restrained color look ready for teaching and an uncomplicated fallback cue for services when video playback is unavailable. Test the backdrop through your livestream cameras as well as in the room; bright scenic faces can pull attention away from people even when the projection looks attractive in person.
Organizing the Build and Reuse
The three interlocking sections in this example made a large pattern more manageable, but your module sizes should fit your own doors, storage space, and handling crew. Plan access behind the wall for lights and cables before closing up the assembly. Separate cutting, folding, labeling, and finishing into repeatable volunteer tasks, and build one finished module before producing the rest. The original team reused materials and existing equipment, so their low material cost should not be treated as a quoted budget for a new installation. Estimate consumables, equipment needs, and volunteer hours separately.
Pro Tips for Triangle Walls
Keep one reference triangle: Save an approved prototype beside the cutting station so each volunteer can compare face size, fold direction, and edge depth before assembly.
Test light spill early: Position your proposed backlights behind the sample cluster and check whether the edges glow without washing out the projected faces. Adjust placement before repeating the layout.
Protect the mapping setup: Record projector positions and save a backup of the mapping file. Recheck alignment whenever the wall or projector moves, even if the software settings have not changed.
Plan supports separately: Coroplast edges and scenic faces are not a substitute for a designed support system. Have a qualified installer assess the wall, attachment points, and any overhead components before installation.
Related Designs
- Sullivan Stage – Scored Coroplast strips create a dimensional pattern with triangular accents.
- Hollow Crosses – Folded Coroplast shapes demonstrate another way to build internally lit scenery.
- Light Squares – Repeated geometric frames offer a contrasting approach to a light-driven backdrop.
- Sheer Backing – A fabric surface provides an alternative canvas for environmental projection and color washes.
- What are Stage Flats? – Compare portable scenic construction methods when planning a reusable backdrop.



this is absolutely wonderful! i know just the event to use this for. can you get in contact with me so i can get some more details of the wall its self and the projection?
Jayme McCoglan
jayme@bocacommunity.org
Chris,
This is unbelievable! Simply stunning! One of these days im going to get out to South Dakota just to hang out and sponge up a bit of your awesomeness!!!
,Steven
Thanks Steven! If you ever get up to Billings MT let me know, I’d be happy to show you around.
Hey Chris!
I’m really interested in doing this design for Easter. Could you email me more information on material list?
This is simply amazing! Great job! What lighting do you have in the sanctuary? How did you pull off the lighting of the triangle edges in O Come Emmanuel?
Thanks Chris, Our normal lighting rig consists of 5 Robe ColorSpot 575’s, 4 Robe Color Wash 575’s, 10 or so Chauvet QSpots, and 15 Blizzard ToughPars, as well as a plethora of conventional lighting fixtures for primary lighting, footlights, blinders, and effects. For that Christmas service we also brought in 11 Elation Platinum Beam 5Rs, and 33 LED Bars (can’t remember the manufacturer, but they were fairly generic). As far as how we pulled off the lighting on the triangle edges? I’m going to guess you mean the triangles on the projection wall, since all the LED triangles are fairly self explanatory. Everything that happened on the triangle wall in the O Come O Come Emmanuel piece was done with projection. We create and map the video to the wall in such a way as to give the illusion of depth that isn’t actually there, and light sources that don’t really exist. It’s really quite a lot of fun to work with. If you want more information I’d be happy to provide it.
This design looks phenomenal! I’d love to do something like this. Could you send me the details on how you Mapped it for projection? jeremy@newseason.cc