



Chad Boak from Vaughn Forest Church in Montgomery, Alabama brings us this great rustic look.
From Chad: Vaughn Forest Church makes a regular practice to update their stage design 3-4 times a year. A new design is normally introduced for Christmas, New Year, Easter, and toward the end of Summer. This set design recycled components from the Christmas set and was repurposed for Easter.
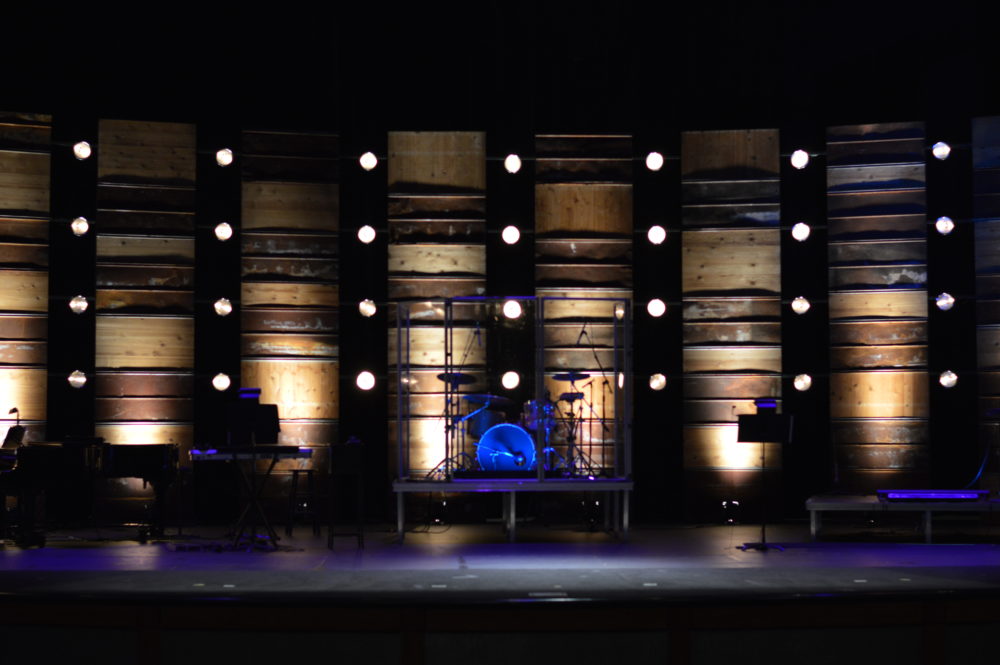
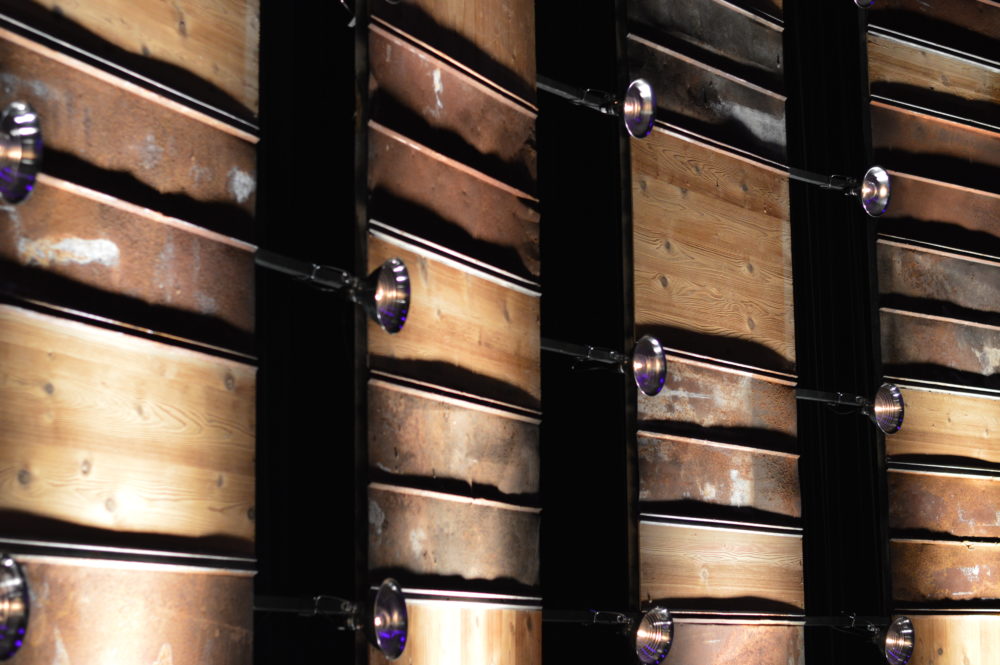
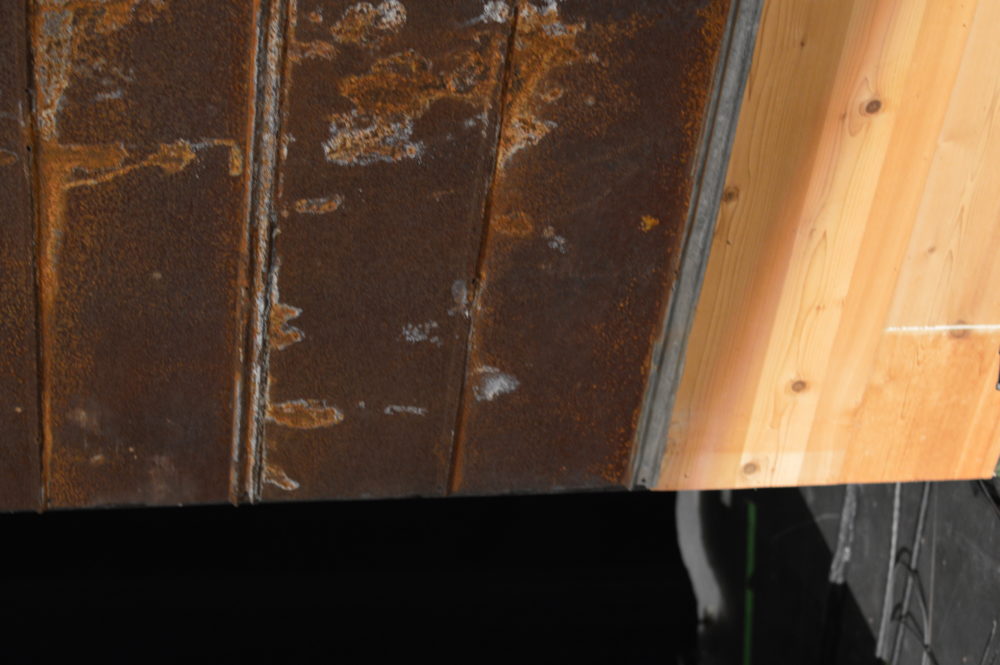
The concept for this new design uses old metal roofing, recycled wood, and painter’s light…fairly simple, right?
Each panel is 16 feet tall and 4 feet wide attached to a 2×2 wood frame on the back. The panels are connected by pieces of 2×4 painted black which is what the painter’s lights are secured to.
Rusted metal roofing and weathered wood panels were rescued or donated and cut into 4-foot wide segments at no cost. Volunteers then laid out the wood and metal in a planned “random” pattern with different sizes of wood and metal alternating.
All 10 panels were assembled in about two days using 100% volunteer help. Similar materials could be purchased at your local home improvement store and weathered yourself, though this would add time and cost to this project.
The old stage was struck on a Sunday afternoon after the morning worship service. The 10 panels were brought in and secured to each other by black 2×4 pieces. Above each panel, paracord was used to secure the panels to existing trussing above the stage. The panels were also bolted into the stage for extra safety and to keep them from moving.
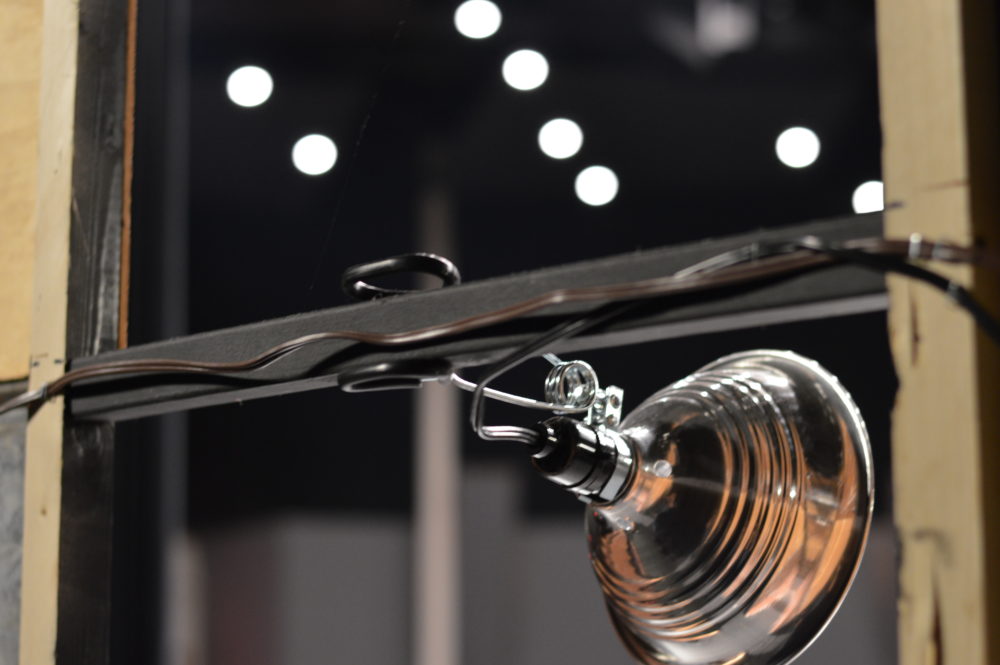
Lighting was set up the next day by 2 people. A total of 36 painter’s can lights with Edison bulbs were installed in 4 rows, 4 high. They were installed in increments 3 feet apart starting at 15 feet high (1 foot down from the highest point, and 6 feet high at the lowest). All of these were connected together and each horizontal row was assigned a dimmer so that the rows could roll for a lighting effect up and down.
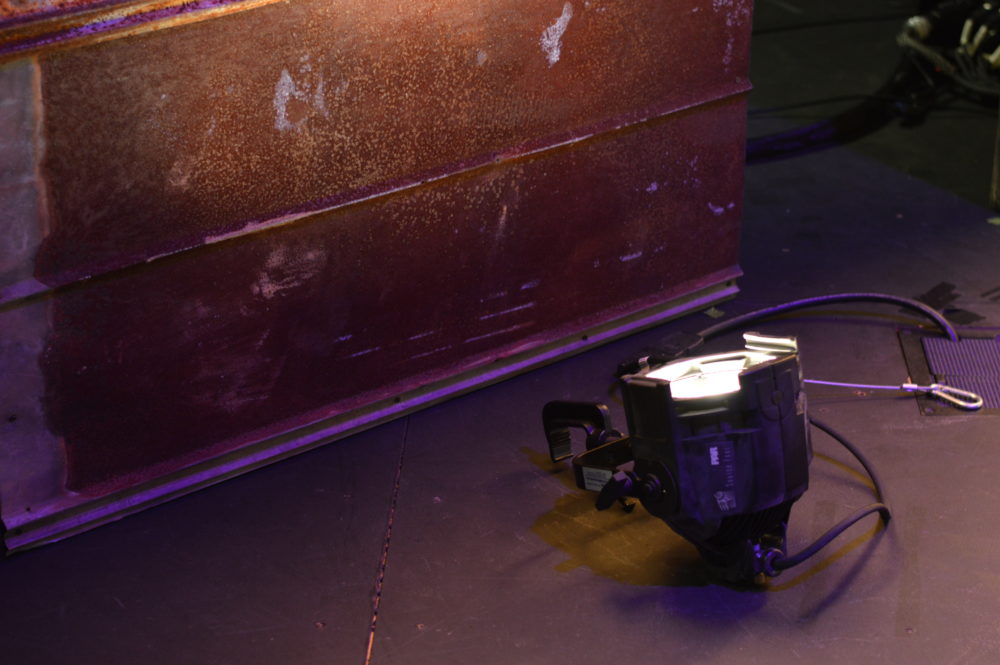
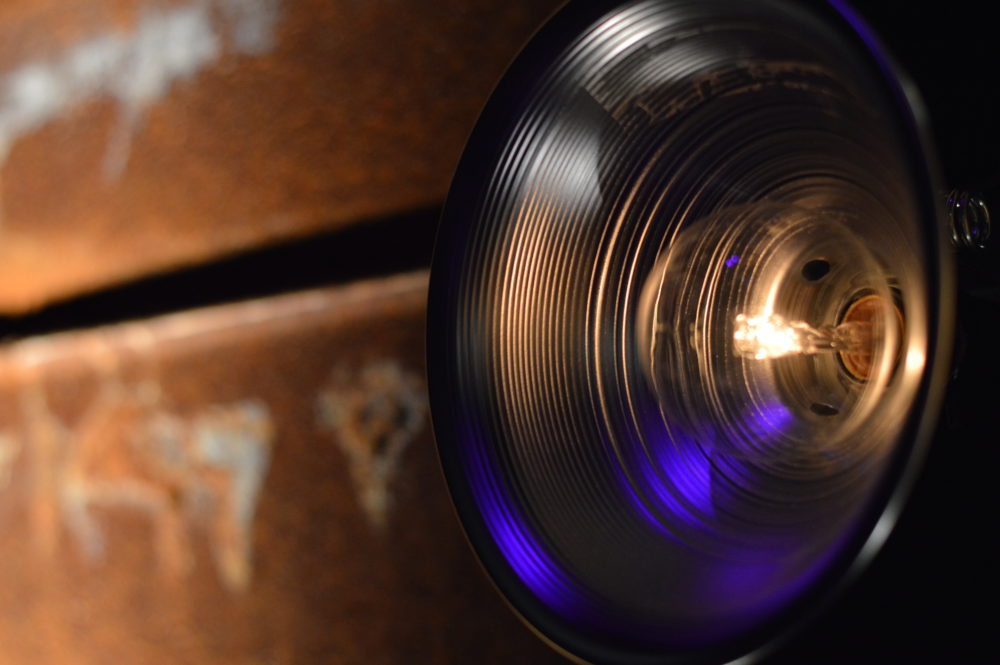
A par can light with a traditional 750-watt bulb was placed at the base of each panel to provide an uplight effect. All of these were wired together on one dimmer row and could be used in conjunction with the painter’s lights to fade in and out.
Total costs were $250-300 due to a majority of the materials being donated.
Additional pictures are available at https://flic.kr/s/aHskFQuHXF.
Chad Boak serves as Creative Pastor at Vaughn Forest Church.
Article by Vaughn Forest Church Communications Director, Brian Harris. (brian.harris@vaughnforest.com)
Building Rustic Stage Texture with Reclaimed Materials
Rustic stage designs work best when the materials carry real texture, and this design succeeds because it does not try to make new materials look old from a distance. The mix of rusted roofing, weathered boards, Edison lamps, and warm uplight gives the wall depth before any color is added. For churches working with a volunteer team, that matters because texture does some of the visual work that would otherwise require more fixtures, scenic painting, or complicated fabrication.
The 16-foot by 4-foot panel format is also a smart construction choice. Each panel can be built flat, staged off-site, and then moved into place as a repeatable unit. That keeps the build organized and lets different volunteers work on separate sections without needing to understand the entire scenic plan. When panels are this tall, the framing and attachment plan matter as much as the finished surface. A 2×2 frame keeps the pieces lighter, while black 2×4 connectors and overhead paracord add stability once the panels are installed.
For teams recreating this look, the key is planning the random pattern before fastening the materials. Lay the wood and metal out on the floor, step back, and check for accidental stripes or clumps of the same finish. Alternating wide and narrow boards with metal sections creates a more natural weathered rhythm. If donated metal has sharp edges, grind or fold those edges before installation, especially anywhere volunteers will lift, carry, or cable near the panels.
The lighting strategy is what keeps the wall from feeling flat. The painter lights provide a warm practical glow that fits the rustic material palette, while the par cans at the base add vertical movement and separation. Assigning each horizontal row of Edison bulbs to its own dimmer gives the lighting team simple control without needing pixel mapping or complex programming. Even a slow chase from bottom to top can make the structure feel alive during worship transitions.
Budget-wise, this is a strong example of designing around what the church already has access to. Donated roofing and wood kept the scenic cost low, but the design still feels intentional because the panels share a consistent size, clear rhythm, and repeatable lighting grid. If your church cannot source reclaimed material, new fence boards, pallet wood, corrugated roofing, or stained lauan strips can create a similar layered effect with predictable dimensions.
Planning a Reclaimed-Material Stage from Mockup to Installation
Before cutting a single board, create a scaled elevation of the stage and divide the scenic wall into buildable modules. Mark the location of doors, screens, speakers, floor pockets, lighting positions, and any sightline that must remain open. Then assign every reclaimed board and sheet of roofing to a panel on the drawing. This simple inventory step reveals shortages early and prevents the most interesting textures from collecting on one side of the stage. Photograph the floor layout of each module before volunteers begin fastening pieces so the intended pattern is easy to reproduce.
Weight planning is especially important with tall scenic panels. Weigh a completed sample module, multiply that weight by the full panel count, and confirm that the stage, anchors, and any approved overhead connections can support the installation. Scenic paracord can help stabilize movement, but it should never substitute for a properly rated attachment specified by a qualified technical leader or rigger. Add positive connections at the base, use locking hardware where appropriate, and document an inspection checklist that the team can repeat before each service.
Build one prototype panel before organizing a large volunteer workday. The prototype helps the team settle decisions about frame spacing, fastener length, edge treatment, stain, sealing, and the order in which wood and metal should be attached. It also exposes practical problems such as a screw point extending through the back, corrugated metal flexing between supports, or a module becoming too heavy for the available crew. Once the prototype passes a lift and installation test, turn it into a visual example and a short assembly guide for every work table.
Plan the electrical system as a separate layer of the scenic design. Label each painter light, route cable away from sharp roofing edges, protect connections from foot traffic, and calculate the total load before assigning fixtures to dimmers. If incandescent Edison lamps create too much heat or power draw, dimmable LED filament lamps can deliver a similar warm appearance with less load. Test the exact lamp and dimmer combination first, because some LED products flicker at low levels or appear uneven on camera even when they look smooth in the room.
A staged installation schedule keeps the room safer and reduces rework. Move finished modules into position first, connect and brace the structure, complete an independent safety inspection, and only then add practical lamps and floor fixtures. Leave enough time for the lighting team to build looks after the scenic crew has cleared tools and ladders. Take wide and close-up photos of framing, cable routes, and connection points before the stage opens; those records make troubleshooting, future reuse, and eventual teardown much faster.
Finally, design the modules with their next use in mind. Label the back of each panel, record its dimensions and weight, and note which surface materials can be removed without damaging the frame. A consistent modular system lets the church rotate panels, repaint connectors, swap selected wood or metal sections, and create a fresh layout without rebuilding the entire wall. That turns a low-cost scenic project into a reusable stage system rather than a one-event expense.
Finishing, Maintaining, and Reusing a Weathered Stage
A reclaimed stage can look effortless from the audience, but its finish needs to be deliberate. Start by sorting boards and roofing into light, medium, and dark groups, then distribute those values across the full wall. This prevents one panel from reading as a solid dark block while another disappears under stage light. If new lumber must be mixed with genuinely aged material, test stains on offcuts and build color slowly. Gray and brown washes usually look more natural in thin layers than one heavy coat, and a light dry-brush pass can soften boards that appear too new.
Choose surface treatments with the room and schedule in mind. A water-based matte clear coat helps contain dust and loose rust without adding a distracting shine. Let every coating cure fully before the panels enter the auditorium, and confirm that scenic finishes meet local fire and building requirements. Corrugated roofing should be cleaned, deburred, and attached with washers or appropriate fasteners so vibration does not enlarge the holes. Place sharper edges where they cannot contact hands, cables, curtains, or traffic paths.
Once the wall is installed, build lighting looks at the brightest and dimmest moments of a service. Warm practical lamps can become visual hotspots on camera, while deep texture may disappear when the front wash is too strong. Balance the Edison bulbs first, add uplight second, and then introduce front light only as needed for people on stage. A subtle side or floor angle will reveal the relief between wood and metal more effectively than flooding the backdrop from straight ahead.
Plan for quiet operation as well as appearance. Large sheets and loosely attached boards can buzz when subwoofers are active, so test the completed wall with speech, music, and low-frequency playback. Add discreet isolation material or another approved fastener wherever a panel vibrates. Keep all scenic pieces clear of HVAC returns and speaker coverage, and verify that the backdrop does not narrow exits or conceal required safety equipment.
After each weekend, use a simple maintenance checklist: inspect anchors, tighten accessible connections, look for new splinters or rust flakes, test every practical lamp, and confirm that cable protection remains in place. Store replacement lamps, labeled hardware, finish samples, and panel photos together. When it is time for a new look, rotate selected modules, change the lamp rhythm, or swap only a few surface pieces. Those small changes preserve the useful structure while giving the congregation a noticeably different stage without another full build.
Related Designs
- In the Fields – A rustic environment that uses natural texture to support a sermon-series theme.
- Flourishing Life – See how repurposed materials can become a warm, dimensional worship backdrop.
- Transplanted Ranch – A ranch-inspired design with weathered surfaces and strong environmental character.
- Wrapped in Ceiling – Another modular-panel approach that turns simple repeated units into a full-stage look.
- Rise Up – A recent build that combines warm practical lighting with bold scenic structure.
Pro Tips for Rustic Church Stage Designs
Seal before hanging: Reclaimed wood and metal can bring dust, rust, splinters, and loose debris into the room. Brush everything down, remove sharp edges, and consider a clear matte sealer before the panels go on stage.
Build repeatable modules: Keep each panel the same outside dimension even if the surface materials vary. Consistent modules make transport, alignment, storage, and future reuse much easier for volunteer crews.
Separate scenic and structural fasteners: Use one fastening plan for the visible wood and metal, and a separate plan for the frame, panel-to-panel connections, and overhead safety support. That makes the design easier to inspect before services.
Test warmth on camera: Edison bulbs and amber uplight can look beautiful in the room but overly orange on video. Check the design through your livestream or IMAG cameras and adjust white balance or fixture intensity before the weekend.
Related: Glowing Woods – Learn how reclaimed wood panels and concealed rope lights created a warm stage glow on a small budget.
Related: Compare this rustic reuse with a church backdrop built from salvaged doors.
Related: Paint Can Lids – Compare a textured industrial backdrop made with paint cans mounted on reclaimed pallets.



Hey there. Love the use of the painters lights. What size did you use? And where were you able to source them from?
Thanks
Shaun
They were standard painters lights that we bought at home depot. Bulbs were incandescent ones from home depot as well. Hope that helps!
Love this look! Where did you get the rusted metal roofing?