John Weiker from Grace Church Bath Campus in Akron, Ohio brings us this awesome bubbly design.
From John: With just having come off of a very popular, very large set, our fall set had some big shoes to fill. The set we were getting ready to take down had covered every inch of stage space we could give up and that meant that no matter where you looked, you saw set. We wanted to be able to accomplish the same thing with this set but yet give our eyes a break from a set that had almost created a wall on the back of the stage. Our vision ended up being, let’s create a set that fills the stage but remains very airy.
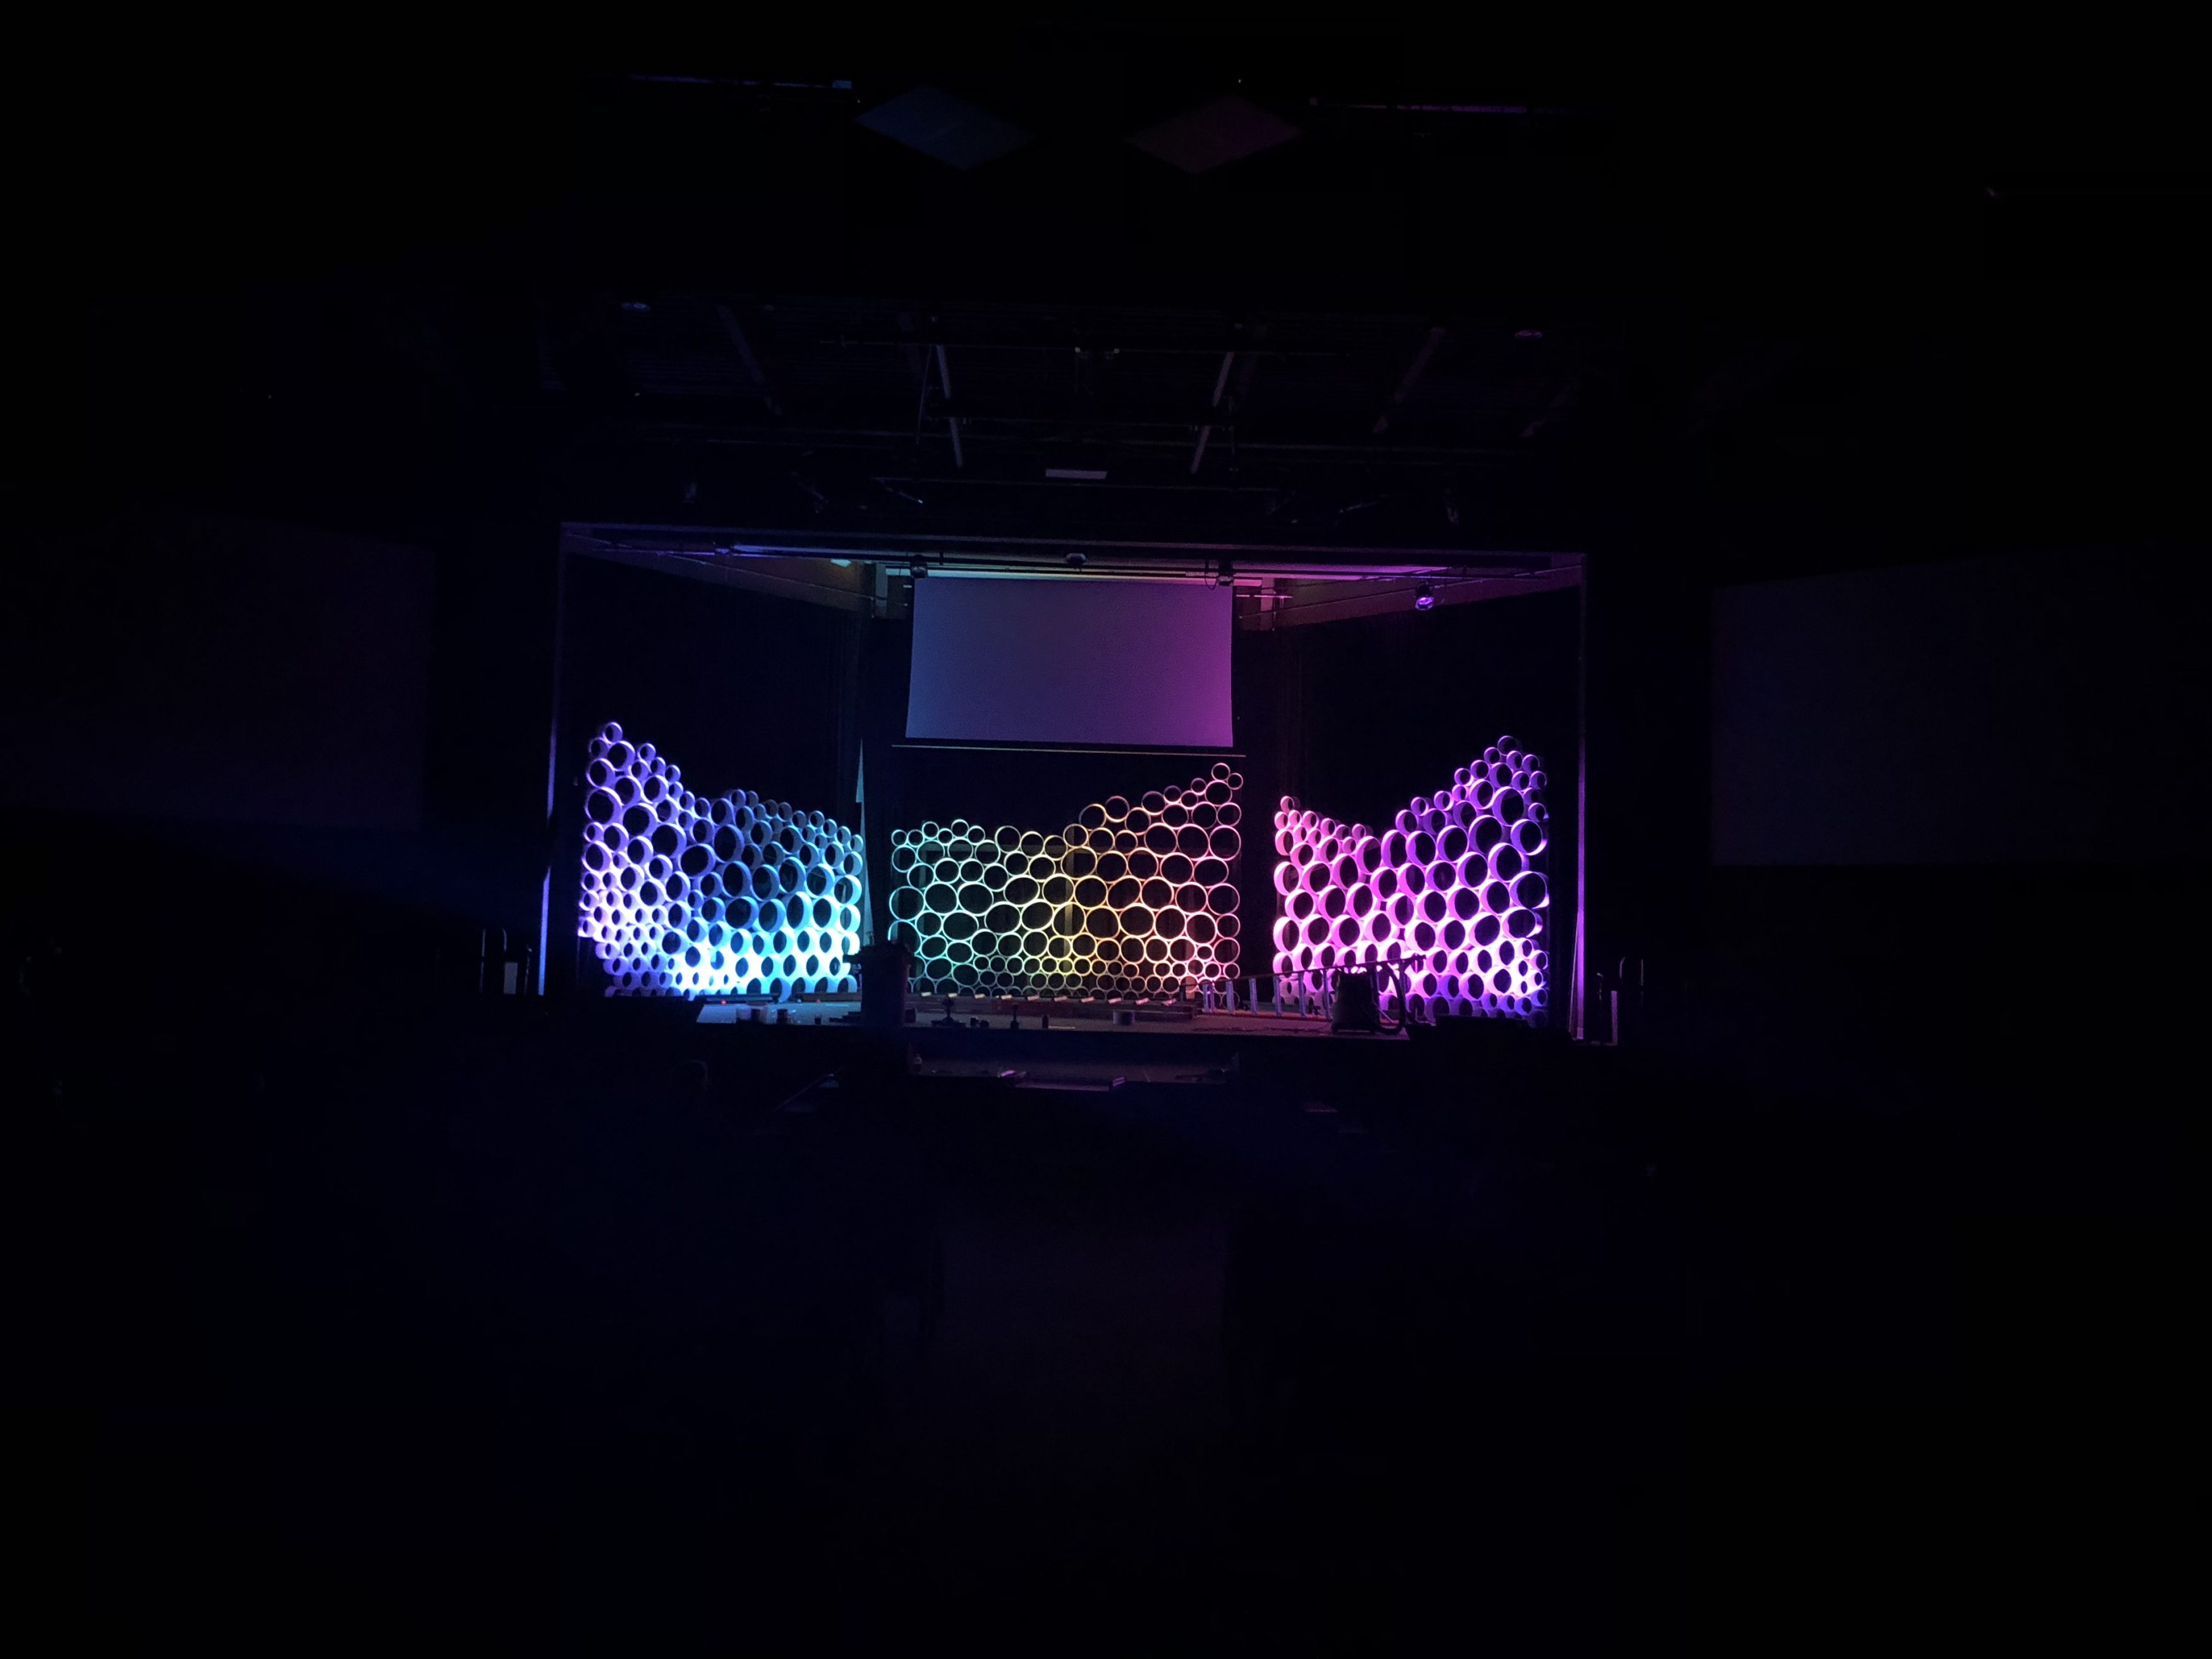
This is what we came up with. Lets stack up different sized tubes that were painted white and created a wave effect across the stage using the different sizes. Our main room would have a set created in three different sections along each of the back walls that would have stacks of cardboard tube cement forms stacked up onto each other. Our other building would have the same direction but instead of having three different sections, we would make one big one since it was a smaller stage.
This was accomplished by using three different sized cardboard cement forms. Some people may know of them as Sono Tubes, they are used to be put in the ground to form a cement pillar. We used the 16in, 12in, and 8in tubes that were 4ft long. To make each piece, all of the tubes would be cut into 6in sections and then painted white. To create our version, we had made approximately 900 pieces in total and every piece was hand painted. Our tubes required two coats on the outside and one coat on the inside to give us good coverage and to cover all of the letterings. When painting the tubes to do want to be careful not to apply too much paint at one time as the tubes are made of cardboard and paint is wet. If you are lite on the paint it also helps to reduce warping.
The way that worked best for us to actually cut the tubes was very simple. We created a sled with a stop on it to be used on a table saw. The sled allowed up to keep a good hold on the tubes and the stop allowed us to cut them all at the same length.
In order to get all of the tubes to stay put, we had created 2×4 uprights that would be spaced out and on the ends of each section, we used luan strips to create end caps to hold the tubes in. We also used some 2×4 back braces to the uprights vertical and to also keep the tubes from falling backward. To keep the tubes from falling down all of the time, we would periodically place screws to tie tubes together and to tie them to the wood. Do note that the larger the tube, the easier it deforms and will need support to keep their shape when weight is on them. We had plenty of spare tubes at the end so I swap out pieces when they start to warp too much.
We decided on using white so that no matter what color light was directed onto the tube, it should take that color and show up bright. It had allowed for some really cool effects with our lighting and the set almost appeared to move as the colors would change.
This set has accomplished everything we had set out to accomplish this round and has been quite popular. Many people say that the tubes look like bubbles in water. If I were to do things differently, I wouldn’t create as large of sections as we did and I would have used more of the smaller sizes.


That is AWESOME! What was the total cost?
Can you give an idea of width and height of the sections? If you used about 900 pieces it would be awesome to have an idea of about how big it ended up! It looks great!
Looks great! What was the total cost?