


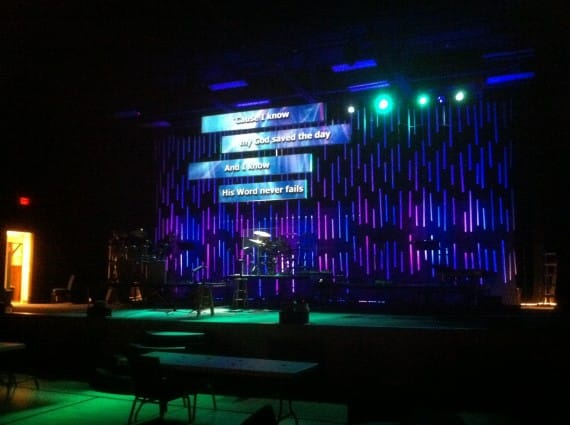
Jeremy Tomlinson from River Run Christian Church in Chuluota, FL, brings us this great design using an offset, separated projection screen.
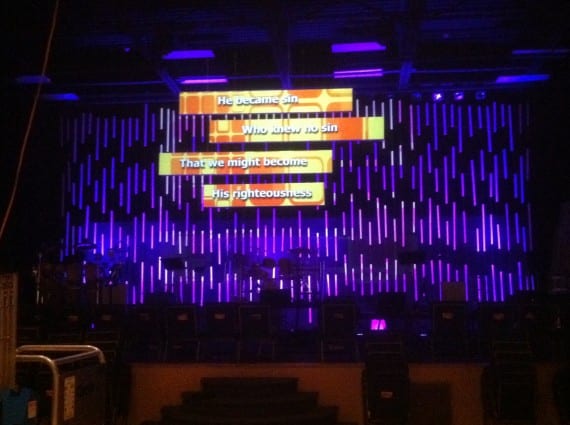
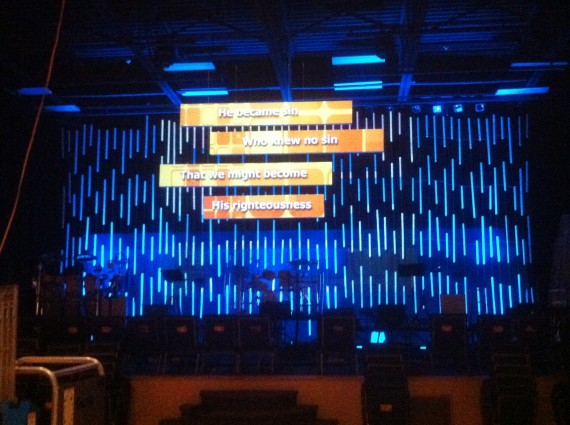
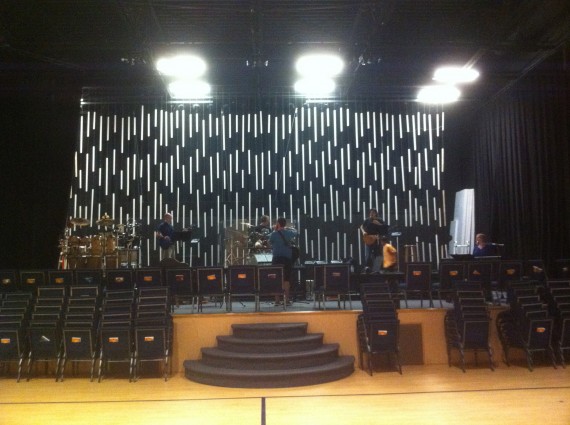
The backdrop was 1×2 wood furring strips painted white, cut into 3 different lengths to give a random look, and stapled and hung on thin black string.
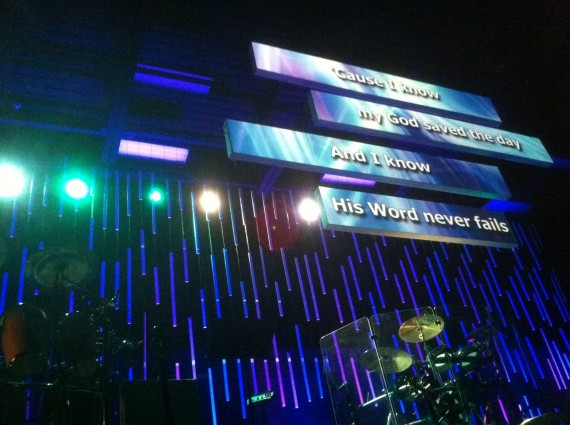
The projection screen was four various-sized “planks” hung with thin 4mm steel cable to appear completely floating. The planks were wooden flats wrapped in a white fabric. They were hung out over center stage about 15ft from the rain backdrop.
The video images were then masked within ProPresenter to only project onto the “planks”, leaving the LED lighted backdrop alone. For lyrics, Jeremy set up a template with four text boxes to quickly know their margins when adding a song.

Planning an Offset Projection Screen
The appeal of this design comes from separating two jobs that a single backdrop often has to perform. Four fabric-covered flats carry the projected imagery, while the white wood strips behind them catch colored light. The open spaces between the screens make the composition feel less like a conventional rectangle. When adapting the idea, begin with a drawing of your stage that includes musicians, microphone positions, the projector, and the seating area. Place the screen shapes where they will remain visible without crowding the people leading the service.
Make a small mockup before building the full-size flats. Arrange four paper rectangles in different sizes, then test how a short lyric phrase could fit across them. A visually interesting arrangement is not automatically a readable one. Leave generous margins around each text area, and avoid layouts that force the congregation to jump unpredictably between panels. Check the proposed arrangement from the rear seats and side aisles as well as from the main camera position.
Testing Fabric, Masking, and Backdrop Lighting
The original screens were wooden flats wrapped in white fabric. For your own version, test a sample of the chosen fabric with the actual projector before covering every frame. Look for even brightness, visible seams, wrinkles, and any texture that distracts from lettering. Pull the fabric consistently across each flat, and compare the finished samples under both projected video and plain white output. Keep the frame construction and support method appropriate to the size of the panels rather than assuming a decorative surface can carry structural loads.
Once the panels are in their final positions, use a simple alignment image to identify their edges and establish the projection mask. The original team used ProPresenter to keep imagery on the separated planks. Treat this as a workflow idea rather than a promise that every software version has identical controls. Test short and long lyric lines in the four-box template, then check several complete songs. Dark masked areas can still reveal stray projector light, so evaluate the look with your intended stage lighting instead of judging only the computer preview.
The rear layer uses white-painted 1×2 furring strips cut to three lengths. Repeating those lengths gives volunteers a manageable cutting plan while the varied placement keeps the texture from feeling rigid. Lay out a sample section on the floor and photograph it before installation. Try a side wash and a more direct wash to compare shadows between strips. Keep enough contrast between the lit wood and the projected screens that the two layers remain distinct; brighter scenery is not always a clearer composition.
The submitted design placed the screens about 15 feet in front of the strip backdrop and suspended them with steel cable. Those details describe this installation, not a required spacing or a ready-made rigging specification. Have a qualified installer review the complete panel weights, connections, support locations, and retention of the wood strips. If your room cannot accommodate suspended scenery, discuss an appropriately supported alternative with your facilities team. Include projector sightlines, access routes, storage, and installation labor when planning the adaptation.
Pro Tips for Offset Projection Panels
- Lock the layout before masking: Finish panel placement first, then align the projected image. Label the panel positions and document the projector location so a later setup does not start from scratch.
- Build a lyric stress test: Include your longest song lines and a few short phrases in the template. Check readability from the least favorable seats before introducing motion backgrounds.
- Separate scenic and people lighting: Keep the wood-strip wash independently adjustable so color changes do not compromise faces or wash out the fabric screens.
- Prepare a simple fallback: Keep a readable, low-motion lyric look ready for services. Rehearse the transition before relying on a more elaborate video treatment.
Related Designs
- Triangle Wall – Compare projection mapping across dimensional surfaces with a separately backlit scenic layer.
- The Doors – Explore a physical backdrop paired with a projected digital door.
- Dots Between Projection – See another approach to separated projection panels, masking, and decorative light.
- Shine it Out – Compare white scenic surfaces and a repeated pattern made from 1×2 wood strips.
- Light Squares – Explore geometric frames made from 1×2 lumber and accented with LED tape.
Related: Shine – Compare a reflective mylar and frosted-plastic window-frame backdrop with front and rear lighting.
Related: Jesus, Light it Up – Compare an illuminated Jesus sign with a Coroplast backdrop and textured, color-lit metal-screen columns.
Related: White Stage – Compare Lifehouse Church’s white curtains, painted floor, and fabric-skirted platforms for a unified stage palette.


So you are only using one projector correct? Does pro presenter have a feature that allows you to set the exact size for each screen you have? In other words, how are you eliminating the “excess” image from projecting past the screens onto the back wall?
Hey John. Yes. This is done by just one projector. I used a BenQ sp920 (6k lumen).
ProPresenter comes with a Masking feature that enables you to make custom masks within the software. Wherever you mask it will not project in that area no matter what image/video you project. This makes this design possible and really helps give it that “floating, 3D feel” especially since they are about 15 feet away from the backdrop. I will try to add some more pictures that show it even better. I tweaked the masks a little better than these pictures show to where there is no spill at all onto the backdrop and it ONLY projects on the 4 individual “planks”. It takes a little while to get it just right but the end result can be well worth it. Other ideas I will try soon are more oddly shaped screens like circular or irregular shaped screens. Best of luck to you an let me know if you have any other questions.
Thanks for the reply! I’m going to give this a shot. What is the fabric you used for the planks?
No prob. I can’t remember the exact name but it was a sheer fabric that was sort of shiny on one side and kind of matte on the other. I got it at JoAnns fabric. I wrapped the planks on all but the backside like a Christmas present with the shiny side out to project on.
How do you show regular videos?
Thanks.
Hey Eric. Sorry for the really late reply. We have two screens just off the picture to the left and right we use for Imag and videos. That is a definite downside to this design, you really can’t show any normal video. It’s really only for effect and lyrics.
Jeremy – cool design, nice job. Quick question – how do you keep the strings/slats from twisting? Do you attach the black string to the stage?
Thanks,
-Blanton
Great question Blanton. Sorry if I’m too late. I should have addressed that in the description because I remember having an issue with that. I ended up getting the thinest black string I could find at a Hobby store and stapling it to the back of the slats horizontally, basically making a grid so it could not twist.
Can you describe how you lit the elements? It looks nice and even.
Hello Aaron. The slats on the backdrop are lit with 1 meter LED Bars — There were 8 of them spaced just a couple feet or less apart. I have found that LED Bars do a great job of washing a wall or backdrop. I use them for almost every set for whatever is the back. The only thing you have to watch out for is washing them out with your front stage wash. To avoid that I definitely suggest Ellipsoidals/Lekos that you can focus and shutter to not hit the back wall.
Here are the ones I use
http://www.techni-lux.com/default.aspx?tabid=13&id=6381
Oh yeah — and you can get a multi-color look because the bars can do 3 independent colors on each. So you can get a striped look that is still even.
Also, I got a great contrast between the little slats by using black string and then hanging the grid a few feet away from the black curtain behind it so the light doesn’t hit the curtain.
The planks out front are all lit with one 6k projector.
Hi.
I wonder how Jeremy set up the template for four text boxes and got the text to know their margins? If you understand:-) I’m new to ProPresenter and want to make something like the offset you have made.
Hello!
The template was very easy to set up. It takes a little time to get it right, but it’s not very hard. Within ProPresenter 5, there is a Masks feature. Open the masks edit window and then add a series of black rectangles to block wherever you don’t want projection. Then as you go hit “show” within the masks edit window to see your progress. When you have it set, your done. Currently, I have a cross shaped screen using the same feature, so you can pretty much do any custom shaped screen using these masks. I hope that helps….
Thank you.
But how did you get the text to be in the middle of the boxes? Did you had to write it in the boxes for each verse and chorus?
I lovr this our church is thinking of slomething like this. but What was your budget on this?