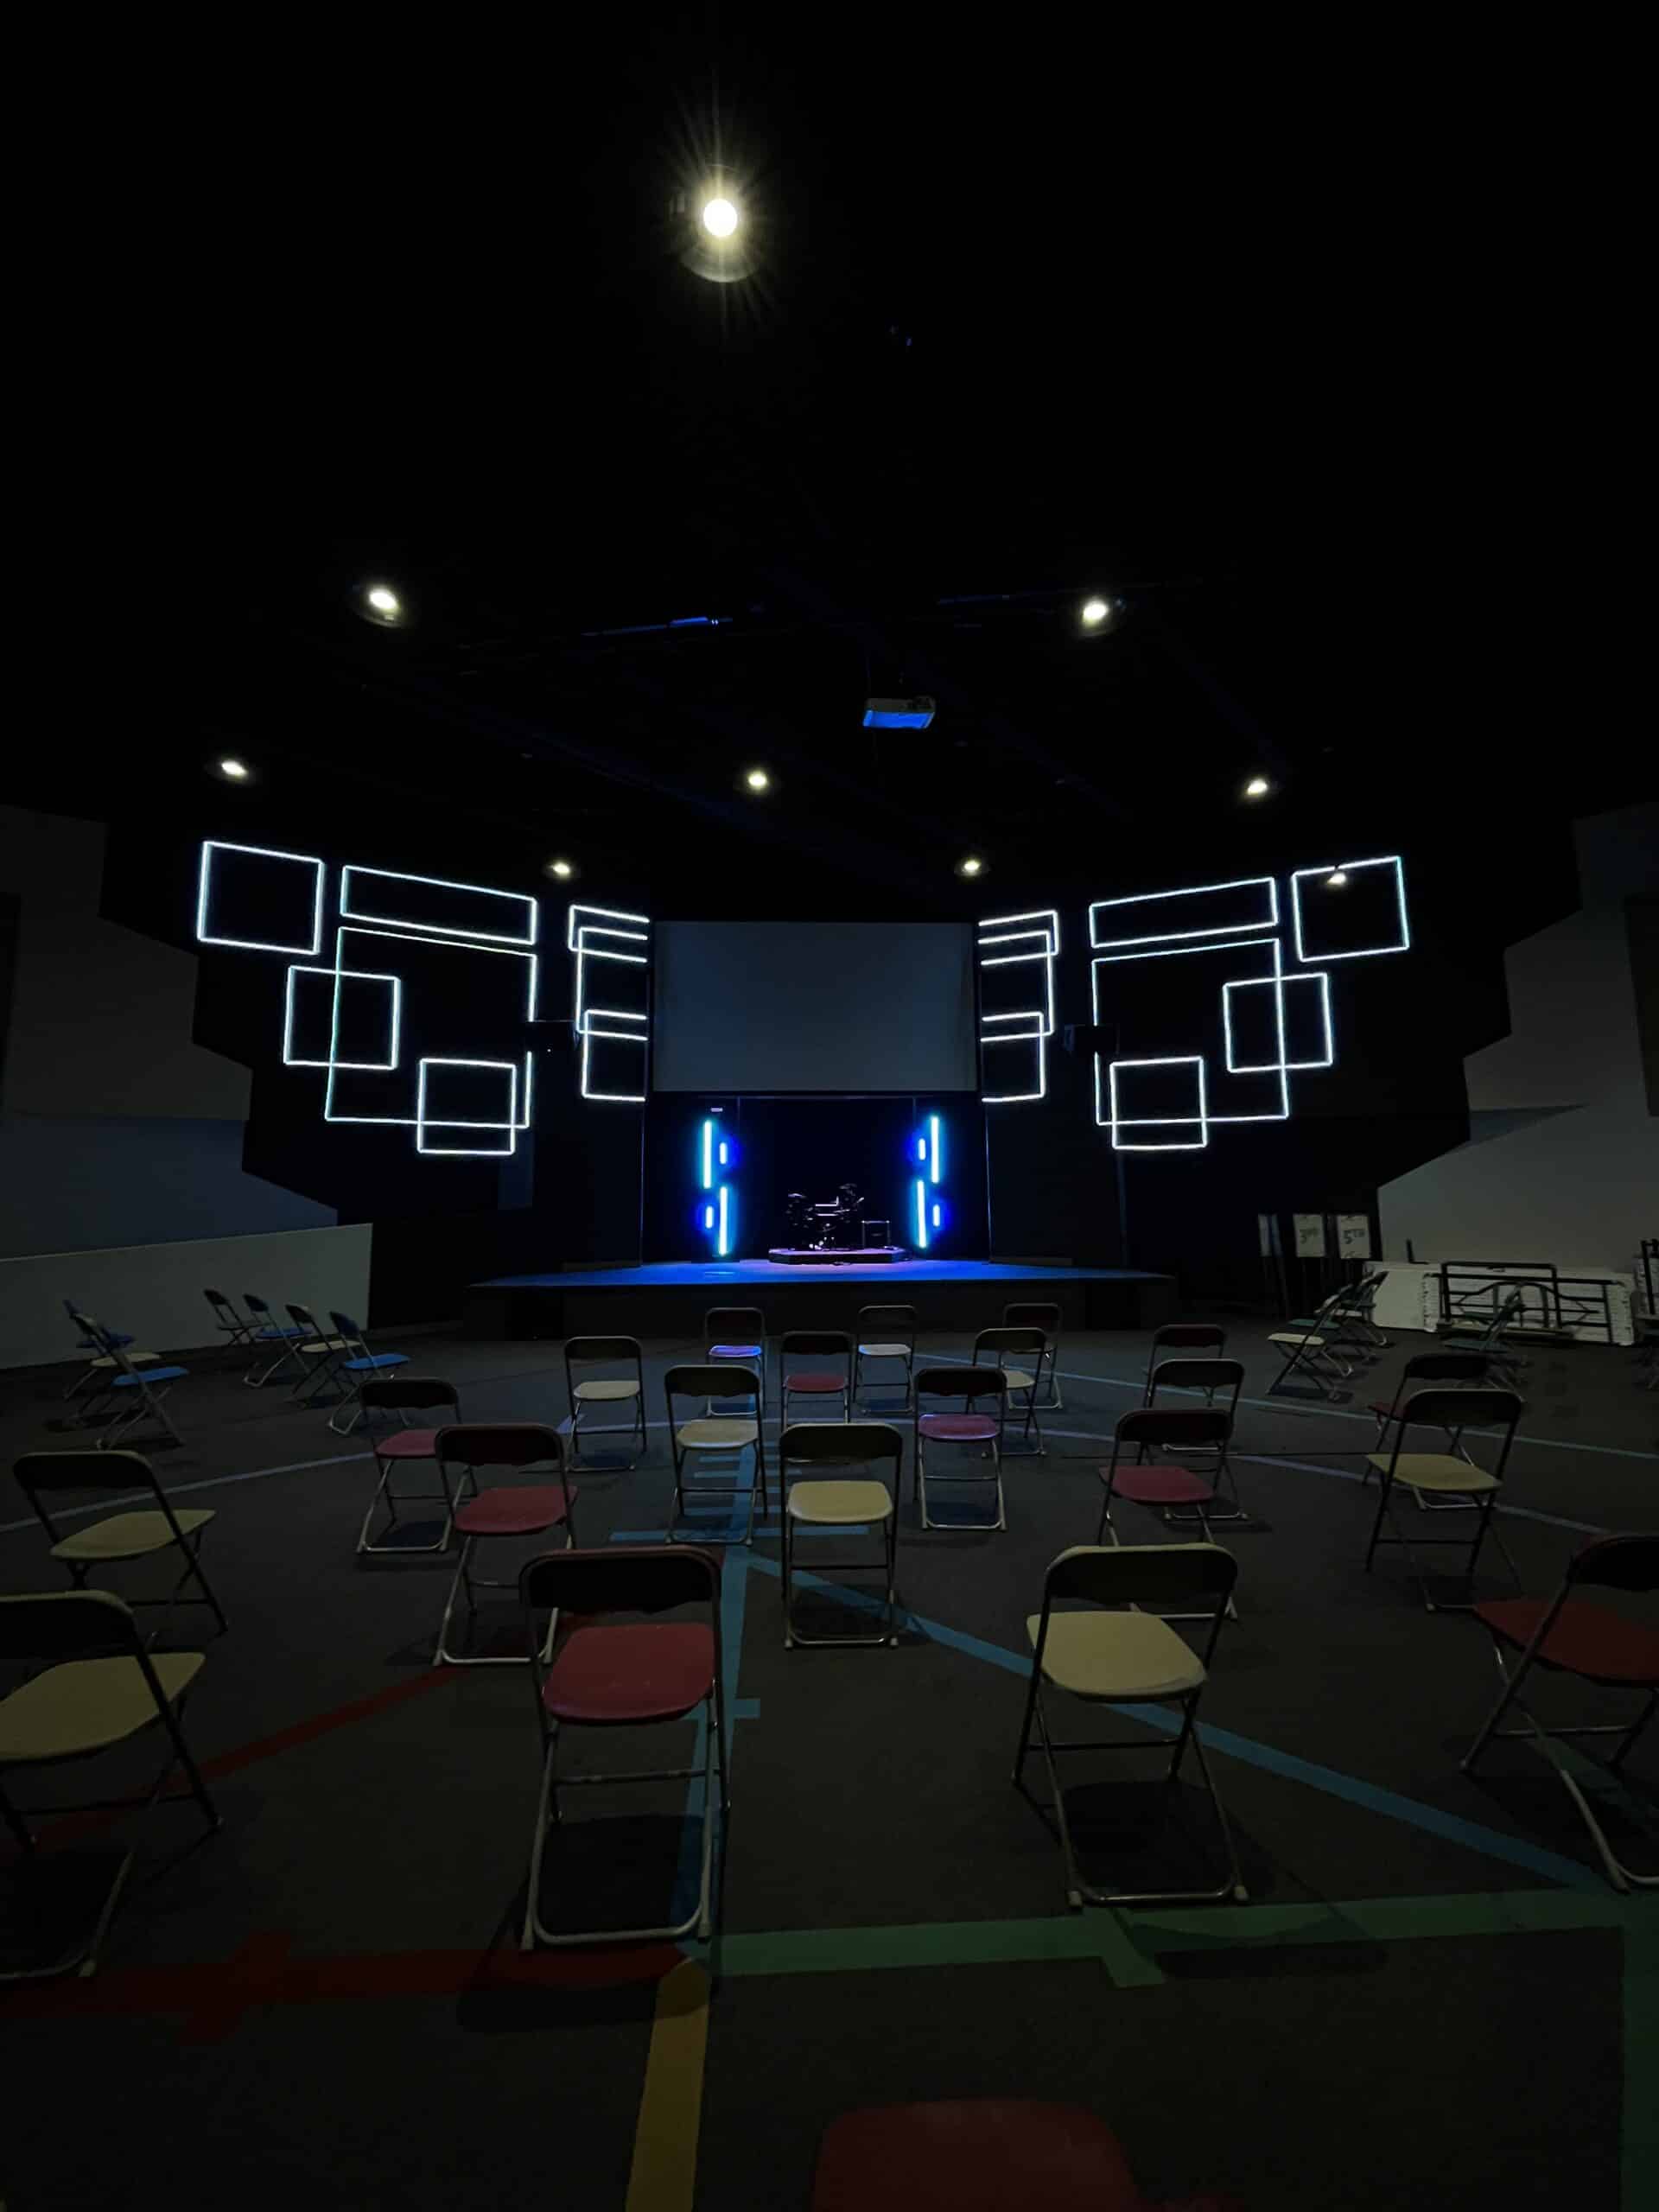
Memo Gutierrez and Lee Rangel from BT Church in McAllen, TX brings us this design inspired by LED Rectangles.
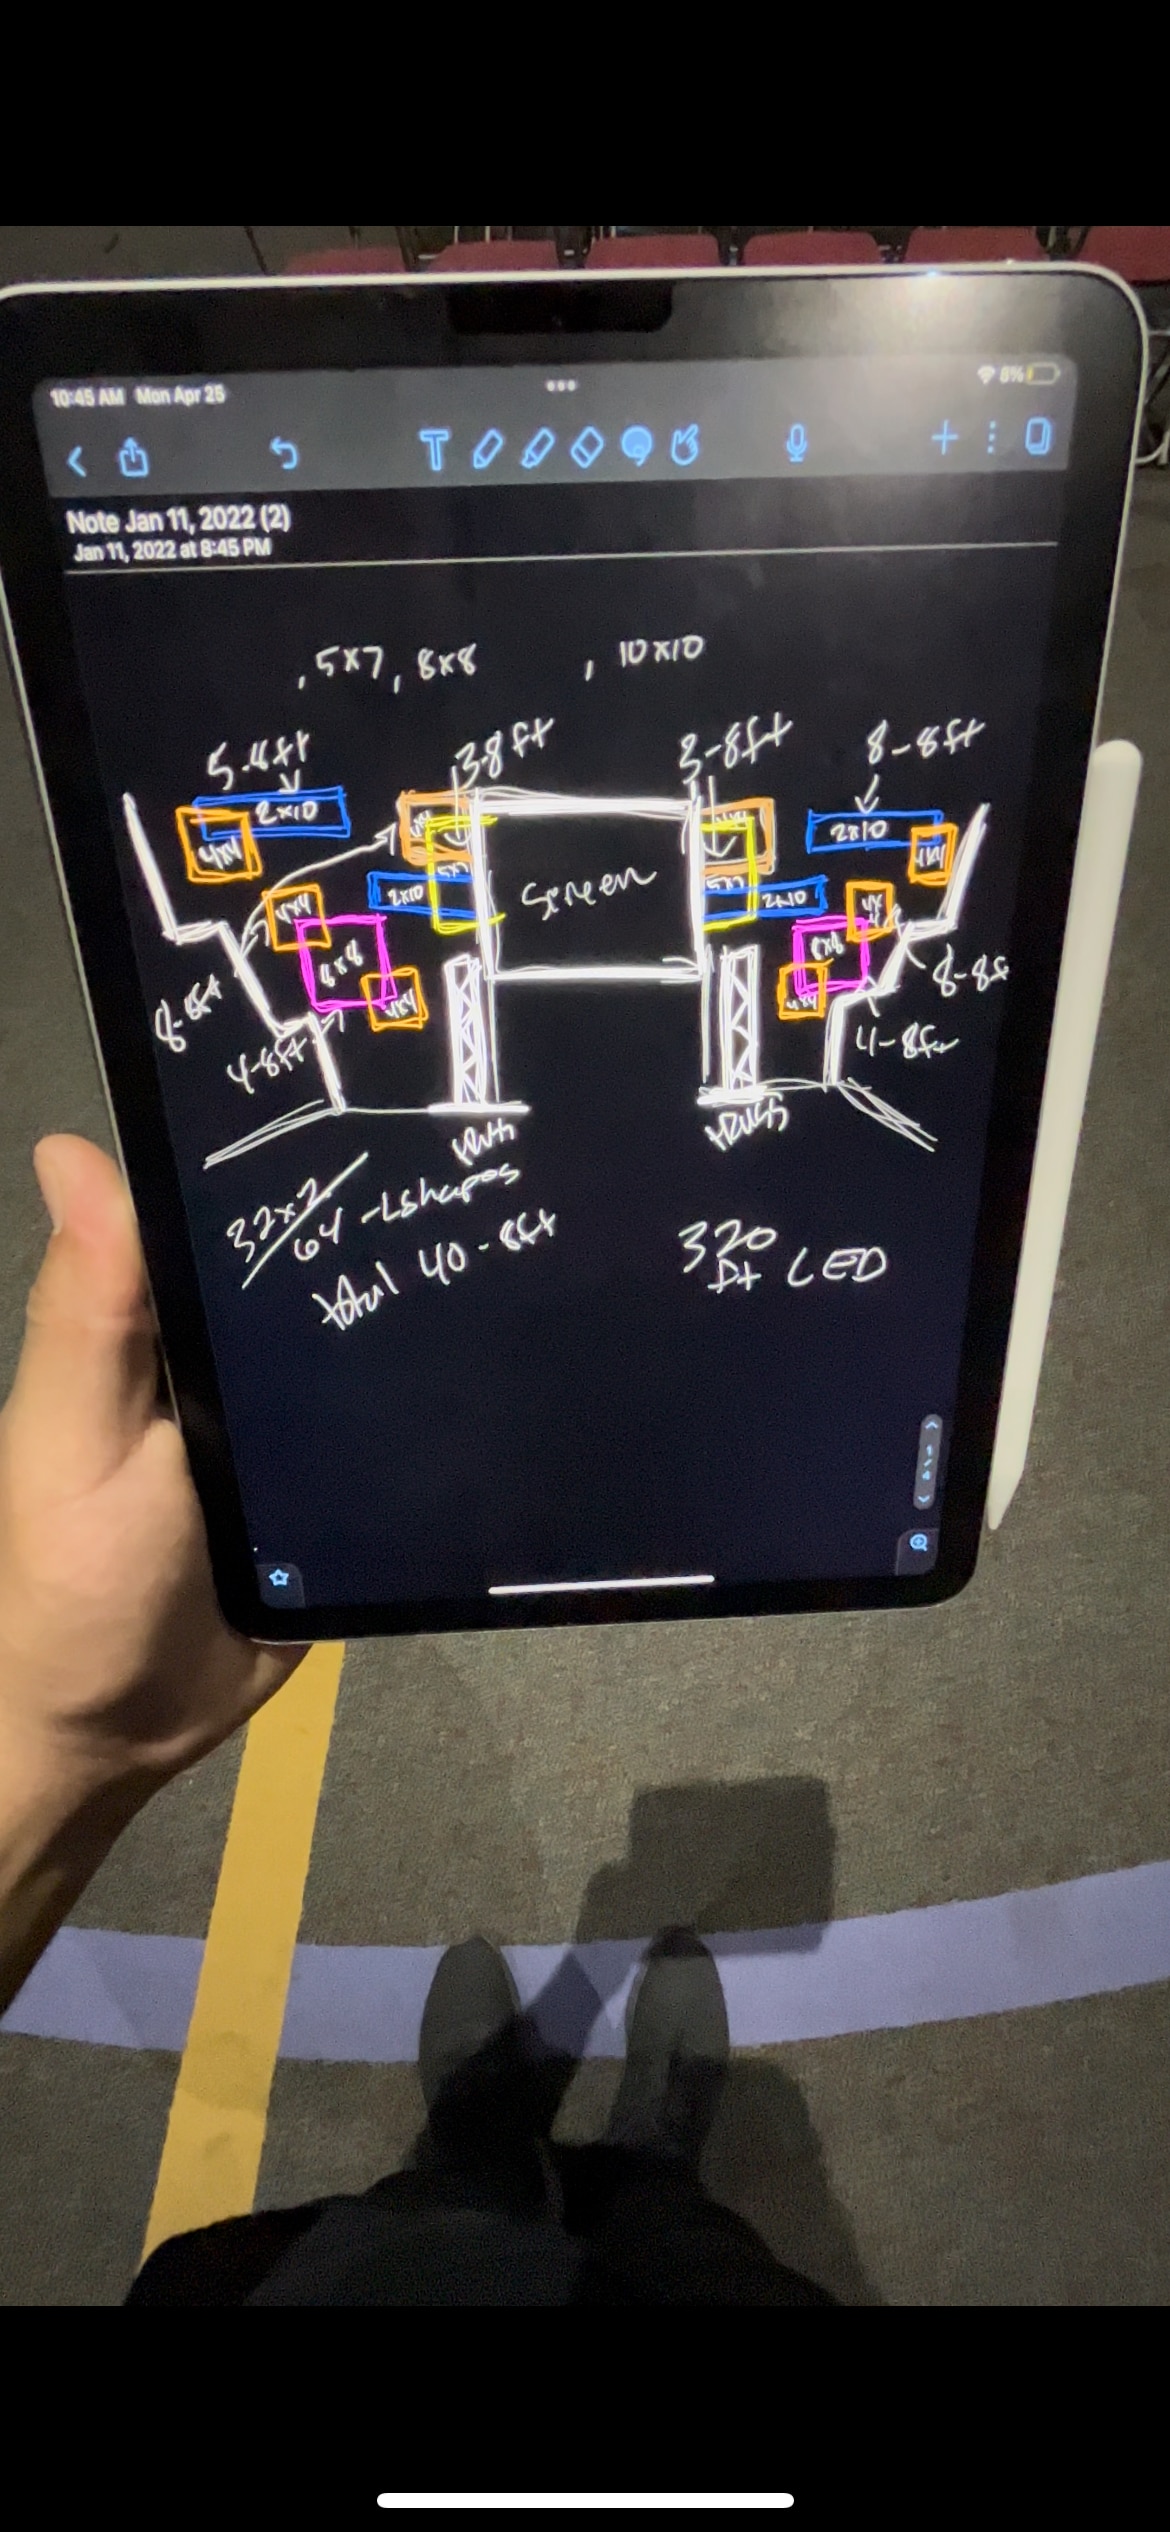
Square frames: Led wooden frames were built by 1x2s braced with corner L-Shape brackets and painted black. Rigged onto each square frame is LED tape, we had a hard time only using adhesive on the back of the tape and the small clear plastic braces that LED tape comes with, so we used transparent zip ties as needed. For LED tape corners, we used L shape LED light strip connectors. There is no diffusion on them but we don’t go past 50% intensity (usually stays at 25%).
Wall rigging: We painted a 12ft 2×4 and screwed it onto the very top of the wall, this building has thin sheet metals as studs, so we used heavy-duty sheet rock anchors with proper distribution for even weight support (highly recommend you look into building blueprint before making any installs).
LED square to wall rigging: Some squares we rigged individually, some we rigged into each other. For the individual squares, we screwed in 2 O-hooks on the 2×4 and 2 on the square frames, spaced out for even weight distribution, then we used fishing wire looped through a few times for extra support. For the bigger squares and squares rigged to each other, we used bigger hooks with fasteners to adjust the height as desired, for better weight distribution we used 4 instead of 2 which worked out perfect. Because of bottom squares rigged into top squares, squares started to warp causing disruption in uniformity.
LED tape to power: We used 22 AWG 4 conductor extension cable with LED 5050 strip to wire, there is plenty of options for this part, and we found this combination to be the most seamless and quality controlled (in this part always overestimate quantity, after rewiring and troubleshooting as needed we were very happy to have extras from previous builds).
DMX conversion: We ran the extension cable from each LED strip to a “central” part that was closest to a power source and DMX while still keeping a consistent, clean look (this part will make or break the entire look, always choose clean over convenient). We ran the cable along the frames keeping them in place with thin black zip ties strategically placed between pixels, then along the fishing line, and finally along the top of the 2×4 and screwed in using the plastic screw-in holders from the LED tape. For decoding we used the 24 channel DMX512 input DC 5V-24V output 24V x 3A, we used a 3 channel patch for each square so with the 24 channel we had enough for an entire side of squares. To power the decoder we used two 12V power supplies for each decoder (quality power source is HIGHLY recommended specially for big builds/long LED strips).
Final thoughts: The build definitely took longer than expected but was a great opportunity for the community and to sharpen hands-on experience. A lot of prayer, a lot of patience, a lot of laughs, a lot of coffee, and a lot of Jesus.


Leave a Reply
You must be logged in to post a comment.