



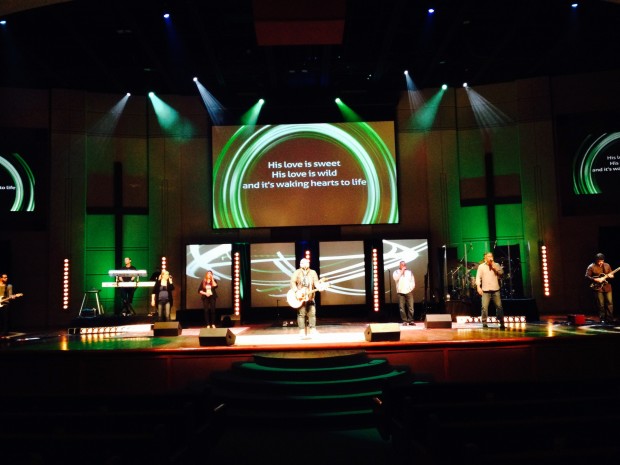
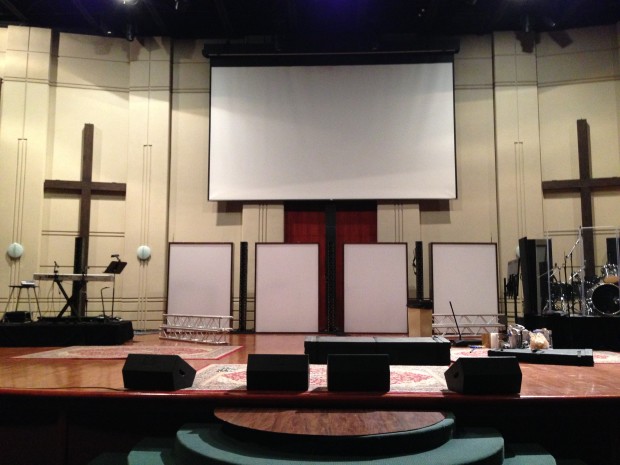
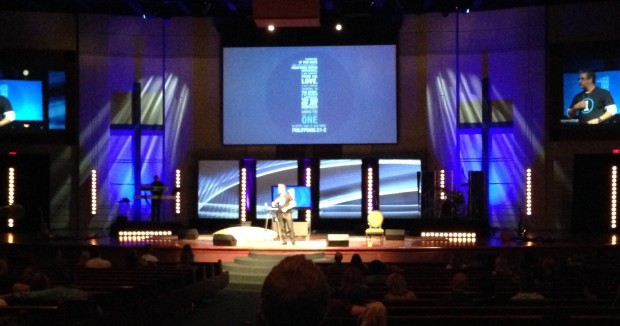
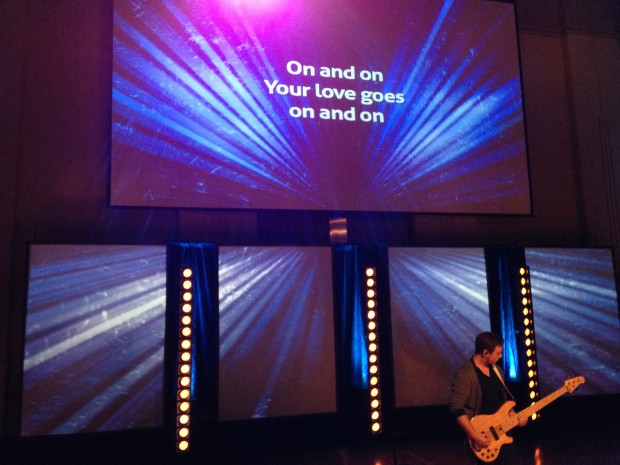
James Tucker from Christ’s Church in Jacksonville, FL brings us these light strips and projection panels.
They already had some 5’ x 8’ spandex shadow boxes left over from another series. So using two Optoma ultra short throw projectors (model W307UST), a Mac Mini running Pro Presenter, and a Matrox Triple Head2Go, they projected video on the spandex. They used the masking feature to add “black” between the screens and to keep bleed off the walls. To get the signal from the Triple Head 150’ through conduit, they purchased a pair of Kanex VGA over Cat 5 extenders (model VGAEXTTX1).
To keep the ground projectors “sync’d” with the lights, they purchased the communications module add on for Pro Presenter. Their console (Jands Vista T2) sent commands via artnet to the Mac Mini. For each service, they created a new show with several song looks and series graphics to make everything match. The Vista would basically tell Pro Presenter which slide to fire per cue.
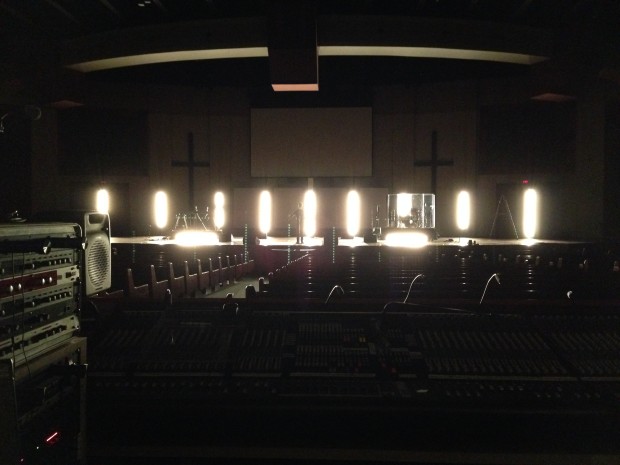
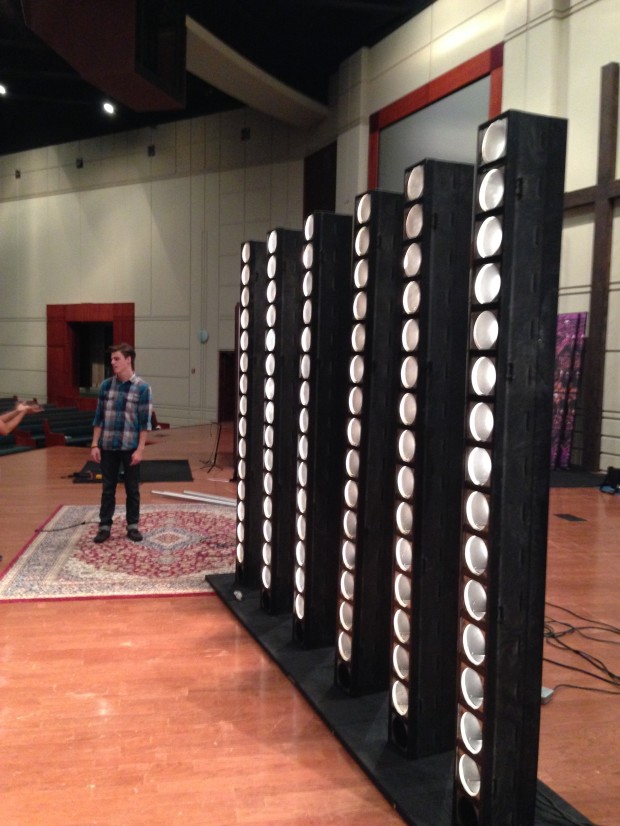
Another addition to the look was 12 light strips to warm up the look. The strips were your common Altman 3 circuit colored border light strips (model R40-8-3) except they took out all the gel and re loaded them with cheap 65 watt R30 lamps as opposed to its original 300 watt lamps. To keep the strips upright, they removed the original yokes and attached a 24” plywood base with a 1/2” bolt through the bottom. They laid two more in front of their band risers.
They wired each strip to its own dimmer to chase during songs. For the most part, they parked them at 20% to give a nice warm glow and peaked them at maybe 40% during chases—not to abuse the audience too much. The price was awesome too: free! James pulled them out of a high school that was being renovated.
The total cost of the project was under $2000. They had some of the items already in house with the exception of the strip light lamps, projectors (rental), cat 5 extenders, and Communications module.
How to Plan a Multi-Panel Projection Stage
This design works because projection, scenic structure, and practical lighting were planned as one system. Separate spandex panels create natural divisions for lyrics, motion graphics, and color, while the masked gaps keep each image looking intentional. Before choosing projectors, draw the stage to scale and mark the screen width, throw distance, audience sightlines, camera angles, and any paths used by musicians. Ultra-short-throw projectors can solve space limitations, but their steep projection angle makes a flat, evenly tensioned surface especially important.
Build and hang every frame before finalizing the media canvas. Measure the visible image area rather than relying only on the outside frame dimensions, then reproduce those proportions in the presentation software. A test grid makes it easier to align edges, focus the image, and create accurate masks. Leave a small amount of safety margin inside every panel so minor movement or alignment changes do not create bright spill on the wall. Dark fabric, black paint, or intentional space between panels can absorb overscan and strengthen the graphic rhythm.
Signal, Control, and Lighting Considerations
Long cable runs deserve the same attention as the scenic elements. Confirm the supported resolution and distance for every extender, distribution device, and adapter in the signal chain. Label both ends of each cable, secure connections where people cannot kick or pull them, and keep a tested spare adapter available. Whenever possible, build a simplified backup look that can run from one output if a computer, splitter, or projector fails during a service.
Linking lighting cues and presentation cues can make transitions feel polished, but automation should remain easy to troubleshoot. Use consistent cue names, document which lighting cue triggers each media item, and rehearse the entire sequence with the same network and control hardware used live. Give volunteers a clear recovery procedure for stopping a chase, advancing media manually, or returning to a neutral look. The warm strip lights in this setup also demonstrate the value of restraint: low intensity added depth and contrast without competing with projected content or shining uncomfortably into the audience.
Budget planning should include rentals, lamps, signal extension, rigging, cabling, and control software—not only the scenic frames. Reusing existing panels and sourcing surplus fixtures can reduce costs, but inspect older equipment before use. Confirm electrical load, grounding, lamp condition, fixture stability, ventilation, and safe cable routing. Any overhead element should use venue-approved hardware and an independent safety method appropriate to its weight and location.
Pro Tips for Projection Panels and Strip Lights
Test with real content: Align with a grid first, then check lyrics, faces, gradients, and fast motion because each reveals different focus, brightness, and masking problems.
Protect the black level: Reduce stray light on the spandex and keep bright fixtures from washing the screens; deeper blacks make even modest projectors look more effective.
Document the signal path: Create a one-page diagram showing outputs, adapters, extenders, projector inputs, resolutions, and network addresses for faster volunteer troubleshooting.
Check every camera: Review the look on wide, close, and livestream shots, then adjust exposure and fixture intensity so the projection remains legible without clipping performers.
Related Designs
- Traditional Projection – See another approach to integrating projected imagery into a church stage environment.
- Strips & Split Projection – Explore a divided projection layout paired with vertical lighting elements.
- Diamond Projection – Use geometric scenic surfaces to give projected content a distinctive shape.
- Projection and Uplight – Combine projected media with simple uplighting for depth and color.
- Shattered Spandex – Turn stretch fabric into dimensional scenic panels with strong visual contrast.
Related: Offset – Compare four separated projection panels with a white wood-strip backdrop, including masking and lyric-layout ideas.
Related: Hyper Techno Dots – For another layered lighting approach, explore a perforated wood backdrop that combines small glowing dots with larger light boxes.



Nice! thanks for the tech tips on the sync of backgrounds.
Real classy design. Of course I like all the screens too!
What program did you use for the masking feature?
Did you front or rear project?