


Sats Solanki & Rob Whitehead from Hope City Church London in Shoreditch, London brings us this cool glowing cross.
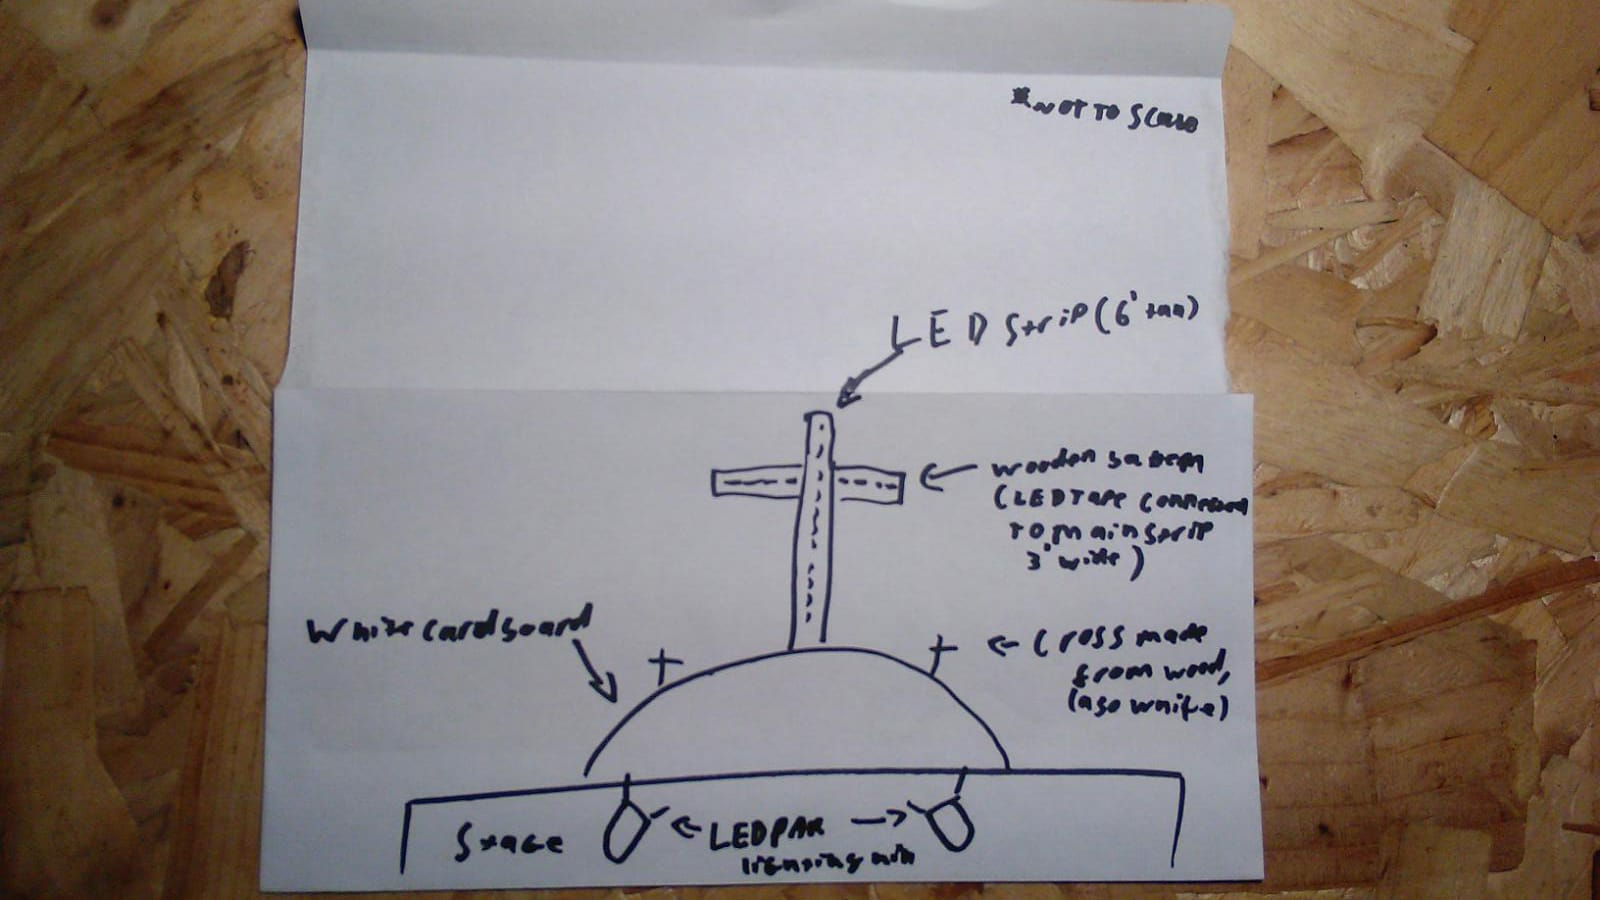
From the team: For an Easter theme we planned to make a light-up cross with a semicircle of cardboard representing Golgotha and the two crosses of the two thieves. (Fig. 1 the initial idea on the back of an envelope)
We later abandoned the hill and other crosses and stuck with the illuminated cross, but switched to fluorescent tubes and again to LED fluorescent tubes for simplicity of wiring.
Parts:
B&Q (diy.com)
2x Diall T8 LED Tube Light bulb (1213mm)
2x Diall T8 LED Tube Light bulb (604mm)
7x Timber connector
1x 10m 2 core 1.5mm² flex (not all used)
1x 15A terminal block (the lights barely use 1A, but the 15A blocks have more space in them)
1x single back box
1x single blanking plate
Screwfix (screwfix.com)
8x 1″ tool clips
RS Components (rs-online.com)
8x T8 cap push-on
1x Re-wireable IEC C14 (male kettle plug)
Already on hand:
~4m 25x25mm Timber (painted black)
~35 screws
2x 90° angle brackets
~8 cable clips
Total cost: £91.23 ($119 USD)
Labour: 3 hours
Construction:
The timber was cut down to two 120cm and two 45cm lengths, and screwed together with timber connectors to form the shape of a cross (Fig. 2), onto which the tool clips were screwed. The clips for the horizontal tubes were raised using a few small blocks of wood to clear the vertical tubes. The cross is hung from the back wall of our stage on screws through the seventh timber connector.
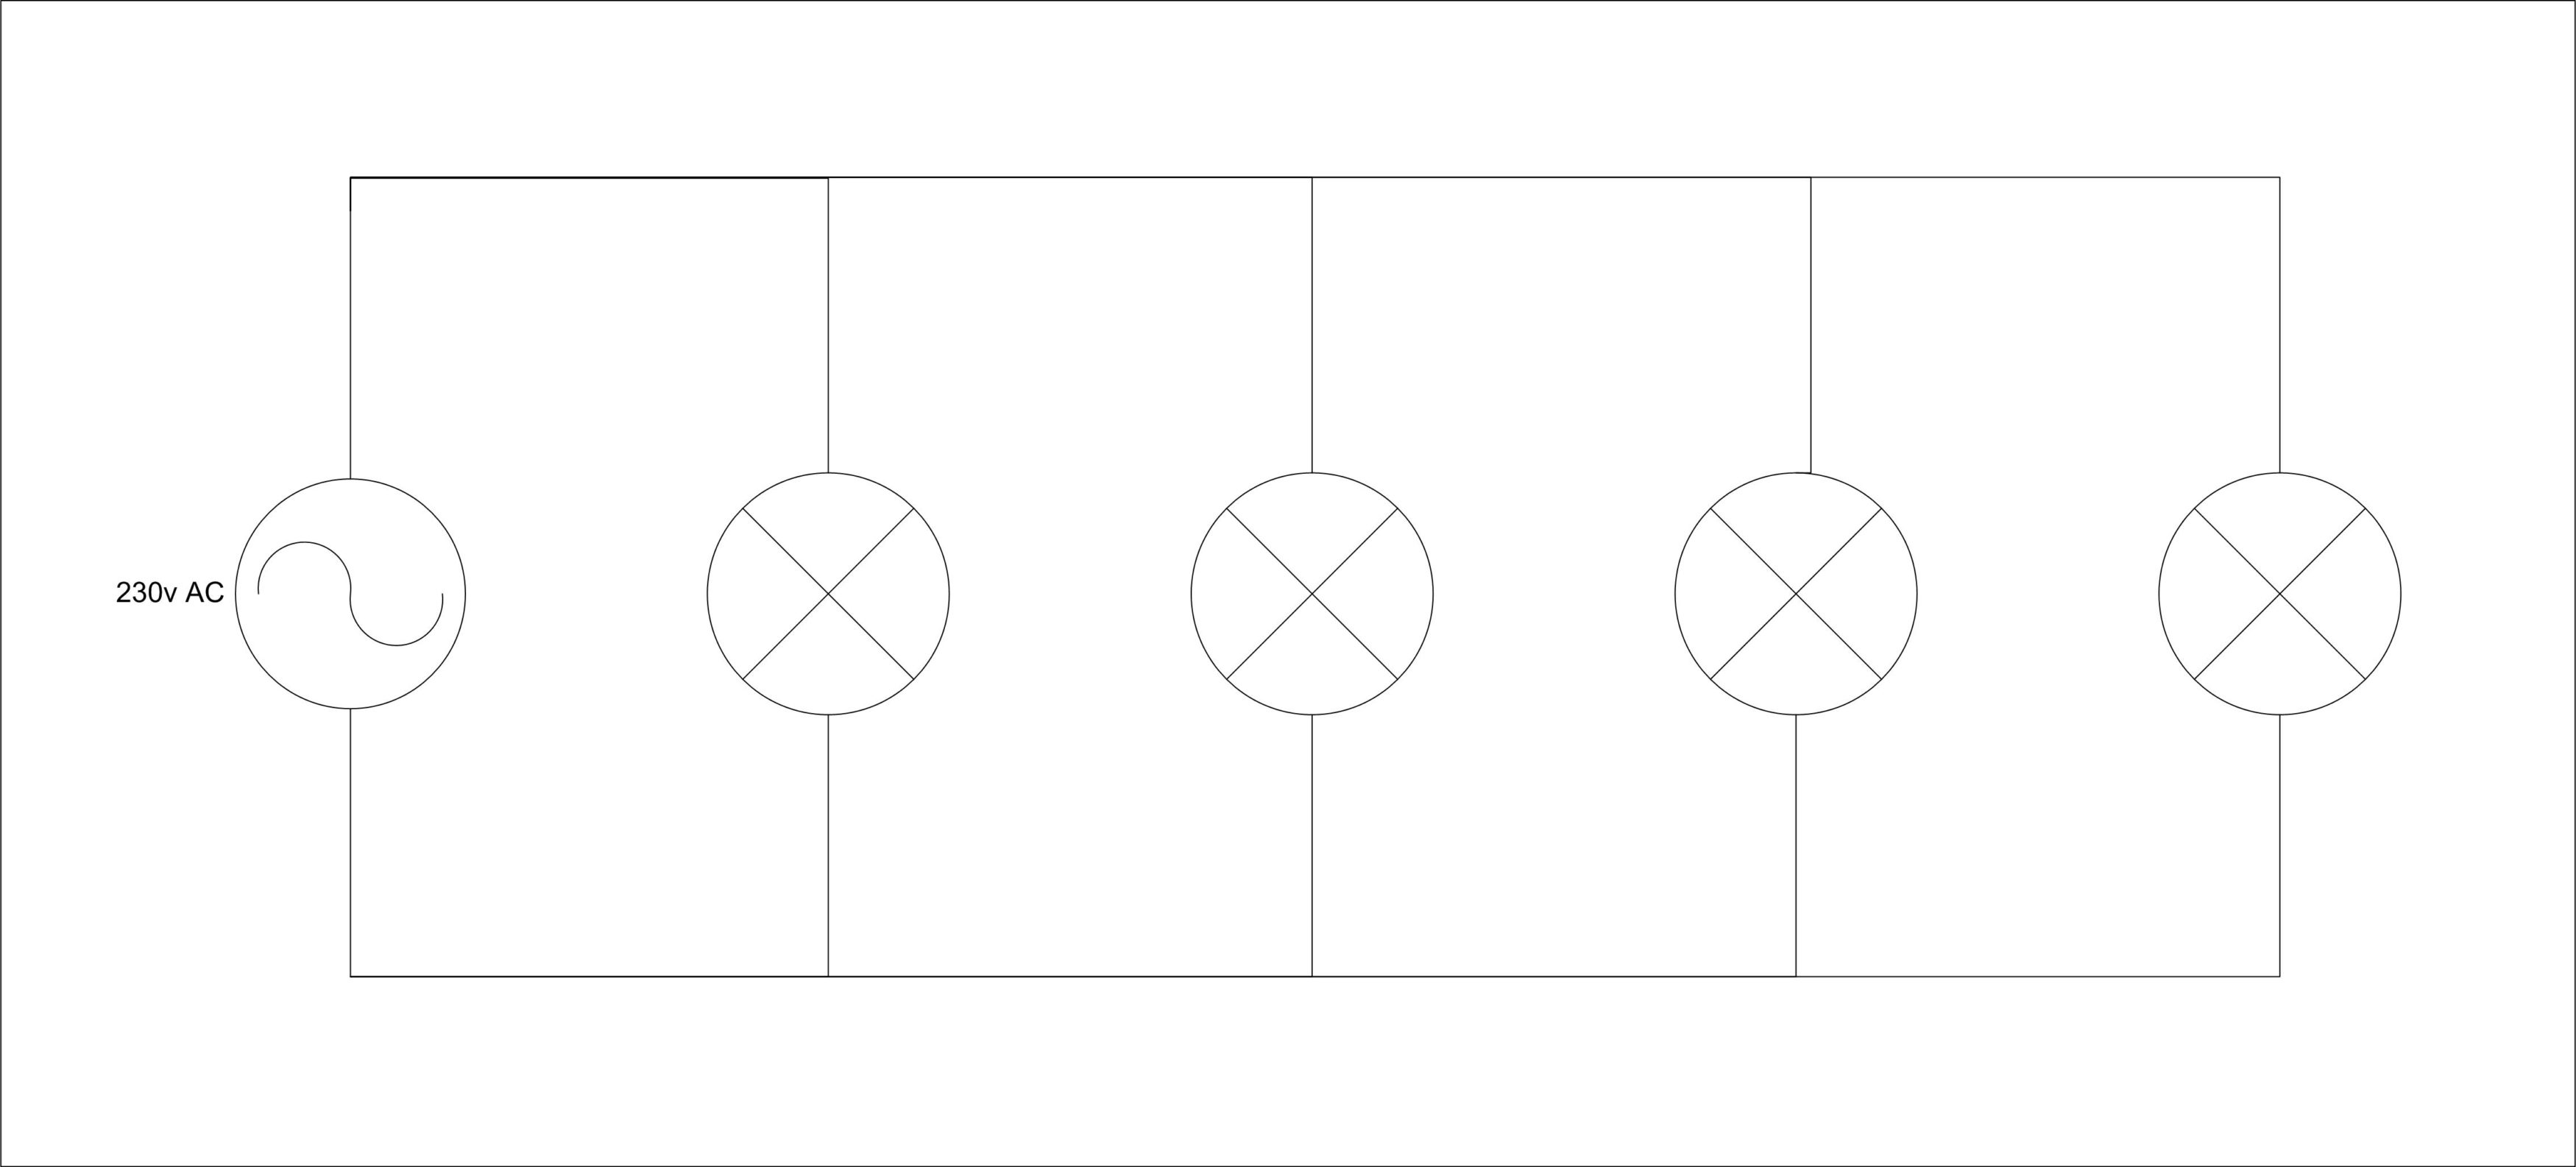
Electrically, the flex was cut into five lengths: four to run to the bulbs and one to the supply (Fig. 3). They had both ends stripped one end connected with a terminal block and the other pushed into the base of the T8 push-on caps (Fig. 4). The other end of the tubes were also covered with push-on caps as these are live when the unit is powered on. The fifth was wired into the C14 connector. The terminal block was placed inside a surface mount back box with a blanking plate and attached to the back of the cross. Cable management was achieved with cable clips along the back of the cross.
LED Fluorescent tubes:
We decided to use the LED replacements for traditional fluorescent tubes as they don’t require a ballast or a starter and just work off of 230v mains voltage (they do come with a ‘LED starter’ for retrofit into existing installations, but all they contain is just a small fuse). These particular ones are the DIY shop’s own-brand tubes and are 4000k at 1600 lumens, which is bright enough for our needs and roughly daylight in temperature . They’re actually surprisingly cost effective as they are effectively mains rated white LED tape in a diffuser. If you want a different colour simply wrap the tube in a lighting gel (such as everyone’s favourite: Lee 162!)
Control:
While originally intended to be at full brightness all the time, we have connected it to a dimmer pack which allows us to dim it to whatever intensity we like; usually between 10 & 20%. We have found a quirk of the tubes – when the tubes are supplied less than 10vAC, the tubes flicker, so the minimum we can dim to without flicker is 5%.
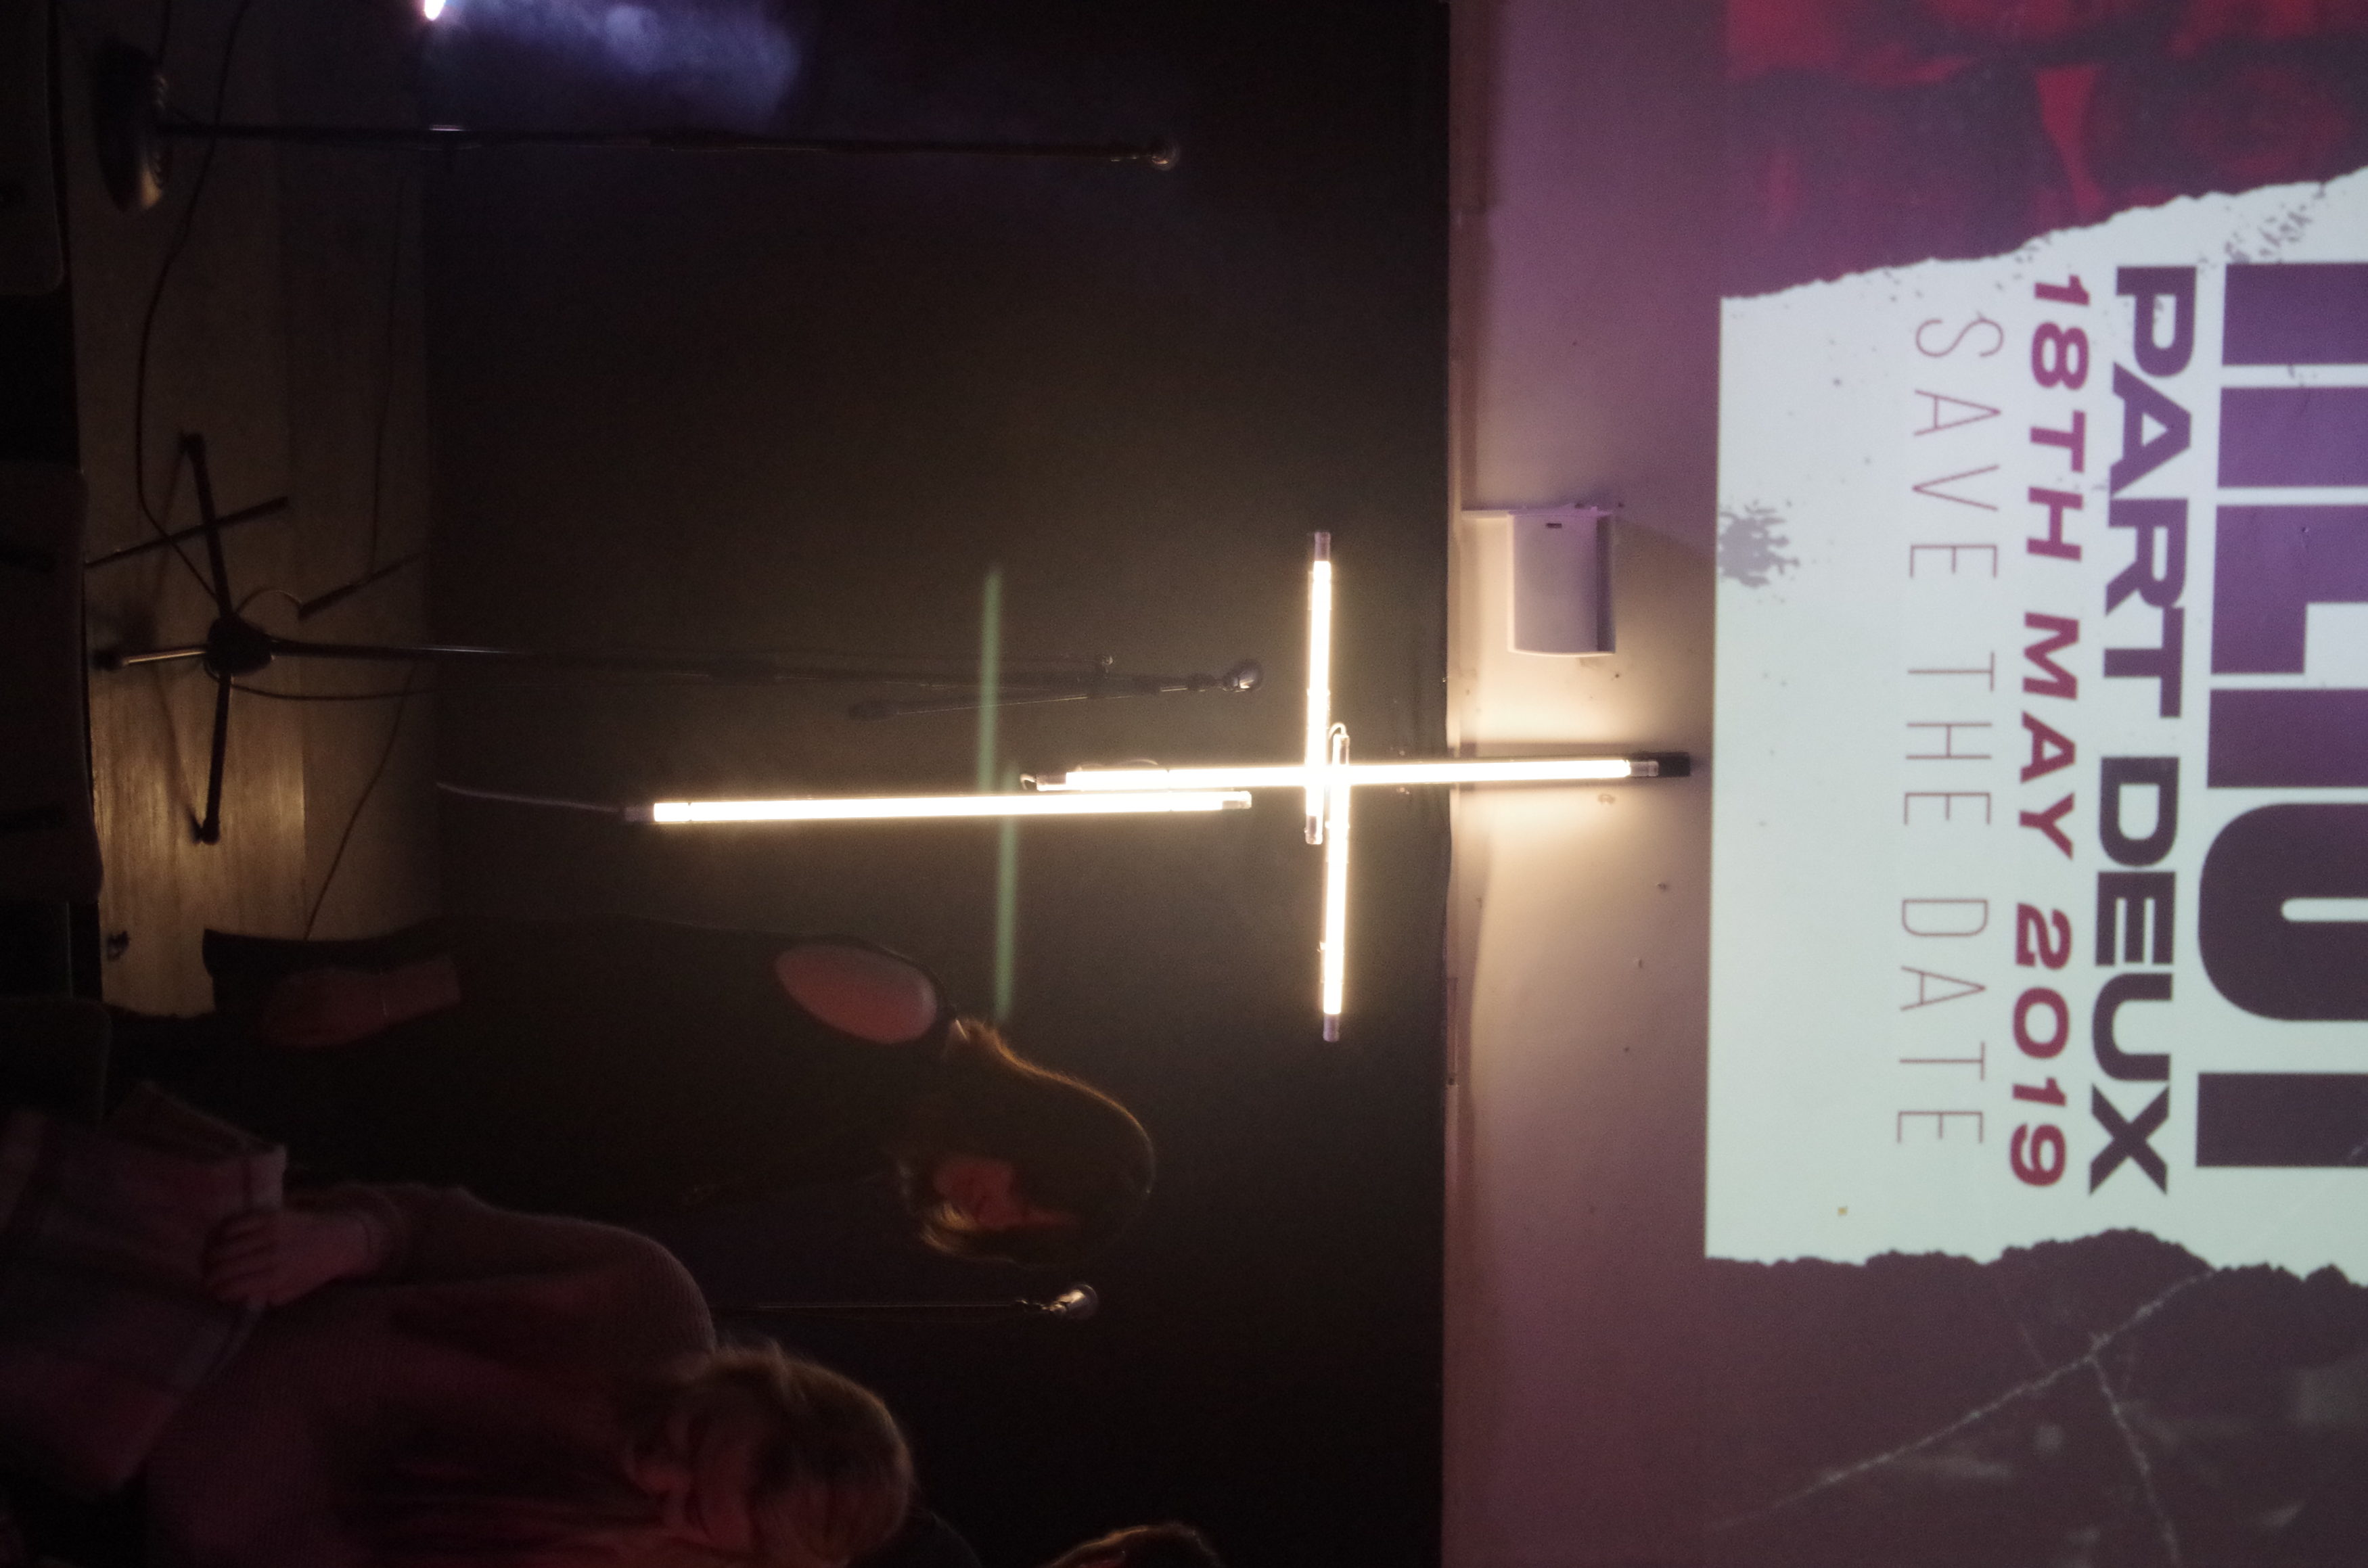
Fig. 5 The cross in situ, powered up
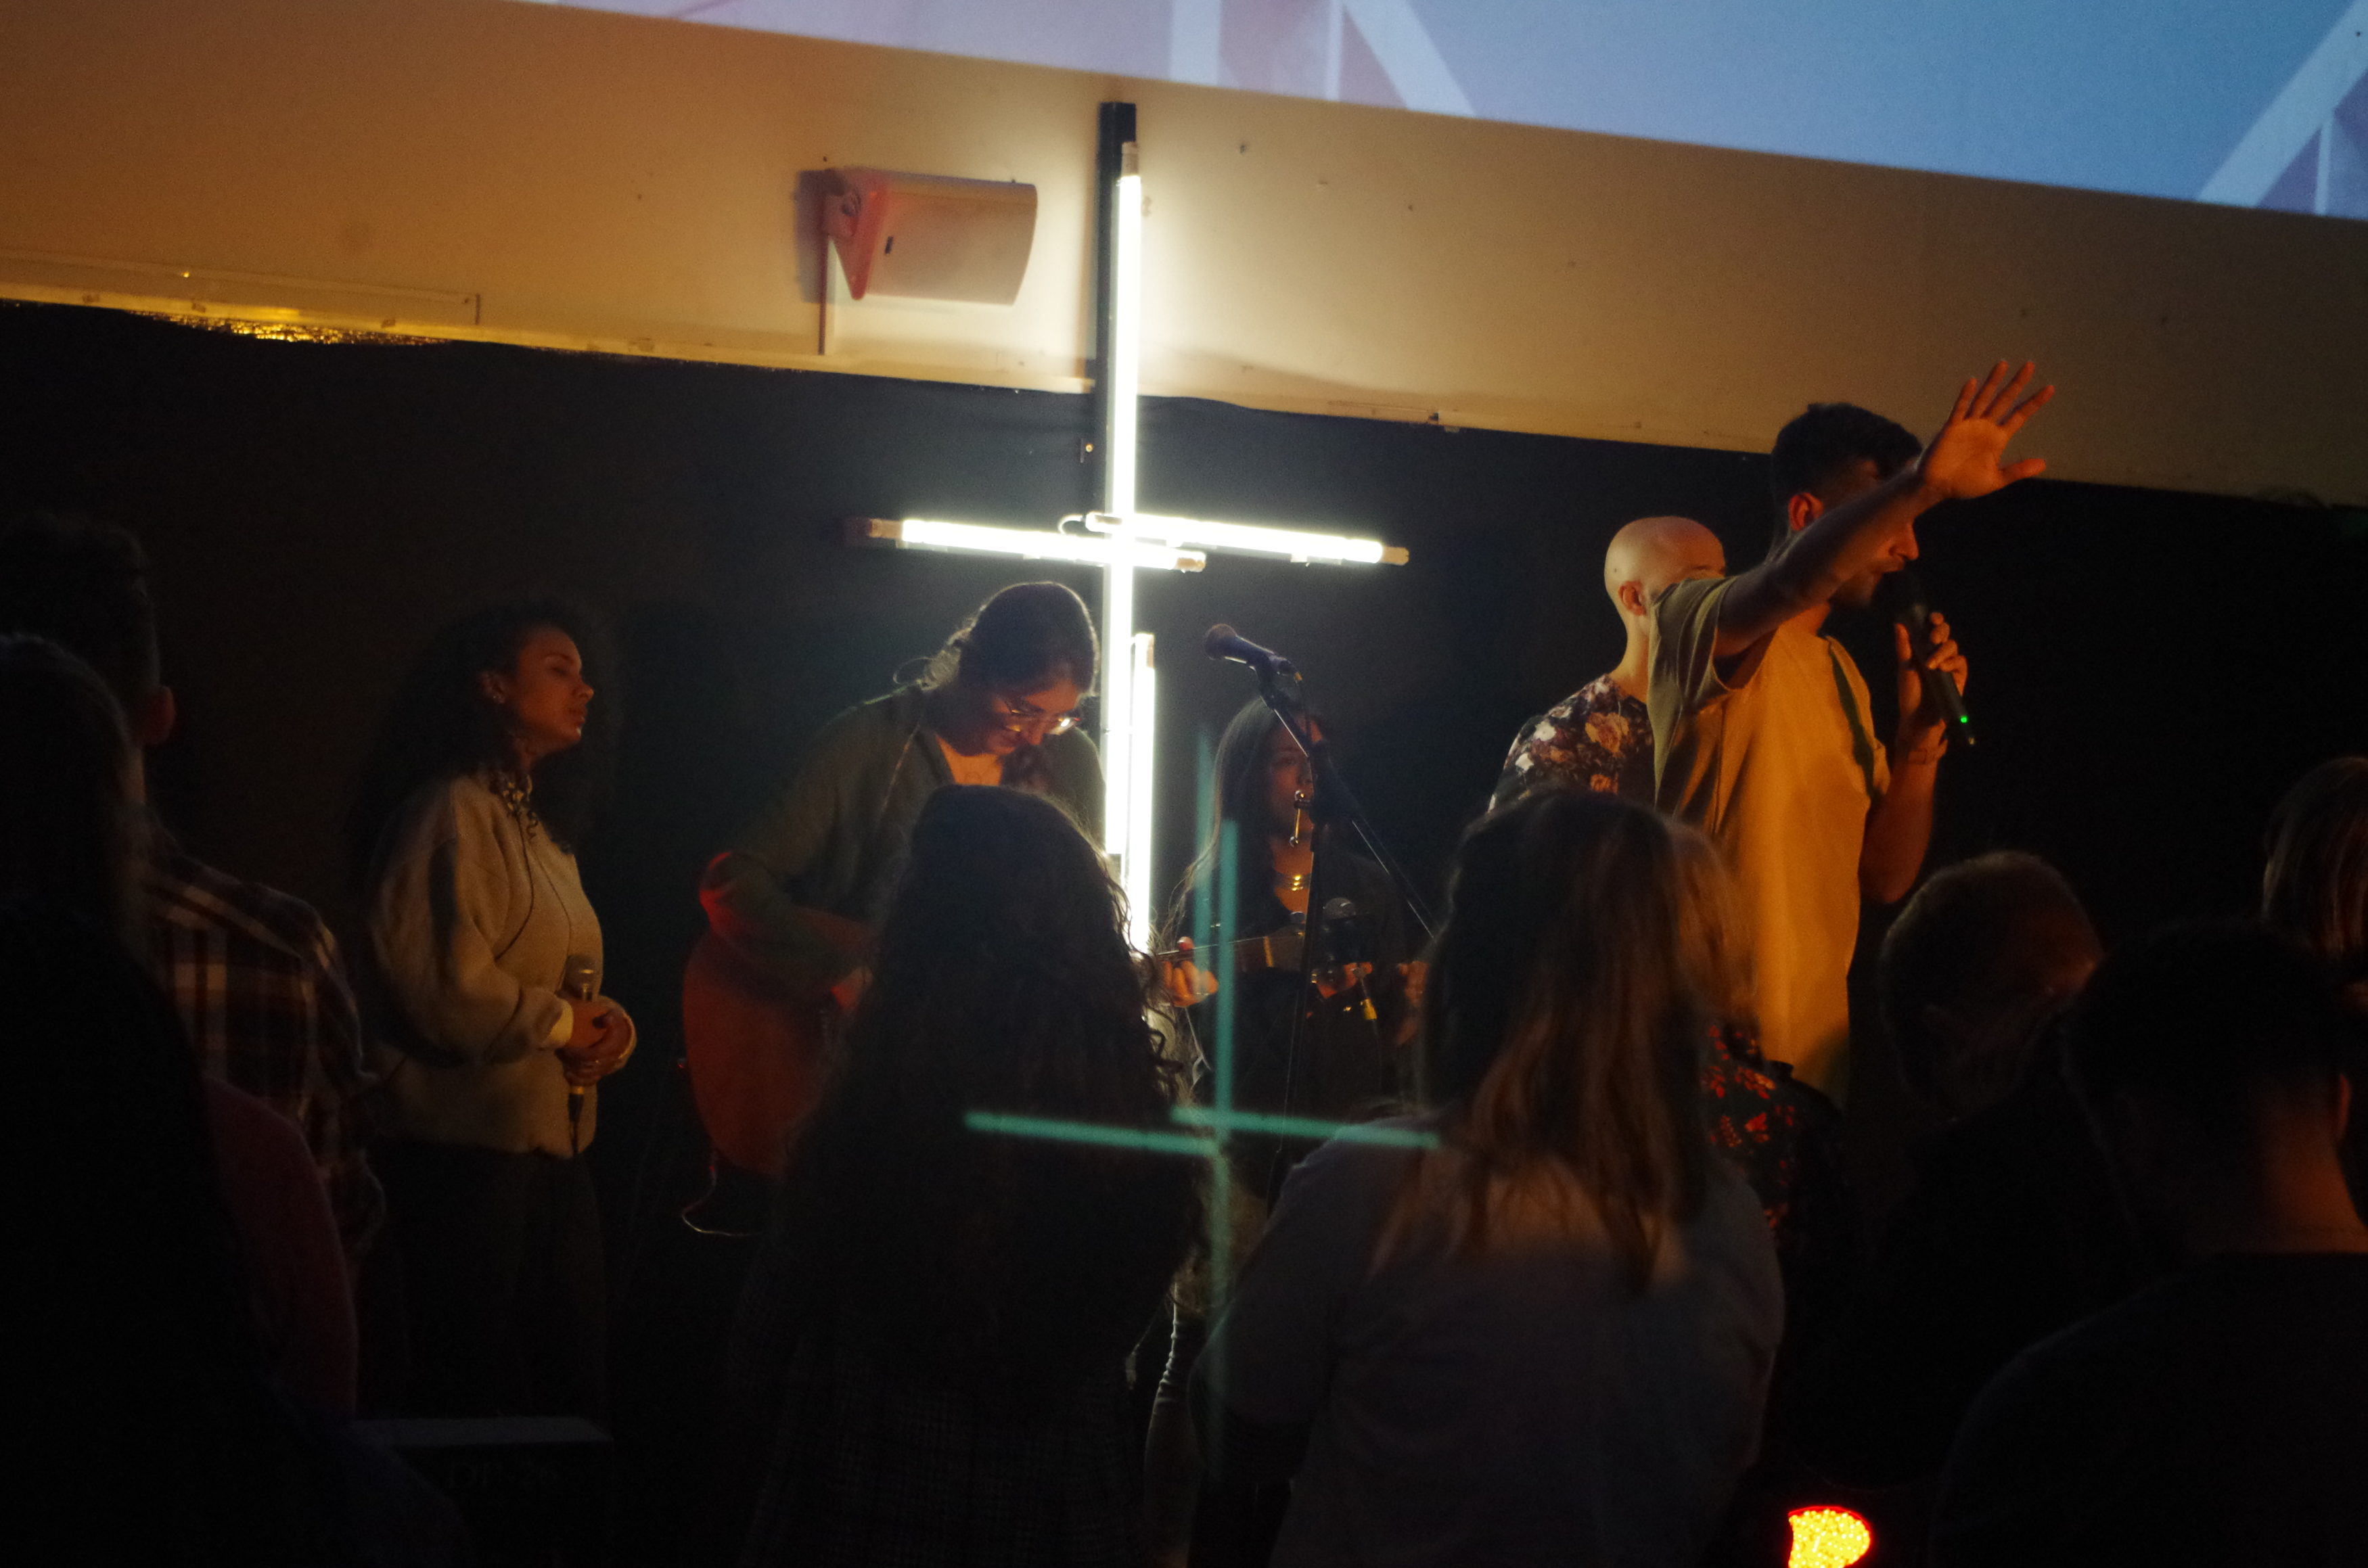
Fig. 6 The cross, mid service


AMA on this design, happy to answer any questions