


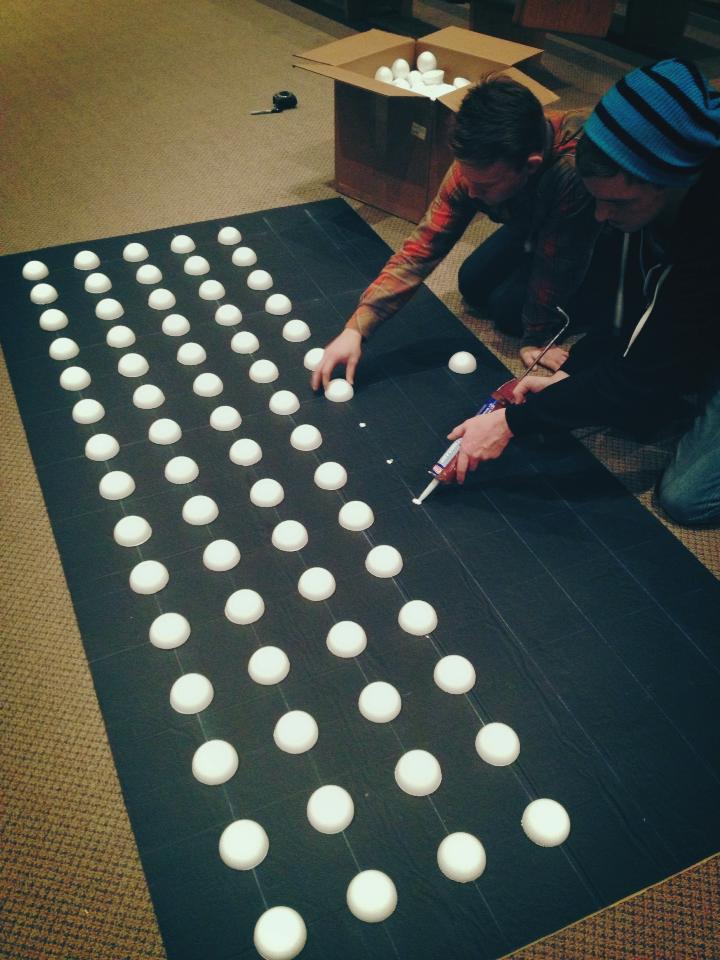
Ryan Sharp, Michael Thompson, and Nate Click from Evergreen Christian Community in Olympia, WA brings us these great grids of dots and spots. (Originally posted July 2013)
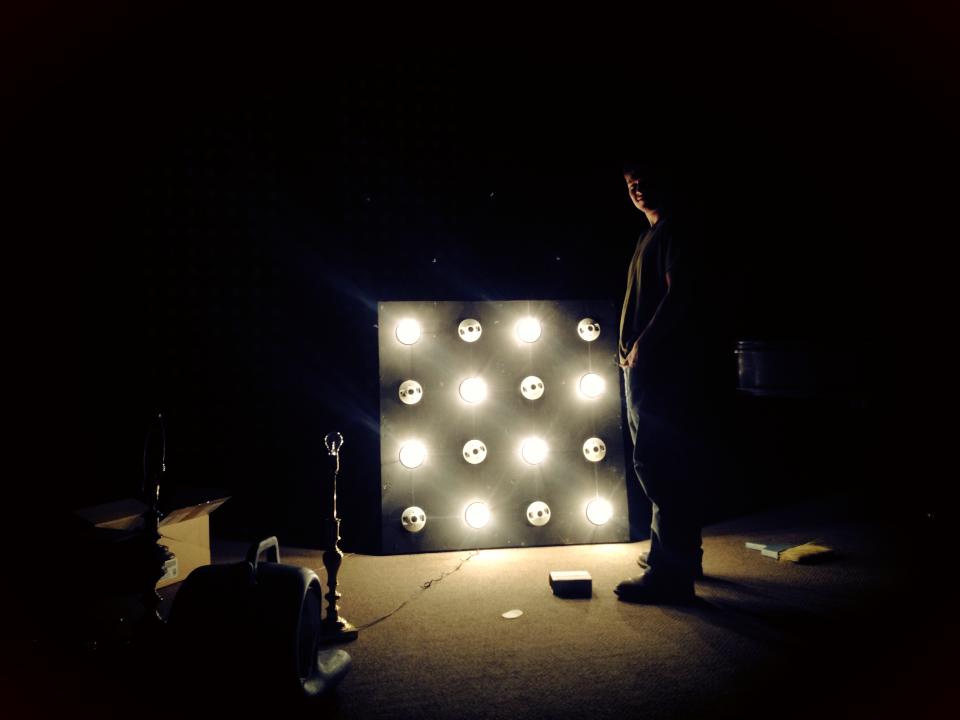
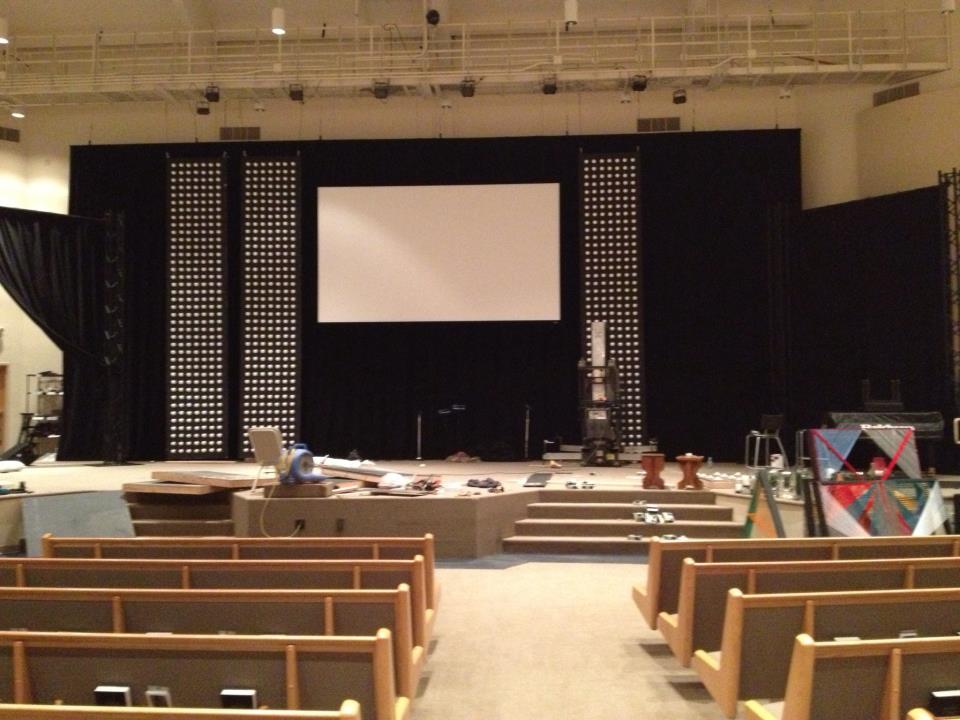
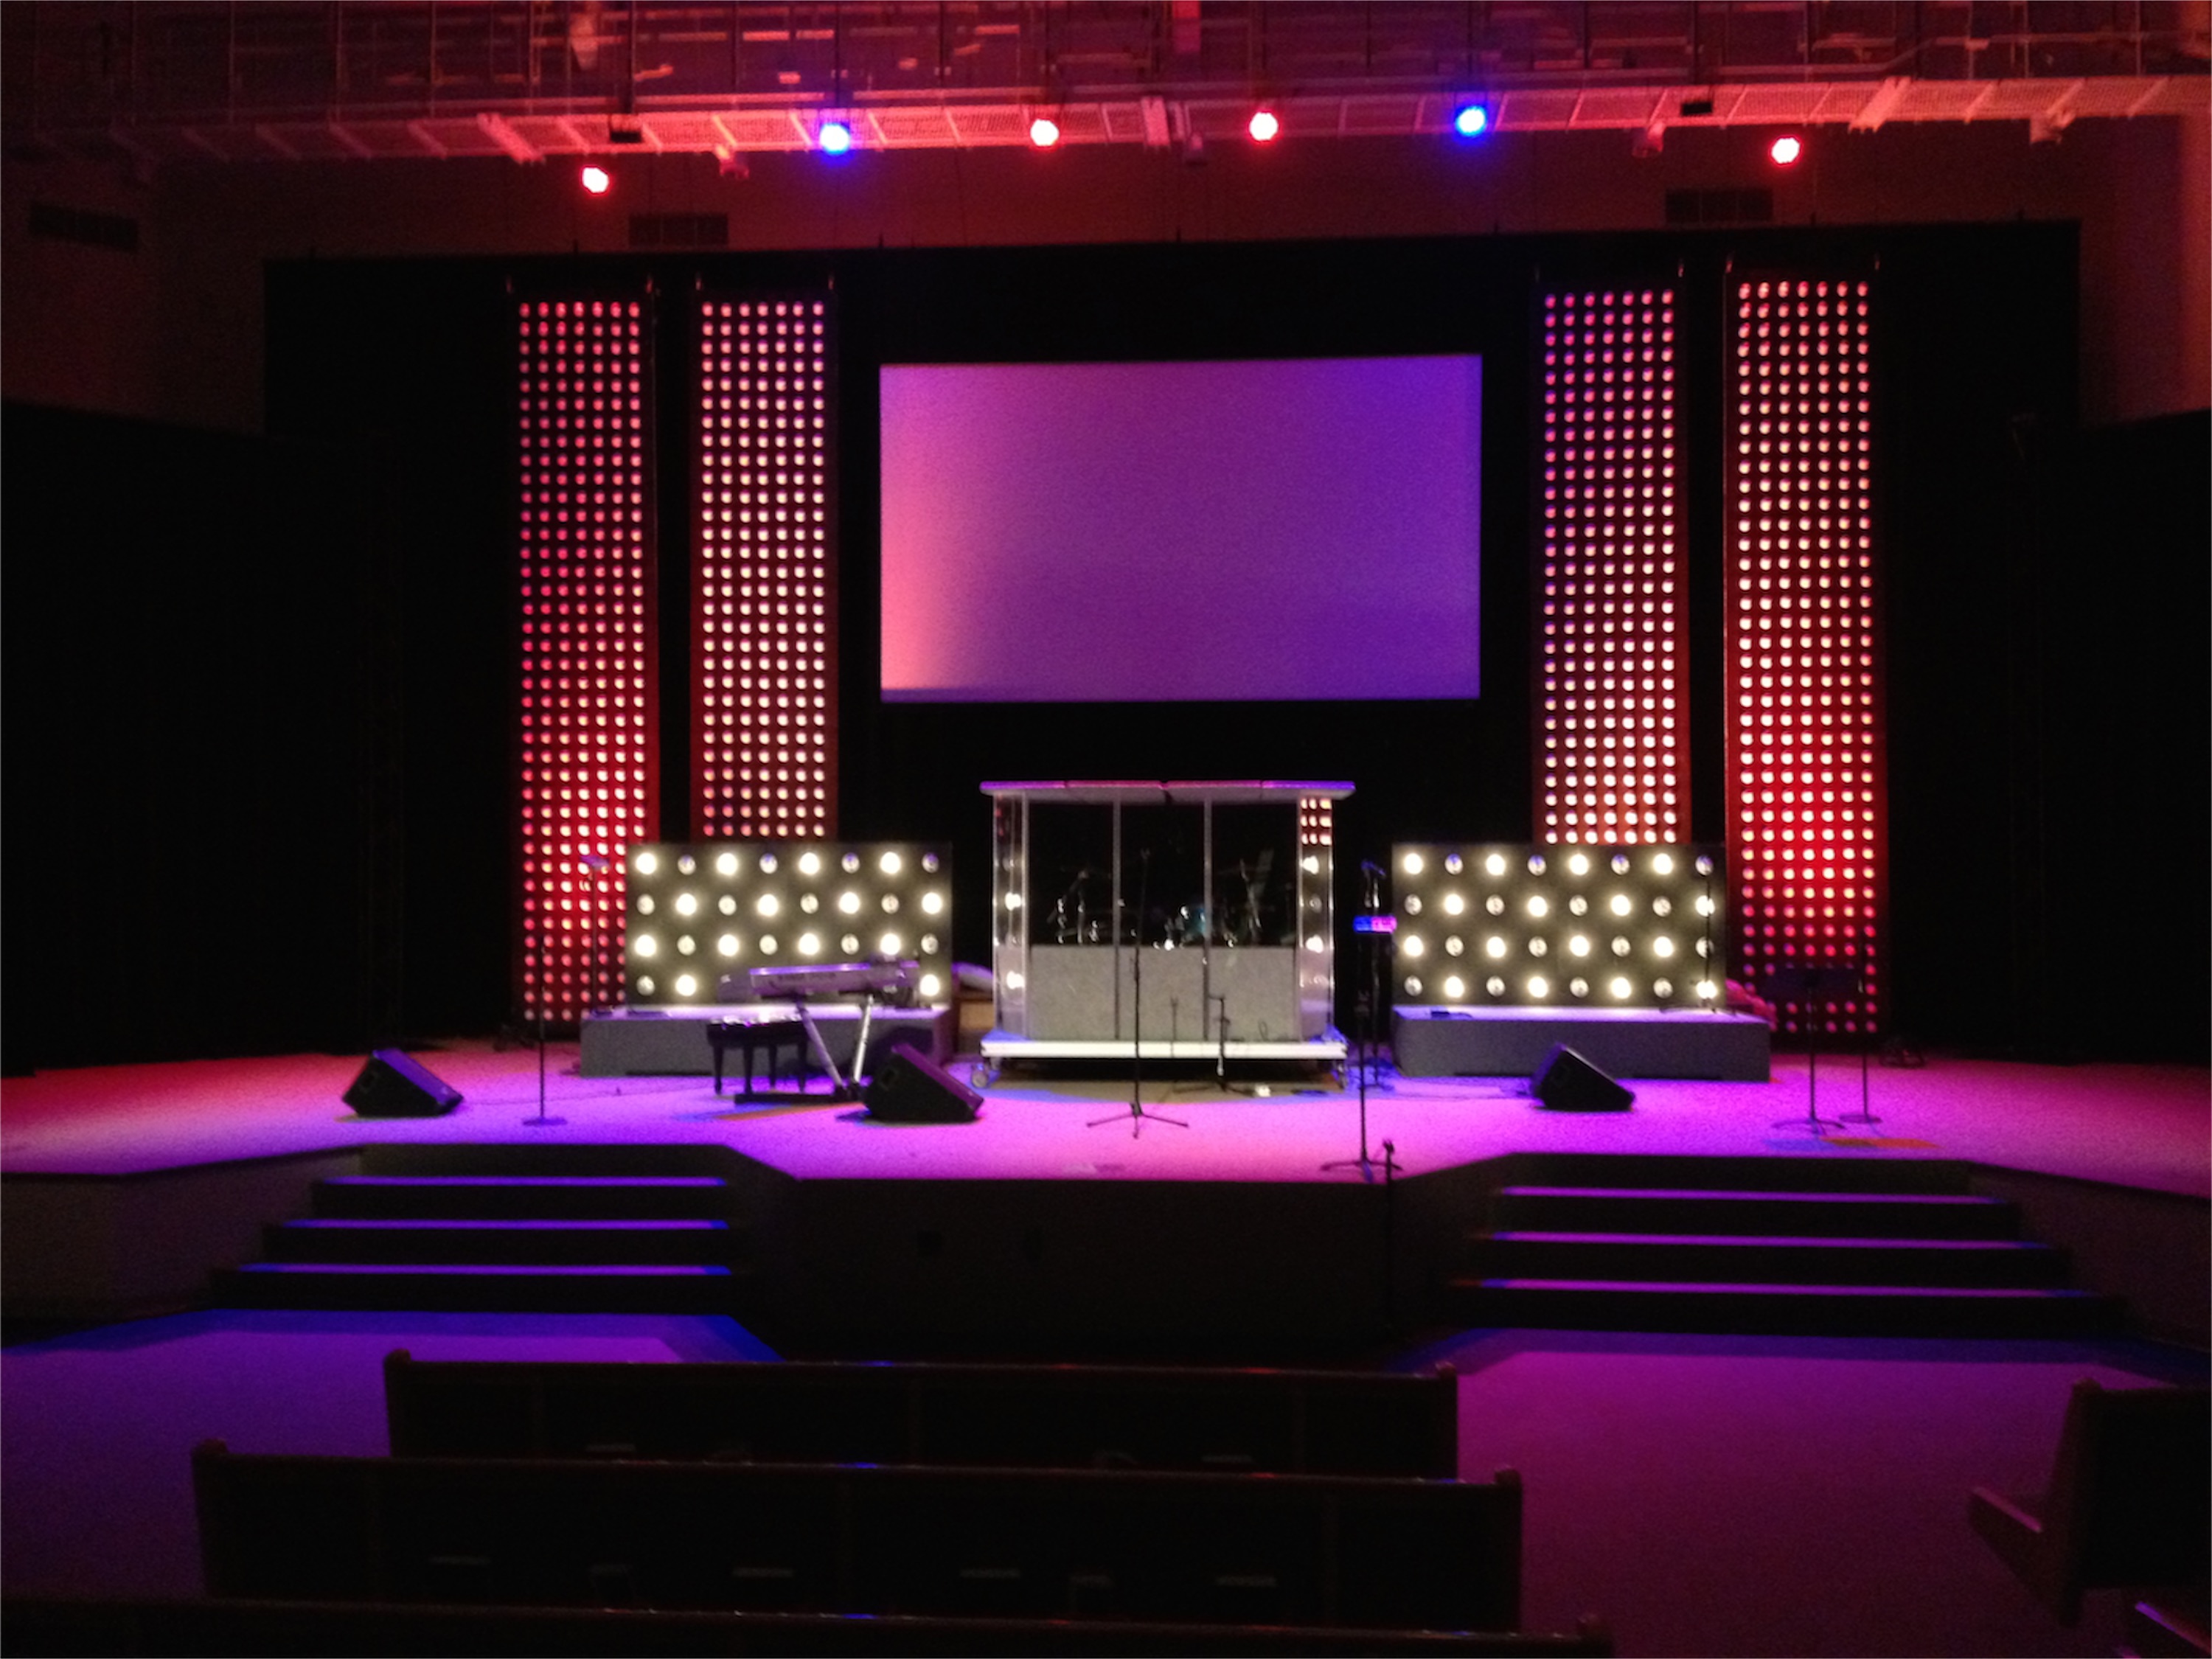
They wanted a design to frame their center screen. They mounted thousands of 3″ half styrofoam balls on insulation board and mounted them to their catwalk. They also wanted floods so they built six 4′ x 4′ frames, drilled holes, and put 96 fixtures that housed 96 30-watt bulbs on 12 separate dimmers so they could control them. The balls were lit with LED lighting both from the top and the bottom.
They’ve changed the set around a few times by moving the floods around in various spots on the stage.
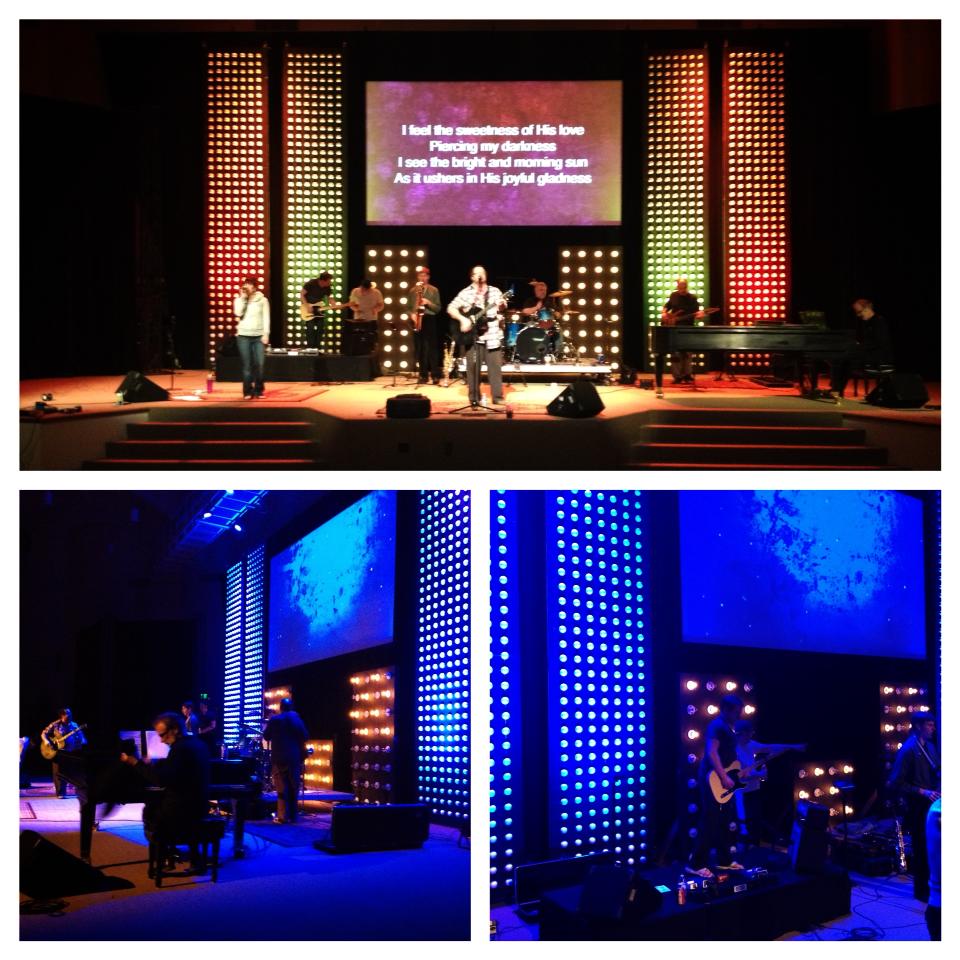
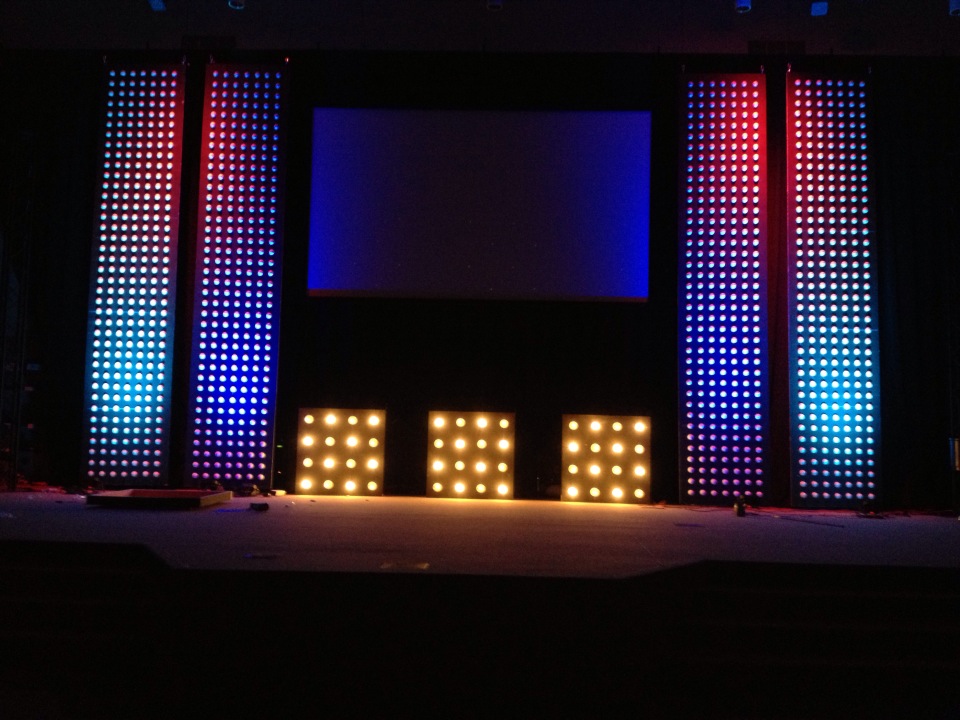


Amazing that such a professional look can be achieved with nothing more than styrofoam balls, insulation board and inexpensive lighting. I like the modern look, especially with the purple/blue lighting.
were can i buy 3″ half styrofoam balls can you link website thank you
http://www.plasteelcorp.com/ is where I purchased them.
We are looking at doing something similar, what did you use to cut the balls? and how did you mount the insulation boards to each other and to the ceiling? Looks awesome! Great job!
Thanks! We ordered them already cut from the website above. We used foam Locktite to glue the boards together and locktited light, long wood scraps to the back to brace them together. We then locktited a metal strip to the top and put 2 climbing carabiners on each side. We mounted the pillars to our catwalk using black rope tied to the carabiners.
Hope this helps. Good luck
Thanks so much!! we will give it a shot!!
Looks great…going to try this…where do I get insulation boards?
love the floods! How did you set up the electrical stuff? what kind of fixtures? are those reg flood bulbs?
They were simply light sockets that we installer to the wood we cut. We drilled holes and wired them from behind. We used simple black and white cable to connect the light fixtures. The bulbs were your run of the mill 30 watt light bulb. With 16 bulbs per square it created a DIY flood. Ok the ends of the wire we put Edison plugs and plugged them into dimmers for DMX control.
Hope this helps
Did you paint the foam black ?
What are you lighting the panels with?
We did the exact same thing, except with styrofoam ice cream bowls. At 1/10 the price of the styrofoam balls. The bowls are almost the identical shape… 1300 bowls look great on an 8′ X 60′ wide back wall.
Do you have pics of the look you achieved with the ice cream bowls?
I would love to see a picture of that using the styrofoam bowls. Would you please send me a few pictures to Don.ciccio@comcast.net
Yes. In fact I just learned that it will be featured on this website later this month.
Ryan,
What are the dimensions of your projector screen?
Our screen size is 16′ x 9′
Hey Ryan,
Did yall make the projector screen, or purchase it?
In the process of wanting one the exact same size and wondering
which is the best route to go about it.
Here is the post about the bowls.
https://churchstagedesignideas.com/2013/08/06/a-spread-of-cups/
Were the insulation boards already black, or did you paint them? IF you painted them, did you spray or roll on the paint? If they were already black, where did you purchase them?
Looks great!
It looks like you put material over the insulation boards to give it that black color? Is that true or did you purchase them this way? Kind of like Adam asked, where did you purchase these? (especially that big of a size).
Also, on your wooden boxes what are the things you put on there that aren’t the light bulbs? IT LOOKS AWESOME!!!
Thanks for your questions! We rolled black paint on insulation board that we got from Home Depot. To make them long, we braced them together in the back with light wooden pieces that were Locktited (glued) to the boards.
The wooden boxes only had light bulbs on them. I think what you’re seeing is the dimming effect with them we achieved by having the lights hooked up to different dimmers so we could control 2 channels per box.
Hope this helps
HEY awesome job on this stage design my question is, what is the distance between each of your styrofoam balls and the dimensions of the the foam you put them on.
Trying to figure out how many balls I would need to make this project happen
Did you paint the metallic side or the white side? Did you peel the thin layer off?
I was wondering do you think it is possible to make a portable set design for this? Our church plant meets at a hotel conference room that holds 100 people. Thanks.
I so would like these in our Youth Group room with our new updated room would look great. Thanks for sharing!
How far apart did you put the balls? The length and width? Thanks so much !
Hey guys I was wondering if I used LED strips to light the panels. Thinking of having them all over the boards between the balls. Do you think this will work?
Any ideas?
Just wanted to say thanks, guys. Did this at church, looks incredible – photos don’t even do it justice. Thanks for sharing the idea!
Can someone do a video tutorial if this with specifics…