

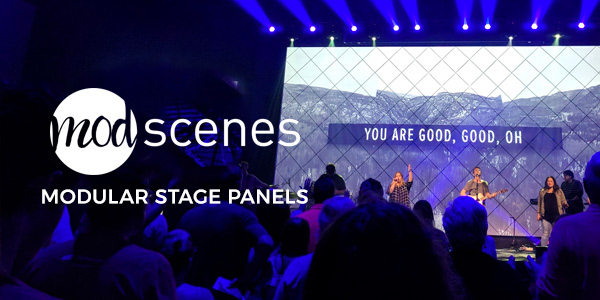
Robby Schlegel from Discovery Church in Orlando, FL, brings us this cool constructed-looking set.
For this set, they wanted to create dimensionality behind the band risers to help create as much natural depth on camera as possible. The idea came from attending a concert at an old theater and wanting to create a stage look with an industrial, brick-and-mortar feel.
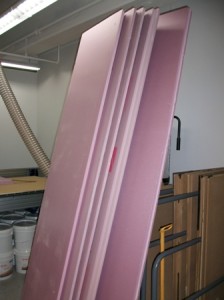
Robby found a blog post on creating faux I-Beams out of pink foam board insulation and stopped at the gray paint step, as he didn’t need the “grunge” look for this design. They constructed 12’ x 12’ frames out of 2” x 6” board, bolting them directly to their stage and rigging them with aircraft cable to their lighting grid. This eliminated the need for large legs to prop up the set from behind and saved valuable stage space.
They screwed the foam I-Beams to the wooden frames and then covered the screw holes with fake bolt heads made from slicing square and round dowel rods to ¼” pieces that were glued and spray-painted a dark metallic gray. They used 1” x 4” boards to make an “X” in the center of the I-Beam frames (painted the same gray as the foam) and glued RGB-LED strip lights to the “X’ and surrounding frames. Their LD even found he could rig some of their smaller LED wash fixtures to the top frame of the set, which helped him with his lighting design.
For the center backdrop, they used 4’ x 8’ sections of faux brick paneling (available at Lowes) and foam I-Beams to cover the seams between the panels. Cutting 9” holes in the brick paneling with a router and circle jig, they fastened aluminum reflector work lights in place to make the backdrop “pop” on video. (Idea taken from Deer in the Headlights). They were surprised to see how well the reflectors caught color from the LED Cyc lights used to light the set.
By scaling down the size of the beams and eliminating some of the more technical elements (LED strips and reflector lights) from the design, they were able to copy the design at one of their satellite campuses with ease.
Materials List:
• Pink ¾” rigid insulation foam (5 sheets)
• Aluminum reflector work lights (20)
• Brick Paneling (9 sheets)
• RGB-LED Strips (10 strips)
• 1 and 1/4” square dowel rod (2)
• ¾” round dowel rod (2)
• 2” x 6” (14 – 12’ long boards)
• 1” x 4” (12 – 8’ long boards)




Planning an Industrial Church Stage with Faux I-Beams
Discovery Church’s design works by separating the band risers, structural-looking frames, and brick backdrop into visual layers. The foam beams suggest substantial steelwork without requiring the scenic finish itself to be steel. Before adapting the look, sketch your stage from above and mark musician positions, screens, entrances, and camera locations. Leave enough space between scenic layers for equipment access and lighting. Check the view from side seating as well as the main camera; a convincing center view can still hide a musician from another angle.
The original twelve-foot frames describe this particular installation, not a universal construction plan. For a smaller room, begin with a scaled drawing and one sample beam section. Compare its width against a person standing onstage and view it from the back row. Narrower beams and fewer frames can preserve the industrial character without overwhelming the platform. Keep the distinction between decorative foam and the supporting structure clear: the foam creates the appearance, while a separately designed support system carries the loads.
Testing Foam Finishes and Brick Panel Seams
Make a small material sample before painting every beam. Use adhesives and coatings identified by their manufacturers as compatible with the exact insulation foam you have selected; some solvent-based products can damage foam. Test the entire sequence, including any primer, gray finish, and faux bolt attachment, and allow it to cure as directed. Review the sample under your stage lighting rather than relying on its appearance in a workshop. A finish that looks metallic nearby may need a different contrast level to read clearly on camera.
The original team concealed brick-panel seams with foam beams, making the joints part of the composition instead of a distraction. Lay out the panel joints and beam positions together before cutting materials. Consider how the brick pattern meets across neighboring sheets and where a beam can naturally cover an edge. If your adaptation includes reflector openings, mock up one panel first and confirm the fixture mounting, ventilation, cable access, and required clearances before repeating the cutout pattern.
Lighting the Layers and Organizing the Build
Try the scenic lighting in separate groups: the perimeter and diagonal LED strips, the brick wash, and the reflector accents. Bring up each group individually, then combine them with the normal lighting on faces. This makes it easier to find hotspots and judge whether the scenery supports the people leading the service. Check the actual video feed for clipped highlights, visible LED points, or flicker, and test speaking and music cues before the installation is considered finished.
Divide volunteer work into sample preparation, foam finishing, panel layout, and labeling. Keep a cut list and photograph a completed section so repeated pieces match. Estimate the full adaptation cost, including suitable supports, approved hardware, cable management, coatings, and labor; the original materials list is not a complete current-price budget. Have qualified venue personnel review structural attachments, overhead rigging, electrical work, and the fire suitability of scenic materials. Do not copy the described aircraft-cable arrangement or attach fixtures to a decorative frame without an installation-specific assessment.
Pro Tips for Faux I-Beam Stage Designs
- Prototype the bolt detail: Attach a few sample dowel pieces to a finished foam offcut. Check their spacing and contrast from the congregation’s viewing distance before producing a whole batch.
- Keep maintenance accessible: Plan removable scenic sections around power supplies, LED connections, and reflector fixtures so a failed component can be serviced without dismantling the entire backdrop.
- Separate scenery from structure: Treat foam beams and brick facing as visual finishes, not load-bearing members. Have the responsible installer specify supports, attachment points, and any fixture loads.
- Record the repeatable look: Label panel positions and lighting groups, save the final cues, and photograph both the front and rear of the installation to simplify resets and future adaptations.
Related Designs
- Shine – Compare reflective window frames and industrial lighting for another layered stage atmosphere.
- Paint Can Lids – Explore an industrial-looking backdrop built around repeated paint cans and pallets.
- Angels and Demons – See a different approach to creating architectural texture with a painted foam wall.
- Tilted Rectangles – Compare lightweight foam scenery with repeated shapes and angled placement.
- Light Squares – Explore wooden frames outlined with LED tape for a simpler illuminated framework.
Related: Here Piggy Piggy – Explore a cardboard piggy bank and foil-covered foam coins for a giving and generosity stage design.


Hey Robby! Thanks for sharing this with us. I’ve seen it in person and it looks great!
Thanks Chris!
I LOVE THIS!
Thanks Eric! It’s definitely one for the books for our team. I hope it offers inspiration for your stage!
I love the use of the CMG motion you are using that is part of the CMG Carbon Bundle. It is a unique motion background and the design fits your stage setup beautifully. Great job. http://www.churchmotiongraphics.com/products/carbon-bundle/
Thanks Jeff! It’s a good one :)
Wondering what is your stage floor made of?
Hey Kyle,
Our stage is a medium color wood laminate.
Looking good bro!
What kind of light bulbs did you use?
The lights were cheap work lights from Home Depot with chrome reflector bulbs so you didn’t see the filament on camera. This softened it and made the work light itself pop instead of the bulb.