John Wallace from Grace Capital Church in Pembroke, New Hampshire brings us this stunning stage design inspired by a conference presentation.
John had $500 to spend on the stage, so he wanted to make sure he could get multiple uses out of the design.
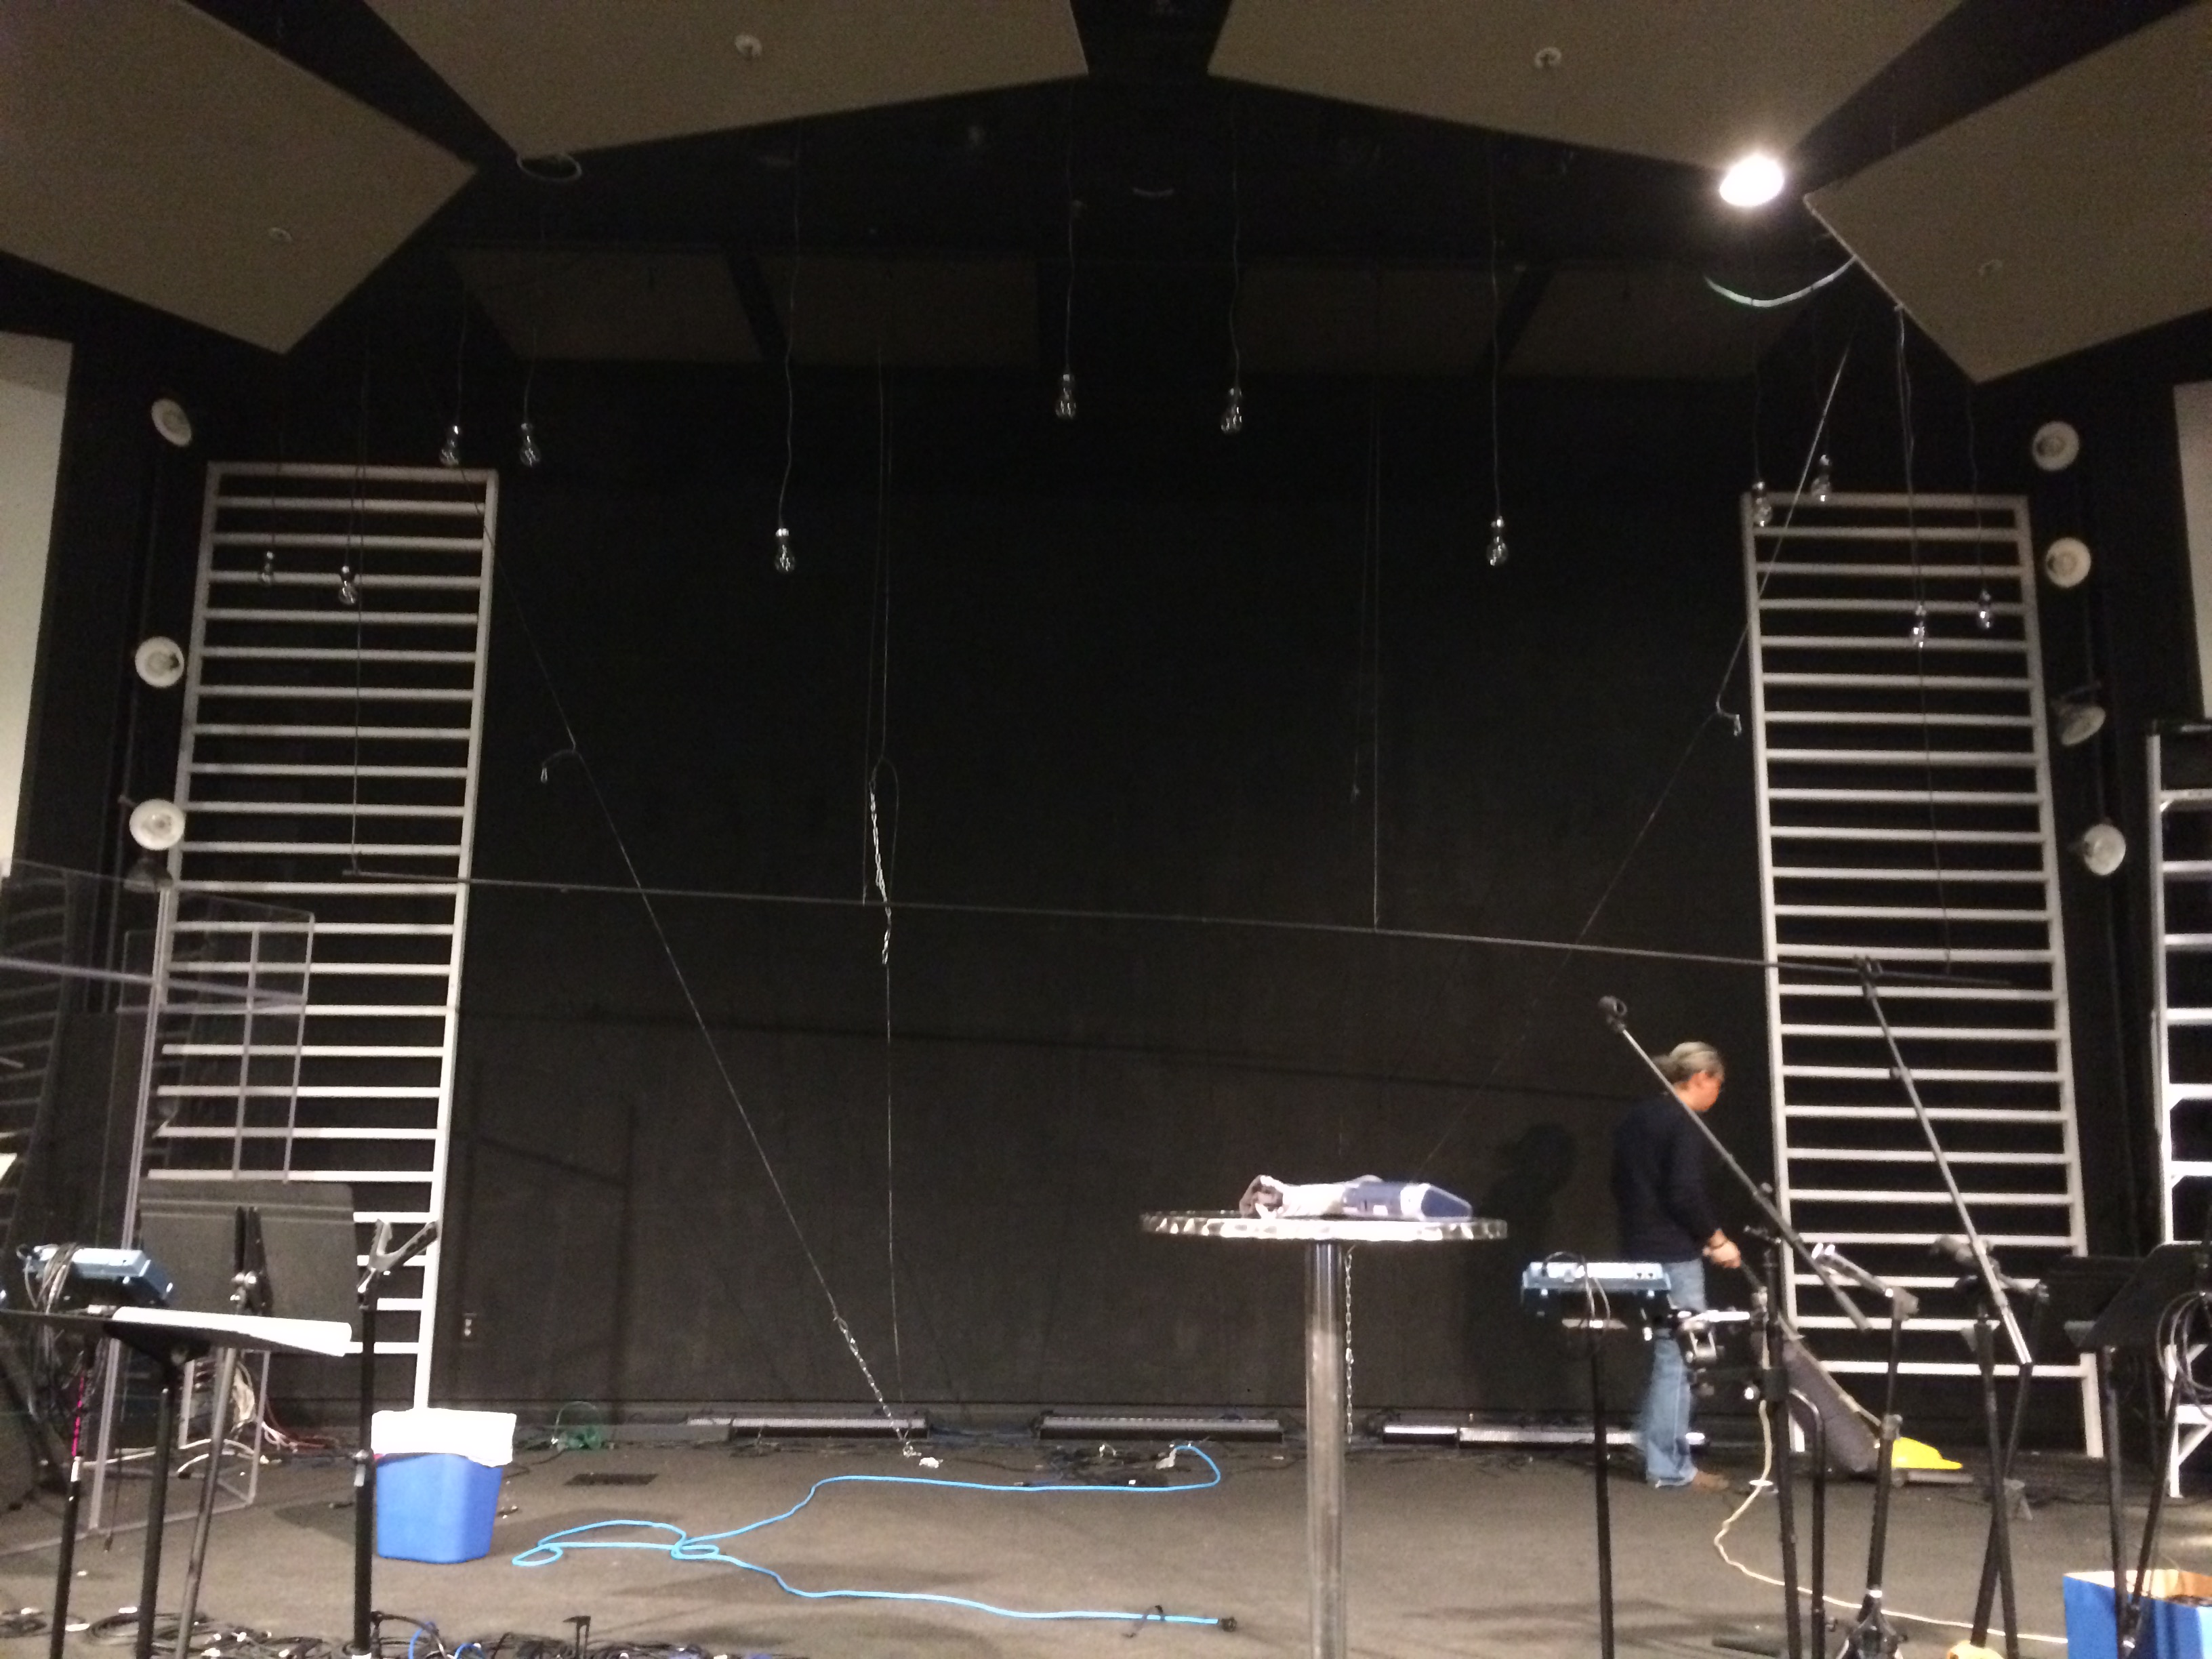
He started the process by building the side “ladders” out of 2x3s. They were painted white and then attached to the back wall. They were 14 feet tall and were built in two sections…a 8 foot and a 6 foot section. In previous sets, he’s used Coroplast to achieve this look but he liked the shadows and texture that the real wood adds. After these were attached, he hung 8 cord sets (Hemma from Ikea) on each side and just let them dangled at random lengths.
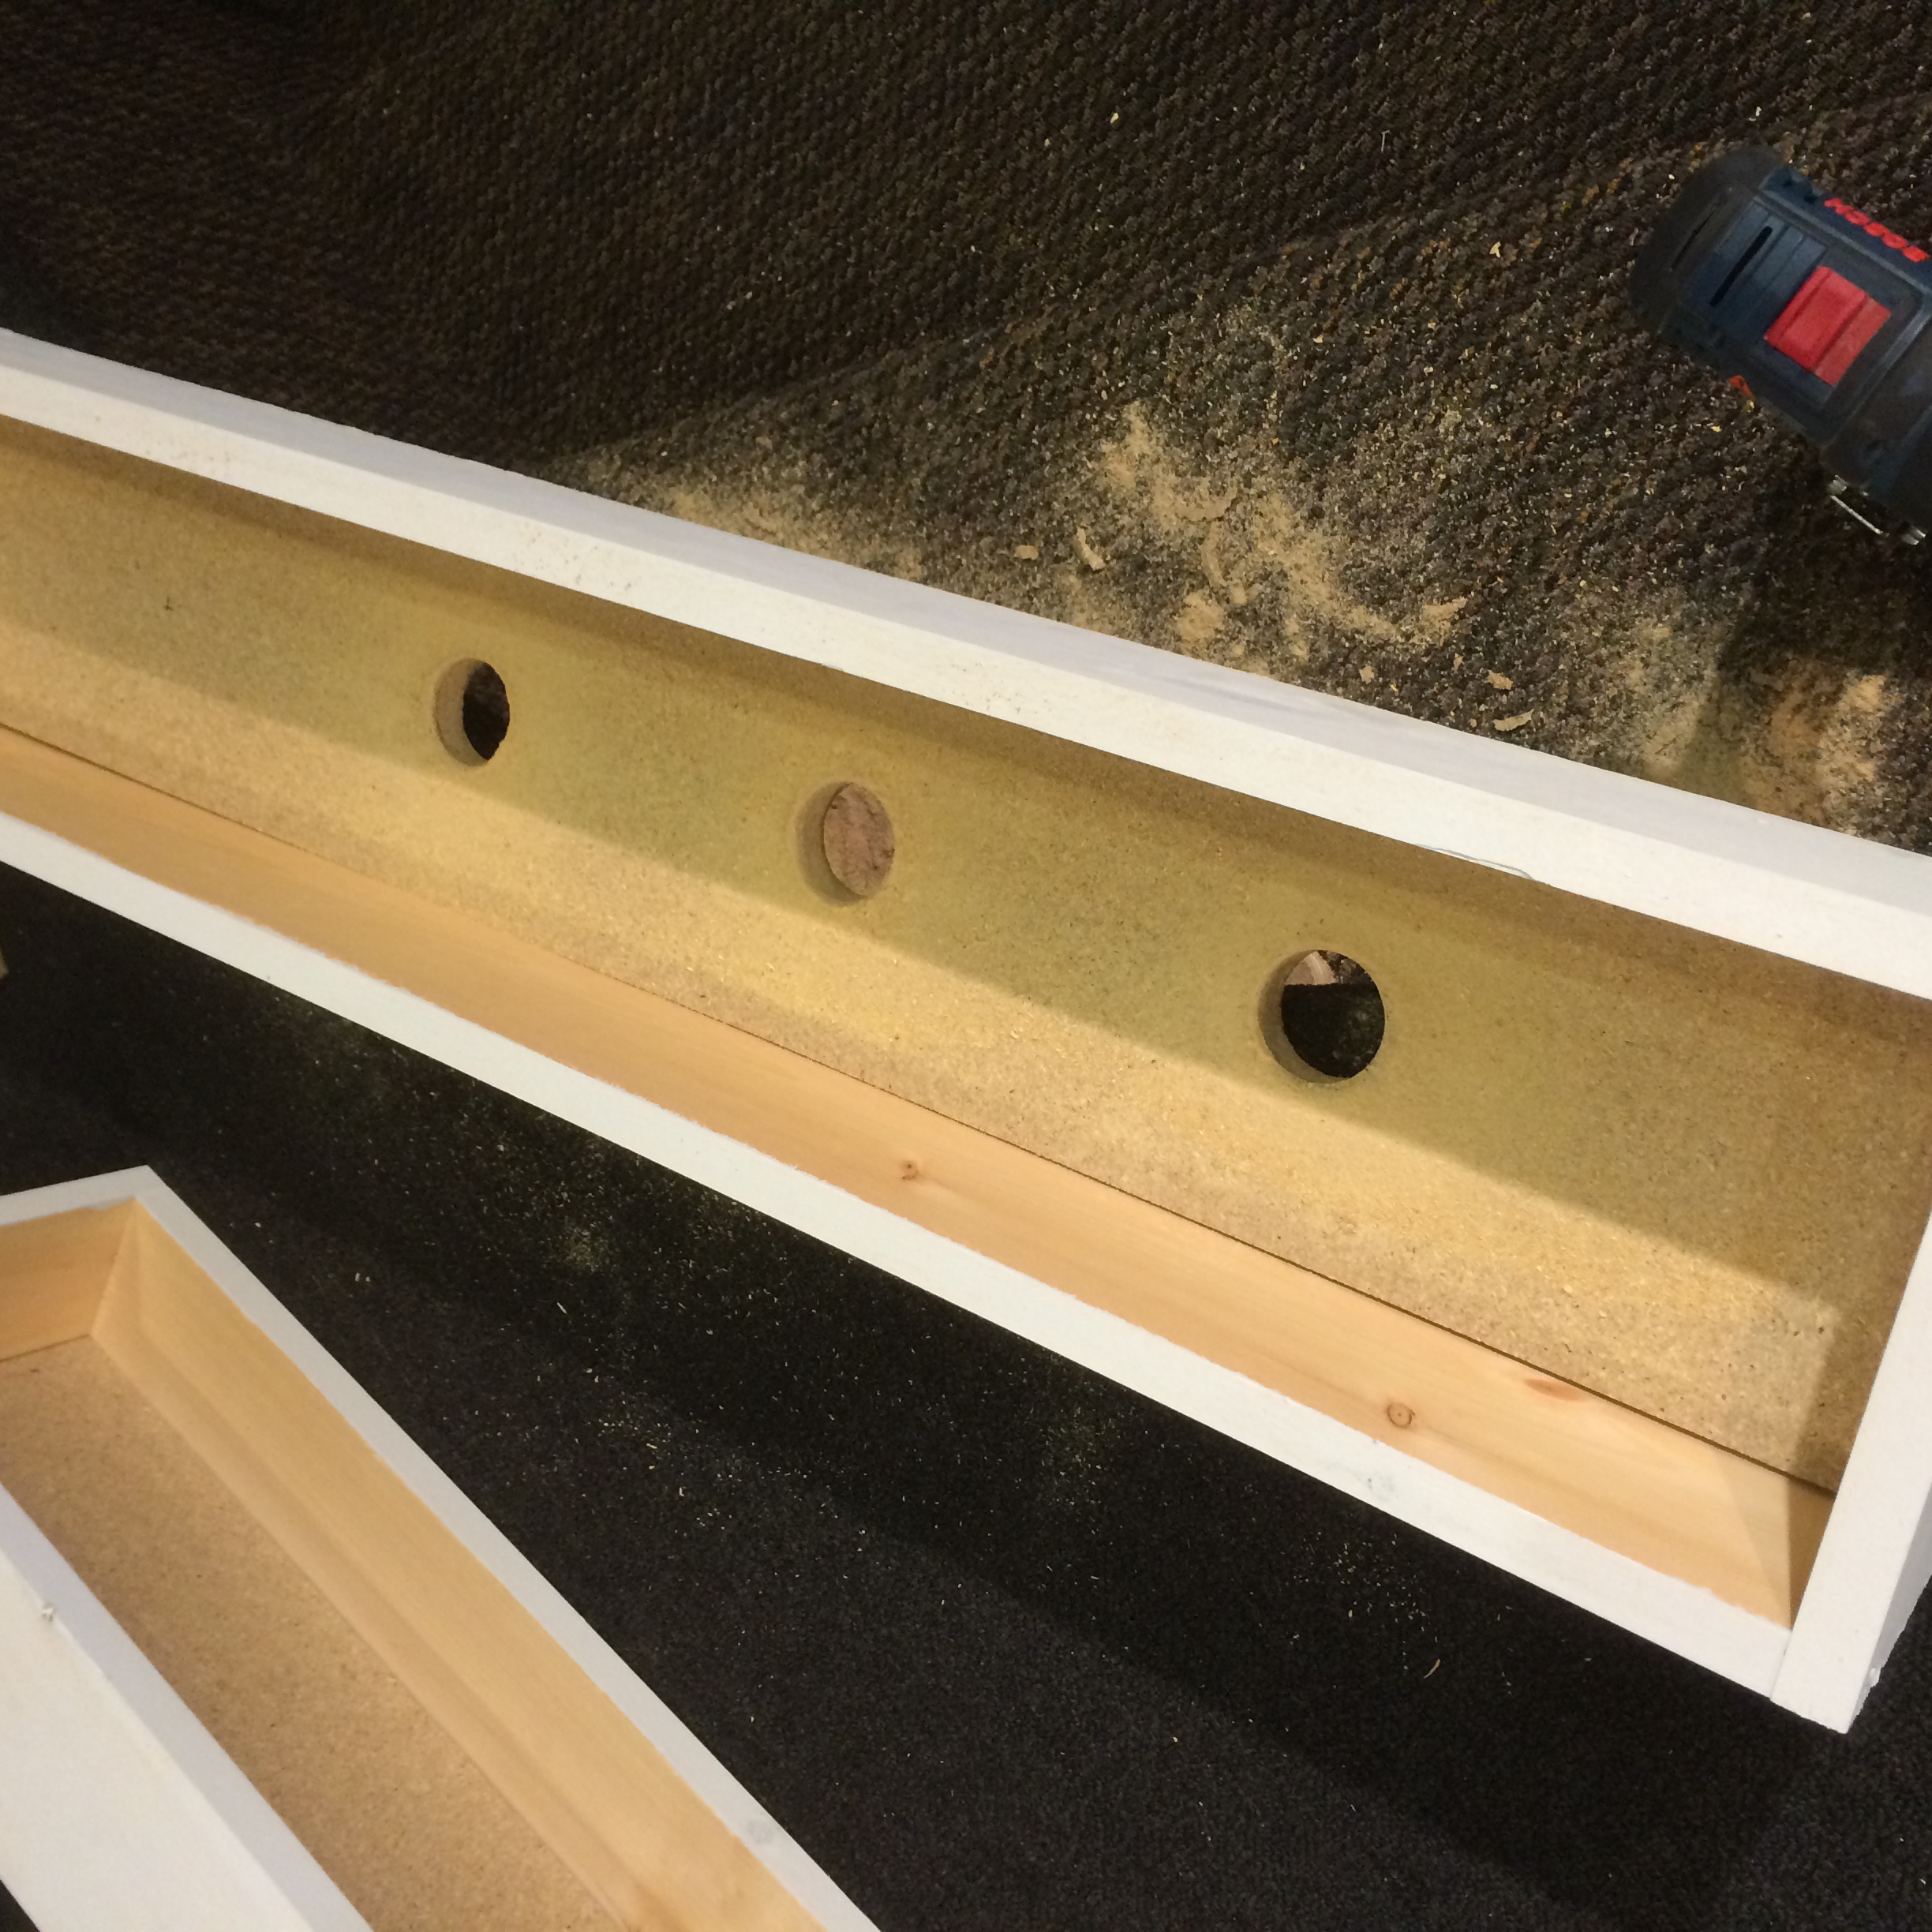
Then he built the boxes. They were made out of common pine boards from Home Depot with a particle board face to hold the sockets. He built them in 3 different lengths for design purposes. They were 8 inches tall by 6 inches deep and the lengths were 30″, 39″, and 48″. Then he took a hole saw bit and drilled the various holes for the lightbulb sockets.
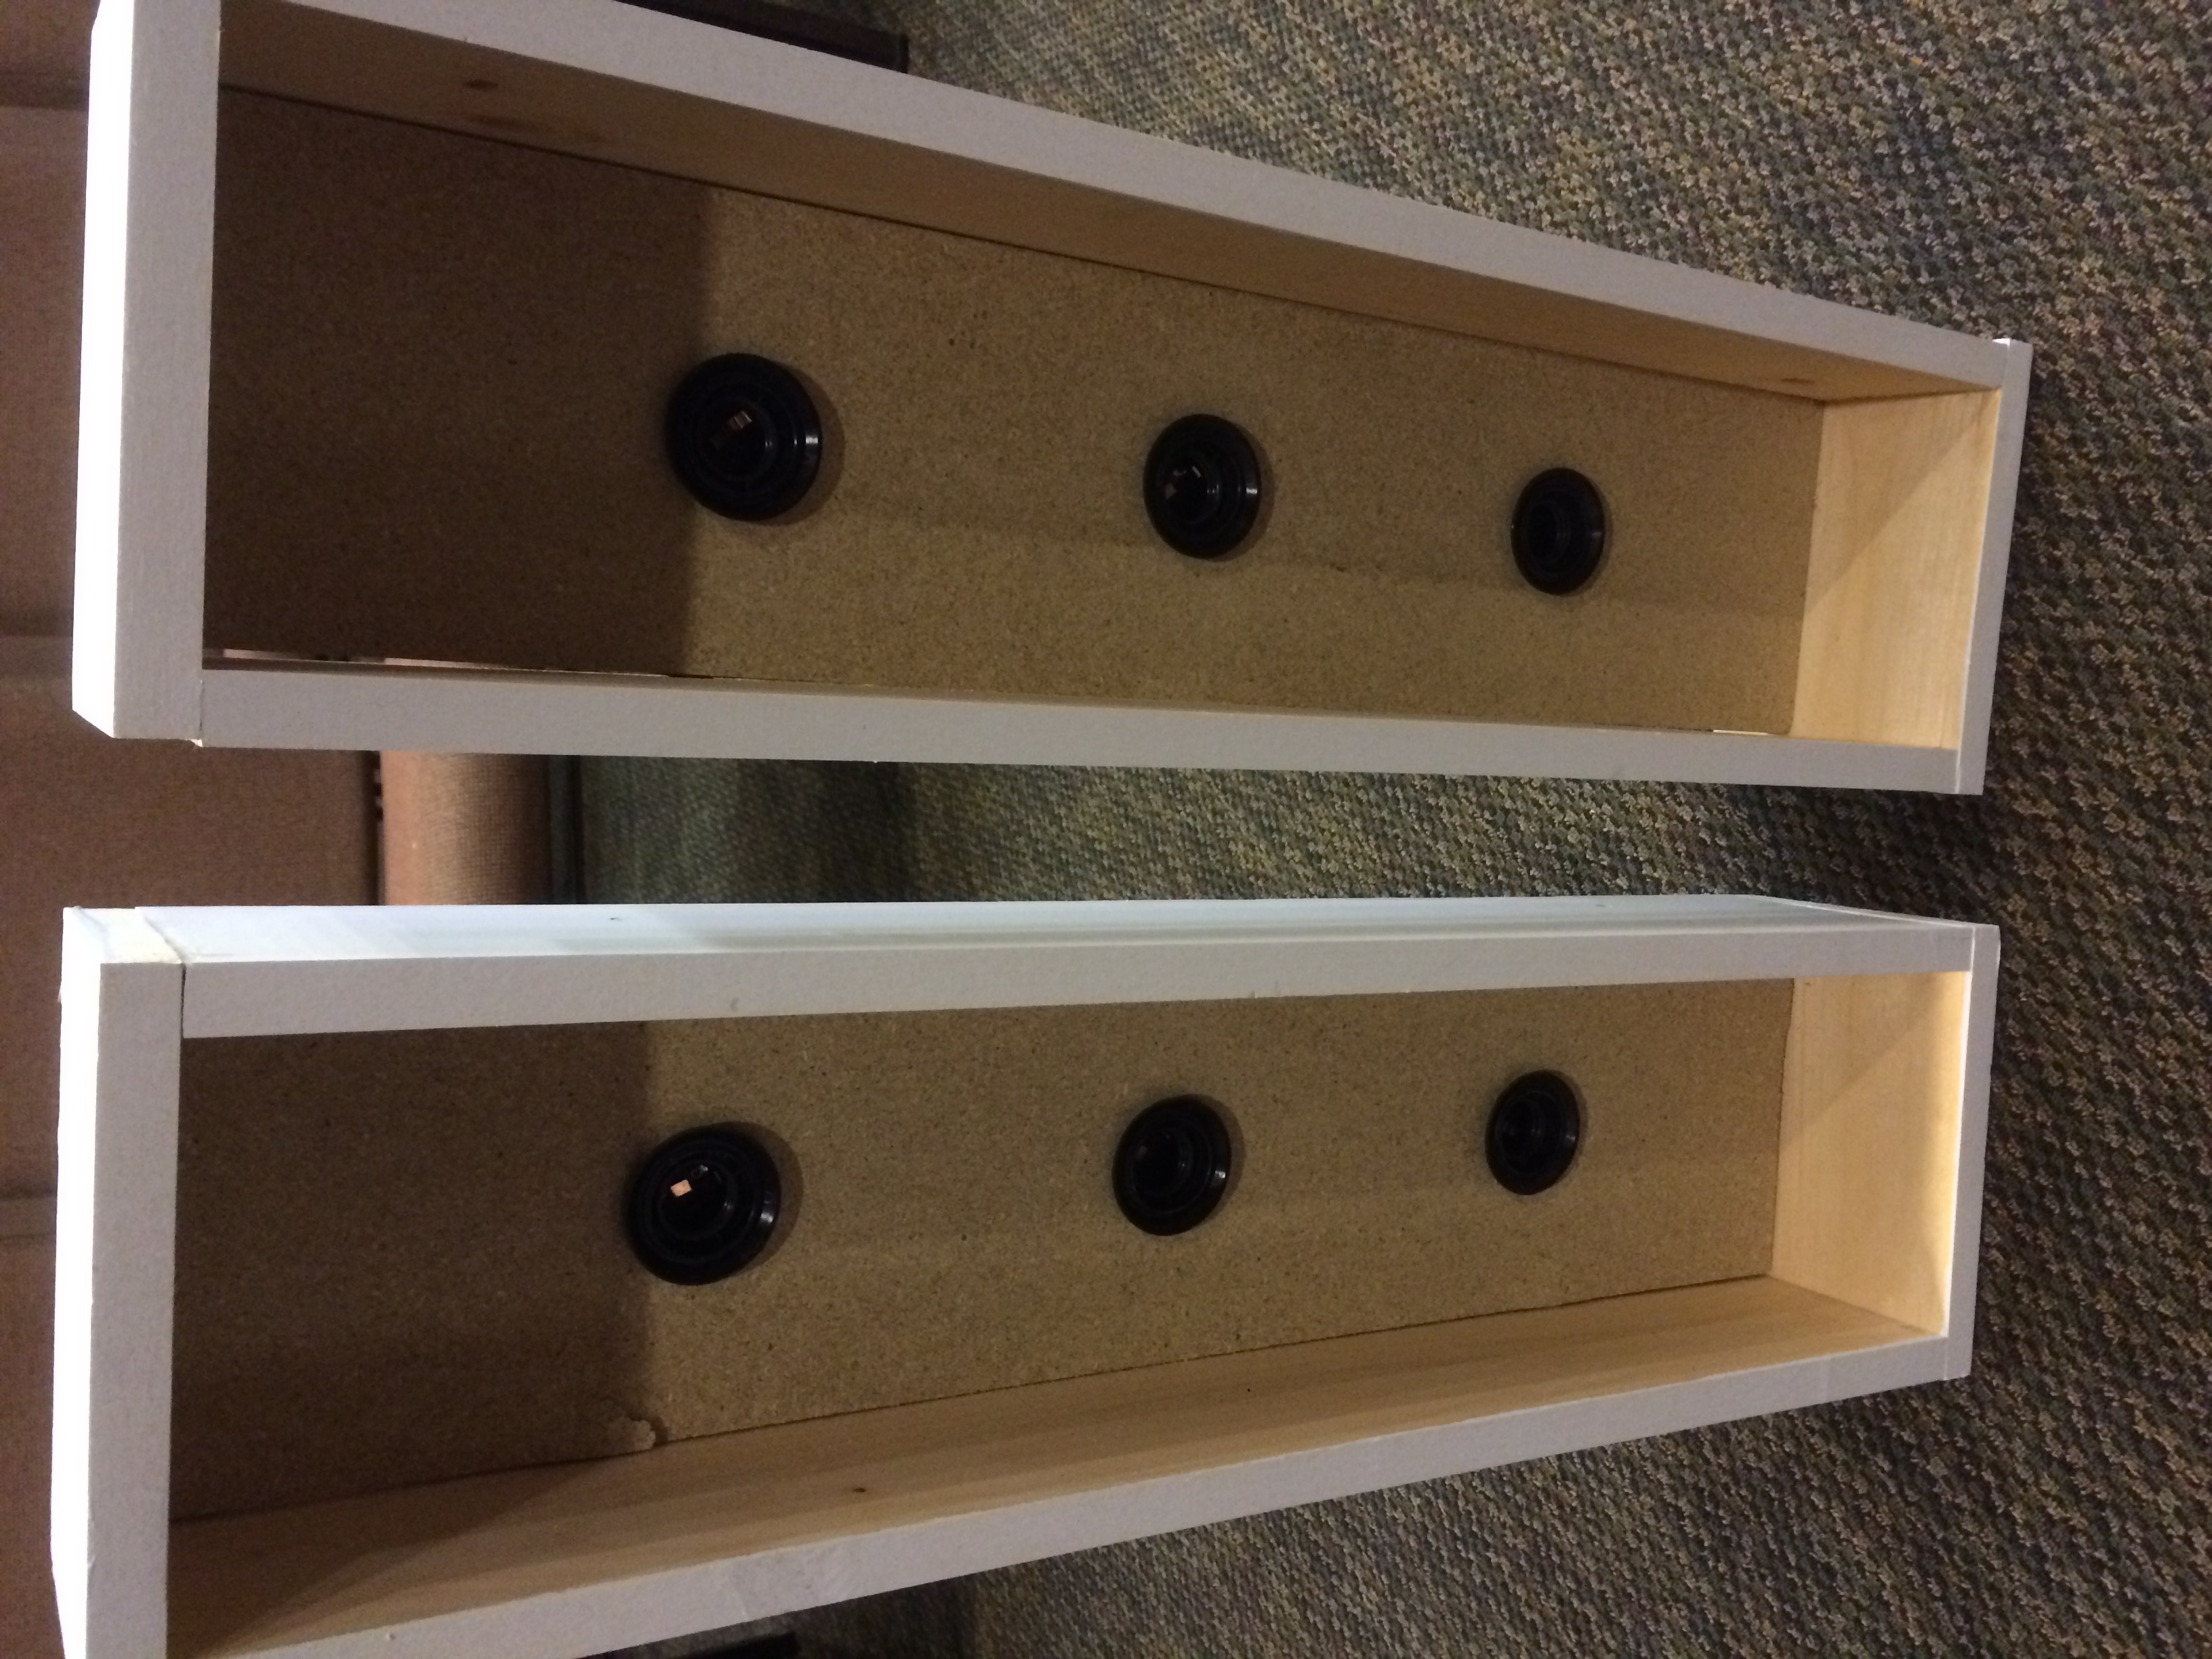
An important thing for him was to make sure he got a lot of bang for the buck with the lighting sockets. He wanted to make sure he could use them on a different set design, so he went with the Hemma cord sets from Ikea. They were $5 and are roughly 15ft long. He was able to preserve the length of all the cord sets and just use power strips on the back of every box, so that there was just one master power cable coming from each box. He had somewhere in the range of 60 cord sets, but they are all able to be reused at full length.
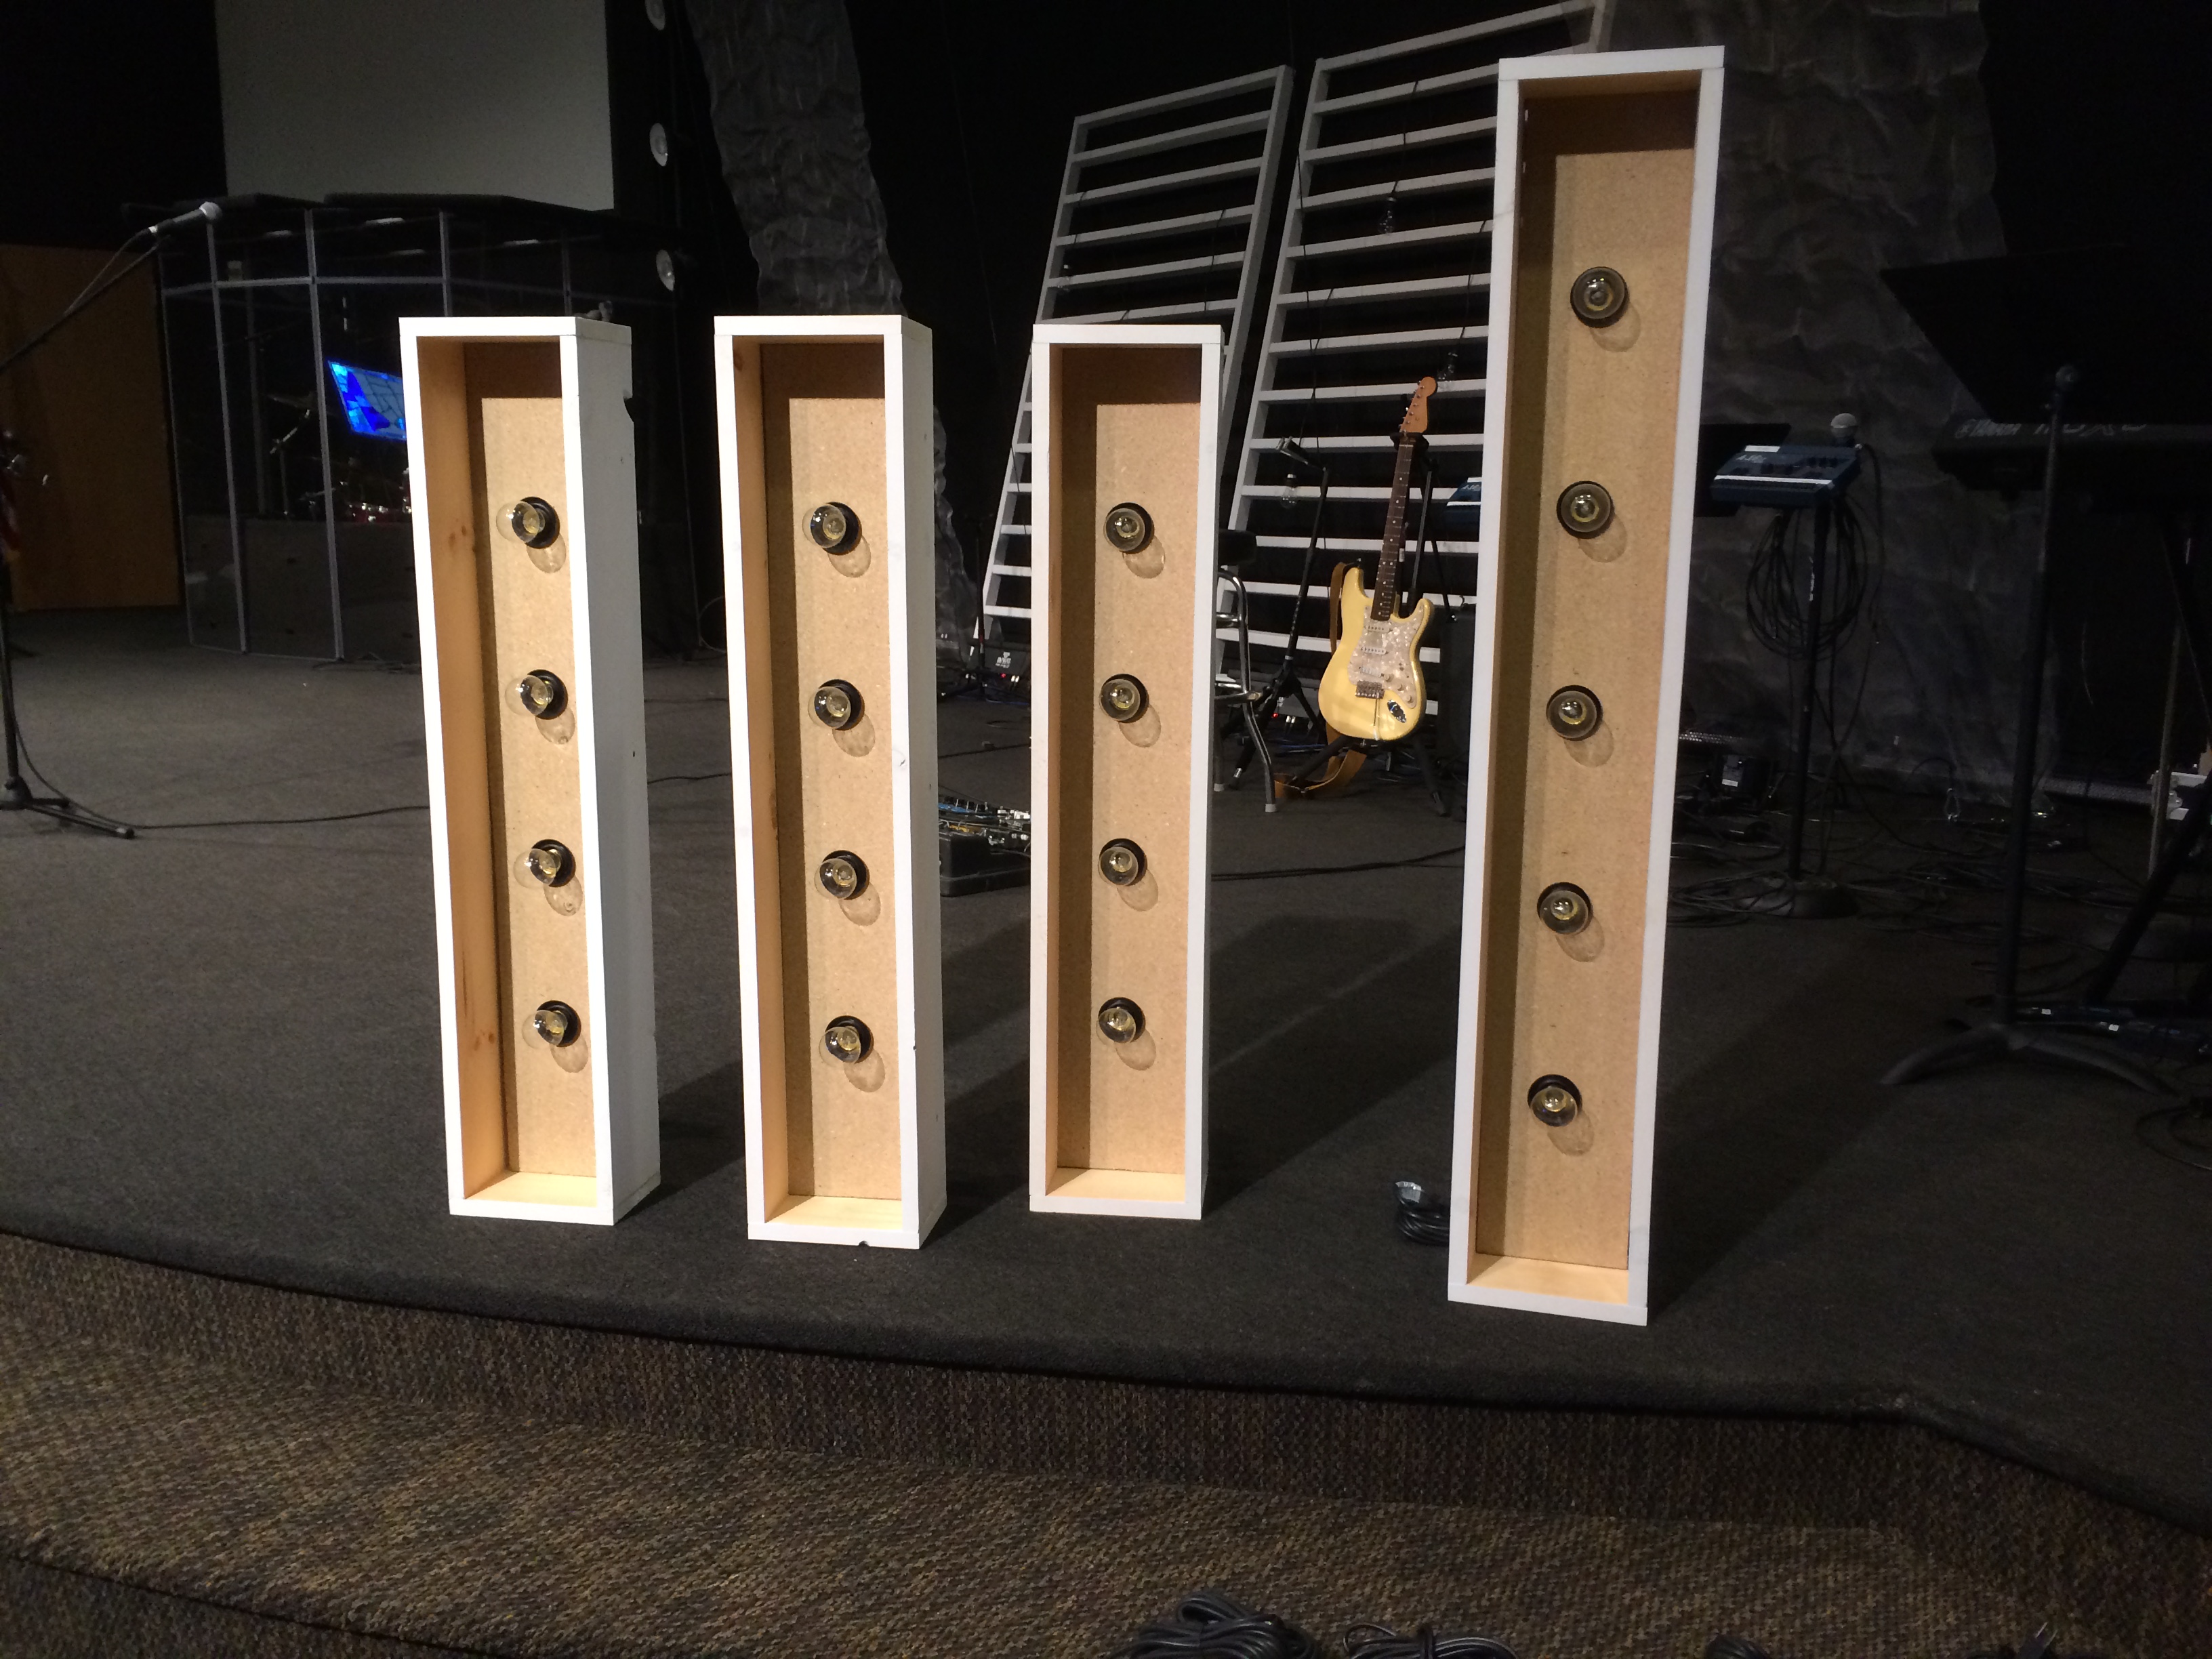
The bulbs used were 40w appliance bulbs from 1000bulbs.com and given the quantity, they were very inexpensive.
The boxes were attached to the back wall with cleats, so they were not fully flush. This was intentional to allow the excess power cords room to stay bundled and the power cord to fall behind it. He intentionally placed them on the back wall to look random. He tried not to create a specific pattern.
Next, he installed four 2×4 on the back wall, and then attached the horizontal pieces of wood with a row of “blinders” in between them. He ended up using shiplap for the horizontal pieces. Between they were about half the price of the regular pine boards of the same size.
The row of blinders were just clip on utility lights from Home Depot with spot light bulbs. They were attached to a blacked out 2×3 that was attached to the 2×4 studs. (They had these lights from a previous stage design.)
All the LEDs they had purchased already so there was no extra purchases in that area.
One of the other uses for the light boxes that they have in mind is to cover the boxes with a piece of Coroplast. This will not only give them diffused look to the exposed bulb look that they have now, but they can also point a projectors at it and do some video mapping and put lyrics, graphics, or movies images on it which will be loads of fun.
Why This Design Works
The genius of this light-filled box design lies in its perfect balance of visual impact and budget-conscious construction. By using affordable materials like common pine boards and Ikea cord sets, John created a professional-looking stage design that rivals expensive commercial installations at a fraction of the cost. The exposed bulb aesthetic creates a warm, vintage ambiance that connects with audiences on an emotional level, making it perfect for worship environments where creating an intimate atmosphere is essential.
The modular approach to building three different box sizes (30″, 39″, and 48″) adds visual interest through asymmetry while maintaining a cohesive overall look. This variety prevents the design from appearing too uniform or sterile, giving the stage a handcrafted, artisanal quality that resonates with viewers. The random placement of boxes on the back wall further enhances this organic feel, avoiding the rigid predictability of grid-based designs.
From a practical standpoint, the decision to use cleats for mounting rather than flush attachment demonstrates smart planning for cable management. The gap behind the boxes allows for power cord storage without visible clutter, maintaining clean sightlines while keeping all electrical components accessible for maintenance or modification. This attention to detail separates amateur designs from professional-quality installations.
The versatility of this design extends beyond its initial implementation. The potential for adding Coroplast diffusion and video mapping transforms a static lighting element into a dynamic multimedia canvas. This adaptability means the same physical structure can serve multiple purposes throughout the year, from subtle ambient lighting during contemplative services to vibrant visual displays during high-energy events.
For churches looking to combine wood construction with integrated lighting, the Radiant Pillars design offers another inspiring approach using wooden pillars with DIY LED tube lighting.
Related Designs
- Points of Light – Fairfax Community Church’s stunning 220-bulb grid design with dimmable Edison-style lighting
- Lit Truss – LED pixel tape design on truss towers with DIY pixel bars for dynamic stage effects
- Mountains and Starships – LED mountain backdrop using PEX tubing diffusion and modular wooden structures
- Seeing Spots – Circular stage design featuring LED orbs and geometric patterns
- LED Cloud – Suspended LED installation creating atmospheric lighting effects
Pro Tips for Light Box Stage Designs
Plan Your Power Distribution: Before building, calculate total amperage draw for all bulbs and ensure your venue’s electrical system can handle the load. Consider using LED Edison bulbs that provide the same warm aesthetic at 6-10 watts per bulb instead of 40 watts. This reduces heat, power consumption, and electrical requirements while maintaining the vintage look that makes this design so appealing.
Use Quality Socket Mounting: Vibration from music and movement can loosen bulb sockets over time. Use thread-locking compound on socket mounting hardware and check connections regularly. For the Hemma cord sets, ensure strain relief at entry points to prevent wire fatigue from repeated flexing.
Consider Thermal Management: Incandescent bulbs generate significant heat. Ensure adequate ventilation around the boxes and avoid fully enclosing the fixtures. If adding Coroplast covers for diffusion, drill small ventilation holes in inconspicuous locations to prevent heat buildup that could affect bulb lifespan.
Label Everything During Assembly: When building multiple boxes of different sizes, label each component clearly during fabrication. This saves hours of confusion during installation and makes future modifications or repairs much simpler. Document your wiring scheme with photos before closing up the boxes.


Related: Office Party – Discover how Southeast Christian Church created stunning stage lighting using fluorescent light panels for a budget-friendly alternative to traditional fixtures.


It’s a great set for us John. You done good, son!
Love the work and creativity on this.
We love our modern set design! You’re the man Johnny!
Great job! Love the size variations on the boxes, and that last splash of color really brings it all together. Nicely done
very impressive and inspiring. Loved them on the you worship night last Friday.
Awesome! Cool to see how it turned out! I like your added splash of color on the lower wood panels!