Jeremy Ginn from First Baptist Church in Castroville, Texas brings us this cool lighting setup.
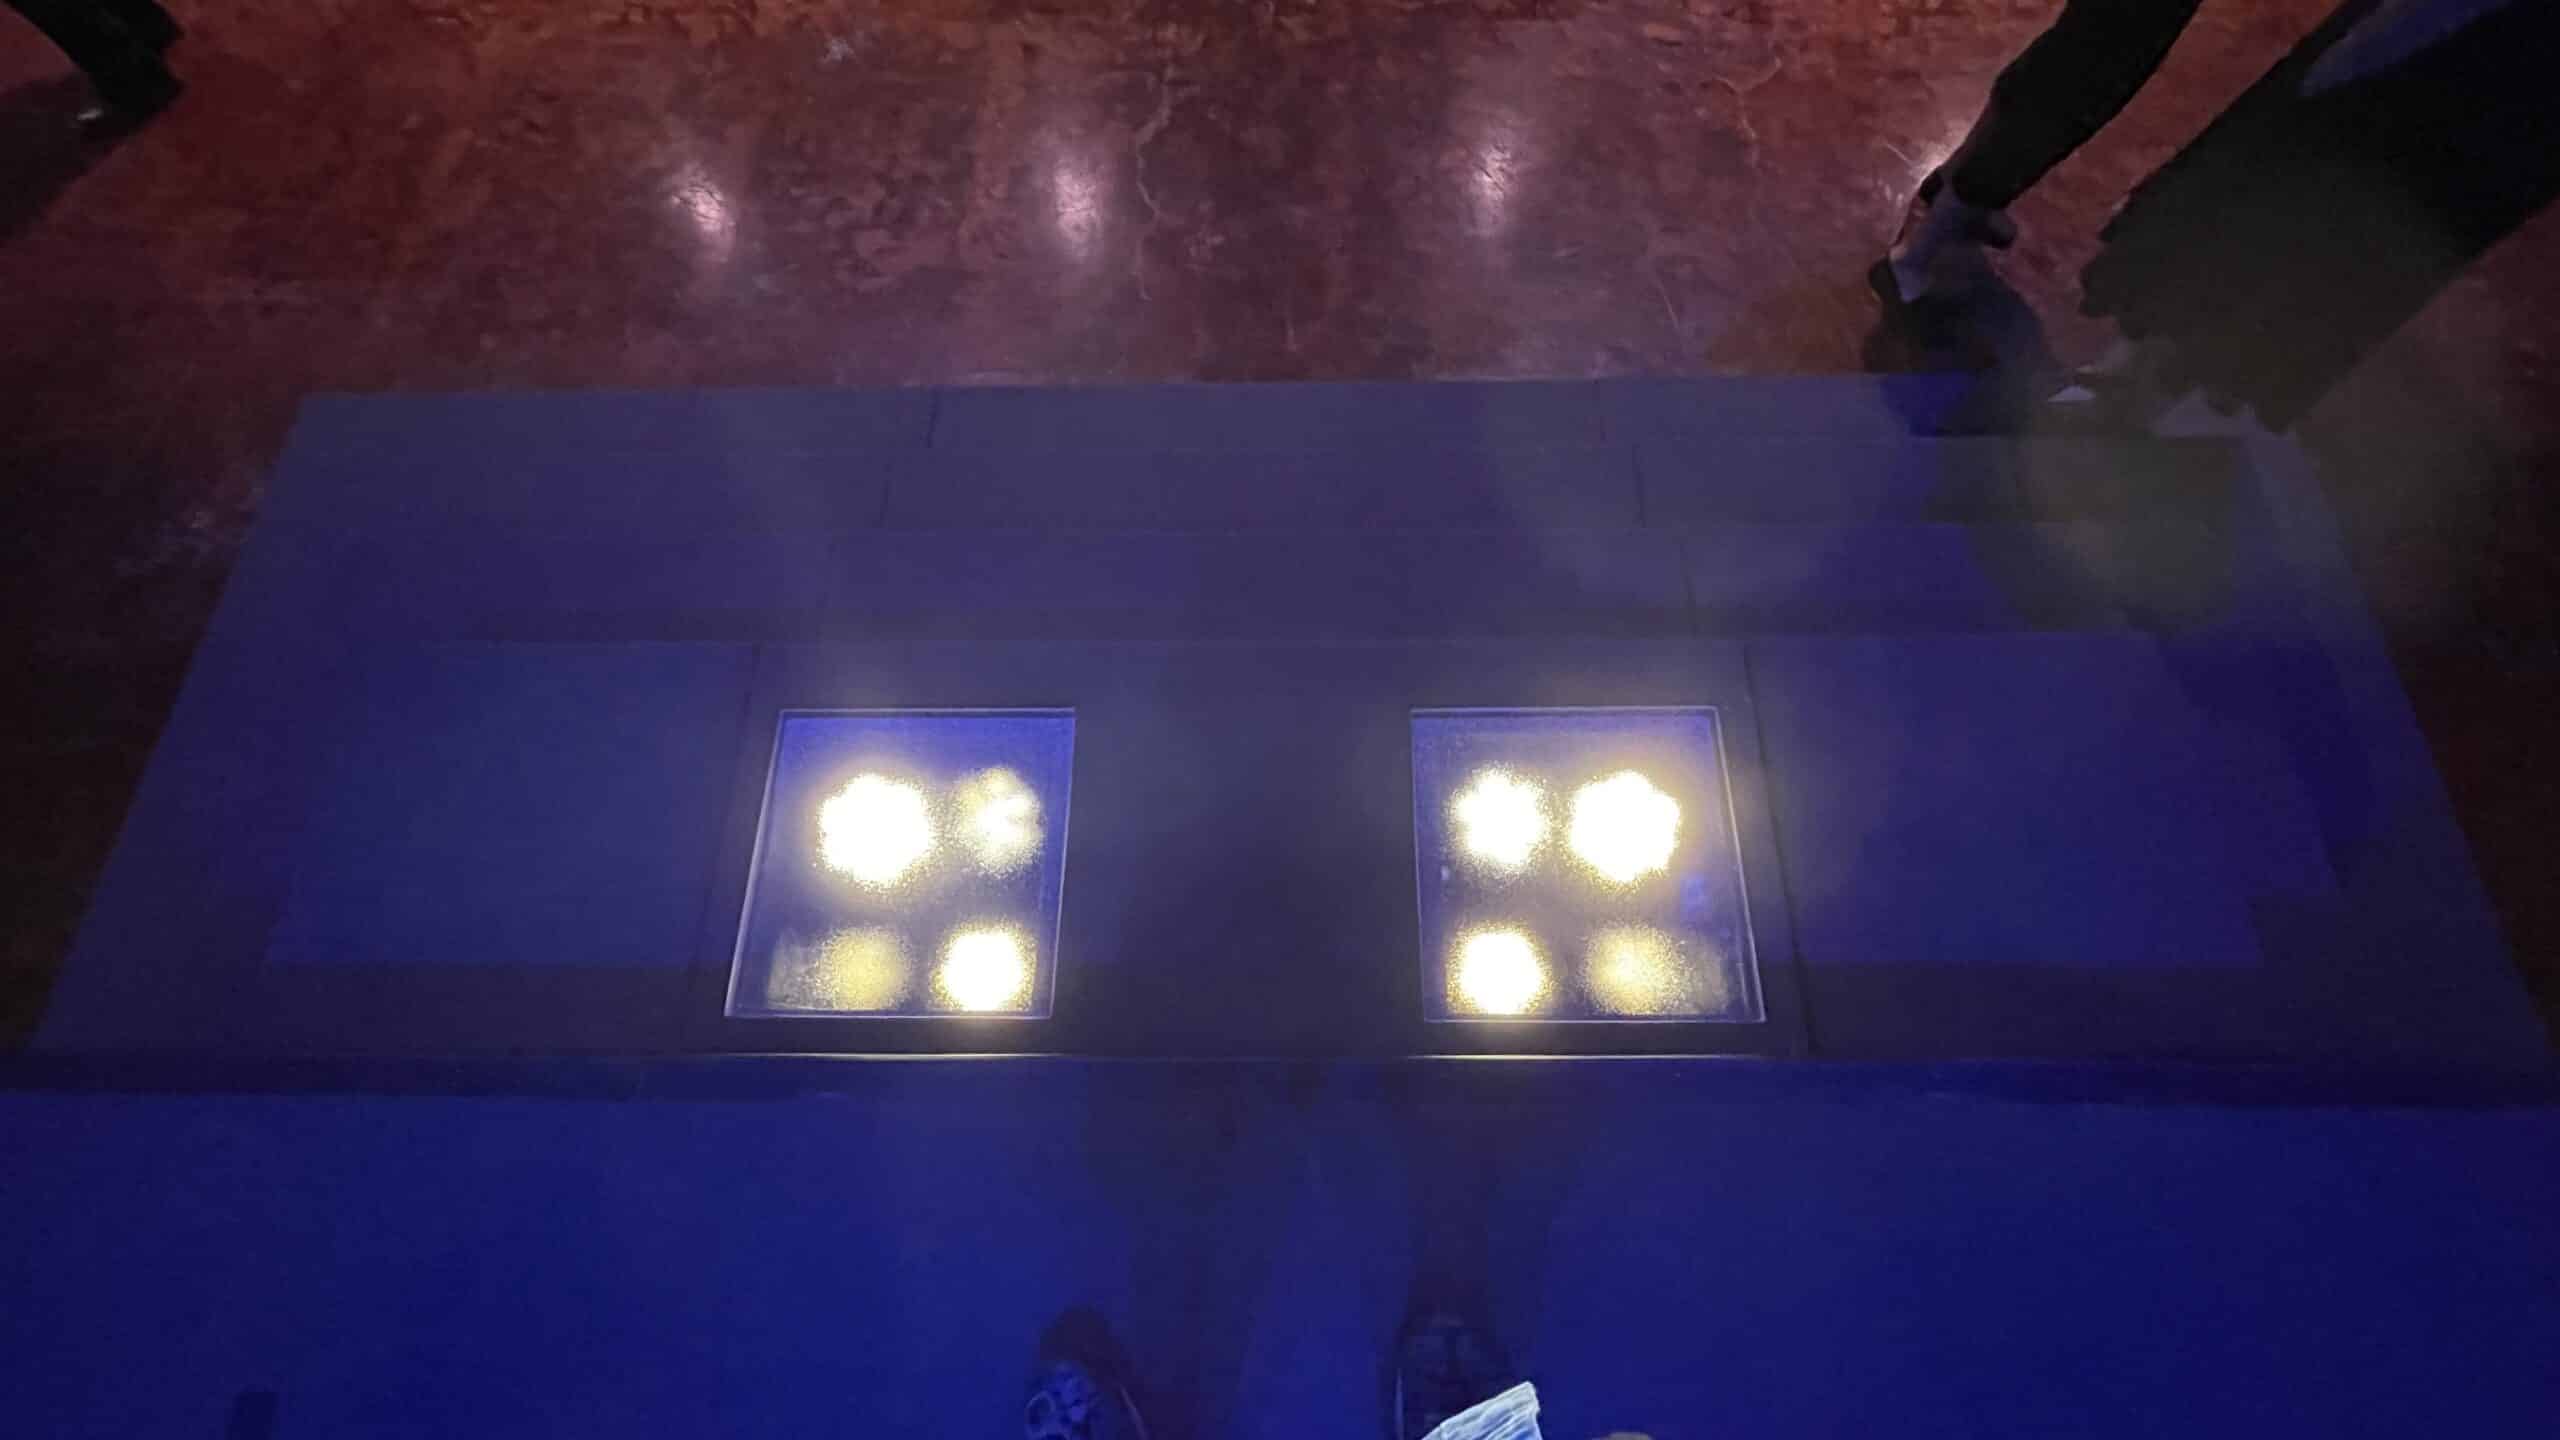
From Jeremy: On occasion, our pastor would appear to have shadows under his eyes during the sermon and it’s noticeable on the Livestream, so we came to realize our lights were causing it and not stress from being the pastor. So I came up with a plan to uplight him that wouldn’t look tacky or cause the loss of use of the steps. I looked online and everywhere I looked I read that 1/4” of this acrylic will hold an average-sized human. I wanted the steps to still function as steps, so I just had to make something work however I didn’t like the 1/4” thick rule. It just seemed too thin! So we tripled that and went for 1” thick!
If you are having the same issues we were and don’t want to mount lights exposed for all to see, follow along with the build we did and see if it’s doable for your scenario!
Tools we used:
– [ ] Skillsaw
– [ ] Jigsaw
– [ ] Pencil
– [ ] Carpet knife/blade
– [ ] Stapler
– [ ] Masking tape
– [ ] Marker
– [ ] 1” thick crystal clear acrylic panels 18×18” x 2 $212 Plastic supply of SA
– [ ] 1/8” thick diffused acrylic panels 18×18” x 2 $45 Plastic supply of SA
– [ ] Drill
– [ ] Hammer and/or crowbar
– [ ] Flat black paint $8
– [ ] 5/16” lag bolts and fender washers $6
– [ ] #6 lag screws and misc hardware $4
Equipment used
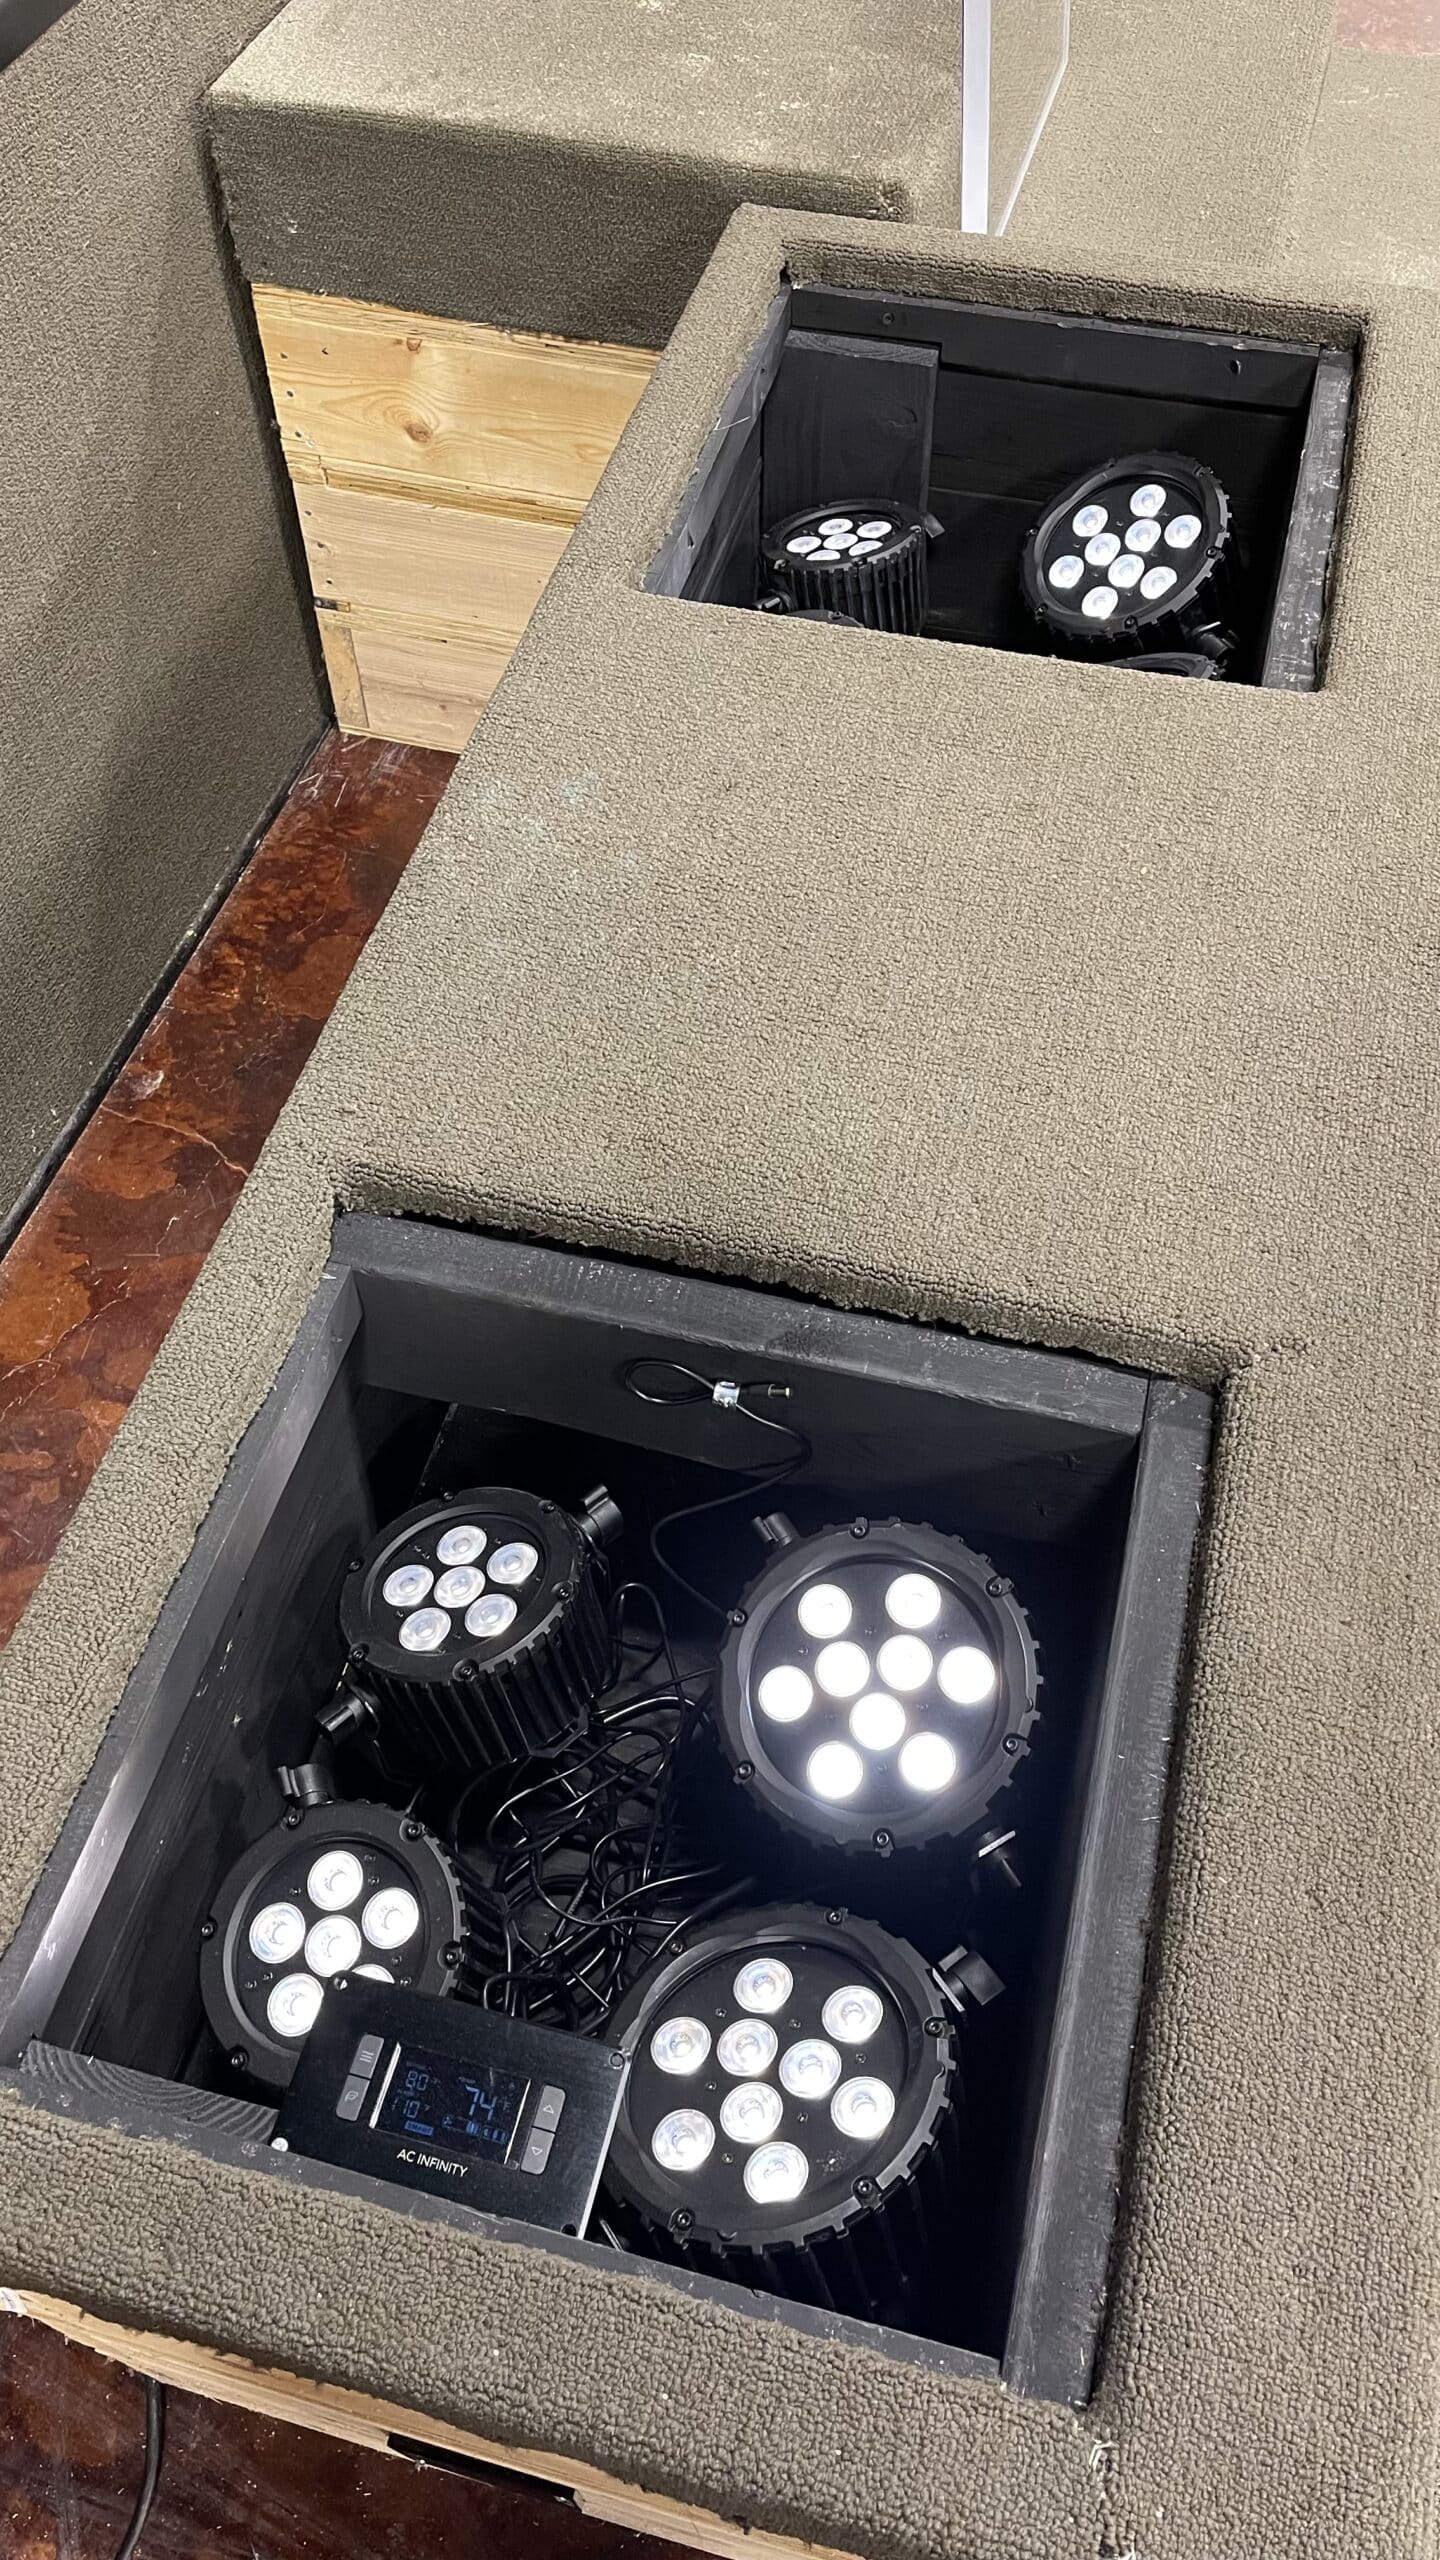
– [ ] Four MagicPar 054D fixtures from MBT – WWCW (had already)
– [ ] Four MagicPar 046D fixtures from MBT – WWCW (had already)
– [ ] Power strip $18 Amazon
– [ ] Donner wireless DMX receiver (will hardwire at a later date) (had already)
– [ ] AC Infinity cabinet ventilation system with probe and controller $59 Amazon
– [ ] DMX cables (had already)
Process:
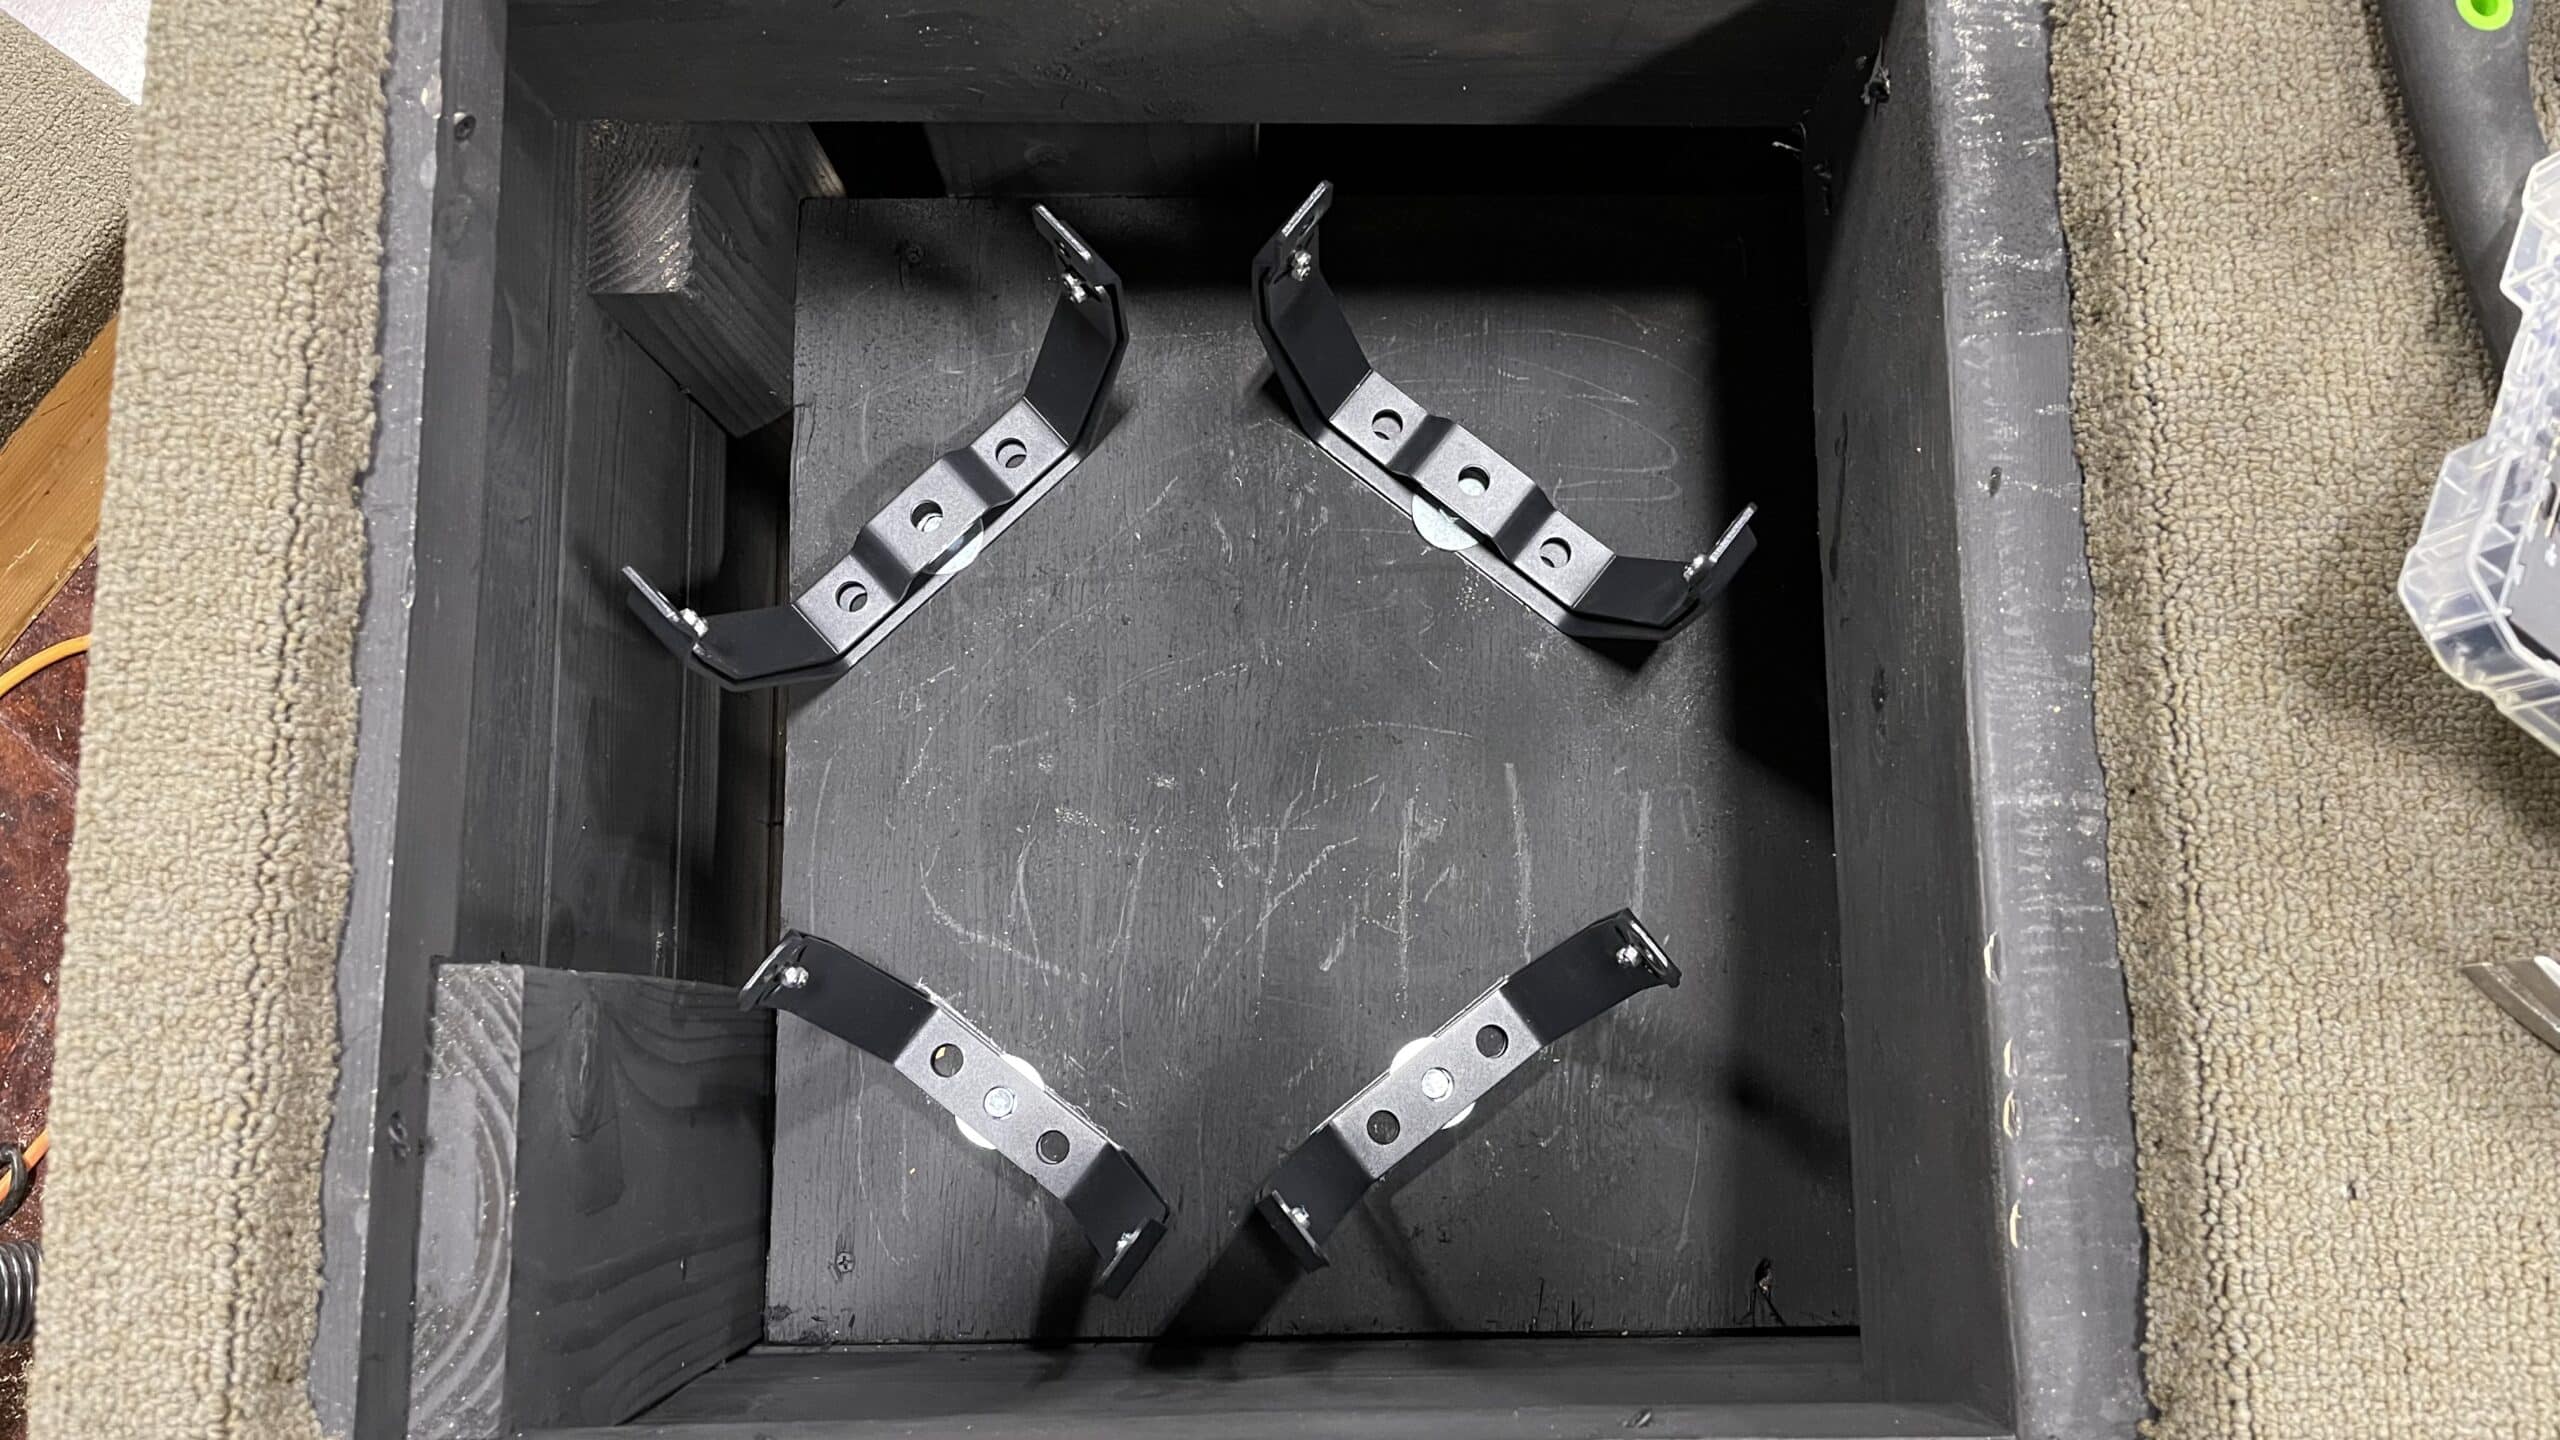
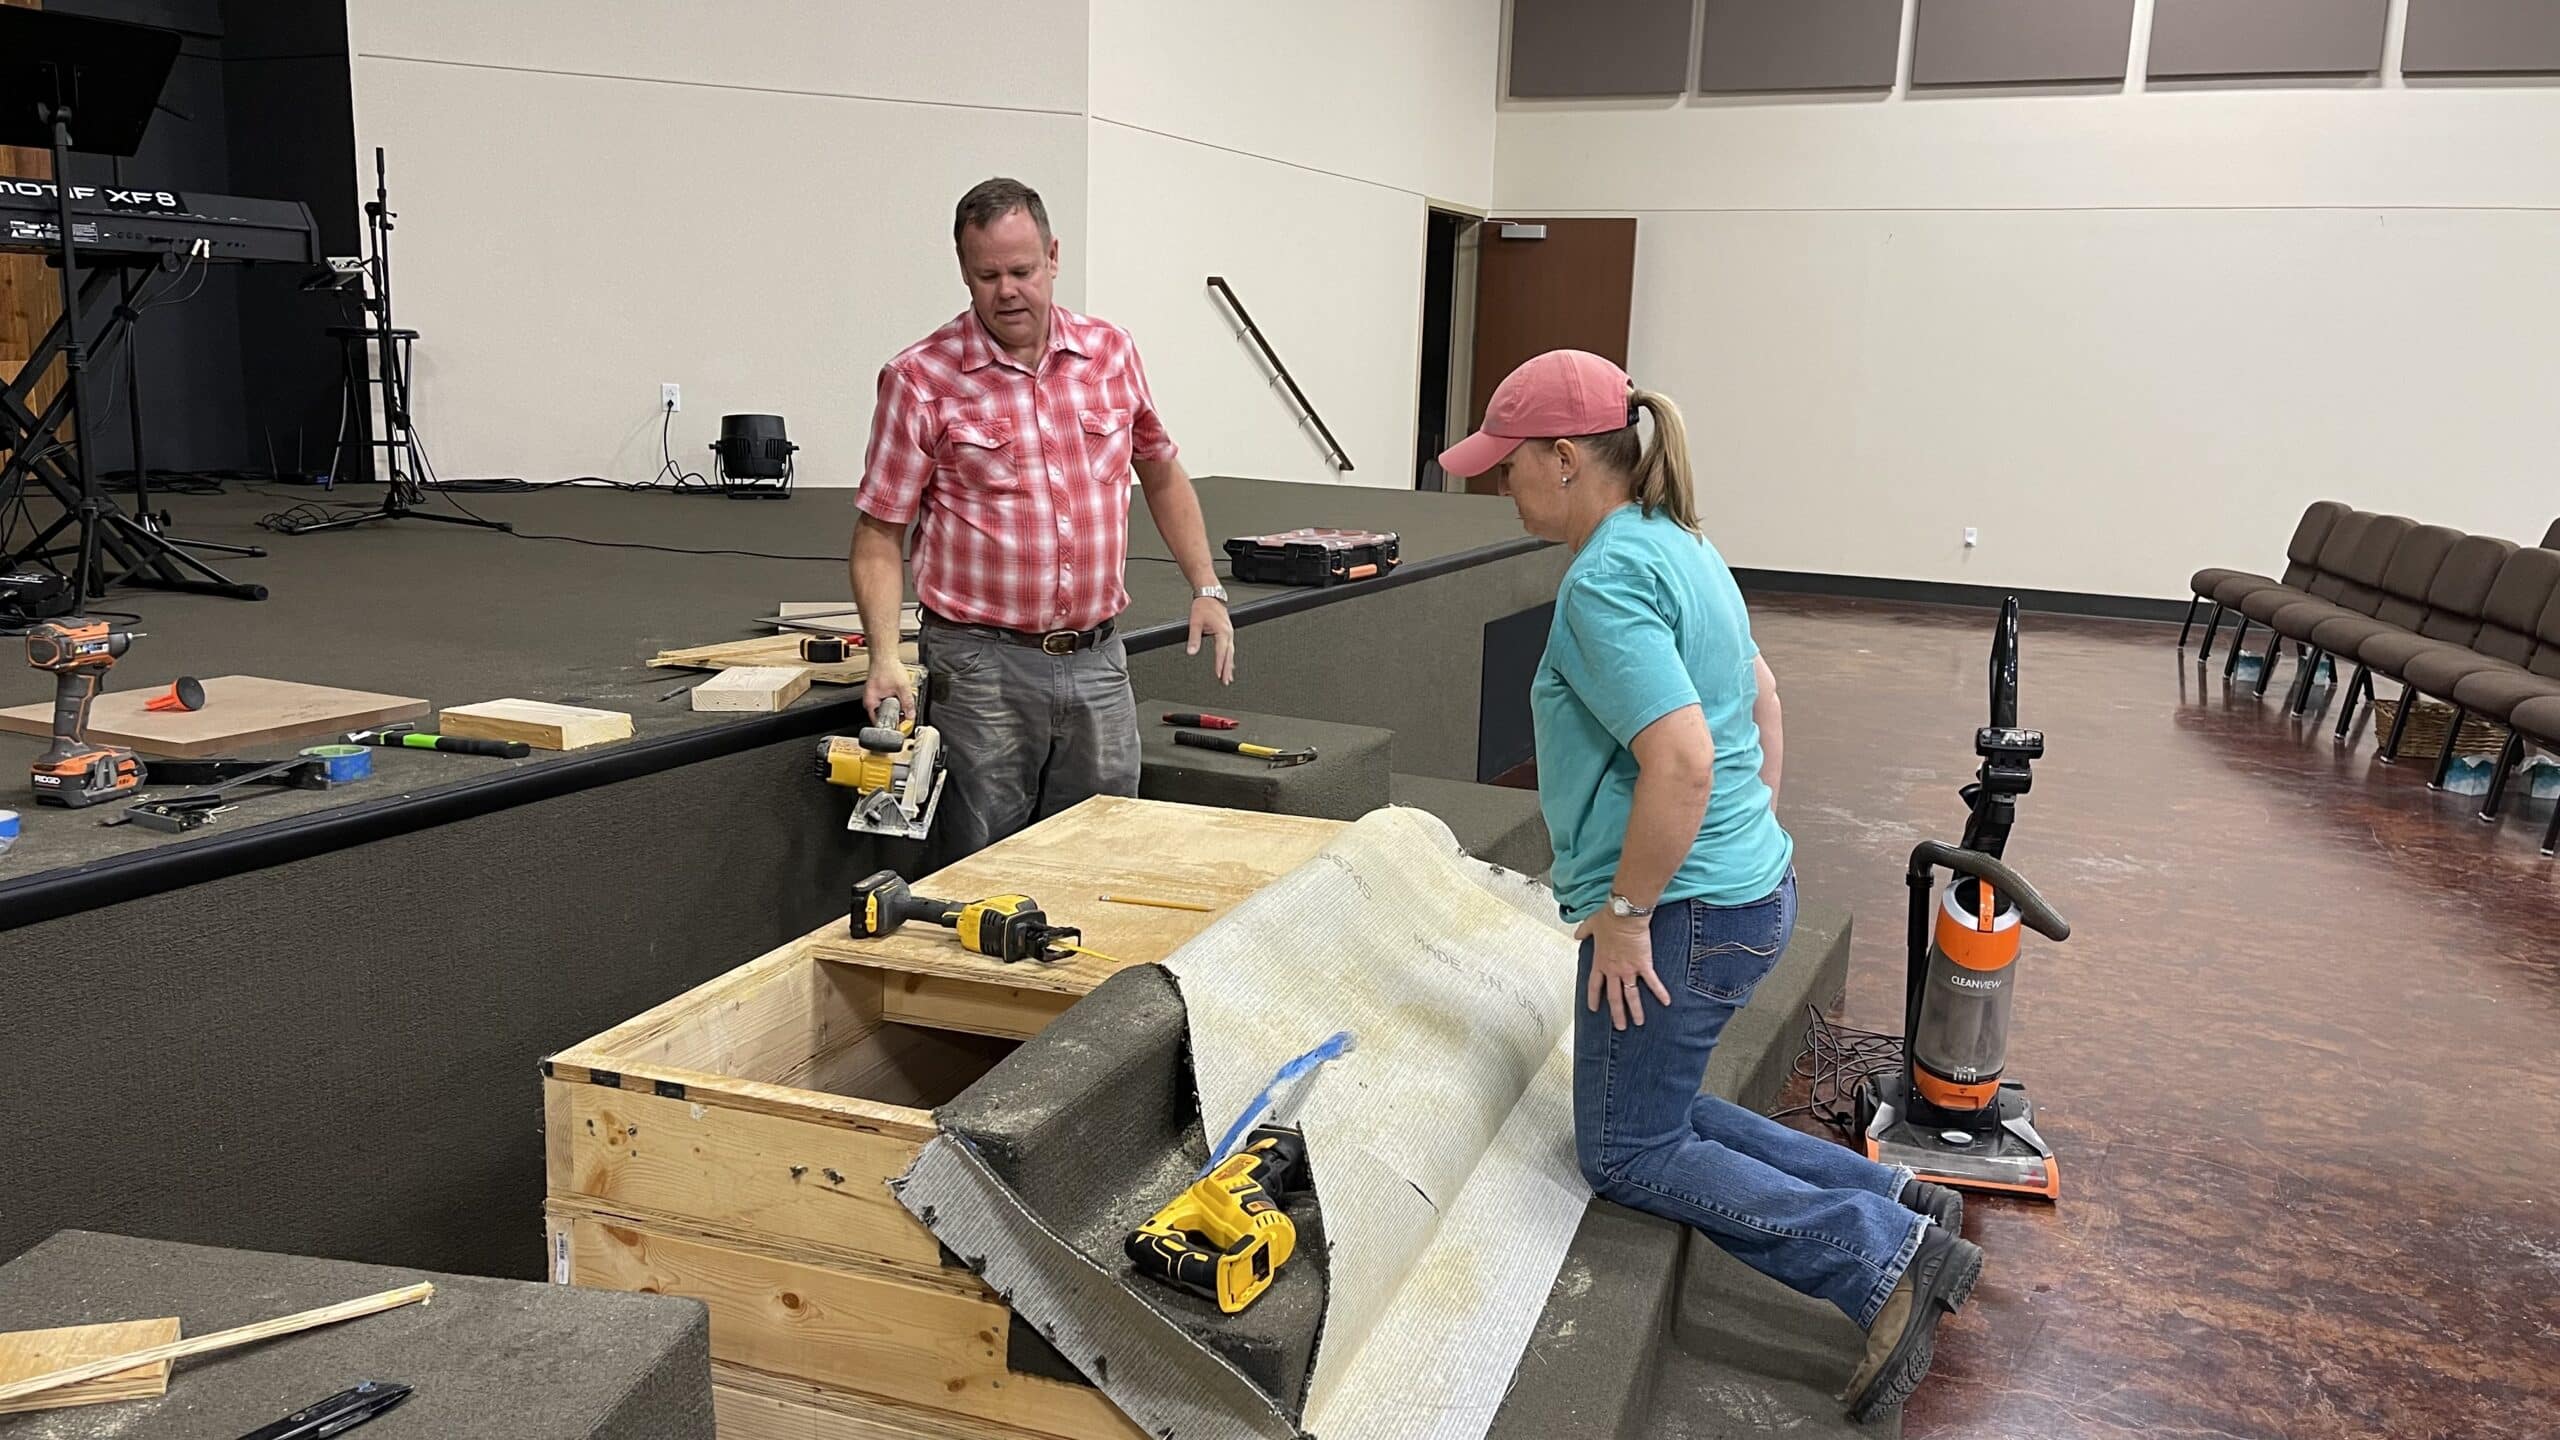
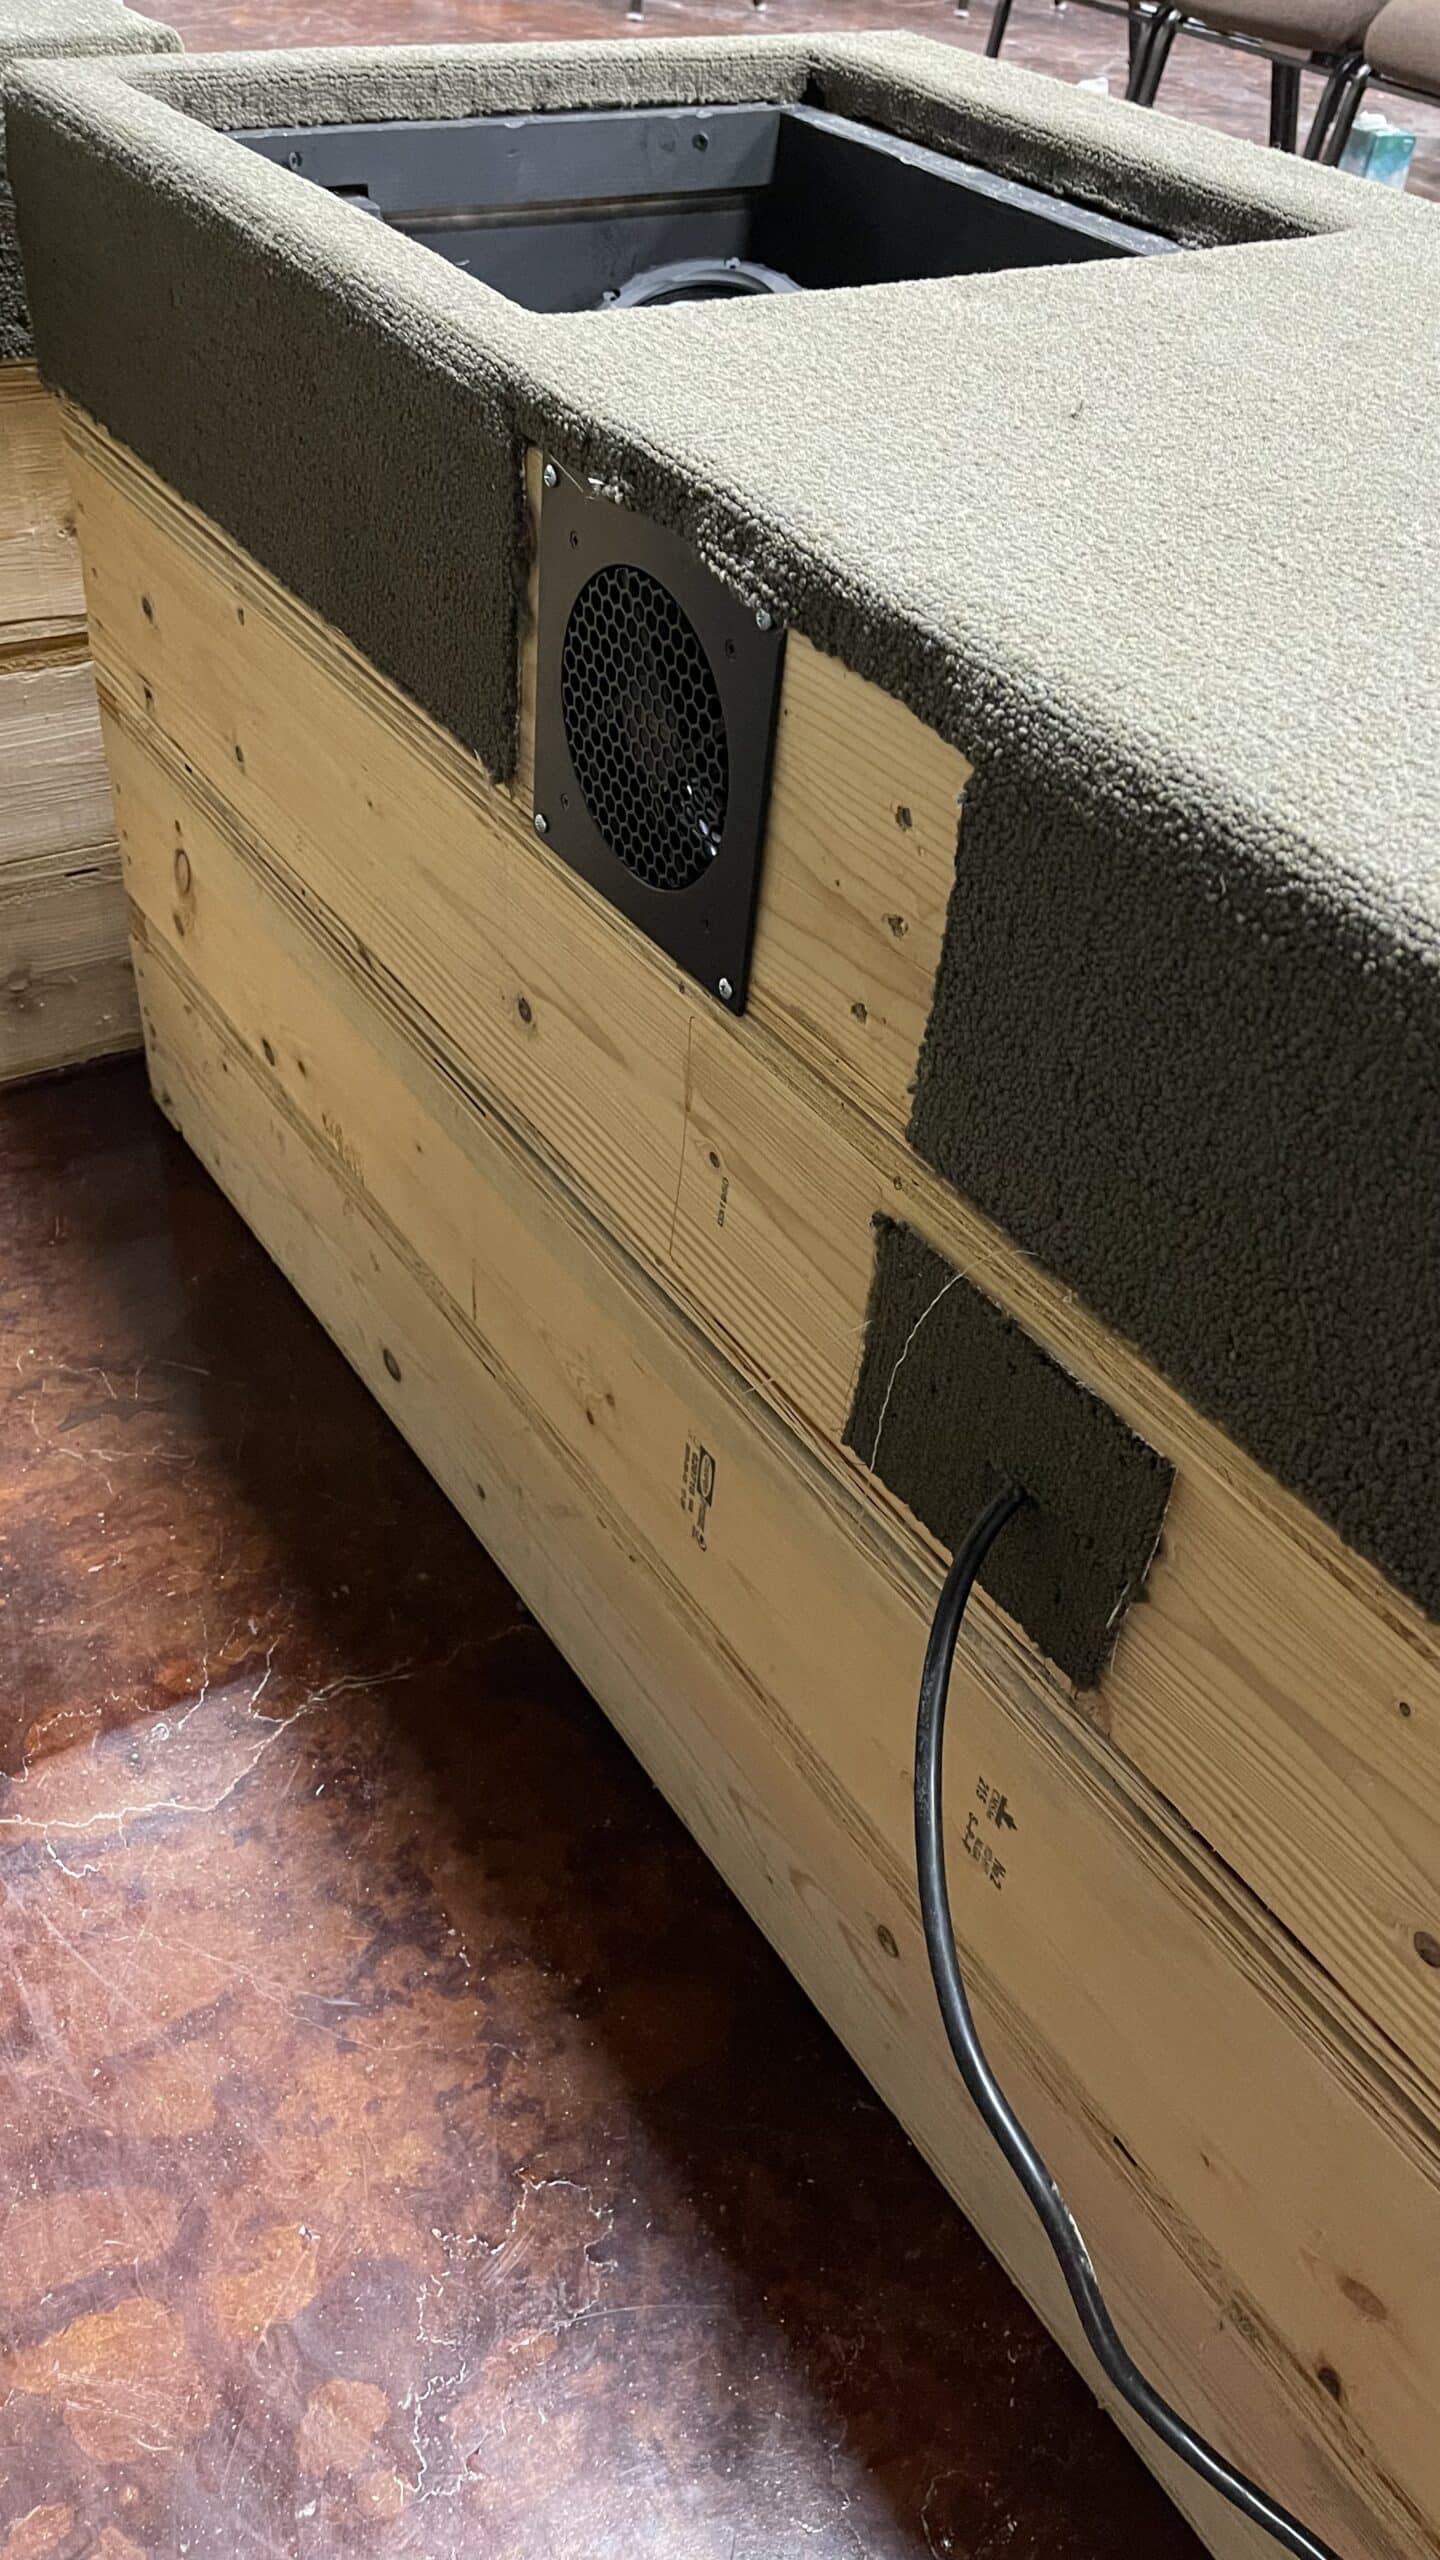
We placed the lights on the steps and arranged them so I could see how big we needed each panel to be. We wanted to spread the light over the width of the stage specifically where our pastor paces during the sermon. We then ordered two 18×18 1” thick acrylic panels and when I went to pick them up I bought a 3×5 sheet of the diffuser panel that I then cut to fit the openings. Since our stair modules were made out of wood, cutting into them didn’t take very long, and we then added a sheet of plywood for the lighting to mount to while giving enough depth for the light beams to be useful yet allowing the acrylic top to sit flush with the carpet and then painted everything black.
I installed the vent fan in the center at the top edge that sits against the wall, and installed two 4” vents below the lights on each end so that cool air is drawn down low and hot air is exhausted against the stage (with an appropriate gap to allow for propped airflow). The controller and temp probe was mounted inside the Stage Right module, and I’ll end up fortifying its mount with a better bracket at some point.
Overall we’re happy with how it turned out. I’ll need to make some adjustments to the light angles and such, but so far it looks great!
Since we use Lightkey on the Mac, adding the fixtures was easy and straightforward!


Leave a Reply
You must be logged in to post a comment.