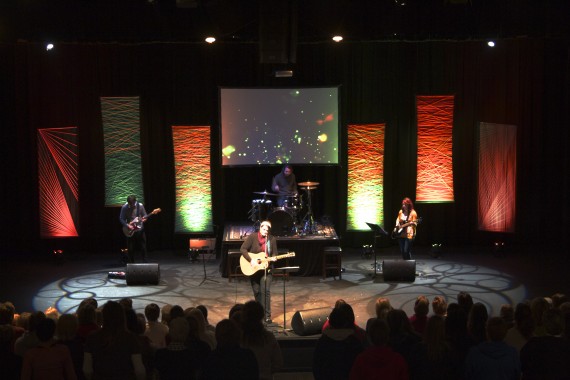
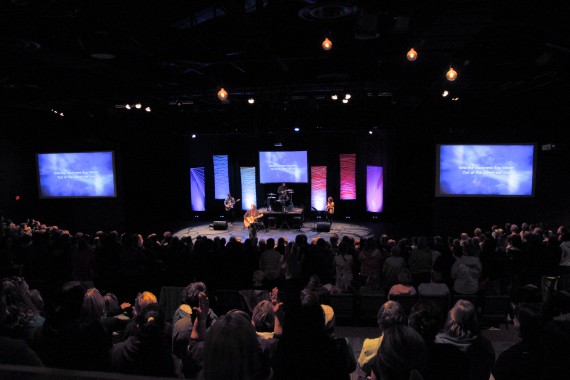
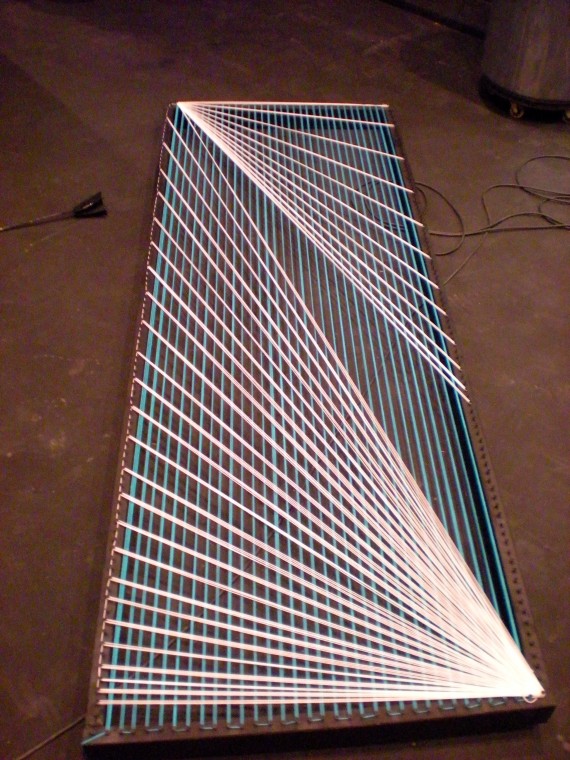
Christopher Law from SpringHill Camps brings us this very cool use of patterned yarn.
This design was for their annual fall women’s retreat (2012). They needed something quick and inexpensive.
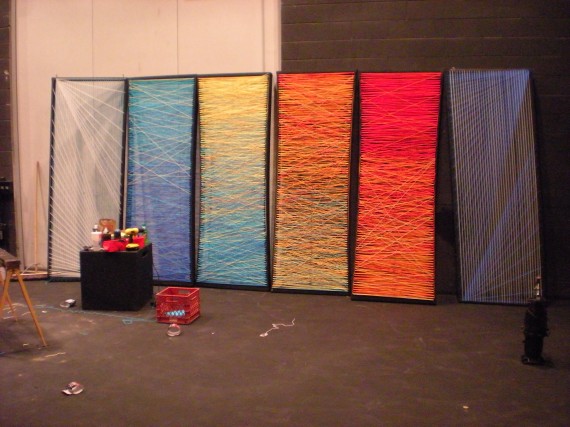
They didn’t plan the designs until they started stringing them up. The frame sizes were 3’x8′ with 6 total – with a center screen hung in the center.
Build steps:
- Build frames.
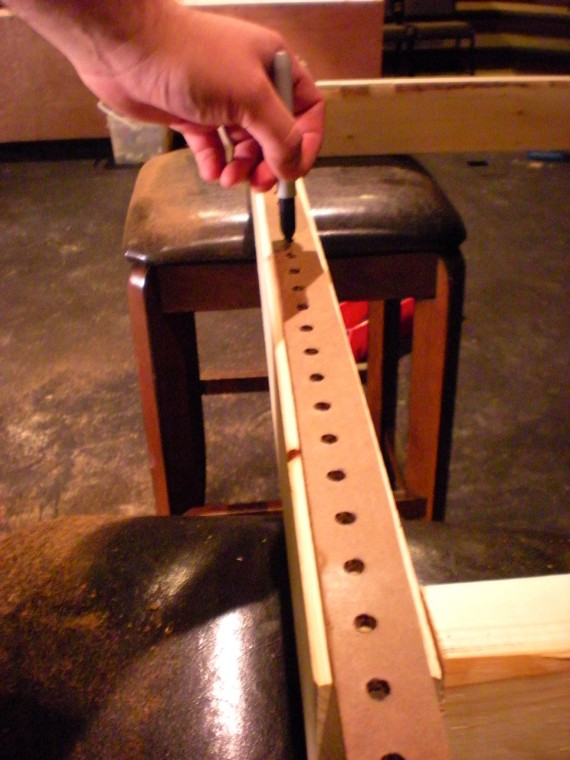
- Use a Sharpie marker and a single row of peg board as a template. Markings were made on the front of the frames for even spacing – top, bottom, and sides.
- 1-1/4″ screws, screwed into markings from template exposing about half of the screw.
- Eye hooks attached for hanging.
- Paint black.
- String up.
They required about 15 man hours and cost about $125. Yarn was Red Heart Super Saver (about $3/ each).
Notes:
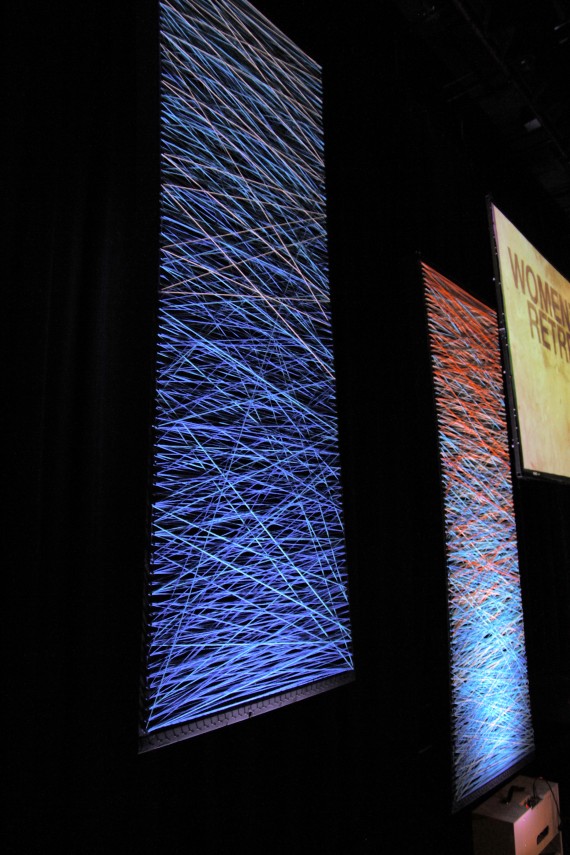
- Apply medium tension to yarn so that when it stretches it holds its shape.
- Apply additional bracing to middle if you want to keep the square shape or move to thinner wood if you prefer an hourglass shape. Because of the number of strands, tension builds up on the wood and it bows inward.





This is great! I’ve had this idea in my head and drawn out! Glad to know it works and looks great! So smart to use the peg board for a template! I would have been with a tape measure! Could you please let me know what you are using for the uplights? I don’t think the ones we use will do the job. They are beautiful without light too! Thank you! Great job!
Thanks Jenifer! These were really a hit with our guests and are a great budget and time friendly element. We use Elation Opti Tri Pars (http://www.elationlighting.com/ProductDetails.aspx?Category=&ItemNumber=1554) for lighting of the panels.
Any light with a MFL or WFL lens should do do a good job with a single fixture. Lighting these at a steep angle either from the floor or ceiling really brings out the texture of the panels.
Hey Springhill, I’m thinking of using this design for our youth worship space after Christmas time. We bring our middle school and high school groups up to SpringHill Michigan for Winter Teen Retreats. You’ll have something different by then, right? Just wanna make sure we don’t get shown up by how much better yours would look ;)
Patrick, We have some big plans in the works for WTR’s this year! We have moved into our Juniors retreats and have a completely different set up now which will be posted here in a few weeks! We are really excited to get started with the Winter Teen Retreat stage soon! Looking forward to having your group with us this winter!
Christopher, do you have a webpage with all of your cool ideas! This is just wonderful!
How did you hang these? Are they free standing?
Theatrical tie line attached to our lighting grid.
Brilliant.
What size is the yarn #4 or #6? Great design by the way!
#4 size.
hi, great idea!
what type of yarn you are using? crochet yarn, cotton or ordinary yarn?
It was red heart econo yarn. It’s a synthetic I believe.
This is a great Idea and can be used for so many different things but, I was wondering did you put anything on the yarn glow in dark paint, neon paint anything? or is that just lighting.
Do you know how much yarn you used?
Getting ready to build this. Thank you so much for the idea.
This is incredible. We are inspired by this and are going to try to let this be our influence for our next design. How much yard did you end up using on this design? Where did you buy it from?
THANKS!
correction: yarn not yard :)
How many skeins of yard did this take? Looks great! Can’t wait to do this at our church.
We used about two per frame.
What size wood did you use? 1×2, 2×2, 2×4?
looks like possibly 2 x 3’s
Hi just wanted to ask if this still looks good even though the background is white? Thanks!
Hi just wanted to ask if you guys think this stage design will look good even in white (or beige) background? Thanks!
How far apart are the screws? What size screws? What kind of light works best? Thanks
This project can be made quicker and cheaper by cutting a 4×8′ sheet of pegboard into two 2×8′ sheets and just looping the yarn through the holes. Then, just hang the sheets from the wall with two screws at the top, or prop them up against a wall for quick setup/tear-down.
Using the pegboard sheets also give you the opportunity to do more intricate designs since you can go in and out of any of the holes on the whole board.
Big props to @Christopher Law for the idea!
I just came across your site and I want to thank you! I have been looking for ideas for my editorial photography shoots and these with the light boxes will be perfect!
Looking at making some of these for a high school play and was just wondering what size lumber did you use for the frame. Great work by the way, they look amazing!
Hi, we want to make this for are party-event. This could work, not? I wonder what I need to buy and how to make it perfectly. Can someone post some links to good material, the best?
And is it save? (fire? when there is to much light on the yard for a long time?)
Hello
Approx how much yarn did you use to complete these panels?
Thank you
Philip
How many skeins of yarn were used for this?
Beautiful work! What size wood did you use to build frames?
Just wanted to know if you used multi colored yarn or just solid colors and then mixed them? Great job!