



Jeremy Huddleston from Saddleback Church Huntington Beach in Huntington Beach, CA, brings us this cool portable design.
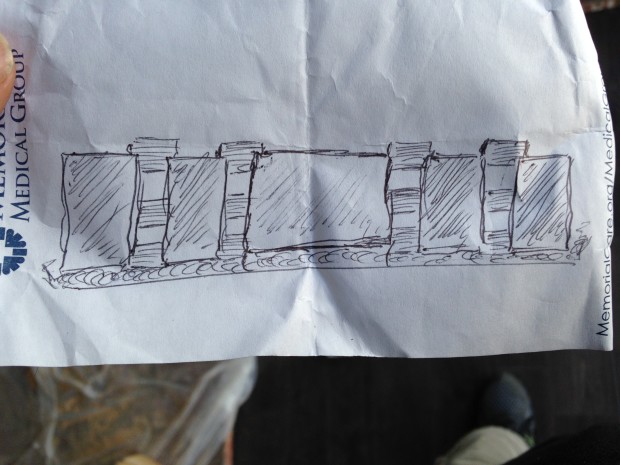
This campus meets at OceanView High School. They are a portable campus, which means everything has to be teardown-ready. Nothing can be screwed to a wall, hung from the ceiling, or mounted to the stage. Everything has to be freestanding. So Jeremy scratched an idea out on a small notepad and went to Home Depot.
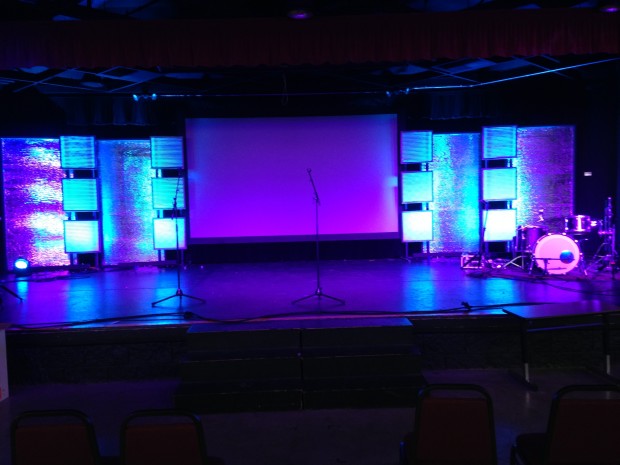
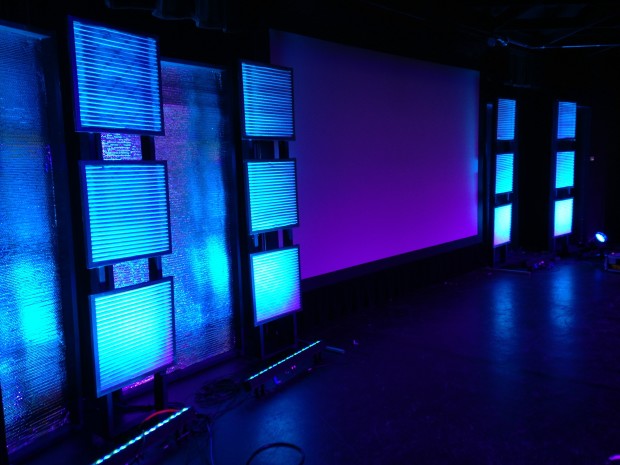
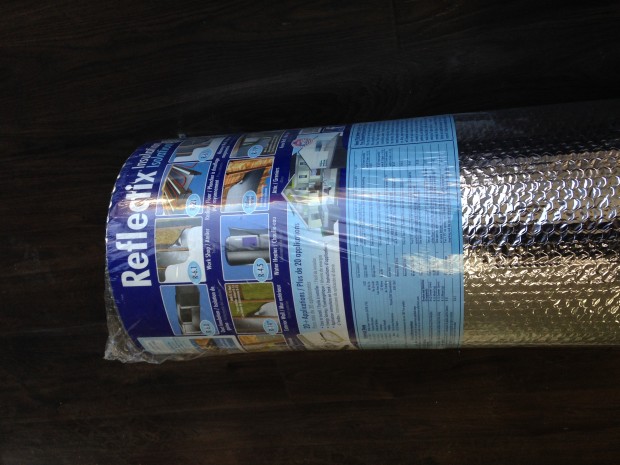
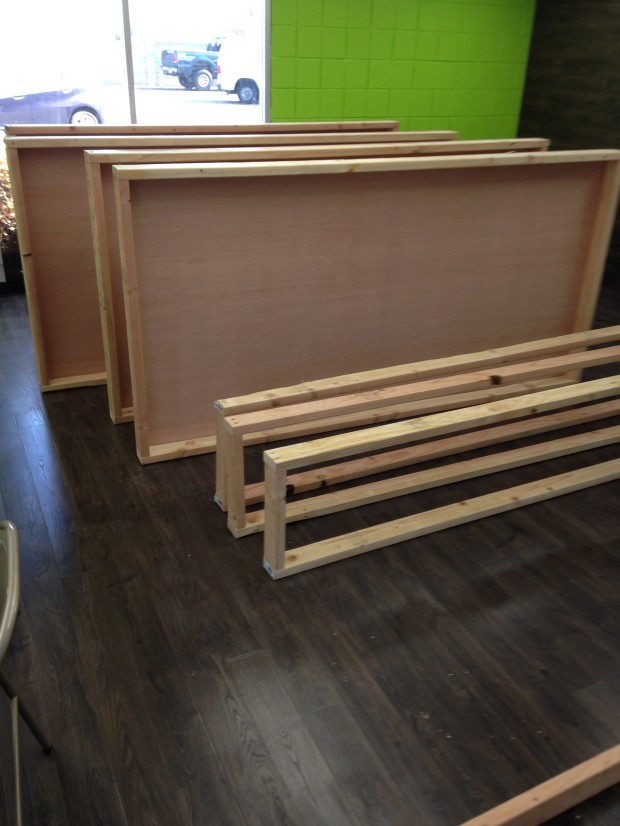
The first part of this design was building four 4×8 frames out of 2x4s. They were backed with a cheap piece of luan, painted flat black, and covered with some of his favorite stage material: “Reflectix” insulation. He hot-glued the Reflectix to the luan plywood. The staple tab texture catches light really well and has kind of an LED look. Plus, it’s a little over $100 for a 4’x100′ roll, so it makes a BIG impact for cheap.
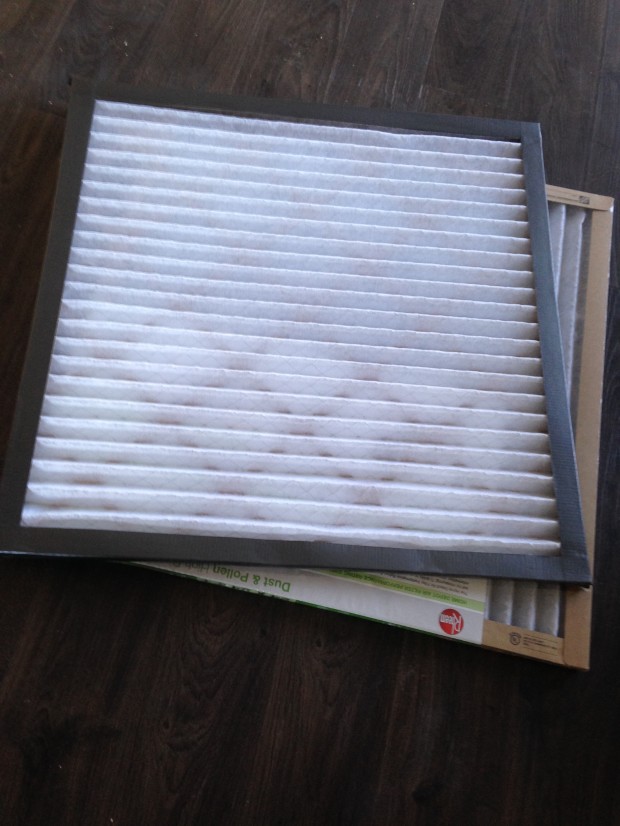
Next, Jeremy wanted a little more texture. So he built four 8′ tall x 16″ wide frames with no back (again out of 2x4s and painted black) and hot-glued three 24″x24″ air filters on each one (wrapped the edges in dark tape to frame them out). Metal “L” Brackets screwed to the bottoms of the frames gave them feet to stand on their own.
They have only 4 Chauvet LED bars on the floor lighting the set, and the staple tab also catches light from the front of house truss. The entire thing can be torn down in about three minutes.
With paint supplies, screws, lumber, insulation filters, braces, etc., this was about a $400 project.
How to Build a Portable Reflective Stage Backdrop
The strongest idea in this setup is that every visual element does two jobs: it creates texture under light and remains simple enough for a mobile team to handle. Reflectix is lightweight, inexpensive, and naturally faceted, so a small number of LED fixtures can produce more apparent depth than they would on a flat black wall. The narrow air-filter towers add a second scale of pattern without requiring another complicated material or permanent mounting point.
For a similar build, begin by mapping the available stage width and the storage footprint. Four-foot-by-eight-foot panels are efficient because sheet goods already come in that size, but each finished unit must still clear doors, hallways, and trailer openings. If full panels are too large, split each one into two hinged sections and use removable rear braces. Label every panel, foot, brace, and cable so volunteers can rebuild the same layout without guessing.
Keep the reflective skin slightly relaxed rather than pulling it drum-tight. Small ridges and staple-tab details create highlights as the viewing angle changes. Test the material with the actual LED bars before permanently attaching it, because narrow beam angles may leave dark bands between panels. A few inches of fixture movement can dramatically improve the wash. Black-painted frames and feet help the structure disappear when house lights fall, leaving the illuminated texture as the focus.
Planning the Budget, Storage, and Setup
Build a prototype panel first and use it to confirm the construction method, lighting distance, and teardown sequence. The frame, thin backing, reflective insulation, filter panels, fasteners, paint, and removable feet can all be sourced from common building-supply stores. Material prices vary, so reserve part of the budget for replacement filters, touch-up paint, gaffer tape, and padded storage separators. Those small items prevent visible wear and extend the life of the set.
For transport, stand the panels vertically with soft spacers between reflective faces. Store hardware in a labeled bin attached to the same cart, and keep each LED bar with its power and control cable. A simple setup diagram taped inside the hardware bin gives the team panel order, fixture position, and cable path at a glance. During rehearsal, check sightlines from the far left and right seats as well as the center; reflective surfaces can reveal hot spots that are not obvious from the lighting console.
A Repeatable Load-In and Teardown Plan
A portable scenic design succeeds or fails in the transitions around the service, so treat the load-in as part of the build. Before the first public setup, photograph each panel from the front and back, then create a one-page map showing the order of assembly. Assign simple roles: one pair unloads and positions frames, one person installs feet and braces, and another handles lighting and cable paths. Keeping those jobs consistent prevents volunteers from crowding the same task and makes it easier to train a substitute.
Measure the full route from the trailer or storage room to the stage. The narrowest doorway, sharpest turn, and lowest overhead clearance determine the maximum practical panel size. Add durable handholds on the back of each frame so no one has to grip the Reflectix surface. If the panels ride on a cart, use retaining straps and place thin foam or moving blankets between faces. A numbered loading order matters too: the pieces needed first should be the last ones placed on the cart.
Plan power and data distribution before the frames move into position. Tape a small floor mark for each LED bar and label both ends of every power and DMX cable. Run cables along protected edges rather than across volunteer traffic lanes, and use cable ramps where a crossing cannot be avoided. Leave enough slack for final aiming without creating loose coils near the feet. Once everything is connected, test one neutral white look before programming saturated colors; white light quickly reveals uneven coverage, wrinkles, damaged filter material, and distracting reflections.
The teardown should reverse the setup sequence. Let fixtures cool, disconnect power, coil cables with hook-and-loop ties, remove ballast, and then move the scenic units. Give one volunteer a short inspection checklist for loose screws, bent feet, torn reflective material, and crushed filters. Small repairs made before storage keep the next load-in predictable. Record the actual setup and teardown time after each use, then adjust the crew assignments or cart layout whenever a repeated bottleneck appears.
Pro Tips for Portable Reflective Stage Designs
- Control the reflections: Start LED bars at low intensity and add brightness gradually. Reflectix can look more dimensional with restrained side light than with a full-power front wash.
- Protect every edge: Cover sharp filter frames, metal feet, and exposed fasteners with dark tape or edge trim. This protects volunteers, floors, cables, and neighboring panels during transport.
- Design for repeatability: Use matching fasteners, numbered components, and tool-free connections wherever possible. A consistent assembly system makes a three-minute teardown realistic even when the volunteer roster changes.
- Test stability safely: Add rear outriggers or weighted bases where traffic, uneven flooring, or cable tension could move a panel. Keep ballast behind the scenic line and never depend on loose gear cases as permanent support.
Related Designs
- Portable Church Stage and Lighting Ideas – Explore flexible scenic and lighting choices for rooms that must reset quickly.
- Portable Stage Design Hacks for Churches on the Move – Learn practical ways to simplify transport, setup, and volunteer coordination.
- Common Church Stage Lighting Mistakes – Improve fixture placement, color balance, and visibility before the next service.
- Half Pipes – See another metallic-looking treatment that turns affordable material into a luminous backdrop.
- Air Filtered – Discover another creative stage texture made from ordinary air filters.
Related CSDI guide: Explore more small-church stage design layouts for real rooms.



Best stage design we have ever had! Nicely done.
You left out the fact that you did all this with 1 weeks notice :)
Great job looks awesome! Do you think it would work with just a 64 LED par light on each panel?
Thank you for sharing
Yes Gary, LED cans would work as well. The trick with this stuff is not to try to light from directly below but to pull the lights out away from it somewhat as it reflects the light more than most materials. Just setup your lights and go out to the seating area and move them around until you find the best position.
Awesome idea and very creative. Loved reading. Thanks for sharing.
Digging it ….way to think outside..
I was just curious exactly which LED light you use to give it that really cool purple color. Or if there are some options. Anything helps. Thanks!
The purple is coming for Chauvet colorado Can fixtures
Hey! I’m doing the same stage and our final product is not reflecting as well as yours. Can you email and chat, because we are stumped?
Kyle … just saw this! Sorry bro …. hoping you got it worked out!
Hey, great idea … very creative use of regular “home-building-supply” stuff!
Thanks for sharing this idea. We were able to create a modified version of this.
Awesome bro! A quite one. Is it still the reflectix that you used on the frames? Thanks
in a portable setting, how do you store these? Are they on rollers?