



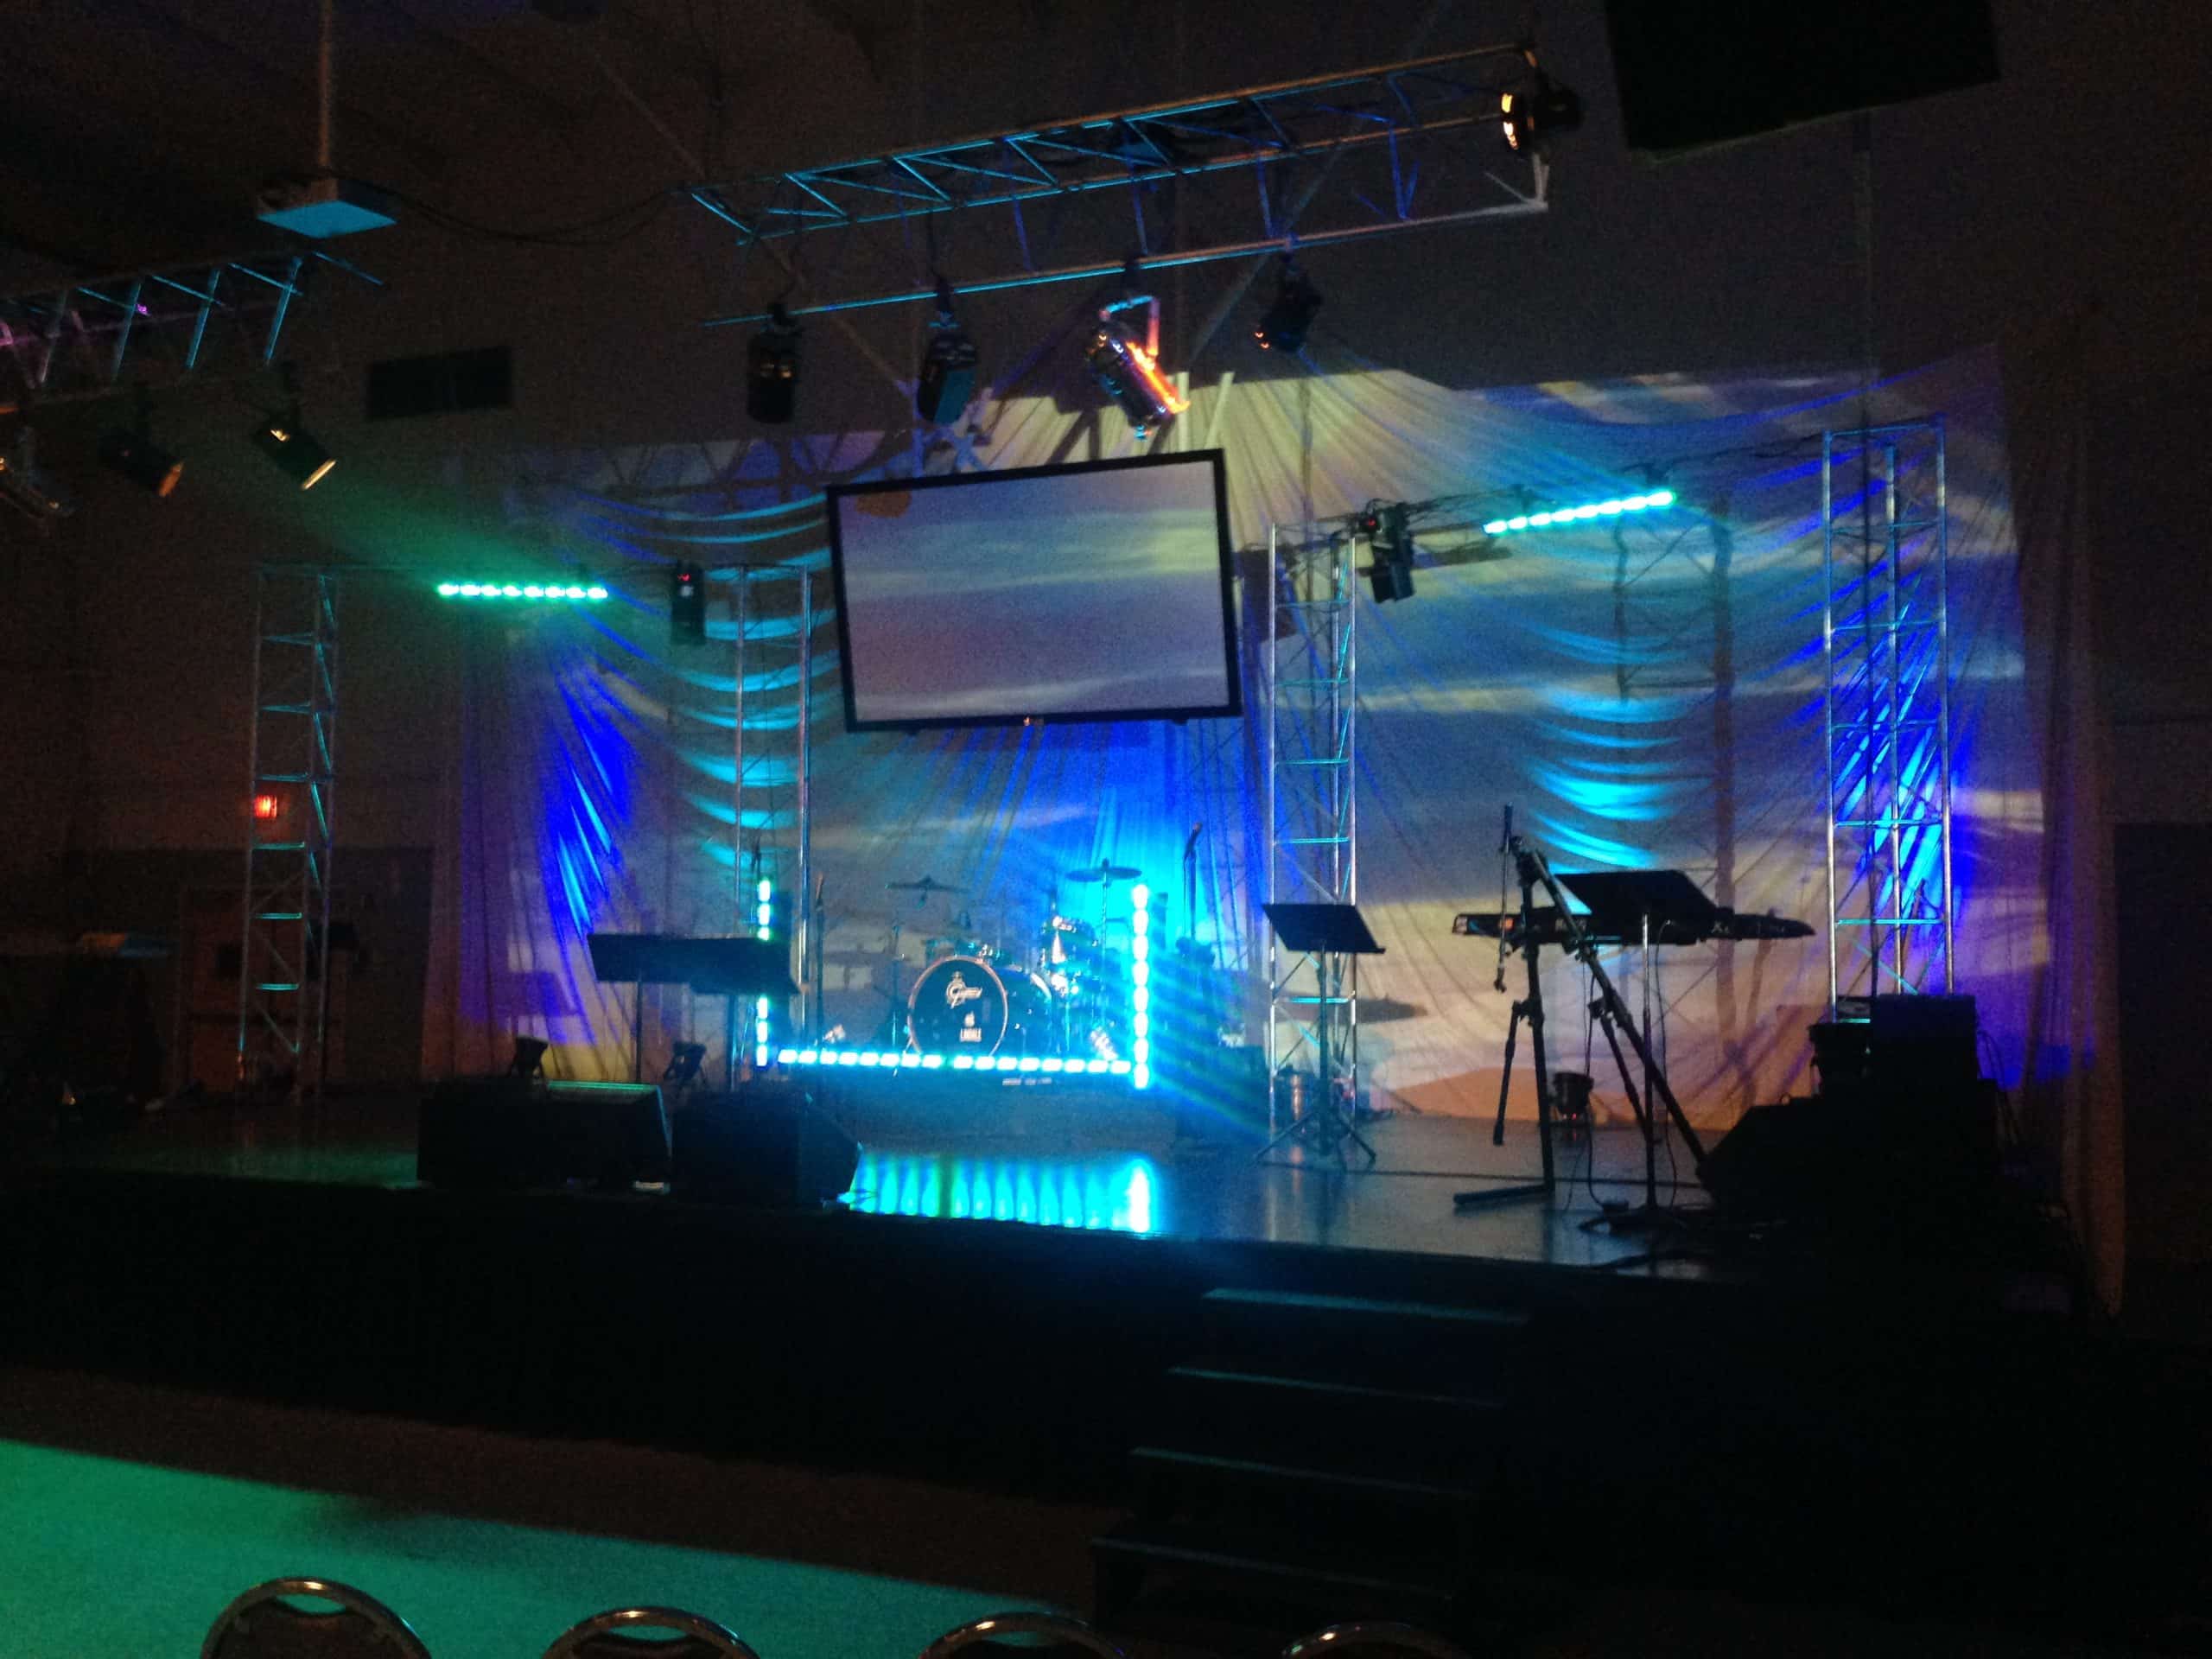
Harrison Meeks from Lindale Church (Elevate Student Ministries) in Houston Texas brings us this design for their youth room.
They purchased a large 100′ parachute from an army surplus center locally and simply tied the center to a truss high above the rear of the stage and used simple rope to tie the far ends to the roof beams of our buildings ceiling which made a beautiful backdrop for environmental projection or to throw some LED washes onto.
The triangle truss columns were actually salvaged antenna tower they snagged for free from an antenna tower supply yard. They used silver metallic spray paint to give it a traditional truss finish and used pipe flanges to anchor them into the stage floor.
They used LED Pixel Bars to create the V-shaped lighting configuration, simply attached to the truss and stands. They repurposed their gymnasium to fit their expanding student ministries, so they literally removed the basketball goal and used the existing framework to attach their projection screen. Total Cost on the parachute backdrop was $125.

How to Plan a Fabric or Parachute Stage Backdrop
A parachute creates scale with very little visual weight, which makes it useful in youth rooms, gymnasiums, and temporary worship spaces. Before buying one, measure the stage width, ceiling height, rigging points, projection area, and every exit path. Sketch the fabric in plan and elevation so the folds frame the platform instead of covering speakers, screens, signs, sprinklers, or emergency lighting. A small mock-up made with inexpensive cloth can help the team test the shape before lifting a full-size piece.
Choose fabric according to the desired effect. White and light gray material reflect saturated LED color clearly, while darker fabric can create more contrast but usually needs additional output. Sheer theatrical fabric can support layered looks and silhouette effects. A surplus parachute provides dramatic radial folds, but its exact dimensions, condition, seams, and flame performance should be checked before use. Confirm the material and installation method with the church’s facilities or safety lead and follow applicable fire and building requirements.
Lighting and Projection for Sheer Backdrops
Place LED fixtures at different angles during testing. Light aimed across the fabric emphasizes texture and folds, while front light produces a softer, more even field. Backlight can reveal silhouettes and add depth when the material is translucent. Keep fixtures far enough away to blend colors smoothly, secure all power and data cables, and use safety cables on equipment mounted overhead. Save several restrained color palettes so the backdrop can support songs and teaching without competing with faces on camera.
Environmental projection works best after a camera test. Fine wrinkles and hot spots that look subtle in the room can become distracting in a livestream. Use a simple image with broad areas of color, then check exposure from the widest and tightest camera angles. If the projection looks washed out, reduce uncontrolled front light on the fabric or reposition the projector rather than making the image excessively bright. Maintain a clear path for projector ventilation and keep the beam away from people whenever possible.
Installation, Storage, and Reuse
Never assume an existing beam, basketball structure, pipe, or antenna section is a rated rigging point. Have a qualified person confirm the structure, hardware, load, and attachment method. Use rated components, provide secondary retention where required, and keep tension low enough that the fabric does not pull unpredictably on the building. Inspect the backdrop before each installation for tears, moisture, damaged seams, or altered flame-retardant treatment.
After the event, label attachment points and take photos from the front and back so volunteers can reproduce the layout. Clean the material according to its care instructions, let it dry fully, and store it in a breathable container away from sharp hardware. Keeping ropes, clamps, labels, and setup notes together turns a one-time scenic idea into a reusable backdrop that can be reshaped for future series.
Pro Tips for Sheer Stage Backdrops
Test one lighting zone first: Aim a few fixtures at a sample section and review it in the room and on camera before programming the full backdrop.
Separate fabric from heat: Maintain the clearances required by fixture manufacturers and never let material rest against lights, power supplies, or ventilation openings.
Document every attachment: Photograph connection points and label hardware so future volunteer teams can rebuild the design consistently.
Plan a calm default look: Create one neutral lighting scene that keeps attention on people and works when no special projection content is running.
Related Designs
- Burnout Fabric – Explore another translucent fabric treatment that combines texture with colored stage light.
- Blinded Behind Sheer – See how layered sheer material can add depth and conceal structural elements.
- Strung Fabric – Use suspended fabric strips to create motion, rhythm, and a lightweight scenic surface.
- Stage Backdrop – Compare a different backdrop approach for shaping the rear of a worship platform.
- Wall Light Panel Ideas – Find dimensional alternatives when a room needs a more structured lighting surface.
Related: For a different environmental projection surface, see Triangle Wall, where layered geometric faces are mapped individually instead of using one fabric canvas.



Leave a Reply
You must be logged in to post a comment.