



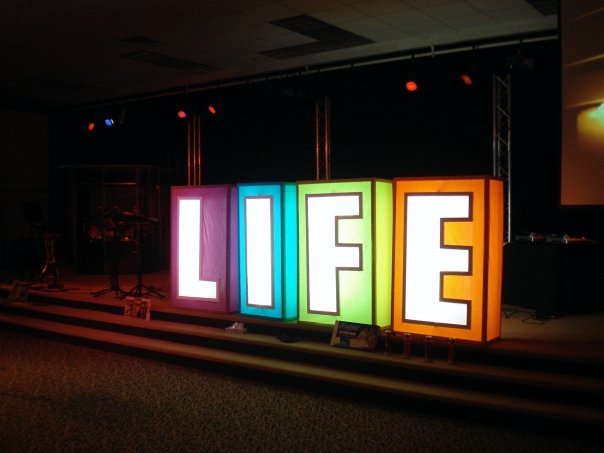
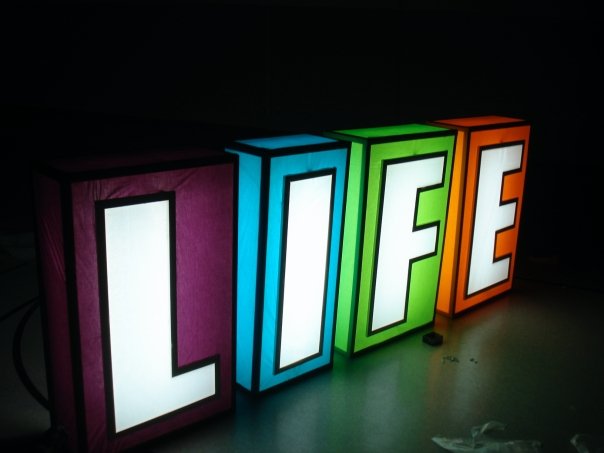
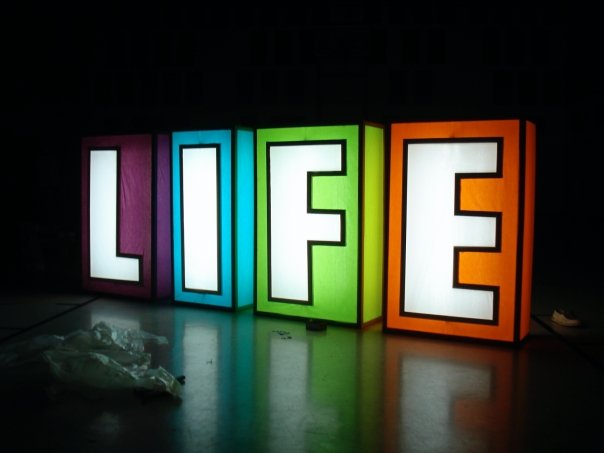
Peter Good at Glad Tidings Assembly of God in West Lawn, Pennsylvania brings us this vivacious stage prop.
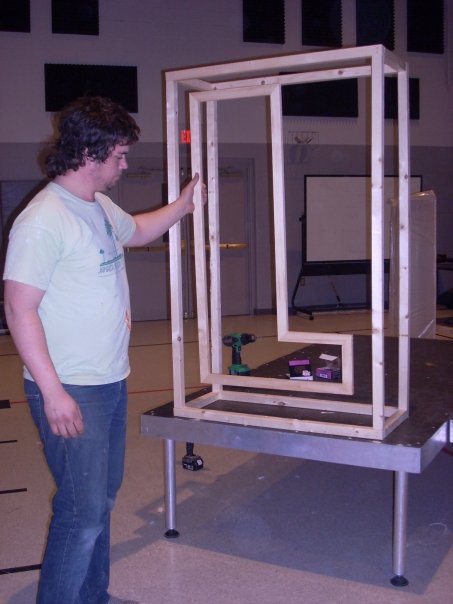
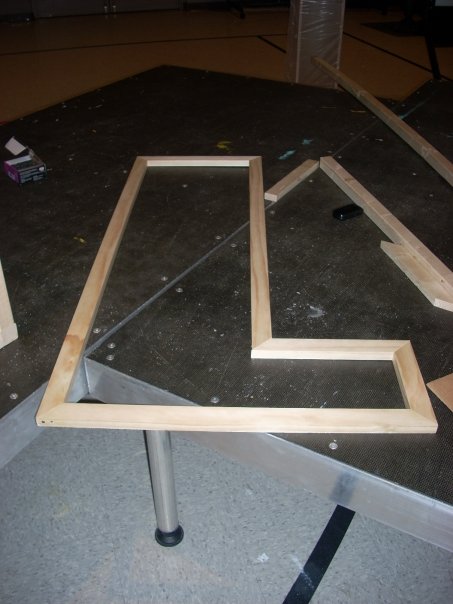
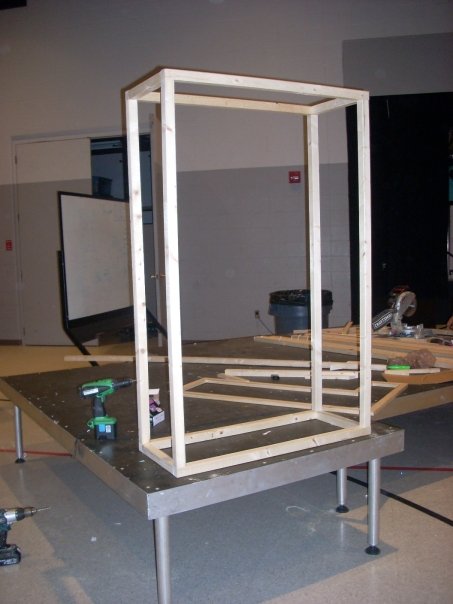
The letter panels stood 5 feet high, 3 1/2 feet wide, and 1 foot deep. The letters were back lit with halogen strip shop lights from Lowes and Home Depot.
Building Oversized Letter Props That Read from the Room
Large dimensional letters work because the audience can understand the idea before anyone explains it. At five feet tall, these panels become architecture rather than small decorations, and the generous depth gives each character enough structure to stand securely. For a similar build, start by plotting every letter on paper and marking the overall width of the finished word. That simple layout check helps prevent uneven spacing and confirms that the set will fit between screens, instruments, and walkways.
A lightweight wood frame is a practical starting point for each box. Thin plywood, hardboard, or rigid foam can form the visible faces, while internal cross braces keep the panels square. Build separate modules instead of one continuous wall so volunteers can carry them, store them vertically, and replace one damaged face without rebuilding the entire word. Paint the inside surfaces a light neutral color to bounce more light, then use saturated colors on the exterior to create the playful, high-energy look.
Lighting, Color, and Safe Installation
Backlighting adds a halo around each letter and keeps the word visible when the room lights drop. Halogen shop lights produced the original effect, but modern LED strip fixtures are a cooler, lower-power alternative. Whatever fixture you choose, leave ventilation space, keep lamps away from combustible panels, secure every cable, and follow the fixture manufacturer’s clearance guidance. Test the set at the actual service lighting level; a glow that looks subtle in the workshop may become much brighter on camera.
Color order matters, too. Alternating warm and cool tones keeps adjacent letters distinct, while repeating one accent color can visually tie the word together. Before painting, photograph color samples under the church’s stage lights because LEDs can shift reds, blues, and greens dramatically. A matte or eggshell finish usually photographs more evenly than gloss and reduces distracting reflections from front light.
Planning the Build and Volunteer Workflow
Divide the project into repeatable stations: measuring and cutting, frame assembly, face preparation, painting, lighting, and final testing. A full-size template makes duplicate shapes faster and helps less-experienced volunteers contribute confidently. Label the back of every module with its letter, orientation, power connection, and storage location. During installation, use approved anchors or discreet ballast so the deep panels cannot tip if someone brushes past them.
Budget first for structure and electrical safety, then use paint to supply most of the visual personality. If storage is limited, design removable side panels or nesting frames. The same boxes can later be repainted, wrapped with fabric, or fitted with different face shapes, turning a one-series prop into a flexible scenic system.
Related Designs
- Weathered – See a recent scenic treatment that builds impact through strong texture and atmosphere.
- Road Trip – Explore a recent themed environment that makes a sermon concept immediately recognizable.
- Faithful Creation – Find another recent stage design shaped around clear visual storytelling.
- Words with Friends – Compare another game-inspired set built around oversized letter forms.
- Pixel Perfect – Discover a colorful, modular design with a playful digital aesthetic.
Pro Tips for Oversized Backlit Letters
Prototype One Letter First: Build and light a single module before cutting the full set. You can correct the depth, brightness, access panels, and support method while changes are still inexpensive.
Control Light Spill: Add narrow interior baffles or black foil where needed so the glow outlines the letters instead of exposing bulbs and cables to the audience.
Design for Service Access: Make the back panel removable and place connectors where volunteers can reach them without moving the entire scenic unit.
Rehearse the Camera Look: Check wide shots and close-ups before the first service, then adjust dimming and front light so the colors stay vivid without clipping on video.
Related: See how plywood lettering, gold rays, and decorative bulbs work together in Shine it Out’s Jesus First stage backdrop.



What did you use for the color panels?
This looks great! How were the letters attached within the boxes? Are the colors within each box cloth?
What did you use for the color panels???
hi guys. ok so for all the material used on this project both color and white i used: drum role please! ………………… bed sheets. :)
i wrapped the the letter in 3mil plastic then a white sheet, from front to back stapled on the back side. i then wrapped the box section in 3 mil plastic to dissipate the light then attached the colored bed sheets. then attached the color section to the back of the letter. cut the extra fabric inside the letter to clean it up. the letters were "hung" in place by using a small board on the back side of the letter attached to brace on the back side of the light. the 2 boards top and bottom were small enough to hold the letters in place and allow light around so there would be no shadow. i hope that makes sense.
i think colored bed sheets are an amazing way to get cheap colored fabric. and usually if you get a queen of king size it is VERY large square footage….
cheers
peter.
A Picture from the Back would Be awesome My Email is kjohnson@sunrisechurch.org. And what is the letter made of just the wood wrapped in plastic or is it a white sheet? Great Idea!!!!!!!!!
the letter is framed in wood then wrapped in 3 mil plastic and then white fabric. and SORRY i do not have a pic from the back i actually built this design 3 years ago and did not think of taking "build" pics. once again sorry.
Do you still have the letters? Would you consider selling them?