



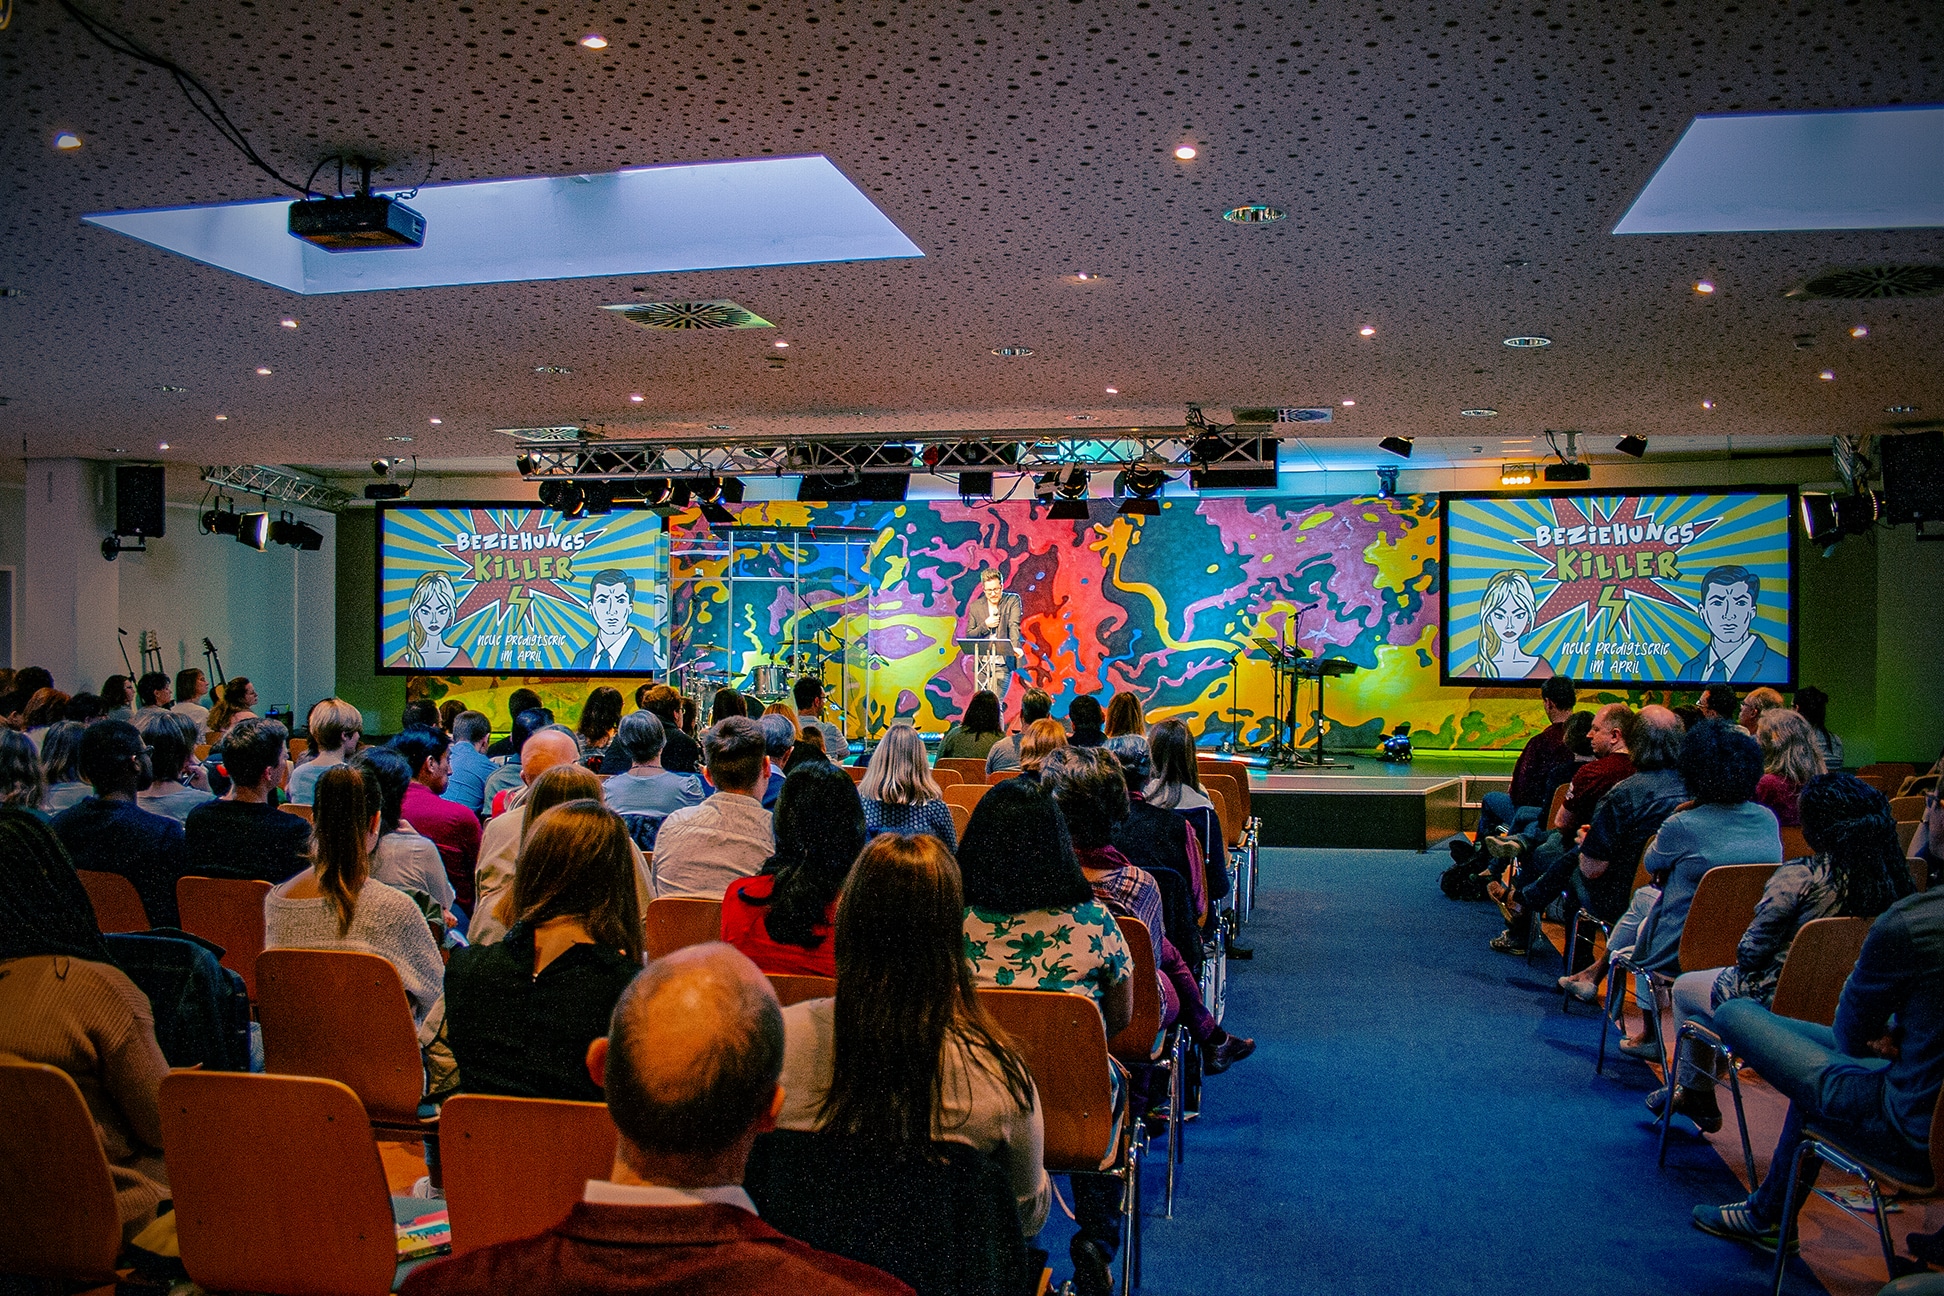
Daniel Reim from Freie Christengemeinde Bayreuth in Bayreuth, Bavaria, Germany brings us this colorful backdrop.
The piece measured 2.5 x 15 meters.
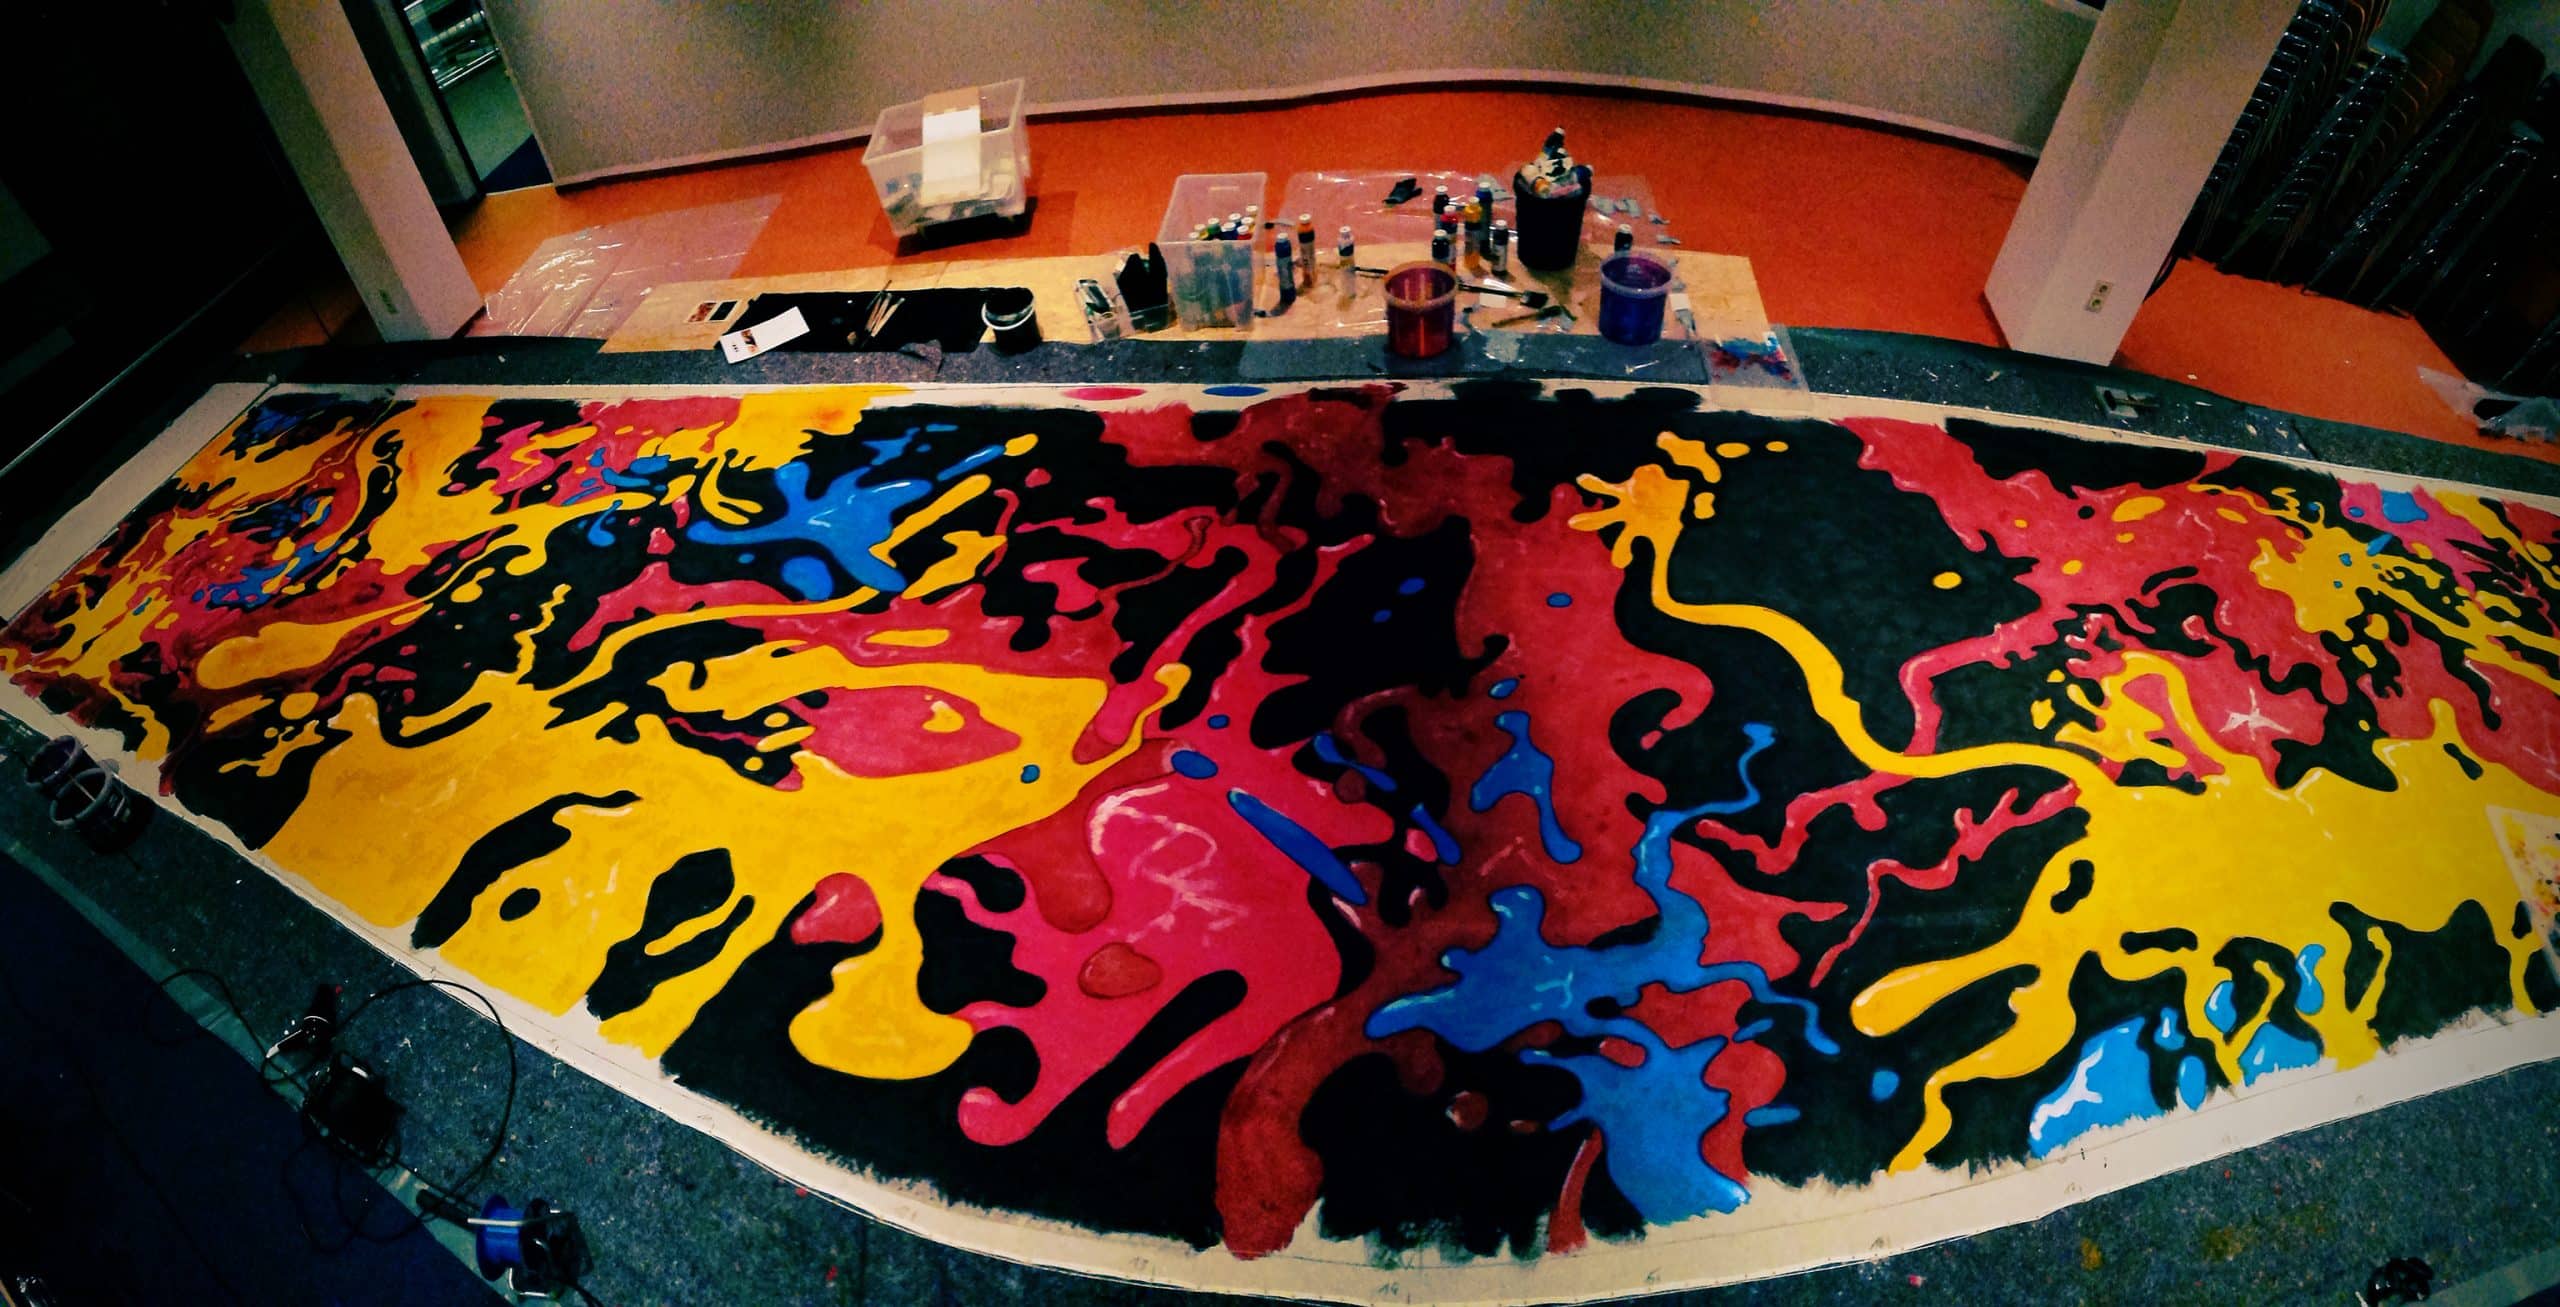
It was a cotton sheer muslin painted with diluted gouache to keep the fabric transparent.
They nailed the material to wood panels with a layer of absorbing fabric underneath to absorb superfluous paint. This allowed the use of a backlight without unwanted shadows.
The design was sketched with charcoal using a string grid to scale, then inked black with brushes on long bamboo sticks and then colored in.
A velcro band was attached onto the upper seam and its counterpart nailed to a ledge on the stage. The three other hems were tunneled, a separate cord run through each tunnel so the backdrop could be stretched out.
LED flood lights were used to light it from the front and the back.




How to Plan a Hand-Painted Fabric Stage Backdrop
A large painted backdrop works best when the artwork, fabric, lighting, and installation method are planned together. Start by measuring the visible stage area, rigging height, screen locations, speaker coverage, exit paths, and the camera crop used for livestreams. Convert the finished dimensions into a simple scale drawing, then divide the design with a grid. A matching string grid on the stretched fabric gives volunteers clear reference points and helps oversized shapes stay proportional from across the room.
Test the entire paint system on a fabric offcut before working on the main piece. Diluted gouache can preserve some transparency, but the result changes with pigment, water ratio, fabric weave, and the material underneath. Make a few swatches with different dilutions, let them dry fully, and view them with front light and backlight. The dry color may look lighter than it did during application, while thick paint can block light or stiffen the fabric. Record the mixture that produces the desired balance so every volunteer uses the same formula.
Painting, Lighting, and Installing the Fabric
Stretching the muslin over an absorbent backing keeps the work surface steady and catches excess moisture. Transfer the main lines with charcoal, then use brushes sized for the scale of the artwork. Long handles or bamboo poles can help painters reach broad areas without stepping onto wet sections, but volunteers still need stable access equipment and a clear work zone. Paint from light areas toward darker outlines when practical, and allow each section to dry before judging the final contrast.
Front lighting reveals the painted color and black linework, while backlighting emphasizes translucent areas and can change the apparent saturation. Program both systems independently so the backdrop can shift between soft, vivid, and silhouette looks. During testing, check faces as well as scenery: a bright painted wall should support the people on stage rather than force the camera exposure so low that skin tones become muddy. Keep LED fixtures and cables at manufacturer-recommended clearances and secure every floor-mounted unit against movement.
For installation, a hook-and-loop header can distribute the fabric across a ledge, while cords in the remaining hems help remove wrinkles. The supporting structure, fasteners, and overhead points should be reviewed by a qualified person for the actual load and room conditions. Keep tension even instead of pulling hard at isolated corners, and maintain required clearance from sprinklers, exits, electrical equipment, and heat sources. If the fabric will be reused, label each edge, photograph the final attachment points, and roll it around a wide tube after it is completely dry.
Pro Tips for Painted Fabric Backdrops
Build a full-system sample: Test fabric, paint dilution, absorbent backing, front light, and backlight together because each part changes the final appearance.
Use registration marks: Add small, removable grid labels along the edges so multiple volunteers can transfer the design accurately without cluttering the artwork.
Photograph each paint stage: Progress photos make it easier to spot uneven coverage and give the team a repeatable reference for future scenic projects.
Protect transparency: Apply color in controlled layers; it is easier to deepen a pale section than to restore light transmission after paint becomes too opaque.
Related Designs
- Multicolored Kingdom – Explore another large, colorful scenic treatment designed to fill a church platform with visual energy.
- Multi-color Boxes – See how repeated shapes and saturated color can create depth under stage lighting.
- Small Church Stage Design Ideas – Adapt scalable backdrop concepts to practical rooms, budgets, and volunteer teams.
- Painted and Brushed – Compare a different hand-painted approach using bold strokes and scenic panels.
- Paint Rags – Discover how fabric and paint can combine into a textured, light-responsive stage surface.



Leave a Reply
You must be logged in to post a comment.