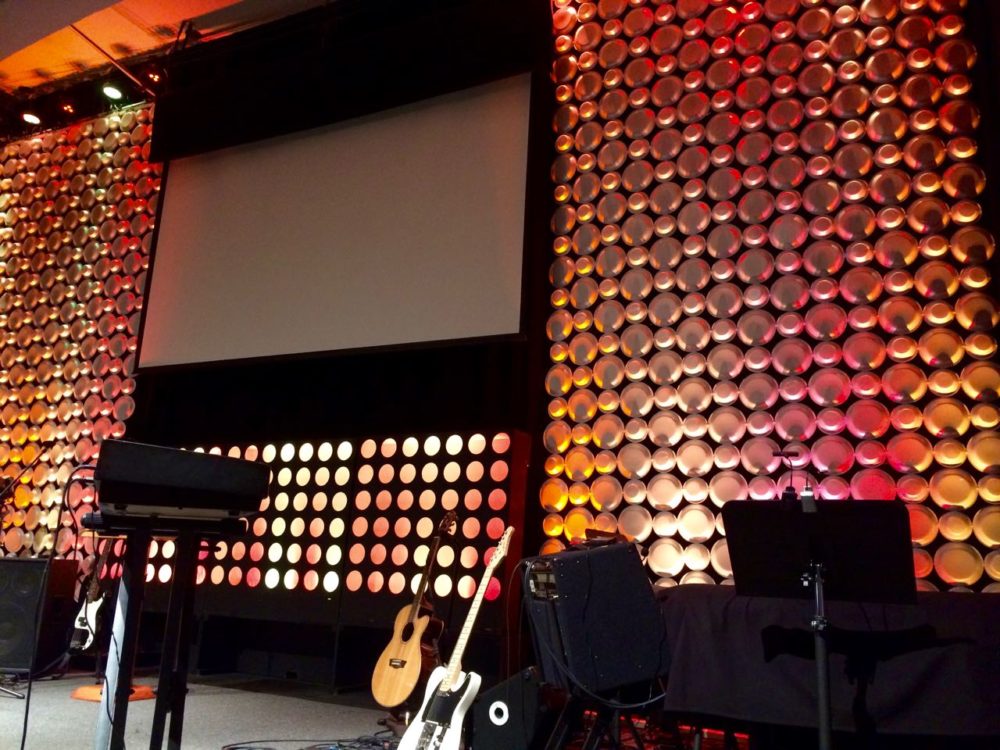
Allen Dunn from First City Church in Pensacola, Florida brings us this styrofoam design.
Inspired by the MultiDish. They used foam plates and bowls from the Dollar Store to construct a hanging curtain for each side of the projection screen.
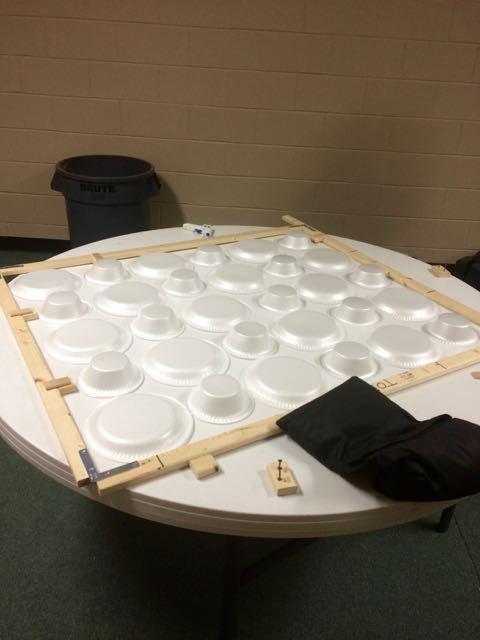
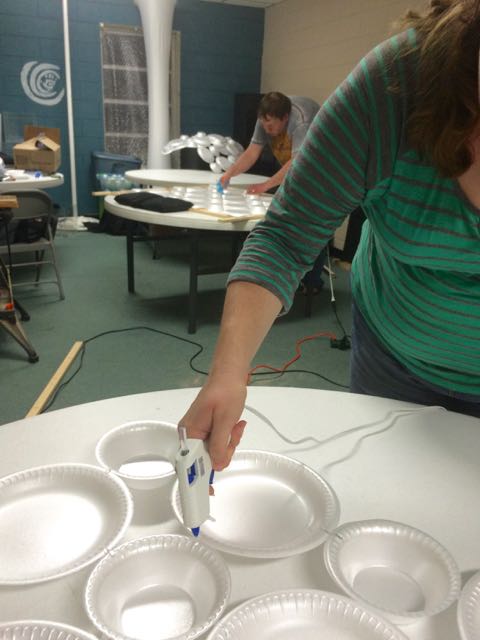
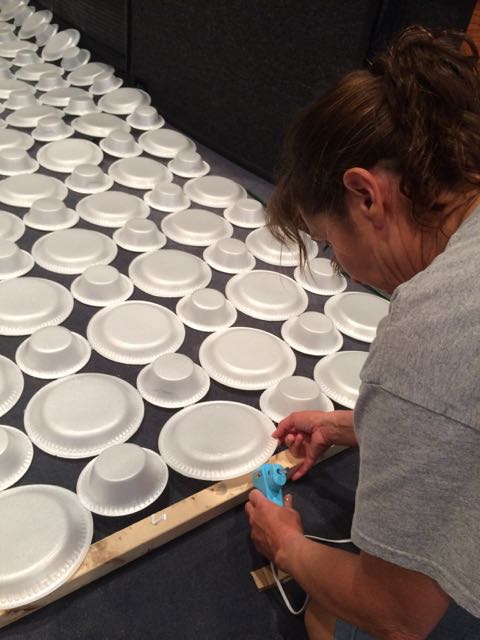
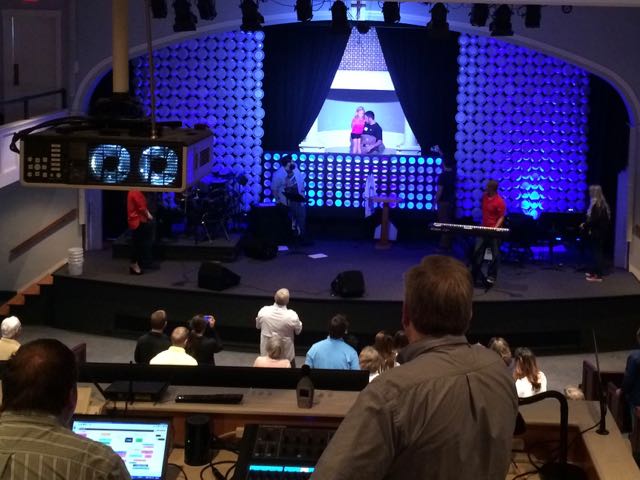
Low Temp hot melt held the plates together. Each 18 foot tall, 8 foot wide bowl and plate curtain was assembled in stages.
First, a jig frame was made to hold a small section in place while hot melt was dropped on each joint. Without the frame, the plates kept jumping out of position. After cooling, the reverse side was also glued at every joint. In the end, the entire weight of the curtain was supported by the hot melt alone.
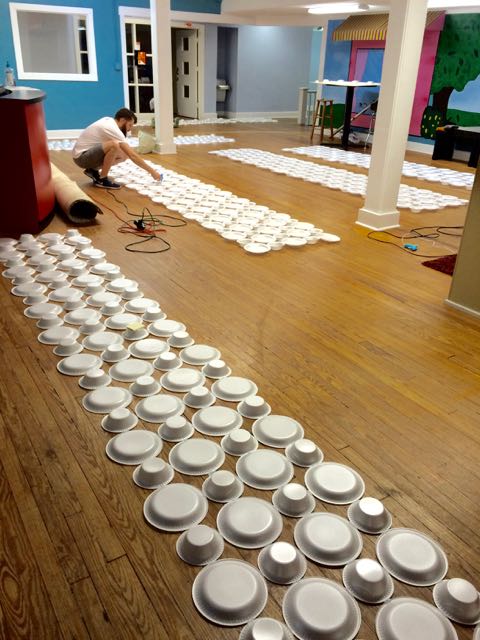
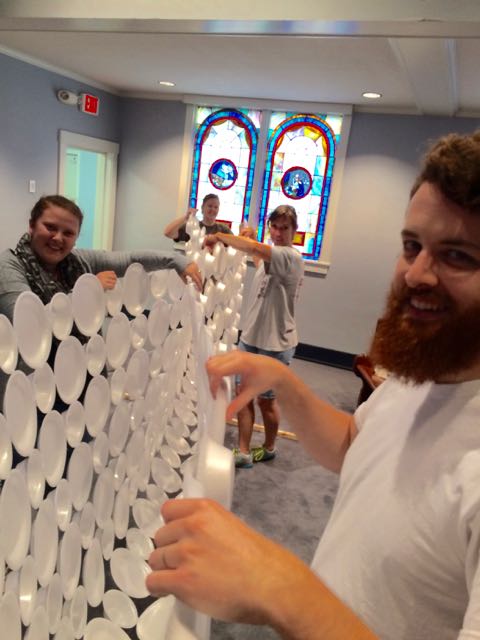
The small sections were aligned on the floor and hot glued to make 18 foot long strips which were then attached side by side until 8 feet wide.
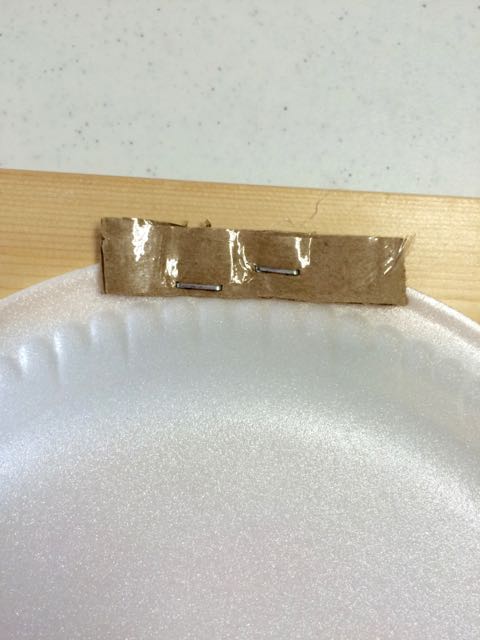
The “curtains” were sturdy. Each was carried near the stage and the top edge stapled to a 2×2. Cardboard was used to keep the staple from tearing through. Fishing line was sandwiched between a piece of cardboard and plates on the bottom row to be used to attach to another 2×2 on the floor after the curtains were raised into position.
The curtains were carefully attached to the lowered batten with the top 2×2. Then they raised the batten and it stayed together.
Lighting was above and below with Chauvet SlimPAR QUAD 3 IRC’s and SlimPAR 56’s
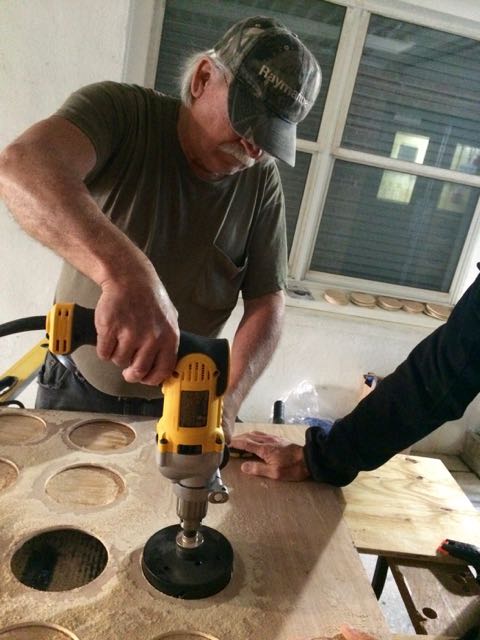
The light boxes from the Laser Beams design were fitted with new front faces made of Laun. Evenly spaced 4 inch holes were cut with a hole saw.
Each box was lit with a Sinuote 40W 252 LED 10mm RGB DMX Wall Light DJ Bar.
Why Choose Styrofoam Stage Design?
Styrofoam stage design offers churches an incredibly lightweight, budget-friendly solution for creating dramatic visual backdrops. This styrofoam stage design technique transforms inexpensive disposable plates and bowls into stunning architectural elements that catch light beautifully and create depth on your worship platform. Unlike heavy traditional stage elements, styrofoam stage design allows for easy installation, repositioning, and storage—making it perfect for churches that need flexible staging solutions.
The beauty of styrofoam stage design lies in its versatility. The textured surface of foam plates and bowls creates interesting shadow patterns when lit from different angles. When paired with LED lighting, this styrofoam stage design becomes a dynamic canvas that can shift colors and moods throughout your service. Whether you’re planning a special Easter production, a youth worship night, or simply want to refresh your sanctuary’s look, styrofoam stage design delivers professional results at a fraction of the cost of traditional materials.
Detailed Budget Breakdown
This styrofoam stage design project demonstrates how effective stage elements can be created on a modest budget. Here’s the complete cost breakdown for building two 18-foot tall curtain panels:
| Material | Quantity | Unit Cost | Total |
| 9-inch foam plates | 180 plates | $1 per 30 | $6.00 |
| 12 oz foam bowls | 180 bowls | $1 per 30 | $6.00 |
| 2×2 lumber (support frames) | 4 pieces | $2.00 each | $8.00 |
| Low temp hot glue guns and sticks | 1 set | — | $40.00 |
| Luan plywood (light box fronts) | 2 sheets | $10.00 each | $20.00 |
| Flat black paint | 1 can | — | $12.00 |
| PROJECT TOTAL | — | — | $92.00 |
Note: Lighting (Chauvet SlimPARs and Sinuote LED bars) was already owned by the church and not included in this budget.
Budget-Saving Tips
Shop Dollar Stores Strategically: Stock up on foam plates and bowls when you see them available. Dollar store inventory varies by location and season, so purchasing all materials for your styrofoam stage design at once ensures consistency in color and texture.
Reuse Your Investment: Unlike fresh floral arrangements or printed backdrops that have limited use, this styrofoam stage design can be stored and reused for multiple events. Store panels flat in a dry location to prevent warping.
Substitute When Needed: If luan plywood isn’t available, any thin plywood or even foam core board can work for the light box fronts. The key is keeping the weight minimal for easy mounting.
Styrofoam Stage Design Construction Tips
Building a successful styrofoam stage design requires patience and the right technique. The jig frame mentioned in the original build is absolutely essential—without it, the lightweight foam pieces shift and slide before the glue sets. Consider building multiple small jigs if you have volunteers helping, allowing several people to work simultaneously on different sections.
When creating your styrofoam stage design, work in a temperature-controlled environment. Hot glue bonds best at room temperature, and styrofoam can become brittle in cold conditions. Apply glue liberally at each joint—this isn’t the place to skimp on adhesive. The hot melt glue is literally holding your entire styrofoam stage design together, and those bonds need to support the full weight of the curtain when hung vertically.
Related Styrofoam Stage Designs
- MultiDish – The original inspiration for this styrofoam stage design, featuring layered foam bowls creating organic texture
- Laser Beams – Light box design repurposed for this styrofoam stage design project, perfect for dynamic color washes
- Stained Glass Everywhere! – Another budget-friendly backdrop option using Coroplast instead of styrofoam
- PVC Pipe Stage Designs – Lightweight structural alternative that pairs well with styrofoam elements
- DIY Church Stage Lighting – Affordable lighting solutions to illuminate your styrofoam stage design
Pro Tips for Styrofoam Stage Design Success
Use Low-Temp Glue Only: High-temperature hot glue will melt through styrofoam plates and bowls, ruining your materials. Low-temp glue guns designed for craft projects provide the adhesion you need without damaging the foam.
Plan Your Layout First: Before gluing a single plate, lay out your full pattern on the floor. This styrofoam stage design creates an 8-foot wide panel—measure and mark your boundaries to ensure your final curtain fits your stage dimensions perfectly.
Reinforce Stress Points: While hot glue is surprisingly strong, add extra glue at the top edge where the curtain attaches to the 2×2 support. This is the highest-stress area of your styrofoam stage design and deserves extra reinforcement.
Test Your Lighting: Styrofoam reflects light differently than fabric or wood. Test your lighting angles and colors before the big service to ensure your styrofoam stage design looks its best from the congregation’s viewpoint.
Handle with Care: Though sturdy when assembled, styrofoam can crack if bent or crushed. Transport your completed panels vertically or flat—never roll or fold them. With proper care, your styrofoam stage design will last through many worship services.
[tentblogger-youtube -ZIAwpvMWbI]


Lindo
What material was used for this design
What material was used for this design and how can I get it?
I base in Nigeria
Styrofoam bowls and plates