Philip Meadows from Church At The Crossing in Aledo, TX brings us this cool faux stained glass set.
From Philip: I wanted to do something different this year for Easter. We have had a lot of brown colors on our stage for the last couple of years and this year I wanted to have lots of color.
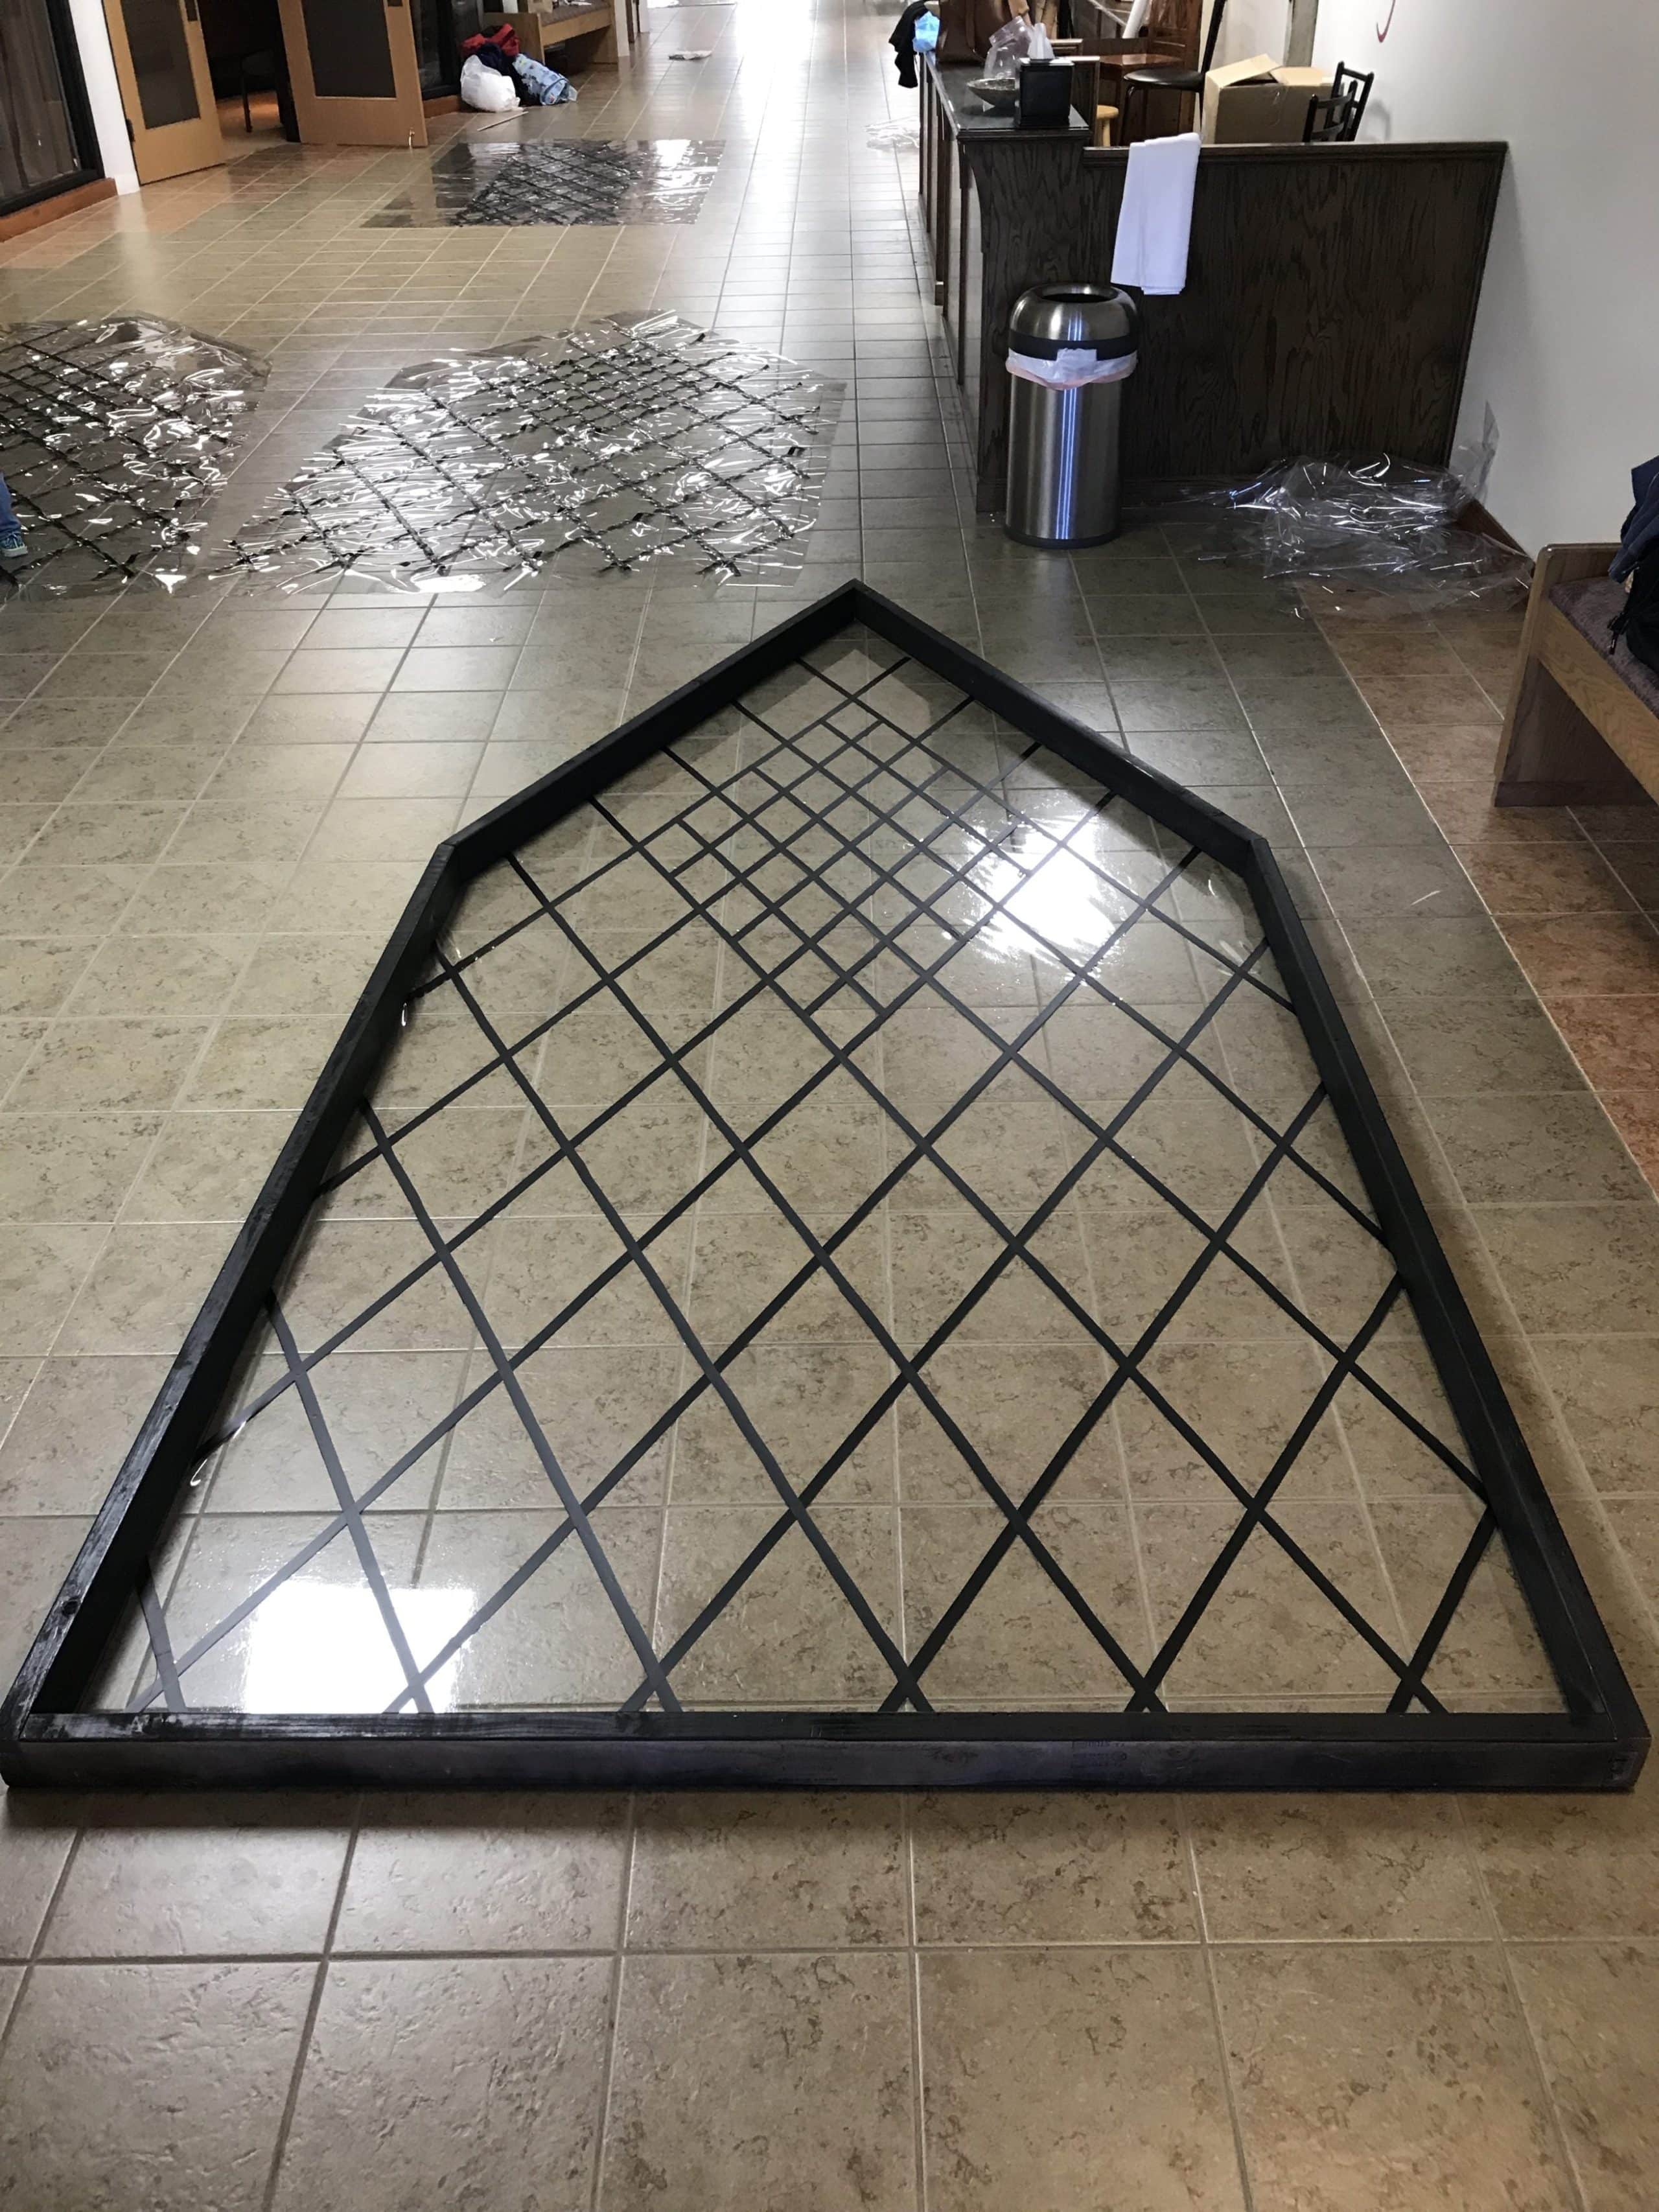
I built these stained glass panels to run across our whole stage. Each large stained glass panel is 14′ tall and the smaller ones are 12′ tall. They are constructed from 2×4’s, clear vinyl fabric, electrical tape and colored cellophane. It was a lot of work but the payoff at the end was worth it!
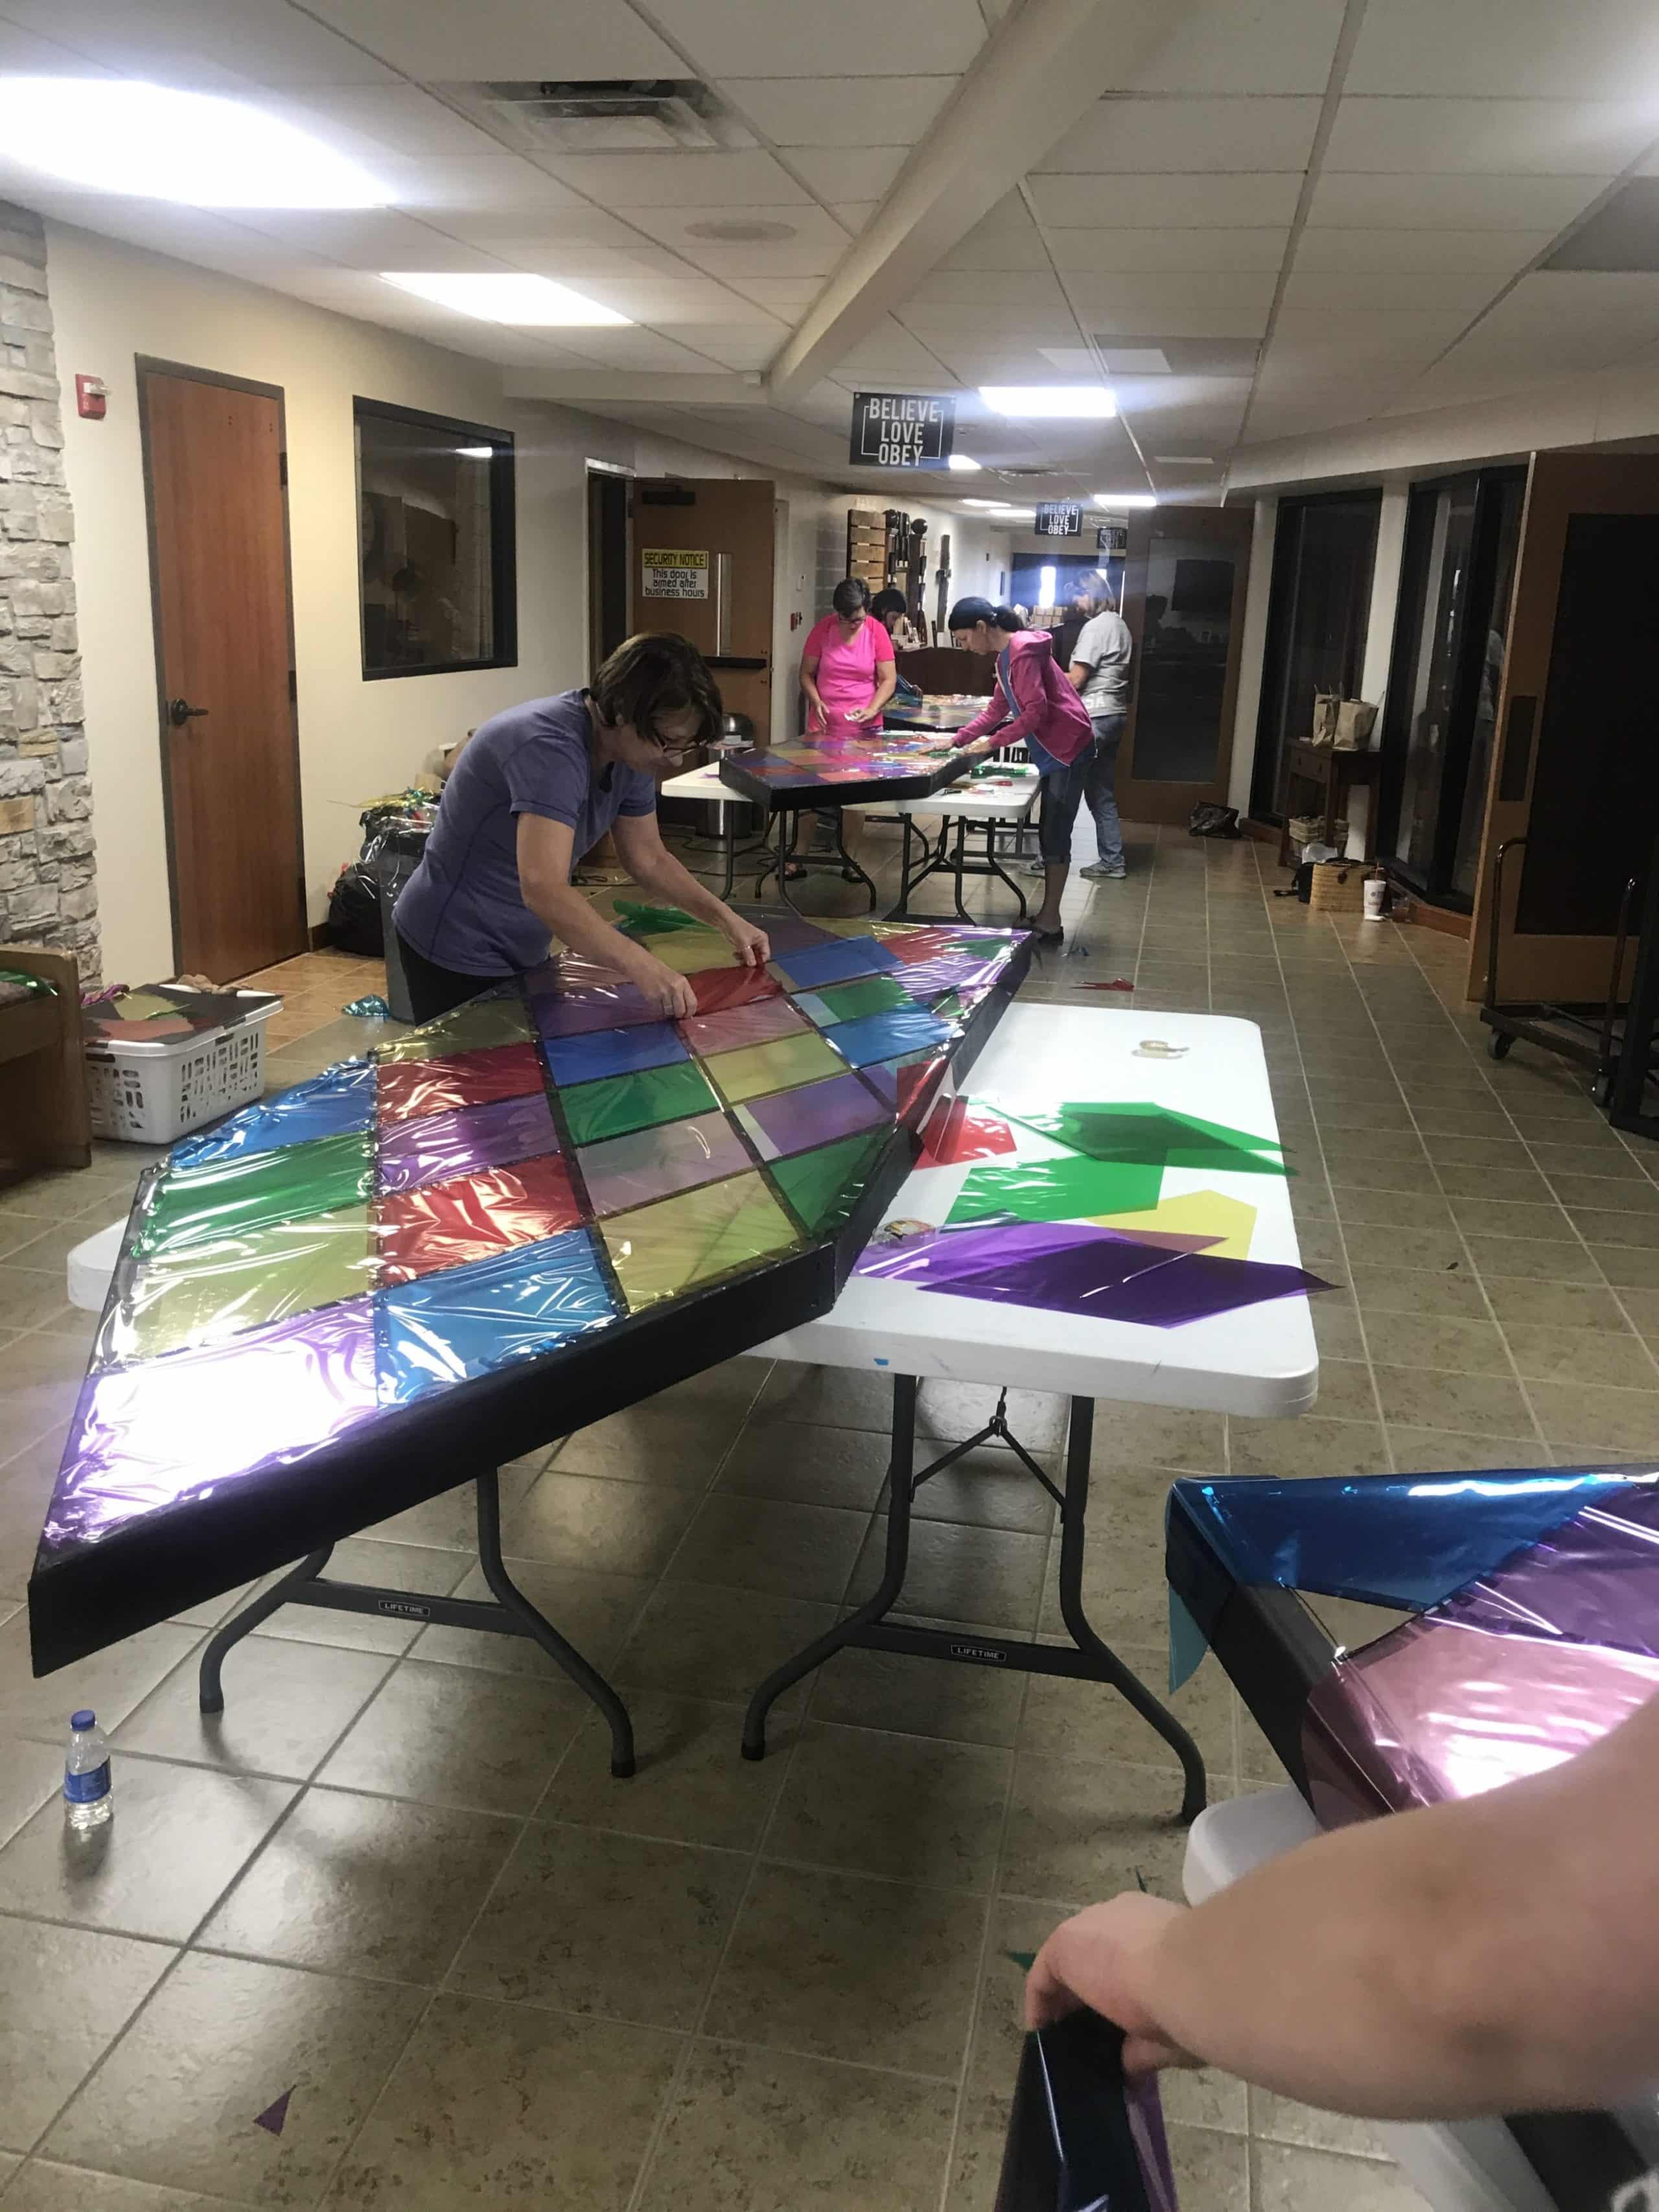
I sketched out the design onto two pieces of vinyl one for the large panel and one for the small panel and used those as templates to draw all of the designs. We then laid out the vinyl on the floor and used the electrical tape to tape off our design. After we taped the design onto each piece of vinyl we stretched the vinyl onto the wood and used a staple gun to hold them on to the back. We then cut and taped the colored cellophane onto the back of each panel. I attached the small panels to the larger panels with door hinges I ordered on Amazon.
It costs us around $900 to do everything, the vinyl fabric was definitely the bulk of the price.
Building Massive Stained Glass Panels for Easter
This stunning Easter stained glass stage design transforms any worship space into a vibrant celebration of resurrection morning. The 14-foot tall panels create an immersive backdrop that immediately draws the congregation’s attention upward, symbolizing the hope and new life that Easter represents.
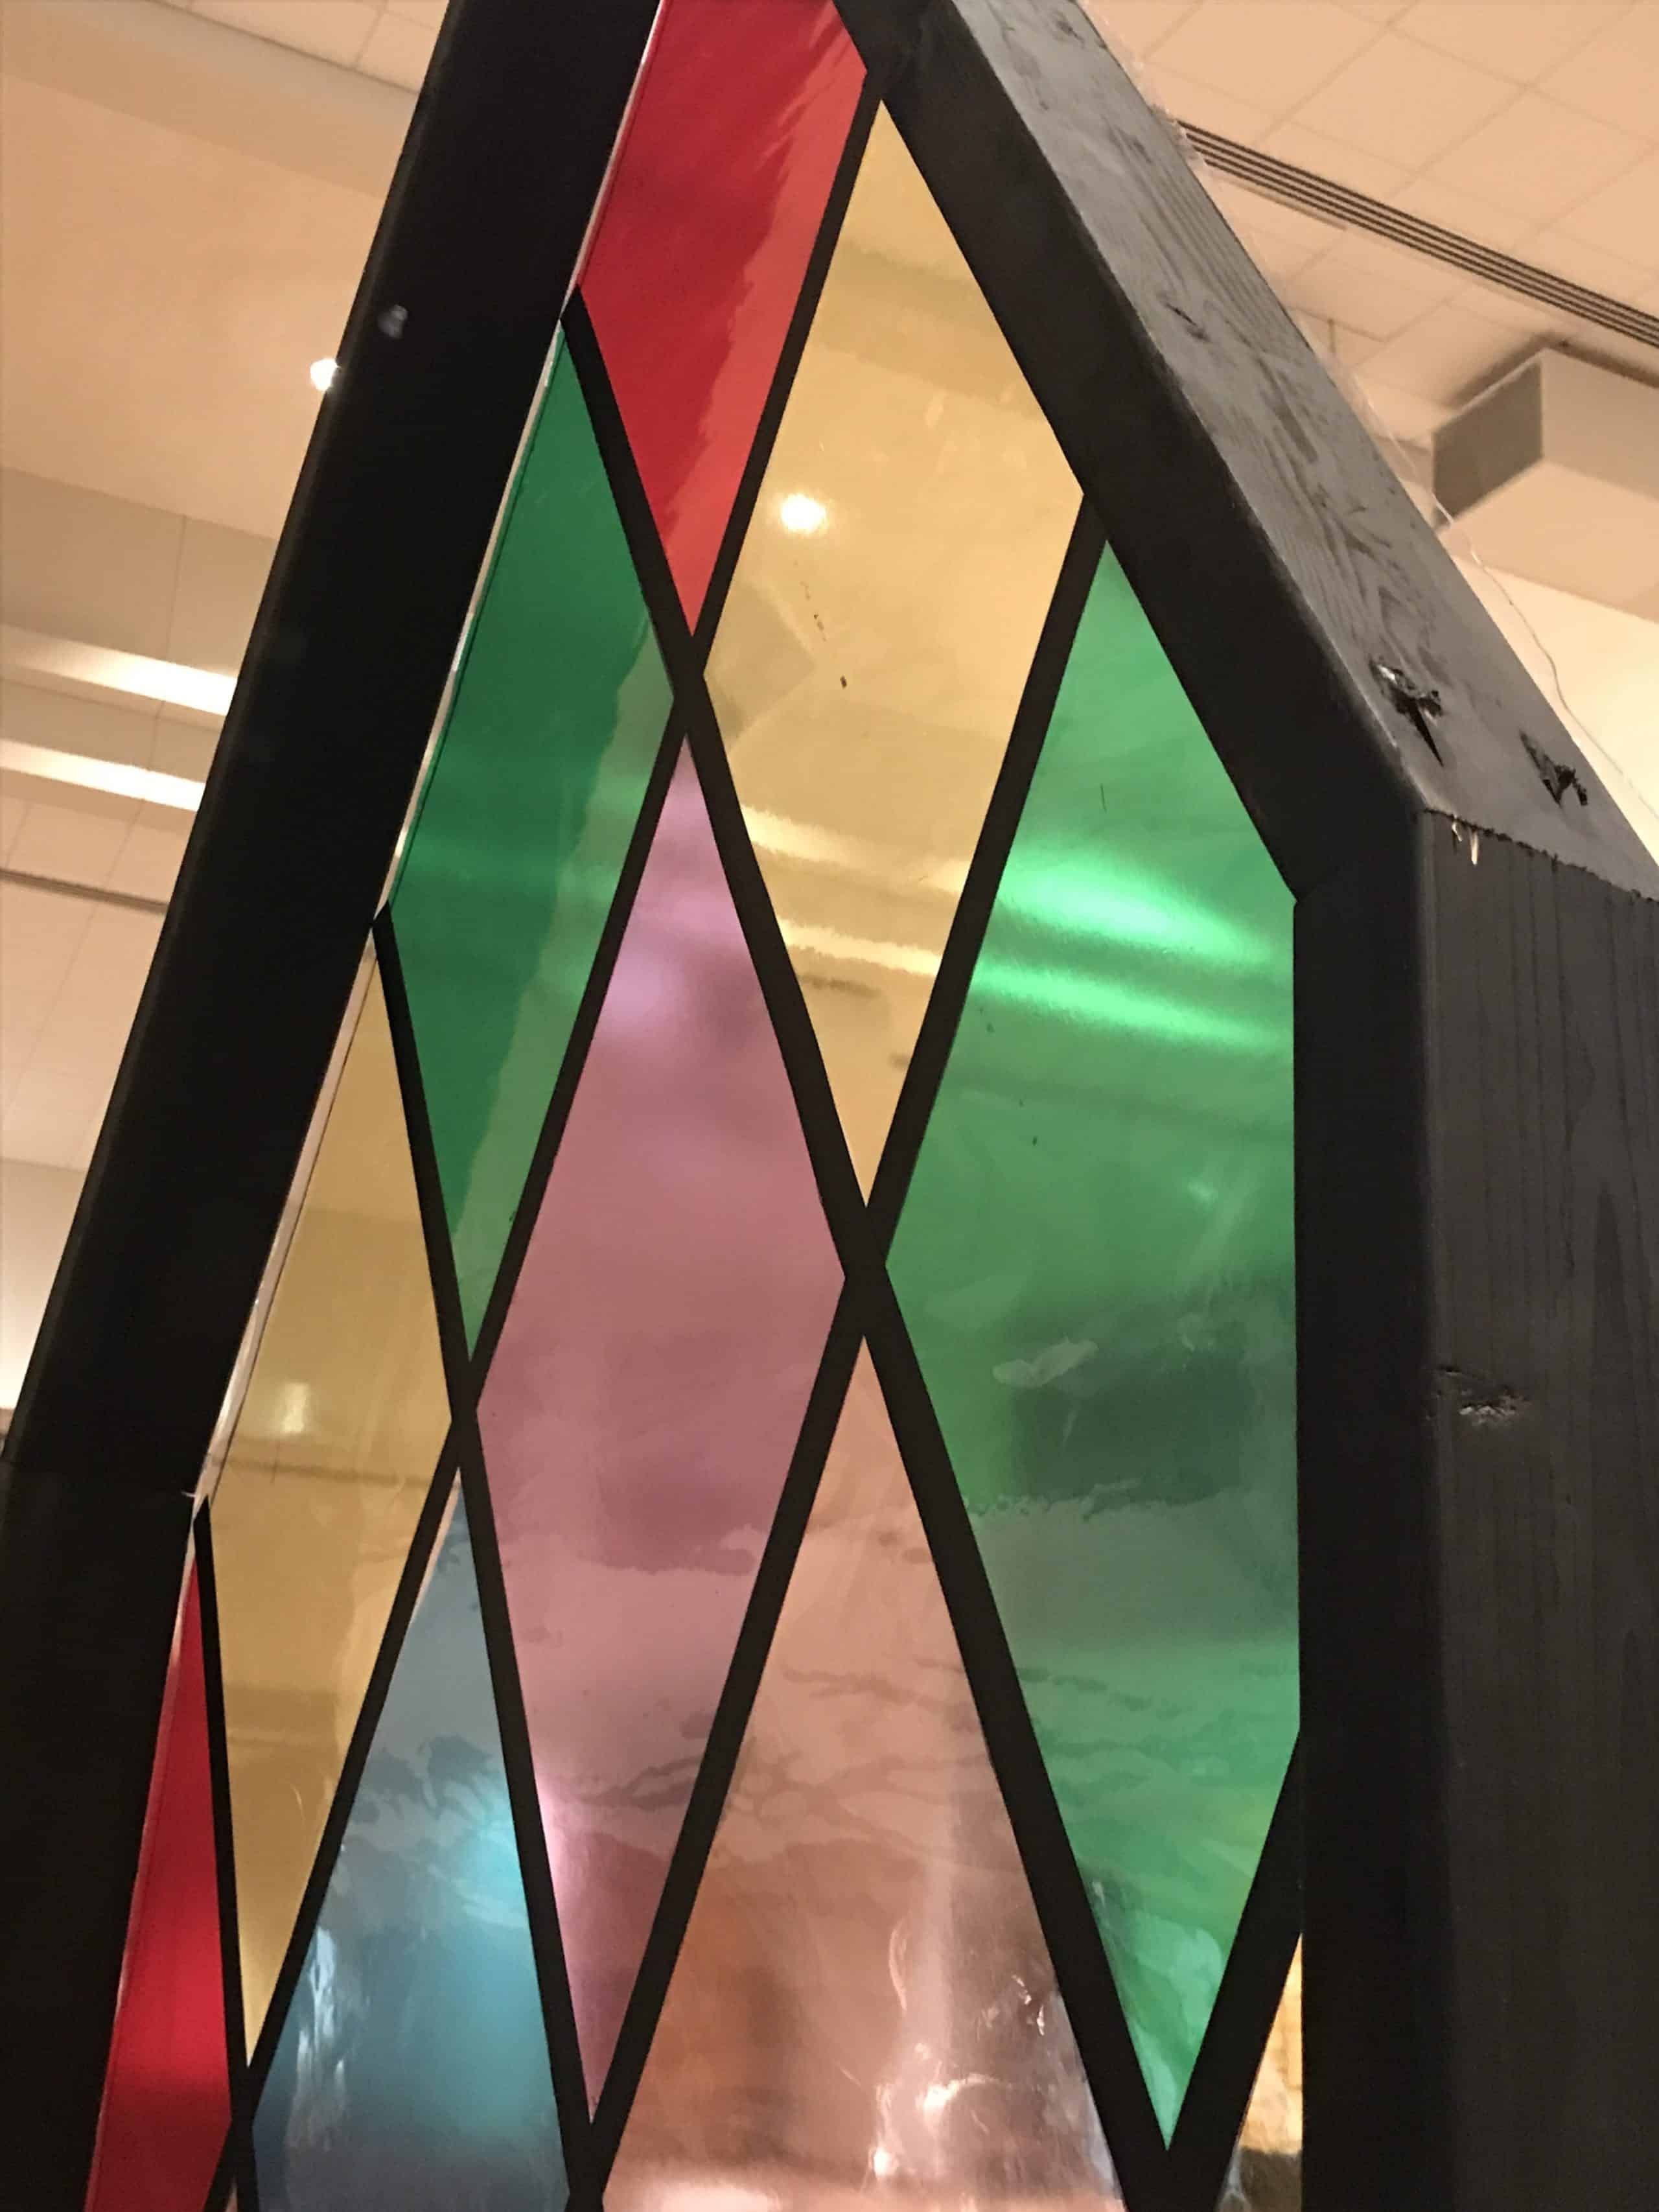
The construction technique combines traditional stained glass aesthetics with modern, budget-friendly materials. Clear vinyl fabric serves as the base canvas, providing durability and the translucent quality that makes stained glass so captivating. Electrical tape creates the classic leaded glass lines that define each section, while colored cellophane brings the brilliant Easter colors to life—deep purples representing royalty, brilliant golds symbolizing glory, and vibrant reds reminding us of sacrifice.
The modular design using door hinges allows for flexible stage arrangements. You can create a continuous wall of color or separate the panels to frame different stage elements. This versatility means the same set can be reconfigured for various services throughout the Easter season, from intimate sunrise services to grand Easter Sunday celebrations.
Lighting these panels is where the magic truly happens. Position LED wash lights behind the panels to create that authentic stained glass glow that seems to emanate from within. The cellophane diffuses the light beautifully, eliminating harsh hotspots while maintaining color saturation. Front lighting can also be used to change the mood throughout the service—warm whites for reflection, vibrant colors for celebration.
Materials:
Lumber: $225
Vinyl Fabric: $400
Colored Cellophane: $110
Screws: $35
Spray Paint: $50
Hinges: $30
Electrical Tape: $40
Related Designs
- Stained Savior – Easter stained glass design featuring a bold Jesus sign created with foam insulation boards and cellophane
- Fractured Glass – Modern geometric stained glass look using coroplast frames and colored film, perfect for contemporary worship spaces
- Stained Glass – Classic foam board and fabric technique for creating traditional liturgical stained glass windows on a budget
- Faux Stained Glass – Alternative approach using different materials to achieve the stained glass aesthetic
- Light Boxes – Similar backlit panel technique for creating glowing stage elements with diffused lighting
Pro Tips for Large Stained Glass Installations
Plan Your Transport: At 14 feet tall, these panels won’t fit through standard doorways once assembled. Build them in sections or plan to assemble them on stage. Consider the path from your workshop to the sanctuary—measure every doorway and hallway before you start cutting lumber.
Secure Your Vinyl Properly: The vinyl fabric is your largest expense and the foundation of the entire design. Use a heavy-duty staple gun and apply consistent tension when stretching it onto the frames. Wrinkles and sagging will be noticeable once the lights hit the panels, so take your time during this step.
Layer Your Cellophane for Depth: For richer colors, consider layering two pieces of cellophane in areas where you want more intensity. This technique works especially well for deep purples and reds. Test your lighting on sample pieces before committing to the full design—different LED temperatures will affect how your colors appear.
Reinforce the Hinges: Door hinges work well for connecting panels, but add extra support brackets where panels meet. The weight of 14-foot frames creates significant stress on hinge points. Use heavy-duty hinges rated for exterior doors, not lightweight interior hardware.


Related: Weave Spots – See how Kearney eFree Church combined Coroplast panels with creative lighting for a stunning Christmas stage design featuring modular platforms and light beams.


Nice!
Amazing!!! I love it! Very creative
quick question : what gauge vinyl did you use?
Good morning, I would like to get a quote for a glass window insert on the back of your church stage