

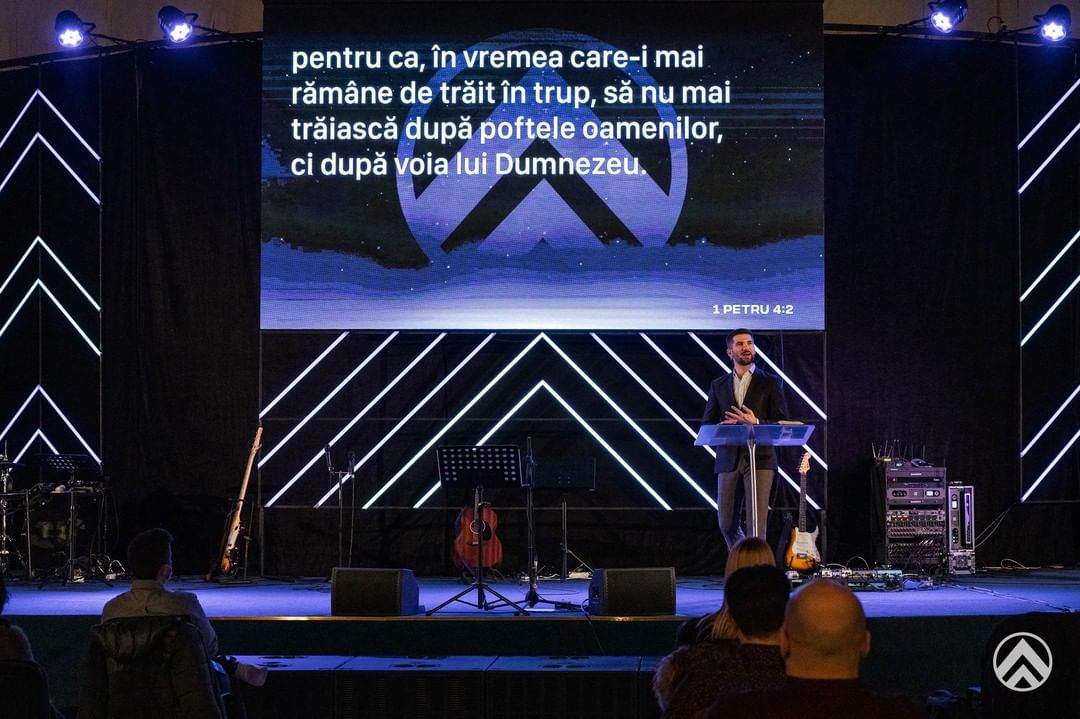
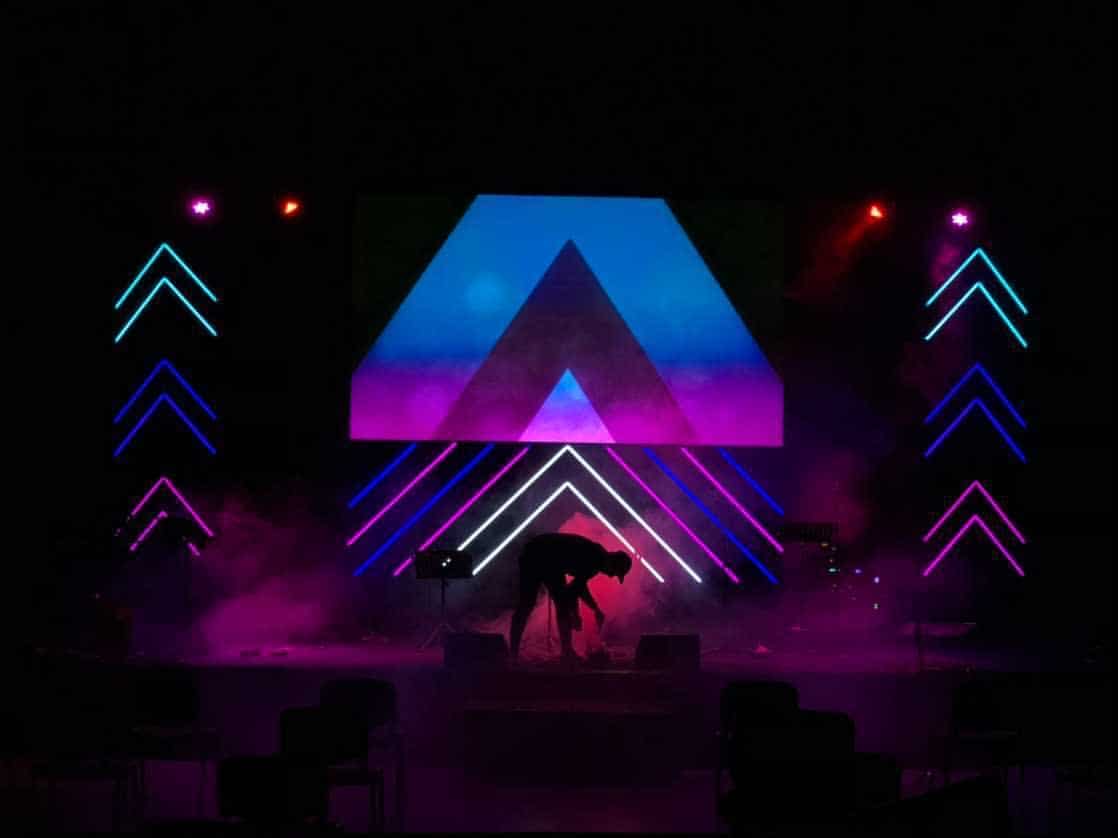
David Rugea from Biserica Impact in Timișoara, România brings us this great LED tape.
This design was simple, using 30mm aluminum tracking, cut at 45 degree angles to house RGBW LED strips inside.
They created frames for the tracking with 1x1s that were screwed into the tracking for support.


Planning an Angular LED Stage Backdrop
The original build combines 30mm aluminum tracking, RGBW LED strips, and supporting 1×1 wood frames. If you are adapting this idea for your own room, treat the guidance below as planning suggestions rather than additional specifications from Biserica Impact. Start with a scale drawing that includes the band, screens, and speaking position. Arrange the illuminated outlines around those elements instead of placing a bright intersection directly behind the speaker’s head.
Mock up the shapes with painter’s tape before cutting any aluminum. Look at the layout from the back row and from the main camera position. A shape that feels dramatic close up may become visually cluttered when musicians and microphone stands are in front of it. Keeping clear gaps between the outlines helps the geometry remain readable without filling the entire wall.
Build and Test One Corner First
Make one small sample using your chosen channel, LED tape, and diffuser before buying materials for the whole set. The original design uses 45-degree cuts in the tracking; carefully deburr cut edges and check the fit on a flat work surface. Do not assume the LED tape can bend sharply around the same corner. Follow its marked cut points and use compatible connectors or wired joins appropriate to that product.
Confirm that the tape, power supplies, and controllers share the correct voltage and support RGBW operation. Calculate the load from the manufacturer’s watts-per-meter rating and the actual strip length, allowing the specified supply headroom. Longer runs may need separately planned power feeds to prevent uneven brightness. Have a qualified technician review wiring, protection, and mounting before installation. The wood frames described above are scenic supports, not a specification for overhead suspension.
Give the Lighting Team Useful Options
Plan cable exits while the frames are on the workbench, and label matching connections so volunteers can assemble the shapes consistently. Keep power supplies accessible with their required ventilation. Before the set goes into service, test every color channel, inspect joins, and check the far end of each run for visible color changes or dimming.
Program a few restrained starting looks: a low-intensity single color, a contrasting color arrangement, and a subtle white-channel look. Balance these against face lighting and screen brightness. Record a short camera test at the actual service settings to catch flicker and overexposed strips. If individual LED points look distracting, test a compatible diffuser and lower output before deciding to add more fixtures.
Pro Tips for Angular LED Frames
Use a repeatable template: Mark frame dimensions and corner positions on a reusable work surface so matching shapes stay consistent across a volunteer-built set.
Hide the mechanics: Plan dark cable routes behind the outlines and keep visible leads away from open negative space. Leave enough access for troubleshooting without dismantling the backdrop.
Check the widest shot: Review the entire stage on camera, not just a close-up of a glowing corner. Adjust intensity so the geometry supports the people rather than competing with them.
Design for reuse: Label each frame and keep a simple connection diagram. Modular shapes can be rearranged for another series without rebuilding the whole backdrop.
Related Designs
- Stained Paper Panels – Explore framed paper panels backlit with LEDs for another illuminated backdrop approach.
- Hyper Techno Dots – Compare a wall of dots and lights with an open linear LED layout.
- Triangle Wall – See how a triangular grid creates a geometric stage composition.
- Light Squares – Compare wooden LED square frames and practical corner connections.
- Star Strings – Explore wooden frames that combine LED tape with star-pattern yarn.


Leave a Reply
You must be logged in to post a comment.