


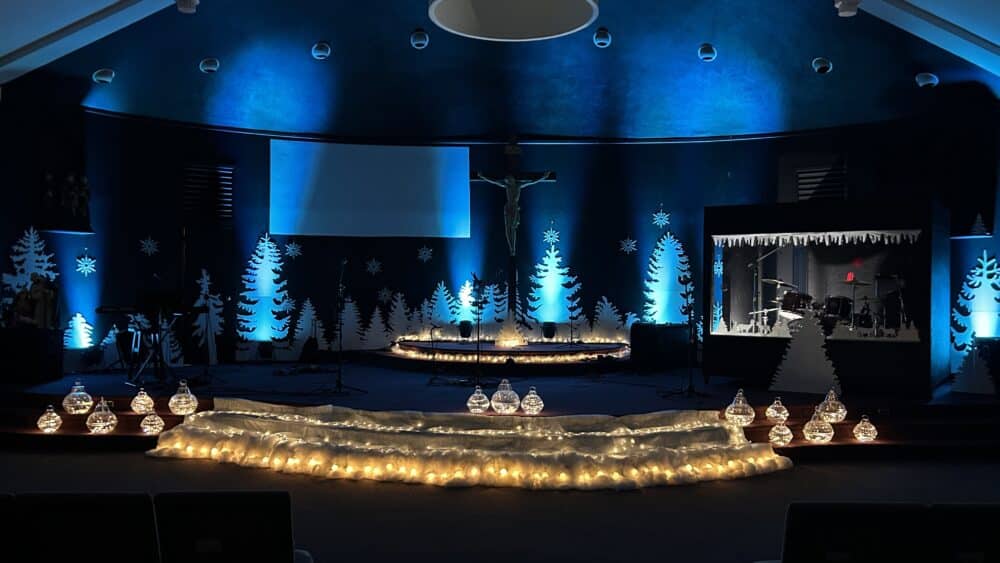
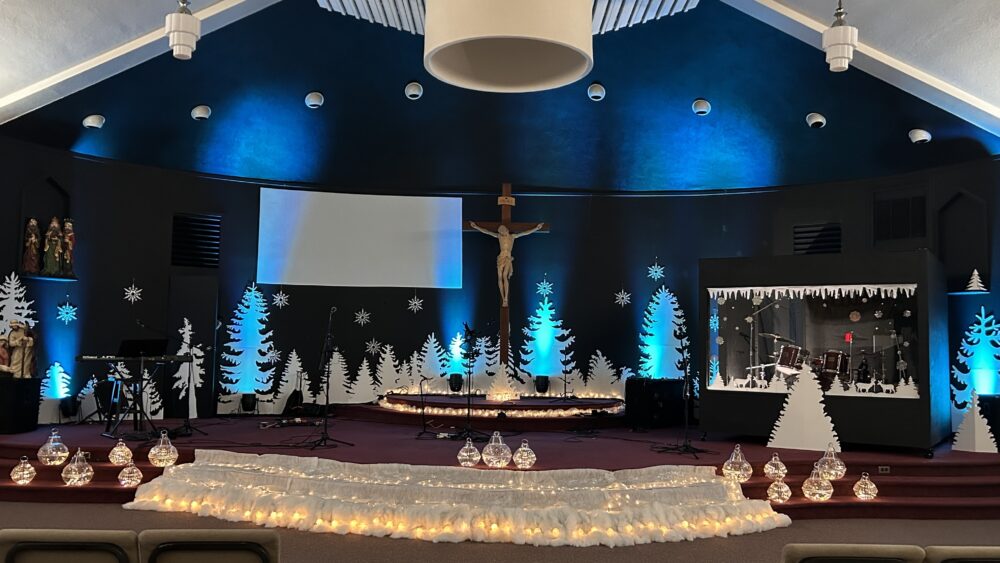
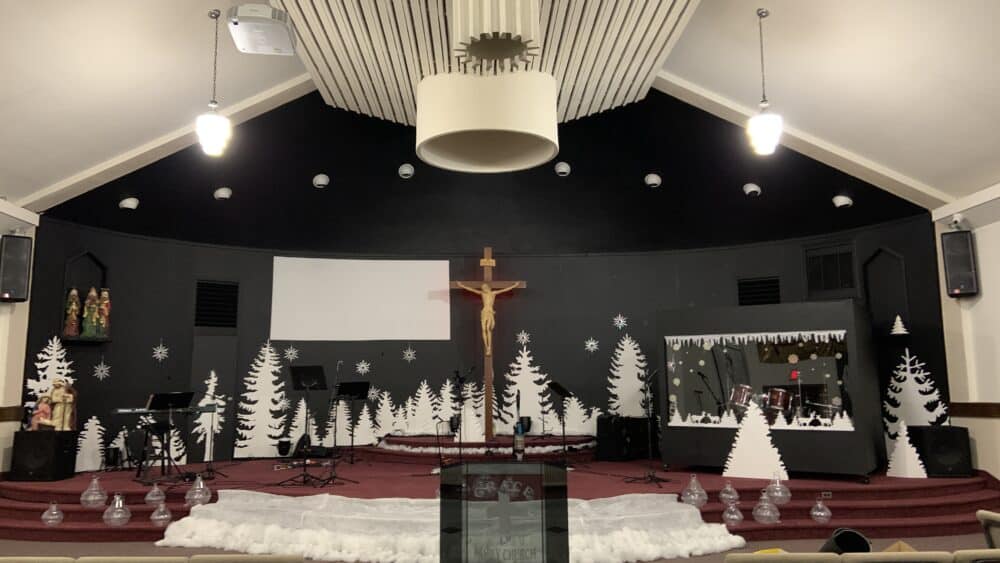
This is from our member Darlene Benoit, Grace Family Church – Sudbury, Ontario with their majestic stage design for Christmas.
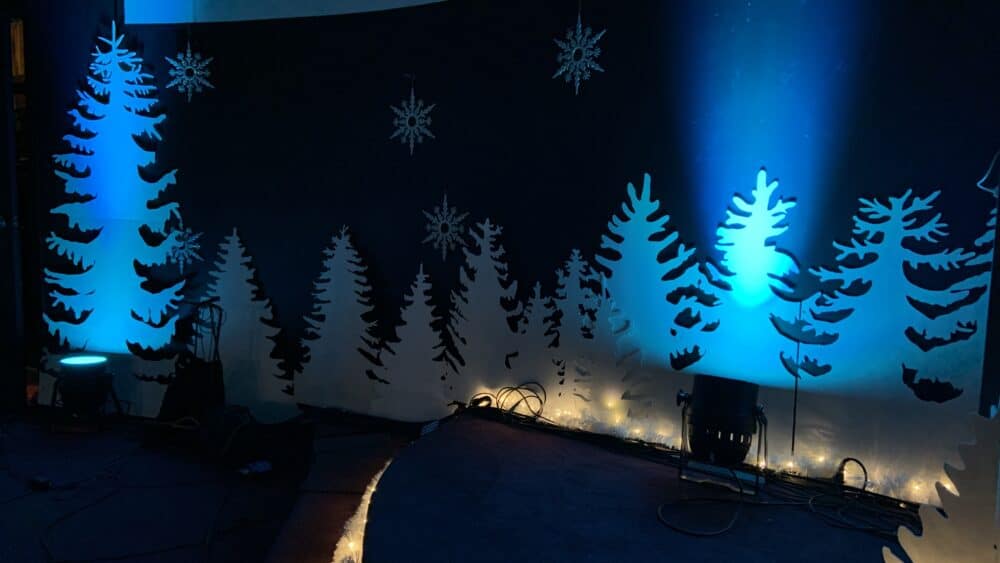
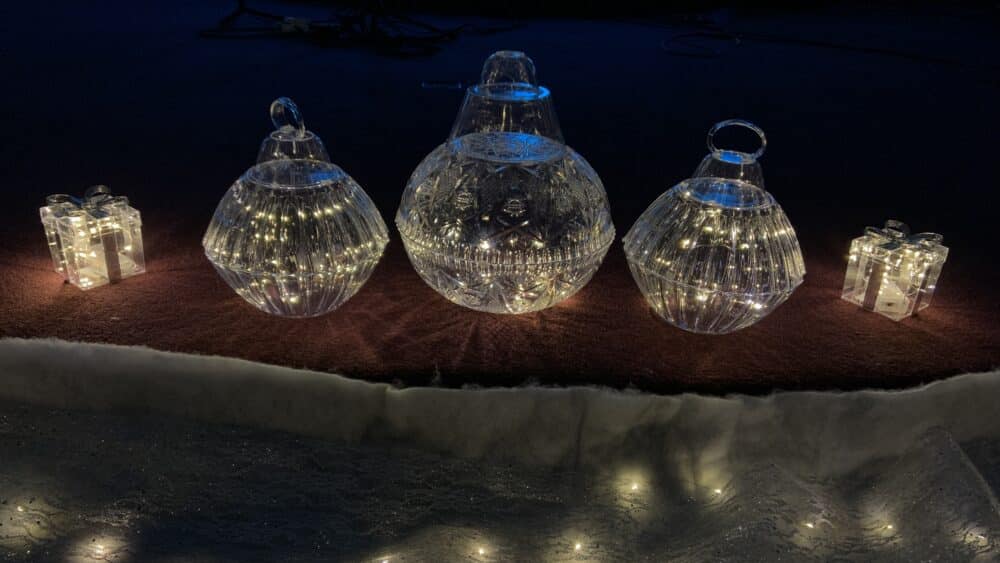
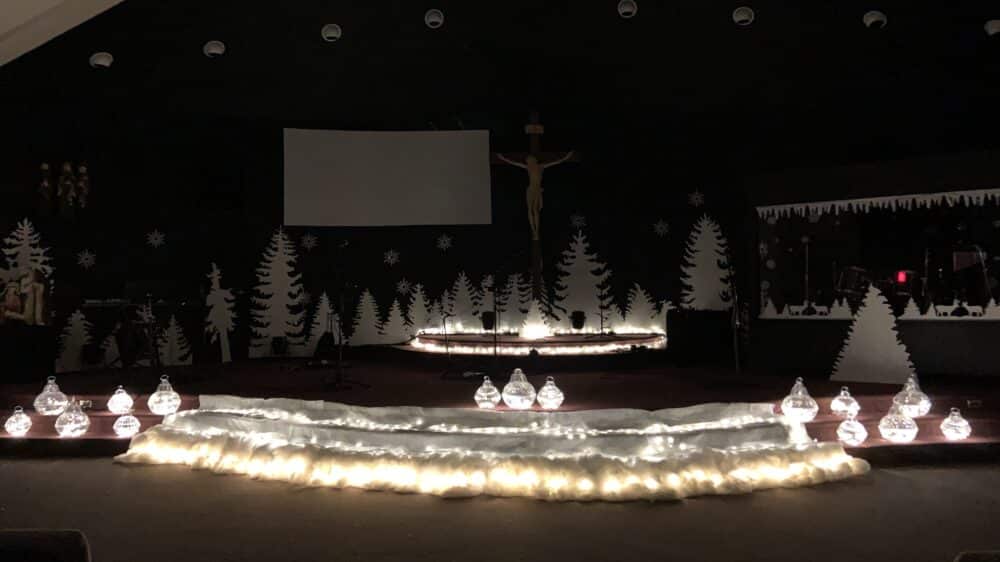
“Our Winter Wonderland scene stays up long past Christmas, bringing joy through the winter months. The display features handmade trees cut from foam board using an electric hot cutting knife, illuminated “ornaments” created from Dollar Tree bowls with battery-operated lights, and a snow-covered landscape using pillow stuffing and snow blankets.”
Materials & Cost
- Foam board (36″x48″) – $200
- Electric cutting knife – $35
- Dollar Tree bowls & lights – $25
- Snow materials & decorations – $40
Total: Approximately $300
Creation Tips
Trees were cut from plastic-coated foam board, with larger ones made by joining two boards. For the glowing ornaments, we drilled holes in plastic bowls and added battery-operated lights. The original design came from a greeting card, with the Holy Spirit guiding our implementation.
Special thanks to Darlene’s friend, Praise for helping with setup as we arranged the trees against the wall, rather than throughout the stage.
Planning a Foam-Board Winter Wonderland
The appeal of this winter scene comes from familiar shapes arranged in layers: tall tree silhouettes establish the forest, glowing ornaments draw the eye, and soft white ground cover ties the pieces together. Start your adaptation with a floor plan rather than a shopping list. Mark the usable wall width, instruments, microphone positions, screens, entrances, and camera angles. Sketch a few tree groups with varied heights, leaving open space around the people who will stand in front of them. A paper mockup helps you decide whether your room needs a dense forest or just a few strong silhouettes.
The original team used 36-by-48-inch foam boards and joined boards for larger trees. Treat those dimensions as a starting point, not a required size. Draw repeatable templates so volunteers can produce matching branches without tracing every tree from scratch. Before cutting a full sheet, test the selected method on a scrap. Check the exact board and coating against the tool manufacturer’s guidance; a heated cutter is not appropriate for every foam product. Support joined pieces with a suitable backing and have the installation team check stability before adding decorations.
Creating Glowing Ornaments and Snow Layers
Build one bowl ornament first and test it in the room with the stage lights on. The plastic finish, light placement, and viewing distance all affect how evenly it glows. Keep the battery compartment accessible so volunteers can change batteries without dismantling the display. If a hole is needed, support the bowl while drilling, remove sharp edges, and secure the light so it cannot fall out when the ornament is moved. Label finished pieces and group their switches where the setup crew can reach them.
Use snow blankets to establish the broad ground layer, then add small amounts of pillow stuffing where extra texture is useful. Keep loose material away from walking routes, electrical connections, and fixtures. Confirm that scenic materials meet your venue’s requirements before installation. White surfaces can become much brighter than faces on camera, so rehearse a speaking look as well as a music look. Begin with neutral front light on people and a restrained scenic wash, then adjust ornament brightness until the whole scene reads clearly without overpowering the worship team.
Budgeting, Setup, and Reuse
The submitted materials list totals approximately $300. Use that as this project’s reported cost, not a guaranteed budget for another church. Price the board, supports, lights, batteries, snow materials, tools, and storage supplies together before purchasing. Divide volunteer work into template preparation, tree assembly, ornament testing, and final placement. Photograph the completed layout and label each tree group so the scene can be rebuilt consistently. Since the winter theme also works beyond Christmas, removable ornaments make it easier to simplify the display without replacing the entire forest.
Pro Tips for a Winter Wonderland Stage
Check the view from every seat: Arrange taller trees behind shorter ones and confirm that outer seats and camera positions still have clear views of faces and screens.
Test one complete ornament: Evaluate a finished bowl and light before producing the full batch; a quick prototype reveals glare, uneven brightness, and awkward battery access.
Keep snow off traffic routes: Outline clear paths for musicians and volunteers before adding soft ground cover, then check those paths under the dimmest service lighting.
Plan flat storage: Label trees and protect their edges with spacers so lightweight scenic pieces survive handling and remain practical to reuse.
Related Designs
- Triangle Wall – Explore a Christmas backdrop that combines geometric depth, backlighting, and projection.
- Sullivan Stage – Compare a reusable Coroplast backdrop with triangle-shaped Christmas tree accents.
- Sky Full of Stars – See how star curtains and projection create an immersive Christmas atmosphere.
- Big Candles – Consider oversized internally lit props as another source of seasonal glow.
- Tilted Rectangles – Compare another lightweight foam-sheet backdrop and its simple shape arrangement.
Related: Angels and Demons – Compare another foam-board set that combines illuminated focal pieces with a layered scenic backdrop.
Related: String Trees and White Branches – Compare white-painted branches and open yarn trees as another way to build a layered Christmas scene.


Leave a Reply
You must be logged in to post a comment.