



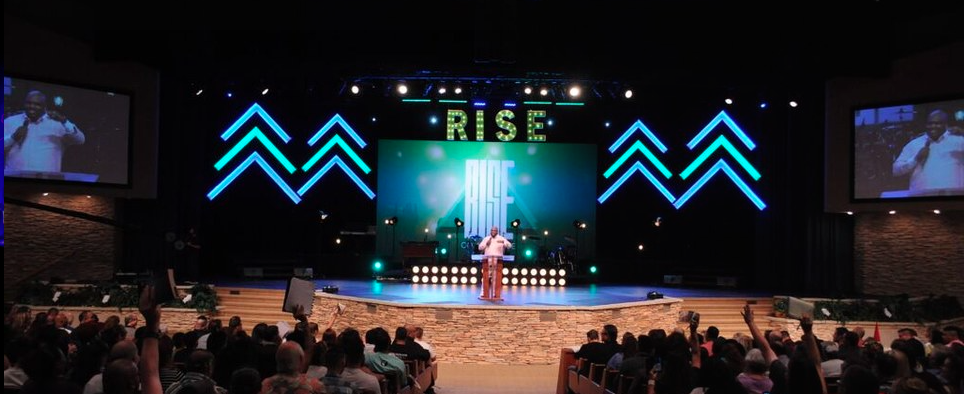
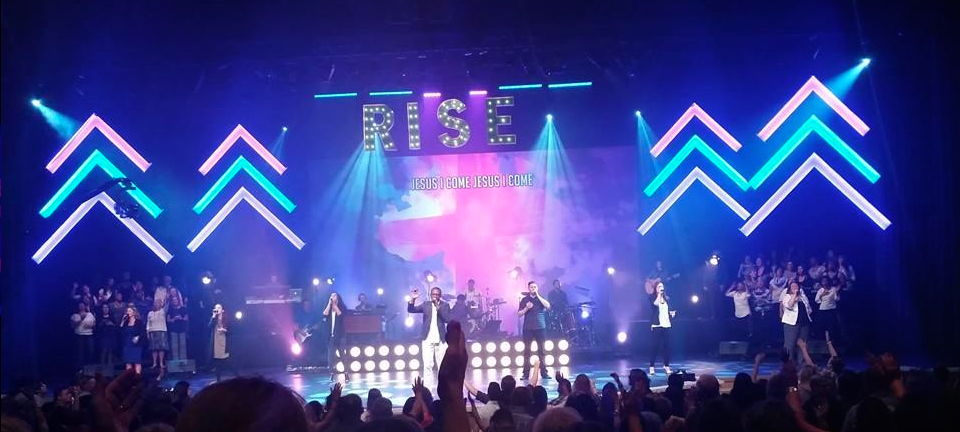
Desiree Carrillo from The House Modesto in Modesto, CA, brings us this great use of marquee-style lettering and LED tape.
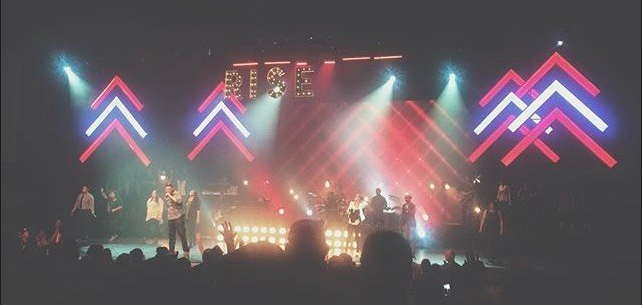
After getting the graphic for their conference, they decided to go with a theme of light and angles. Desiree decided to do some research, and she came across the post “Chevron? More Like Chevright!” on CSDI and loved how they incorporated the chevrons. She decided she wanted to do the same thing but instead flip them so the arrows pointed up, as if to “rise” up from the bottom. She also had this idea of doing a “light wall”. She had seen many posts about how different churches had done them, so she just decided to come up with her own way using collective resources. The RISE letters were repurposed from a previous conference, and the theme colors were blue and green, so she decided to spray paint the old red letters a lime green so that they would “pop” more.
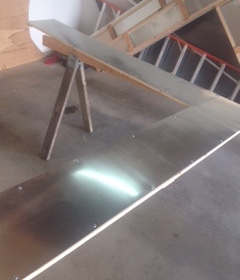
For the chevrons, they framed them out and used metal sheeting. They decided to try this instead of masonite because they thought they would get a better reflection with the LED tape. Unfortunately, the metal was too reflective and instead didn’t hold any of the light in or spread it as they had hoped. They ended up painting the metal sheeting an eggshell white. The chevrons were very lightweight and easy to move around, which made them convenient for transporting. Also, unlike “Chevron: More Like Chevright!” Desiree decided to use two strands per chevron instead of one because she wanted them to really pack a punch of color (this also brought the cost of the LED’s up). For the 45deg angles, they ended up repurposing some old wood they had from a previous project. Looking back now, Desiree believes crown molding (as seen in the other post) probably would have been way easier than creating their own. Lastly, they built a basic box frame for the chevrons using 2x4s and then attached eye bolts and suspended them above the stage.
This entire stage design: light stands, light bulbs, work lights (for the light wall), LED tape (w/ decoders and PSU’s), lumber, and paint cost them about $5,500.
All of the LED tape, accessories, and DMX decoders were purchased from Amazon.
Check out her portfolio for some more pics and vids: http://www.lightingdezigns.carbonmade.com
Creating Dynamic Chevron Stage Designs with LED Integration
Chevron patterns have become a staple in modern church stage design, offering a geometric visual language that conveys movement, direction, and energy. This design from The House Modesto demonstrates how chevron elements can be adapted to support specific thematic messaging-in this case, the concept of rising upward. The upward-pointing arrows create subconscious visual cues that reinforce the spiritual theme without requiring explicit explanation.
The material selection process for this project reveals important lessons about light interaction that apply to many LED stage designs. The initial choice of metal sheeting seemed logical for maximizing LED reflection, but the reality proved that too much reflectivity can actually diminish the desired lighting effect. When surfaces are overly reflective, they create hot spots and glare rather than the smooth, even glow that makes LED tape installations visually appealing. The solution-painting the metal with eggshell white-demonstrates how surface finish dramatically impacts lighting outcomes.
The decision to use two strands of LED tape per chevron rather than one shows how design requirements should drive technical specifications. While this choice increased material costs, it achieved the design goal of creating vibrant, saturated color that would read clearly throughout the worship space. Church stage designers often face this tension between budget constraints and visual impact, and this project shows that strategic investment in key elements can deliver disproportionate visual returns.
Suspension and rigging considerations are often overlooked in stage design discussions but represent critical safety and practical concerns. The use of eye bolts and aircraft cable (implied by the suspension method) provides secure attachment points while allowing for precise height adjustment. This approach enables the team to fine-tune the chevron positioning for optimal sight lines from all seating areas, ensuring the design reads effectively whether viewed from the front row or the balcony.
Related Designs
- Chevron? More Like Chevright! – Discover the original inspiration for this design featuring downward-pointing chevrons and crown molding details.
- Reverberation – Learn how Fair Haven Church created a stunning LED cross design using U-channel and tape lights for their worship space.
- Faithful Creation – See how Southern Hills Church built a budget-friendly 12-foot cross using coroplast and simple 2×4 framing.
- In the Darkness, Light – Explore how Church at the Cross built stunning hybrid LED and incandescent fixtures using buckets and Edison bulbs.
- Ground Zero – Discover how Pleasant Valley Church created a haunting memorial stage design using foam board and LED lighting.
Pro Tips for LED Chevron Stage Designs
- Test Your Materials: Before committing to large quantities of any reflective material, test a small sample with your actual LED tape under stage lighting conditions. What looks good in daylight or under shop lights may behave completely differently under theatrical LED fixtures. Document your tests with photos from audience sightlines.
- Plan for Power Distribution: LED tape projects require careful power planning. Calculate total wattage needs, plan power supply placement for minimal cable runs, and ensure adequate ventilation around power supplies. Overheating is the most common cause of LED system failures in church installations.
- Consider Modular Construction: Building chevron elements as separate, manageable units makes transport, storage, and installation significantly easier. The lightweight design shown here allows for quick setup and teardown, which is essential for churches that share their sanctuary space with other ministries.
- Document Your Process: Take photos during construction to create a visual guide for future volunteers. Label all components clearly and store them together. The investment in documentation pays dividends when the design needs to be reinstalled months or years later by a different team.




Related: Weathered – Explore a modular backdrop built from reclaimed wood, corrugated roofing, and warm practical lights.
Related: Portable Reflections – Explore an affordable reflective stage treatment that multiplies the impact of a small LED lighting package without permanent mounting.
Related: See how plywood lettering, gold rays, and decorative bulbs work together in Shine it Out’s Jesus First stage backdrop.



Desiree,
I love the design! Great work. I particularly like the depth you have with the Cheverons, gives you great unquie looks from all parts of the room. Keep up the great work for Christ!
,Steven
Love seeing CMG motion backgrounds being used from CMG Mega Packs.
Desire you did a amaze job. It makes me want to go The House of Modesto. Hugs and love to you. The House of Modesto has been bless to have you on board. Praise the Lord with the beautiful, amazing, creativity and hardworking you and the crew are awesome
Desiree,
Love, love love!! You are so creative!!! Just have always loved the way you have designed our stage, it always looks so amazing!! I love the fact that we’re still using the chevrons and lightwall even after the conference!! God bless you with all that you do!! Much love to you from The House Modesto!
How did you light the boxes below the drummer? I like the conventional circle look!
Hey Tyler,
Basically we just took some left over sheets of plywood and marked out where each light would go. We used the light part as our template and basically made a spacer to determine how much space we wanted in between in light. Then after cutting out the circles I painted the entire piece of plywood black. I then took just the tin circle of work lights and silicone glued them in place. I left the plywood face down for a day so that the tin could set. After that once we transported them to the church, we made basic wood “L” brackets on the backs of the plywood sheets, attached the lamp base of the work lights, plugged them into power strips in groups (then we ran them to the dimmers on the floor so that we could control them from the console) and voila! Oh and I bought 60w lamps for each light. I figured 60w was nice enough to give it a glow but bright enough that people would need their sunglasses, and essentially not too much overkill/crowd abuse :)
Oh and I believe our lights were Bayco 8.5″ Clamp Lights